Table of Contents
Advertisement
Advertisement
Table of Contents

Subscribe to Our Youtube Channel
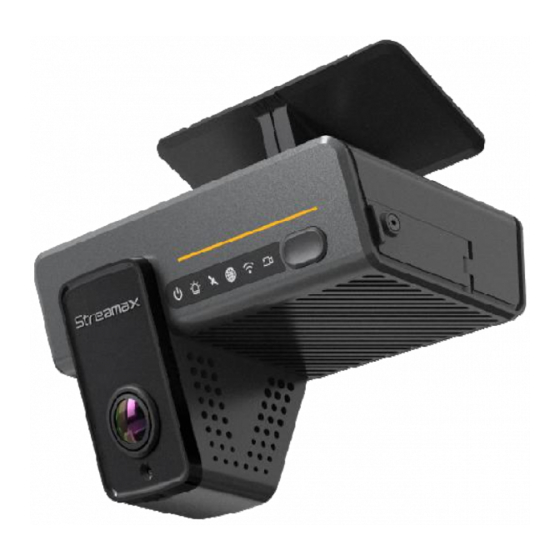
Related Manuals for Streamax AD Plus2.0


Summary of Contents for Streamax AD Plus2.0
- Page 1 AD Plus2.0 User Manual Page 1 of 68...
- Page 2 AD Plus2.0 User Manual Revision History Revision Date Version Revision Description Author 2022-04-08 V1.0 First issue Wang Xiaoyong Page 1 of 66...
-
Page 3: Table Of Contents
AD Plus2.0 User Manual Contents Overview............................3 1.1. System Introduction.......................... 3 1.2. Function Overview..........................3 Instructions for Use of Functions....................3 2.1. Software Download and Installation....................3 2.2. Login/Logout.............................3 2.3. General.............................. 6 2.4. Preview............................10 2.4.1 Viewing Real-Time Recording................... 10 2.4.2 AI Calibration........................10 2.5. -
Page 4: Overview
AD Plus2.0 User Manual Overview The AD Plus2.0 User Manual is intended to help users to better understand and apply the powerful functions available in the device system. Please note that only professional personnel can set the device. Please note that only professional O&M personnel can set the device. - Page 5 Turn on Wi-Fi and GPS on your mobile phone before connecting the device with the truck EasyCheck app. After the AD Plus2.0 device is powered on, it will remain in AP mode within 2 minutes. Then, run the truck EasyCheck app on your mobile phone and tap SEARCH.
- Page 6 AD Plus2.0 User Manual on the upper right corner. The menu including Help, About, and Logout is displayed. Tap Logout to log out of the connected device. Tap Help to view the help document of the truck EasyCheck app, as shown in the figure below.
-
Page 7: General
AD Plus2.0 User Manual 2.3. General On the General screen, you can view the real-time status of the device, import/export parameters, logs, and other files, and upgrade the software. Basic Info: shows the server connection status, IO level status and use, OBD data, G-Sensor data, ACC status, pulse status, and device status. - Page 8 AD Plus2.0 User Manual Positioning information: it is used to check the satellite positioning signal quality of the device, and help the installation, operation and maintenance personnel to evaluate the positioning capability and quality of the device, so as to perform corresponding maintenance actions.
- Page 9 AD Plus2.0 User Manual Version Info: shows the software version information. On the Version Info screen, you can locally upgrade the version of the MDVR, IPC, R-Watch, communication module, GPS, or power box. A USB adapter cable is required to connect to a USB flash drive or the EasyCheck App with the SD card for the upgrade.
- Page 10 AD Plus2.0 User Manual Other: allows importing/exporting O&M logs, restoring default settings, and rebooting the device. A USB adapter cable is required to connect to a USB flash drive or the EasyCheck app with the SD card for data import/export operations.
-
Page 11: Preview
2.4.2 AI Calibration ADAS automatic calibration is supported by AD Plus2.0. After the ADAS lens installation height, left margin, front end width, and front end length are entered, the equipment will be calibrated automatically. For detailed setting screen, refer to Section 2.9.5. - Page 12 AD Plus2.0 User Manual ⑥ Select the two check boxes. ⑦ Tap Next. ⑧ Enter the vertical height of the front-facing camera from the ground, the horizontal distance between the front-facing camera and the outer edge of the leftmost tire of the vehicle (on the left side of someone standing on the outside of the vehicle and facing the front end), and the width and length of the front end (in centimeter or inch;...
- Page 13 AD Plus2.0 User Manual ⑩ Tap Next (tap Learn more to learn how to calibrate the ADAS camera). ⑪ Tap Next. ⑫ Select the check box. ⑬ Tap the required source of speed from Satellite, Pulse, OBD, and ATrack. ⑭...
- Page 14 AD Plus2.0 User Manual ⑰ After checking that the left and right signal cables are properly connected, tap Complete. The calibration of the ADAS camera is completed. 2.4.2.2 DSC Calibration ① On the home screen, tap Preview. The Preview screen is displayed ②...
- Page 15 AD Plus2.0 User Manual ⑥ Select left-hand drive or right-hand drive for the steering wheel (left-hand drive indicates that the steering wheel is on the left of the cockpit when the driver is seated in the cockpit and facing toward the front direction; right-hand...
- Page 16 AD Plus2.0 User Manual Click DMS for calibration Choose the channel corresponding to the DMS camera Click Calibration for the next step Confirm the prompt--Click Next for the next step For the installation location of the DMS camera, the left A-pillar, the right A-pillar, the front side of the countertop, and the lateral side of the countertop are available.
- Page 17 AD Plus2.0 User Manual with the actual installation method) *Note: Before clicking Next to start formal calibration, the driver shall sit in the normal driving posture and look straight ahead. Click Next to move on to the next step for automatic face calibration.
-
Page 18: Playback
AD Plus2.0 User Manual Calibration completed Click OK to complete the calibration and exit the calibration mode. 2.5. Playback 2.5.1. Video Playback On the Playback screen, you can search for the main-stream video/sub-stream video in the main storage/sub-storage on a certain date. - Page 19 AD Plus2.0 User Manual On the Playback screen, select a date from the calendar for video playback. On the left part of the screen, you can select the year and month. Tap select different years and months. In the calendar, the color of the strip under a date indicates that videos were recorded on that day.
-
Page 20: Video Export
AD Plus2.0 User Manual You can drag the to any position in the timeline below. on the upper left corner of the screen to reduce the time interval and to enlarge the time interval. This function allows you to quickly locate a certain time period for the next playback/export operation when there are many video segments. - Page 21 AD Plus2.0 User Manual In the video export options, you can choose to export the cropped video to an external USB disk or mobile phone, so that O&M personnel can quickly obtain and share the video. Page 20 of 66...
-
Page 22: Basic Setup
AD Plus2.0 User Manual 2.6. Basic Setup Note: On all parameter configuration interfaces, tap Save to save the modified parameters and tap Default at the bottom of the screen to restore the default settings of the parameters. 2.6.1. Registration Information... - Page 23 AD Plus2.0 User Manual is available only when Time Zone is set to UTC+0) Time Sync: The time will be synchronized automatically when there is a deviation between the system time and the actual time. In the automatic time synchronization settings, you can enter the date and time manually, or set the time synchronization method.
-
Page 24: On/Off
AD Plus2.0 User Manual DST: For some regions, you need to set the DST due to the time zone reason. Specifically, you can set the start & end time, and offset in weeks or days. Tap Preferences > Basic Setup > Time Setup > DST, as shown in the following figure: Enable: allows you to enable or disable the DST function. - Page 25 AD Plus2.0 User Manual device). Ignition Delay: allows you to set the time for the delayed shutdown after the car key is turned off, which can be set from 0 to 86399 seconds, and the default is 300 seconds. Video Recording Delay: allows you to set the time for the video recording after the car key is turned off.
- Page 26 AD Plus2.0 User Manual the set value in the sleep status. Low Volt Upload: automatically reports the low voltage to the platform after being selected when the low voltage protection is triggered. Note: When the low voltage protection is not enabled, 7 V is the judgment condition for low voltage protection by default.
-
Page 27: User Setup
AD Plus2.0 User Manual the first N9M server is supported for remote wakeup; Telephone Wake/SMS Wake: wakes up the MDVR by calling or sending SMS messages to the device. You need to set the mobile number to wake up the device in advance. -
Page 28: Network
AD Plus2.0 User Manual Tap Add to add a user. in the Setup column to set the password for the user login. admin (Admin): The system has an administrator account by default. The administrator has the permission to add/delete common users and set parameters. - Page 29 AD Plus2.0 User Manual N9M: indicates the protocol type for the device to report information to the video surveillance platform CEIBA2. 808: indicates the protocol type for the device to report information to the 808 platform (not used for overseas trucks).
- Page 30 AD Plus2.0 User Manual 99admin,120223,WIFI2,WEP,streamax,streamax,1! 99admin,120223,WIFI2,NONE,streamax,1! Client mode: Command parameters: Mode, Encryption Type, ESSID, Account, Password, Static Enable, Static IP Address, Subnet Mask, and Gateway! 0 indicates that the static IP address is enabled and 1 indicates that the dynamic IP address is enabled.
- Page 31 You can cannot change it or set a password for it on this screen. Moreover, the device maintains the hotspot status during and after the startup. (If the AD Plus2.0 has the AP mode switch Page 30 of 66...
- Page 32 The device uses the AP mode within 3 minutes after the startup by default. (If the AD Plus2.0 is equipped with the AP mode switch button, you can switch the device to the AP mode with the button.
Need help?
Do you have a question about the AD Plus2.0 and is the answer not in the manual?
Questions and answers