
Subscribe to Our Youtube Channel
Related Manuals for Streamax C6D solution


Summary of Contents for Streamax C6D solution
- Page 1 INSTALLATION GUIDE C6D I N S T A L L A T I O N G U I D E V2.0 C6D solution Side 1 av 12...
-
Page 2: Table Of Contents
INSTALLATION GUIDE C6D Contents ..............................1 What’s included in the box? ......................3 Descriptions ..........................4 Main unit ............................4 Inside camera ..........................5 Installation ........................... 6 Load SIM and SD card ........................6 Select installation location front camera ..................6 Panic button..........................7 GPS .............................7 Wiring ............................8 How to’s ............................ -
Page 3: What's Included In The Box
INSTALLATION GUIDE C6D What’s included in the box? Camera Power, alarm, sensor cable GPS antenna Panic button T8 Torx wrench USB Adapter Side 3 av 12... -
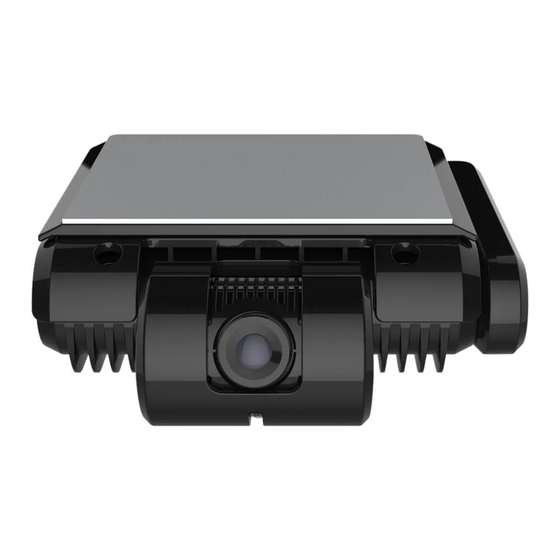
Page 4: Descriptions
INSTALLATION GUIDE C6D Descriptions Main unit Side 4 av 12... -
Page 5: Inside Camera
INSTALLATION GUIDE C6D Inside camera Mounted inside the vehicle facing backwards, used for taking pictures of passengers Side 5 av 12... -
Page 6: Installation
INSTALLATION GUIDE C6D Installation Load SIM and SD card 1. Use a T8 Torx wrench to turn the screw on the right-side panel of the C6D 2. Open the panel and load the SIM card as shown below 3. According to he order requirements, if the SD card is a non-standard material, you need to load the SD card as shown below 4. -
Page 7: Panic Button
INSTALLATION GUIDE C6D The adhesive plate for mounting can be removed from main unit for easier installation by loosening a screw from centre top of the unit. Then slide the mounting backet. Panic button Connects to ALM1 Connect GPS to GPS/BD (4pin connector) Side 7 av 12... -
Page 8: Wiring
INSTALLATION GUIDE C6D Wiring Do not connect Speed wire (PIN1) Side 8 av 12... -
Page 9: How To's
INSTALLATION GUIDE C6D How to’s Connect to C6D View camera angle with Ceiba 3 mobile app 1. Google Play: https://play.google.com/store/apps/details?id=com.googlemap.ceibaii 2. Login 3. Tap car icon in top left corner 4. Tap on the name of the desired device 5. Tap video icon in lower right corner Local 1. -
Page 10: Change Apn
INSTALLATION GUIDE C6D Change APN If another service provider is used, APN needs to be changed to ensure online connectivity. APN is set in Basic Setup -> Network -> Communication Module -> APN Set custom server address If customer is not going to use Tura Scandinavia’s server, then Server1 and Server2 credentials need to be changes to meet customers setup. -
Page 11: Import Configuration
INSTALLATION GUIDE C6D Import configuration Preparation 1. Login using EasyCheck app 2. Navigate to Version Info and remember Device Model 3. Copy config file into “ConfigFile\”Device Model” folder on the SD card. (example: \ConfigFile\928_VB) 4. Connect EasyCheck with SD card inside to your device. (USB adapter is needed) 5. -
Page 12: Update Firmware
INSTALLATION GUIDE C6D Update firmware 1. Copy received firmware file to SD card inside folder “autoupgrade”. (SD card\autoupgrade) 2. Attach EasyCheck with SD card inside to the device. 3. Upon reboot, the device will start upgrading automatically. Submit commissioning report A complete commissioning report shall be sent to terje.skatterod@turascandinavia.com with...
Need help?
Do you have a question about the C6D solution and is the answer not in the manual?
Questions and answers
Hi I have bought a van with this system fitted is there a way to get it set up it has both cards fitted not sure if it is transferable to the new owner thanks John.
To set up the Streamax solution system in your van:
1. Copy the configuration file into the “ConfigFile\\Device Model” folder on the SD card (e.g., \\ConfigFile\\928_VB).
2. Insert the SD card into the EasyCheck device and connect it to your system using a USB adapter.
3. Ensure the SD card is mounted. If not detected, reboot the device.
4. Navigate to "Other" in the system menu and select "Import Configuration File" to load the setup.
5. To update firmware, place the firmware file in the SD card folder named “autoupgrade”, insert it into the device, and reboot. The upgrade will start automatically.
6. After installation, send a commissioning report with the date, fleet, and vehicle plate within 3 working days.
The information does not confirm whether the system is transferable to a new owner.
Answer: Setup steps are provided, but transferability to a new owner is not confirmed.
This answer is automatically generated
Hi I have bought a van with one of your systems in it’s a C6D-A1 unit I have checked and both cards are in and it’s flashing red is it easy to set up and transfer to me thanks John.
To set up the Streamax C6D-A1 unit and transfer ownership, follow these steps:
1. Install SIM and SD Card:
- Use a T8 Torx wrench to open the right-side panel of the C6D unit.
- Insert the SIM card and SD card as shown in the manual.
- Close the panel and tighten the screws.
2. Mount the Device:
- Place the main unit on the right side of the rearview mirror.
- Ensure the lens does not point at a tinted area.
- Use the CEIBA 3 mobile app live view to adjust the camera angle before fixing it permanently.
3. Import Configuration File:
- Copy the configuration file into the folder “\ConfigFile\Device Model” on the SD card (e.g., \ConfigFile\928_VB).
- Insert the SD card into the EasyCheck device.
- Connect EasyCheck to the C6D unit using a USB adapter.
- Ensure the SD card is mounted. If not detected, reboot the device.
- Navigate to "Other" and click the Import Configuration icon.
4. Update Firmware (if needed):
- Copy the firmware file to the SD card folder “autoupgrade” (\autoupgrade).
- Insert SD card into EasyCheck and connect to the device.
- Reboot the device; it will upgrade automatically.
5. Commissioning Report:
- Submit a report within 3 working days after installation.
- Email it with the subject “DATE, FLEET, VEHICLE PLATE”.
There is no specific step mentioned in the context for "transferring ownership," so this process likely involves installing and configuring the device for a new user or vehicle.
This answer is automatically generated