Advertisement
Quick Links
sauder.com
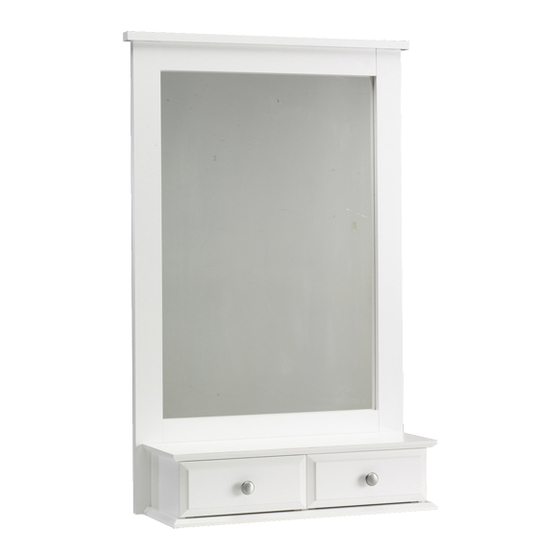
Mirror
Shoal Creek Collection | Model 411236
Need help? Visit Sauder.com to view video assembly tips or chat with a live rep.
Prefer the phone? Call 1-800-523-3987.
Share your journey!
Your everyday "Am I a
vampire?" checker.
NOTE: THIS INSTRUCTION
BOOKLET CONTAINS IMPORTANT
SAFETY INFORMATION.
PLEASE READ AND KEEP FOR
FUTURE REFERENCE.
English pg 1-20
Français pg 21-23
Español pg 24-26
Lot # 389063
03/10/16
Purchased: __________________
Be sure to give us a ring before
making any returns. 1-800-523-3987
Advertisement

Subscribe to Our Youtube Channel
Related Manuals for Sauder Shoal Creek 411236


Summary of Contents for Sauder Shoal Creek 411236
- Page 1 Shoal Creek Collection | Model 411236 NOTE: THIS INSTRUCTION BOOKLET CONTAINS IMPORTANT SAFETY INFORMATION. Need help? Visit Sauder.com to view video assembly tips or chat with a live rep. PLEASE READ AND KEEP FOR FUTURE REFERENCE. Prefer the phone? Call 1-800-523-3987.
-
Page 2: Table Of Contents
Table of Contents Assembly Tools Required Part Identifi cation No. 2 Phillips Screwdriver Tip Shown Actual Size Hardware Identifi cation Assembly Steps 5-20 Hammer Not actual size Français 21-23 Español 24-26 Skip the power trip. Warranty This time. Page 2 411236 www.sauder.com/services... -
Page 3: Part Identifi Cation
TOP (1) LEFT END (1) DRAWER BACK (2) L2 TOP/BOTTOM MOLDING (2) UPRIGHT (1) DRAWER SIDE (4) M2 RIGHT MOLDING (1) BOTTOM (1) BACK (1) N2 LEFT MOLDING (1) SHELF (1) DRAWER BOTTOM (2) MIRROR (1) www.sauder.com/services 411236 Page 3... -
Page 4: Hardware Identifi Cation
BLACK 9/16" LARGE HEAD SCREW - 28 BLACK 1-7/8" FLAT HEAD SCREW - 11 BLACK 1/2" FLAT HEAD SCREW - 8 BLACK 1-1/4" FLAT HEAD SCREW - 4 BLACK 9/16" PAN HEAD SCREW - 14 GOLD 1" MACHINE SCREW - 2 Page 4 411236 www.sauder.com/services... -
Page 5: Assembly Steps
Assemble your unit on a carpeted fl oor or on the empty å carton to avoid scratching your unit or the fl oor. To begin assembly, push a SAUDER TWIST-LOCK® å FASTENER (7F) into the large holes in the ENDS (A and B). - Page 6 MOLDINGS (M2 and N2). Arrow (4 used) Arrow Do not tighten the HIDDEN CAMS in this step. Hole The arrow in the HIDDEN CAM must point toward the hole in the edge of the board. Page 6 411236 www.sauder.com/services...
- Page 7 Step 3 Using your hammer, gently tap the SUPPORT PINS (5R) å into the holes in the ENDS (A and B) and UPRIGHT (C). www.sauder.com/services 411236 Page 7...
- Page 8 Insert the METAL PINS (1R) in one end of the UPRIGHT (C) into the holes in the SHELF (E). å ® How to use the SAUDER TWIST-LOCK FASTENER 1. Insert the dowel end of the FASTENER into the hole of the adjoining part.
- Page 9 NOTE: Be sure the METAL PINS in the UPRIGHT (C) insert into the å holes in the BOTTOM (D). fi n i s h r f a BLACK 1-7/8" FLAT HEAD SCREW (4 used in this step) Unfi nished edge www.sauder.com/services 411236 Page 9...
- Page 10 Step 6 Fasten the TOP/BOTTOM MOLDINGS (L2) to the å MOLDINGS (M2 and N2). Tighten four HIDDEN CAMS. Side Step: Make nachos. (Optional, but recommended.) The groove must be here. Page 10 411236 www.sauder.com/services...
- Page 11 SHELF (E). Use four BLACK 1-7/8" FLAT HEAD SCREWS (2S). BLACK 1-7/8" FLAT HEAD SCREW (4 used in this step) r f a i s h For support, place packing fi n foam and magazines here. www.sauder.com/services 411236 Page 11...
- Page 12 å The SCREWS will tighten into the grooves. BLACK 1-7/8" FLAT HEAD SCREW (3 used in this step) The holes are closer to this edge. Cut-out BLACK 9/16" LARGE HEAD SCREW (12 used for the BACK) Page 12 411236 www.sauder.com/services...
- Page 13 N2). Use fourteen BLACK 9/16" PAN HEAD SCREWS (51S). NOTE: There are no pre-drilled holes in the MOLDINGS. The å SCREWS will tighten into the grooves. BLACK 9/16" PAN HEAD SCREW (14 used for the MIRROR CLIPS) (14 used) www.sauder.com/services 411236 Page 13...
- Page 14 Step 10 Fasten the DRAWER FRONT BRACKETS (30G) to the å DRAWER SIDES (H). Use eight BLACK 1/2" FLAT HEAD SCREWS (43S). BLACK 1/2" FLAT HEAD SCREW (8 used in this step) Page 14 411236 www.sauder.com/services...
- Page 15 This DRAWER FRONT will be now the LEFT This hole DRAWER FRONT (F). must be Use outside hole here. Use inside hole This DRAWER FRONT will be now the RIGHT This hole DRAWER FRONT (F). must be here. www.sauder.com/services 411236 Page 15...
- Page 16 Apply three pieces of TAPE to the DRAWER FRONT (F) and stick the fl ap of the DRAWER BOTTOM (J) onto the DRAWER FRONT (F). Repeat this step for the other drawer. å BLACK 1-1/4" FLAT HEAD SCREW (4 used in this step) Flap Page 16 411236 www.sauder.com/services...
- Page 17 Fasten the DRAWER BOTTOM (J) to the DRAWER BACK (G) å and DRAWER SIDES (H). Use eight NAILS (1N). Repeat this step for the other drawer. å Unfi nished surface NAIL (16 used in this step) www.sauder.com/services 411236 Page 17...
- Page 18 TAPE to the DRAWER BOTTOM (J) and stick the fl aps of the DRAWER BOTTOM (J) onto the TAPE. on sauder.com. Fasten the KNOB (32K) to the DRAWER FRONT (F). Use a å GOLD 1" MACHINE SCREW (50S).
- Page 19 BRACKETS with the holes in the MOLDINGS (M2 and N2). Use six BLACK 9/16" LARGE HEAD SCREWS (1S). 411201 Dresser BLACK 9/16" LARGE HEAD SCREW (12 used in this step) www.sauder.com/services 411236 Page 19...
- Page 20 å This completes assembly. Clean with your favorite å furniture polish or a damp cloth. Wipe dry. And to celebrate, why not share your success story? Left Drawer 5 lbs. 3 lbs. 3 lbs. Right Drawer Page 20 411236 www.sauder.com/services...
-
Page 21: Français
QUANTITÉ d’ a chat de cet élément et conserver le livret pour future référence. EXTRÉMITÉ DROITE ..........1 EXCENTRIQUE ESCAMOTABLE .....4 Pour contacter Sauder EXTRÉMITÉ GAUCHE ..........1 FIXATION TWIST-LOCK® ........2 en ce qui concerne cet MONTANT................1 VIS D'EXCENTRIQUE ..........4 élément, faire référence au numéro de lot et... - Page 22 éviter d'endommager l'élément ou le sol. Pour commencer l'assemblage, enfoncer une FIXATION ÉTAPE 7 TWIST-LOCK® SAUDER (7F) dans les gros trous des EXTRÉMITÉS (A et B). Faire tourner, avec précaution, le DESSOUS (D) et TABLETTE (E) sur ces chants avant.
- Page 23 CONSOLES sur les trous des MOULURES (M2 et N2). Utiliser six VIS TÊTE LARGE 14 mm NOIRES (1S). ÉTAPE 16 Insérer les tiroirs dans l'élément. Ceci complète l'assemblage. Nettoyer à l’ a ide d’une encaustique pour meubles ou d’un chiff on humide. Essuyer. www.sauder.com/services 411236 Page 23...
-
Page 24: Español
EXTREMO DERECHO ..........1 EXCÉNTRICO ESCONDIDO .......4 et conserver le livret pour future référence. EXTREMO IZQUIERDO ..........1 SUJETADOR TWIST-LOCK® ........2 Pour contacter Sauder PARAL ...................1 BIELA DE EXCÉNTRICO ........4 en ce qui concerne cet FONDO .................1 12G SOPORTE DE METAL ..........2 élément, faire référence... - Page 25 PASO 7 Para comenzar el ensamblaje, empuje un SUJETADOR TWIST-LOCK® SAUDER (7F) en los agujeros grandes de los EXTREMOS (A y B). Cuidadosamente vuelva el FONDO (D) y el ESTANTE (E) sobre los bordes delanteros.
- Page 26 MOLDURAS (M2 y N2). Utilice seis TORNILLOS NEGROS DE CABEZA GRANDE de 14 mm (1S). PASO 16 Inserte los cajones dentro de la unidad. Esto completa el ensamblaje. Limpie con su pulimento para muebles preferido o un paño húmedo. Seque con un paño. Page 26 411236 www.sauder.com/services...
-
Page 27: Warranty
GARANTIE LIMITÉE DE 5 ANS 1. Sauder Woodworking Co. (Sauder®) off re une couverture de garantie limitée à l’ a cheteur 4. La présente garantie ne s’ a pplique qu’ a ux défauts garantis qui se produisent pour initial du présent produit pendant une période de cinq ans à... - Page 28 Dear Valued Customer: So, how did it go? Thanks so much for choosing Sauder® furniture. I hope the Set a world record for speed? purchase and assembly process was a positive experience Feeling good about yourself? and you feel good about the furniture you just built. If you Nice.
Need help?
Do you have a question about the Shoal Creek 411236 and is the answer not in the manual?
Questions and answers