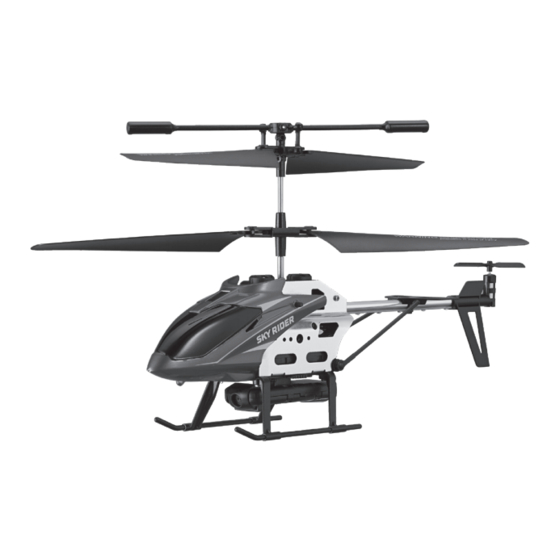
Summary of Contents for sky rider MINI GLOW PRO
- Page 1 MINI GLOW PRO Quadcopter Drone with Wi-Fi Camera User’s Guide for Model DRW241 v2764-01...
- Page 2 Warnings & Precautions Important Safety Instructions • Reorient or relocate the receiving antenna. • Read and follow all instructions. • Increase the separation between the equipment and • Keep these instructions for future reference. receiver. • Heed all Warnings. • Connect the equipment into an outlet on a circuit •...
-
Page 3: Table Of Contents
Table of Contents Mini Glow Pro Quadcopter Drone Features Includes Mini Glow Pro Quadcopter Drone – 5 Trim Adjustment – 12 Features Setting Trim & Countering Drift • 6-axis gyroscope • Smartphone cradle Includes Gyroscope Recalibration • 3 speed settings •... -
Page 4: Overview
Overview Charging the Battery Craft Layout & Features Rotor Guards Balance Bar Battery Tail Blades Propellers Charging Cable Back LED (Red) Camera Battery Battery Charging Procedure The craft’s battery must be charged before it can be flown. Before charging, be sure the Landing Skids craft and remote control are powered OFF to avoid risk of injury or damage. -
Page 5: Remote Control
Remote Control Functions Battery Installation Take Off/ Landing Press to start rotors and take Speed Setting off automatically. Press again Press to switch between to land and stop rotors. Press Low/Med/High. Press and and hold for Emergency Stop. hold to shine LED lights. Insert 3 x AAA batteries (not included). -
Page 6: Flying
Flying Flying Craft/Remote Link Step 4 Before flying, the craft and the remote must be linked together and the gyroscopes on the Simultaneously push the Left Control Stick craft must be allowed to calibrate. fully downward and the Right Control Stick down and to the left as shown in the figure. -
Page 7: Trim Adjustment
Trim Adjustment Trim Adjustment Setting Trim & Countering Drift Gyroscope Recalibration Even after the craft is calibrated, it may show a tendency to drift while airborne. Adjusting If the craft is experiencing difficulty flying or is behaving erratically, it’s gyroscopes may the trim will help counter this effect and allow for better control the craft. -
Page 8: Flying Tips & Features
Flying Tips & Features Flying Tips & Features Tips for Safe Operation Auto-take off/Landing • It is recommended to only fly in large, open spaces that are free of obstacles like Before attempting Auto-take off/Landing, be sure that there is ample clear space power lines, trees, ceiling fans, etc. - Page 9 Free Download Android Scan the appropriate QR code with your smartphone or search for “Sky Rider Cruise” in the Apple App Store or Google Play Store. Connect to Wi-Fi NOTE: Wi-Fi control may be interrupted by interference from other nearby Wi-Fi equipment.
- Page 10 Sky Rider Cruise App Screen Controls Flight Controls When connected to the craft via Wi-Fi, the view from the camera will be displayed here. Gravity Sensor Mode uses the G-Sensor in your phone to control the craft. Tilt the phone forward, back, left and right to control the pitch and roll of the craft.
- Page 11 Sky Rider Cruise App Parts & Repair Using the Remote & App Together REMINDER: Pilots are responsible for any damage caused by improper use. Parts Replacement It can be easier to capture photos and video by using the remote to fly the drone and using the app in a viewing only method.
-
Page 12: Troubleshooting
Troubleshooting 3D Mode If you are experiencing problems using or flying the craft, consult this table. VR Mode splits the phone’s screen for use in a VR headset. Press the 3D button on the PROBLEM POSSIBLE CAUSES SOLUTION screen to turn this feature ON or OFF. Use VR Mode to give a friend a fully immersive, point- of-view flying adventure. -
Page 13: Customer Support
Customer Support Contact Information Warranty Website: www.gpx.com See included 30 Day Warranty for warranty information. Warranty and the most up-to- Email Support: prodinfo@dpiinc.com date version of this User’s Guide can also be found at: www.gpx.com Email Parts: partsinfo@dpiinc.com Phone Support: 1-888-999-4215 International Support To download this User’s Guide in English, Spanish, and French, or to get answers to frequently asked questions, visit the support section at: www.gpx.com...


Need help?
Do you have a question about the MINI GLOW PRO and is the answer not in the manual?
Questions and answers