Table of Contents
Advertisement
Quick Links
Advertisement
Table of Contents

Subscribe to Our Youtube Channel
Related Manuals for AAXA Technologies P2-B


Summary of Contents for AAXA Technologies P2-B
- Page 1 aaxa TECHNOLOGIES User Guide...
- Page 2 Caution! WARNING: Please use this product as instructed. Misuse may cause injury or death. DO NOT use while driving Caution for Battery Use • Do not pierce or puncture the battery DO NOT expose to water or wet with sharp objects surfaces.
-
Page 3: Table Of Contents
Table of Contents Connecting a USB Stick Chapter 1: P2-B at a Glance Chapter 3: Menu Screens P2-B Introduction Main Menu Remote Video Player Menu Accessories Photo Viewer Menu Chapter 2: Getting Started Music Player Menu Powering On / Off... -
Page 4: Chapter 1: P2-B At A Glance
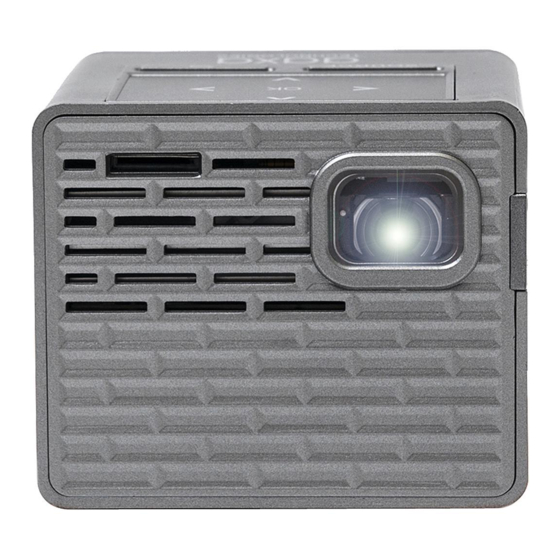
Chapter 1 P2-B at a Glance Main Unit Front/Back TF Card Slot Focus Adjustment Touchpad Digital Input Power Button USB Port Power Port Headphone Out AV Port... -
Page 5: Remote
Remote & Touchpad Select Source Power On/Off Mute Main Menu Navigation Volume Down Volume Up Video Play Menu Back Remote * The remote control is not able to POWER ON the projector NOTE: Pressing power on the remote once will only enable or disable the remote control. In order to fully turn the projector off, hold the power button down on the remote or projector for at least 3 seconds. - Page 6 Remote & Touchpad Cont. The P2-B includes a touchpad directly on top of the projector. The touchpad allows users to navigate through the menu options. In order to select an option, “OK” needs to be tapped.
-
Page 7: Accessories
Accessories Tripod Remote Power Adapter A/V Cable *Under various circumstances, the actual accessories may be different from those shown in the pictures above. Additional accessories are available for purchase at www.aaxatech.com... -
Page 8: Chapter 2: Getting Started
Chapter 2 Getting Started Powering ON the projector To power-on a fully charged P2-B, hold down the power button for approxi- mately three seconds until the projector turns on. Powering OFF the projector Hold down the power button for approximately three seconds until the projector turns off. -
Page 9: Focus Adjustment / Throw Distance
Focus Adjusment / Throw Distance Focus Adjustment • Spin the focus wheel up or down until the image becomes clear. Throw Distance Chart Throw Distance Diagonal Size Unit: Inches Unit: Inches 16:9 Aspect Ratio Throw Ratio 1.20 Projection Angle: 100% Offset *minimum throw distance: 10 inches... - Page 10 External Inputs and Outputs TF Card Digital Input (Mini) USB Stick Composite AV Headphones/speakers...
-
Page 11: Connecting To Digital Input
Digital Input port. Step 2: Connect the other end of the mini-Digital Input Cable to your P2-B’s Digital Input port. Step 3: In the Main Menu, select the “INPUTS” icon and then the “VIDEO” icon. Select the “INPUTS” icon... - Page 12 Connecting to a Computer Cont. Step 4: To enable Digital Video output on your computer, most computers require “turning on” the video output feature. Each computer is different. Please consult your computer’s manual for instructions to enable Digital Video output. Below are standard instructions for a Windows 10 computer – not all systems are the same.
-
Page 13: Connecting To Composite Video
Connecting to Composite Video Step 1: Connect the 3.5mm Composite A/V Cable to the back of the P2-B. Step 2: Plug the composite end of the AV Cable (Red, White,Yellow) to your device. - Page 14 Select the “RCA” icon Step 4: Turn on your multimedia device. Connectivity with multimedia devices through Composite AV The P2-B can connect to many media devices including: VHS players, DVD play- ers, cameras, video game consoles and other peripherals with ease.
-
Page 15: Connecting To Digital Input Video
Digital Input Cable (purchased separately) to your device’s Digital Input port. Step 2: Connect the other end of the mini-Digital Input Cable to your P2-B’s Digital Input port. Note: Apple devices require a specialized Digital Input adapter (Sold separately by Apple) - Page 16 The P2-B can connect to many media devices including: iPod, iPhone, iPad, DVD players, Blu-Ray players, smart phones, cameras, video game consoles and other peripherals with ease. *Some smart phones require video out capabilities to work with the P2-B. Check with your phone manufacturer.
-
Page 17: Headphones
Connecting Speakers / Headphones Step 1: Connect your speakers/headphones to the projector’s audio port. Step 2: Ensure that the projector and/or the headphones are powered on. Step 3: Place the headphones on and enjoy! CAUTION Prolonged use of headphones at a high volume may impair hearing. -
Page 18: Connecting A Tf Card
TF Card How to insert your TF Card • Slide in your TF card into the TF card slot on the back of the P2-B (facing down as shown in picture). • Gently slide the TF card until it clicks into place. - Page 19 TF Card Cont. File Menu System • The P2-B will show all folders and files you have on your TF Card in the C: Media Player menu drive. • In the main menu, select the type of file • Use the remote or touchpad to navigate you wish to play.
-
Page 20: Connecting A Usb Stick
USB Drive How to insert your USB Drive • Slide your USB Drive into the USB port. • Gently slide the drive until it cannot go in any further. How to access your USB Drive • Insert your USB Drive into the projector. - Page 21 USB Drive Cont. File Menu System • The P2-B will show all folders and files Media Player menu you have in the C: drive. • In the main menu, select the type of file • Use the remote or touchpad to navigate you wish to play.
- Page 22 TF Card and USB Drive • If both TF Card and USB Drive are inserted, depending on which one inserted first, the first one will show in the C: drive and the second one will show in the D: drive.
-
Page 23: Chapter 3: Menu Screens
Chapter 3 Menu Screens Main Menu The P2-B features a built-in PMP (Portable Media Player) function. This function allows the projector to play videos, pictures, music files, and text directly from your connected devices. • Press the left and right directional buttons on the remote or the directional arrows on the touchpad to choose an icon from the main menu. -
Page 24: Video Player Menu
From the sub menu (Fig. 3.2), select the storage media with the stored files. • Choose which file you wish to play. Fig. 3.1 Fig. 3.2 The P2-B will show all folders and files you have on your USB or TF card. Use the remote or touchpad to select folders or files. - Page 25 Video Player Menu While Playing Videos While playing videos, the volume is adjustable. You can simply adjust volume by pressing the volume buttons on the remote or the up & down arrows on the touchpad. Further controls of the video are available in the video player submenu - which is accessed through the “OK”...
- Page 26 Video Player Sub-Menu Playing Videos The Video Player Sub-Menu can be accessed by pressing “OK” during video playback. To exit the Video Player Sub-Menu, press the “Down” arrow on the remote or touchpad. To navigate the Playback Menu, use the directional buttons on the remote or touchpad to highlight the option you wish to choose (Fig 3.3).
-
Page 27: Video Playback Faq
Video Playback FAQ How do I loop a video? 1. Choose either USB or TF Card for playback 2. Navigate the folders until you reach the file you wish to play. 3. Choose the file you want to play. 4. Press “OK” when video is playing, then move left on the video player menu to select “Repeat”... -
Page 28: Photo Viewer Menu
From the sub menu (Fig. 3.5), select the storage media with the stored files. • Choose the file you wish to play. Fig 3.4 Fig 3.5 The P2-B will show all folders and files you have on your USB or TF card drive. Use the navigation buttons to select folders or files. - Page 29 Photo Menu While Viewing Pictures While viewing pictures, you can simply navigate through all images by pressing the left and right buttons on the remote or touchpad. Further controls are available in the Photo Submenu - which is accessed through the “OK” button. Previous Picture Next Picture Enter Photo Player Submenu...
- Page 30 Photo Sub-Menu Viewing Pictures: After pressing “OK” during picture slide-show playback, the Photo Sub-Menu appears. To exit the Photo Sub-Menu, press the “Down” arrow on the remote or touchpad. Every picture is able to be rotated and zoomed in or out based on the option you wish to choose on the Sub-Menu.
- Page 31 Photo Slideshow FAQ How do I convert PPT to JPG? First open your presentation on your PC or MAC. Go to “Save As” and save your pre- sentation as .JPG files. (Fig 3.6.1) Fig 3.6.1 Choose “All slides”. (Fig 3.6.2) *If you have more than 10 slides, you must rename Slides 1-9 with a “0”...
-
Page 32: Music Player Menu
From the Sub-Menu (Fig. 3.8), select the storage media with the stored files. • Choose the file you wish to play. Fig. 3.7 Fig. 3.8 The P2-B will show all folders and files you have on your USB or TF card drive. Use the remote or touchpad to select folders or files. - Page 33 Music Player Menu Listening To Audio: To adjust the volume, use the volume keys on the remote or “Up” and “Down” arrows on the touchpad. To navigate the playback menu, push the “OK” button to open the menu and use the directional buttons on the remote or touchpad to highlight the option you wish to choose (Fig 3.9).
- Page 34 Music Playback FAQ How do I create a song playlist? How do I loop a song? Insert your media device (either TF card or 1. Choose either USB or TF Card USB) into computer. for playback Make a new folder on media device (folder 2.
-
Page 35: Text Viewer Menu
Use the navigation buttons to select folders or files. Viewing Text Files: The P2-B Projector allows you to view text files. Select the file you want to view in the file menu for the particular storage device on which the file is stored. You can press the left and right arrow buttons on the remote to flip through the pages you have in the present folder. -
Page 36: Chapter 4: Setup Menu Settings
Chapter 4 Setup Menu The Settings Menu can be accessed by selecting “Setting” on the Main Menu Within the settings menu, there are four more submenus that allow you to customize your P2-B the settings you want. Picture • Picture Mode •... -
Page 37: Picture Settings
Picture Settings Picture Mode • Changes the picture mode to different settings depending on your usage Color Mode • Adjusts the color temperature from warm to cool (red to blue) Aspect Ratio • Changes the aspect ratio of the *Caution: Some pictures may be cut off picture - Auto, 4:3, 16:9*, etc. -
Page 38: Sound Settings
Sound Settings Sound Mode • Changes the sound mode depend- ing on what is currently playing Balance • Adjusts the sound balance manu- ally Auto Volume • When the auto volume function is turned on, it normalizes the incoming audio signal so that the video will be played at a mederate volume... -
Page 39: Time Settings
Time Settings Sleep Timer • Sets when projector goes to sleep Auto Sleep • Sets auto sleep function where projector will turn off when not in use or if there is no signal. -
Page 40: Option Settings
Option Settings OSD Language • Changes the language of the device. Options include English, Spanish, Chinese, German, French, Korean, Japanese Restore Factory Default • Restores the projector to factory settings... -
Page 41: Chapter 5: Technical Details
Be sure to setup the computer to enable a video signal output. On some lap- tops this is done by pressing and holding Function F5 key. If using the P2-B as an external monitor on Windows based systems, this can be done by selecting “extend my desktop to this monitor”. - Page 42 Technical Details Troubleshooting THE PROJECTOR DOES NOT TURN ON Possible Causes Solution There is no power Check to ensure the power outlet source is good. Check the Power Adapter to ensure a proper con- nection with the wall outlet as well as the projector. Confirm that the unit is charged and has enough power The power button was not held long enough...
-
Page 43: Specifications
Specifications Brightness: 130 Lumens Max Resolution: 1920x1080 (1080P) Native Resolution: 854x480 (WXGA) Contrast Ratio: 1000:1 Aspect Ratio: 16:9 Projection Lens: Manual Focus Image Size: 8~100 inches Lamp: Triple RGB LEDs with Vibrant Color Technology Life 20,000hrs Video in: Composite A/V (3.5mm Jack) Digital Input (Mini) (compatible) Audio Out: 3.5 mm Stereo Headphone Jack... -
Page 44: Notes
Notes... - Page 45 Please direct all customer service inquiries to: AAXA Technologies, Inc. 17691 Mitchell N., Unit #B Irvine, CA 92614 (714) 957-1999 info@aaxatech.com...
Need help?
Do you have a question about the P2-B and is the answer not in the manual?
Questions and answers