Advertisement
Quick Links
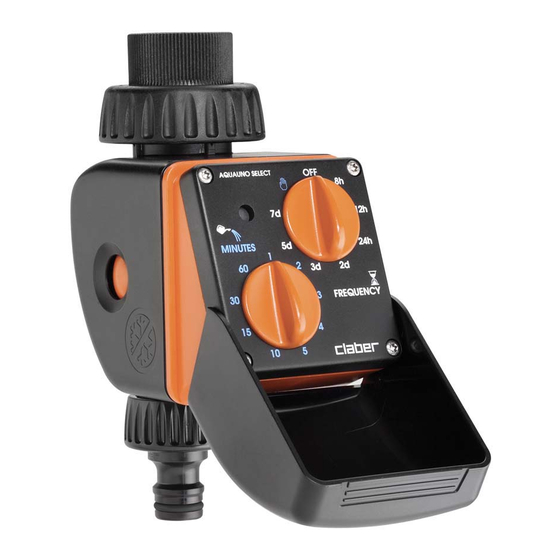
CLABER AQUAUNO SELECT 8423
INSTALLATION:
Do not install the water timer inside valve boxes, below ground level or indoors. Do not use the water
timer with chemicals or liquids other than water. Do not use the water timer with operating pressures
lower than 7.3 psi or higher than 145 psi.
Connect the timer to the tap.
Advertisement

Related Manuals for claber AQUAUNO SELECT 8423


Summary of Contents for claber AQUAUNO SELECT 8423
- Page 1 CLABER AQUAUNO SELECT 8423 INSTALLATION: Do not install the water timer inside valve boxes, below ground level or indoors. Do not use the water timer with chemicals or liquids other than water. Do not use the water timer with operating pressures lower than 7.3 psi or higher than 145 psi.
-
Page 2: Fitting The Battery
Connect the hose on the watering line. FITTING THE BATTERY: Press the two side buttons to open the timer. Insert a new 9V alkaline battery. - Page 3 IMPORTANT: Remember to turn on the water tap. USE: The timer will allow users to start and program a watering cycle selecting the watering time (MINUTES) and the frequency of watering (FREQUENCY). The selectable watering time and frequencies are factory set and cannot be changed. USE:...
- Page 4 The indicator LED on the timer provides important information: ● flashing quickly: the water timer is being programmed ● flashing slowly: the water timer is waiting to water or is watering ● flashing red: replace battery as soon as possible LED Off: 1.
- Page 5 Set the FREQUENCY by positioning the "FREQUENCY" selector (for example 12h): programming has now been completed the LED blinks fast for a few seconds, then SLOWLY (1 blink every 2 seconds). After programming, watering will start immediately and will end after the time set using the “MINUTES” dial.
-
Page 6: Manual Watering
Starting from when the timer was set, or from when the battery was inserted (if the “FREQUENCY” selector is not set to OFF), the first irrigation cycle will begin immediately and subsequent cycles will begin after the number of hours or days set using the “FREQUENCY” selector. EXAMPLE: If the timer is set (i.e. - Page 7 Turn the "FREQUENCY" selector to the "5 MIN " position. There is no need to set the "MINUTES" selector as the duration of the manual watering cycle is factory set and cannot be changed. A watering cycle of 5 minutes watering time will start immediately. It is not possible to extend the duration of a manual cycle (the time lapse of 5 minutes is factory set);...
- Page 8 If, at the end of a manual irrigation session, you turn the FREQUENCY dial to the start position (e.g. 12 hours), the previous programming will be retained in the memory: watering sessions will start up at the usual times. Whilst turning to go back to the previous frequency, do not stop for more than 3 seconds on another frequency, otherwise it will be considered as a new programming instruction.
- Page 9 If the "FREQUENCY" selector remains in the "5 MIN " position, the watering cycles programmed previously will not take place (status indicated by the LED, which stays dark). CHANGING A WATERING PROGRAM - CHANGING THE START TIME AND/OR THE FREQUENCY OF WATERING CYCLES: Wait for the new time at which watering is to start each day (for example 22:00).
- Page 10 Reposition the "FREQUENCY" selector on the new frequency required (example from 12 to 8 hours). After reprogramming, a watering cycle of the selected watering time starts immediately. Subsequent cycles will then start following the number of hours or days set with the "FREQUENCY" selector. CHANGING A WATERING PROGRAM - CHANGING THE WATERING TIME OF THE CYCLE: The irrigation run time can be varied both while waiting between one irrigation session and the next and while irrigation is in progress.
- Page 11 During the wait between one cycle and the next, the user can: shorten or lengthen the selected watering time by repositioning the "MINUTES" selector: the change will take effect from the next cycle. EXAMPLE: At 19:00 hours, I want to change the duration of a watering cycle programmed to start at 20:00, increasing it from 10 to 15 minutes.
- Page 12 To reduce the time set: turn the “MINUTES” dial. The watering session in progress will stop when it gets to the new time that’s been set. Warning: if the new time selected has already been passed when it is chosen, irrigation will immediately stop.
-
Page 13: Cleaning And Maintenance
Warning: to pause an irrigation session in progress turn the FREQUENCY dial to OFF. Programming will have to be reset. CLEANING AND MAINTENANCE: Clean the filter at the end of each season and check it regularly. Turn off the water tap and loosen the screw collar, turning counterclockwise. - Page 14 Loosen the 3/4" screw collar of the tap connector, turning clockwise. Remove the filter. Rinse the filter clean under running water. After washing, reassemble all parts as before. To clean the internal components properly, please see the diagram showing the mechanical parts to be disassembled/ reassembled at the end of the season.
- Page 15 Remove the battery. Store it in a closed environment, away from damp, where the temperature does not fall below 37 °F.
Need help?
Do you have a question about the AQUAUNO SELECT 8423 and is the answer not in the manual?
Questions and answers