Advertisement
Quick Links
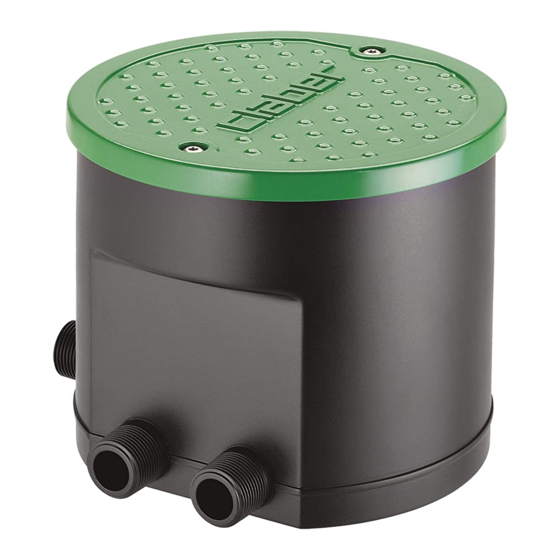
Installation. The valve box is to be installed outside, buried at ground level (1-2) or resting on the surface (3), ensuring
that the cover opening is free so that the valve inside the box can be programmed easily. If installed below ground, do
not place it in areas which are frequently walked over or passed over by mechanical means (eg. ride-on lawn mowers).
1
1
91002*
91009*
91013*
91025*
16
mm
16
mm
91013*
91227
91228
91229
Installation drawing. * parts not supplied, to be purchased separately.
Once the valve box has been positioned, make the hydraulic connections as indicated on the following pages:
depending on individual requirements, it is possible to connect the valve box with pipes of di erent diameters
using the speci c ttings (not supplied). Below each link is referred to the example above.
16
mm
1
16
mm
Hydro 4 (cod.): 90829
2
2
16
mm
90325*
20mm
l. 1/2'M
*
90326*
91256
91255
90910*
91254
91257
91258
91222
91225
91232
25
16
mm
mm
2
3
2
1
Hydro 4
Hydro 4
Page 1
90524*
25
mm
20
90320*
mm
20mm
l. 3/4' F
Turbina
Turbo-jet
Colibrì
90474
90260
90210
90262
90220
90230
20
mm
User manual
User manual
3
3
20
8804*
mm
8609*
9073*
8609*
*
16
mm
91013*
Pop-up
90019
90020
20
mm
16
3
mm
8609*
8804*
2
4
3
3
click
click
1
Advertisement

Related Manuals for claber Hydro 4


Summary of Contents for claber Hydro 4
- Page 1 (not supplied). Below each link is referred to the example above. click click Hydro 4 (cod.): 90829...
- Page 2 11. - Insert the water timer into its seat 12, screw the cover back on 13, close the valve box with its cover 14 and secure it using the designated screws 15-16. Hydro 4 (cod.): 90829...
- Page 3 Line Line Hydro 4 (cod.): 90829 PROGRAMMING EXAMPLE. In the example, programme A starts watering at 5:00 (START TIME) and at 21:00 (START TIME2): at these times the valves open in order (RUN TIME: valve 1 for 5 minutes, valve 2 for 10 minutes, valve 3 for 5 minutes, valve 4 not used).
- Page 4 Rain Manual Schedule Sensor Test Hydro 4 (cod.): 90829 DISPLAY. The following functions are assigned to the various keys or combination of keys: Indicate the programmed start times (start time) for automatic watering Signals that the main number indicator represents the start time...
- Page 5 It is now possible to go back to the page with the keys, and change the values if needed. Hydro 4 (cod.): 90829 SETTING CURRENT DAY AND TIME. When the batteries are rst tted the display shows the rst page current TIME/DAY, indicating as default 12:00 and Sunday.
- Page 6 PROG PROG PROG Hydro 4 (cod.): 90829 PROGRAMMING WATERING - Set/modify the RUN TIME. The RUN TIME page allows the user to set a watering run time for programme A and programme B for each LINE. From the RUN TIME page, press to enable modi cation ->the symbol...
- Page 7 PROG PROG PROG Hydro 4 (cod.): 90829 PROGRAMMING WATERING - Set/modify the WEEKLY SCHEDULE. With the weekly programming (WEEKLY SCHEDULE) the user selects the days of the week on which the set Watering cycles are activated. From the WEEKLY SCHEDULE page, press ->...
- Page 8 LINE PROG PROG EXIT EXIT Hydro 4 (cod.): 90829 PROGRAMMING WATERING - Exiting the test/manual watering page. Move to the page where TEST is displa- yed with the symbols ashing. Press to exit TEST/manual mode. Press to go back to the EXIT page with the clock.
- Page 9 LOW BATT LINE PROG EXIT LOW BATT LINE PROG LOW BATT LOW BATT EXIT LINE PROG LINE PROG EXIT EXIT LOW BATT LOW BATT LINE PROG LINE PROG EXIT EXIT Hydro 4 (cod.): 90829...
- Page 10 EXIT EXIT EXIT Hydro 4 (cod.): 90829 CLEANING AND MAINTENANCE. Clean the outside of the valve box and the control module when necessary using a soft cloth dampened slightly with water or speci c detergent: follow the detergent cleaning instructions.
Need help?
Do you have a question about the Hydro 4 and is the answer not in the manual?
Questions and answers