
Related Manuals for BIGTREETECH MANTA M8P V1.0


Summary of Contents for BIGTREETECH MANTA M8P V1.0
- Page 1 Shenzhen Big Tree Technology Co., Ltd. BIGTREETECH BIGTREETECH MANTA M8P V1.0 User Manual 1 / 39...
-
Page 2: Table Of Contents
Shenzhen Big Tree Technology Co., Ltd. BIGTREETECH Contents Contents ..............2 Revision History .............5 1 Brief Introduction ............6 1.1 Main Features ............6 1.2 Basic Parameters ............7 1.3 Product Dimension .............9 2 Peripheral Interface ............10 2.1 Interface Diagram .............10 2.2 Pin-out ...............10 3 Interface Instruction ............11... - Page 3 4.4. System Settings (CM4) ..........26 4.4.1 USB 2.0 Hub Ports ..........26 4.4.2 DSI1 Display Interface ...........26 4.4.3 CSI1 Camera ...........26 5. BIGTREETECH CB1 Setup steps ..........27 5.1 Download OS Image...........27 5.2 Download and Install Raspberry Pi Imager ........27 5.3 Write OS Image ............27 5.4 WIFI Setting ............29...
- Page 4 Shenzhen Big Tree Technology Co., Ltd. BIGTREETECH 7 Precautions ..............39 4 / 39...
-
Page 5: Revision History
Shenzhen Big Tree Technology Co., Ltd. BIGTREETECH Revision History Revision Description Date 01.00 First Draft 2022/06/18 01.01 Delete 31865 2022/08/04 5 / 39... -
Page 6: Brief Introduction
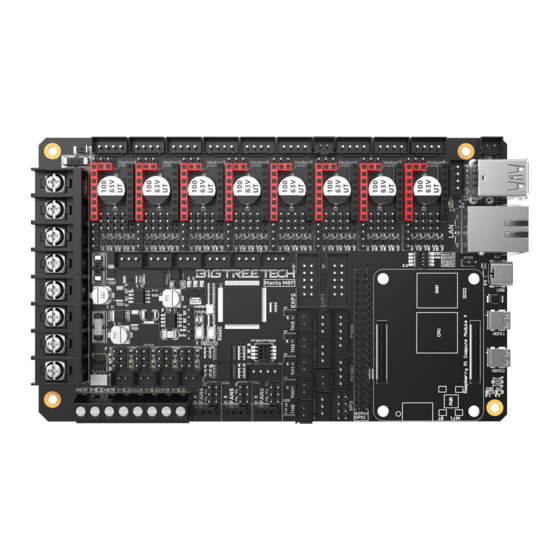
BIGTREETECH 1 Brief Introduction BIGTREETECH MANTA M8P is a 32-bit printer motherboard developed by the 3D printing team of Shenzhen Big Tree Technology Co., Ltd. for Klipper firmware. You can simply plug in the core board to run the Klipper firmware, which greatly simplifies the connection between the motherboard and the Raspberry Pi, and saves a lot of space. -
Page 7: Basic Parameters
1.2 Basic Parameters 1. Product Size: 170 x 102.7mm, you can read more details here BIGTREETECH MANTA M8P V1.0-SIZE-top.pdf 2. Installation Size: Please read: BIGTREETECH MANTA M8P V1.0-SIZE- top.pdf 3. Microprocessor: ARM Cortex-M0+ STM32G0B1VET6 64MHz 4. - Page 8 Shenzhen Big Tree Technology Co., Ltd. BIGTREETECH 17. Motor Drive Interface: Motor1, Motor2, Motor3(dual motor interface), Motor4, Motor5, Motor6, Motor7, Motor8, a total of Eight 18. Temperature Sensor Interface: 5-way 100K NTC, of which 4-way 100K NTC and PT1000 are optional 19.
-
Page 9: Product Dimension
Shenzhen Big Tree Technology Co., Ltd. BIGTREETECH 1.3 Product Dimension 9 / 39... -
Page 10: Peripheral Interface
Shenzhen Big Tree Technology Co., Ltd. BIGTREETECH 2 Peripheral Interface 2.1 Interface Diagram 2.2 Pin-out 10 / 39... -
Page 11: Interface Instruction
Shenzhen Big Tree Technology Co., Ltd. BIGTREETECH 3 Interface Instruction 3.1 USB Power Supply After the M8P motherboard is powered on, the D32 red light on the left side of the MCU will light up, indicating that the power supply is normal. The VUSB in the middle of the board is the power selection terminal. -
Page 12: Uart Mode Of Tmc Driver
Shenzhen Big Tree Technology Co., Ltd. BIGTREETECH Subdivis Driver Chip Excitation Mode Full 2 Phase Step 1-2 Phase LV8729 W1-2 Phase Max 128 2W1-2 Phase Subdivisions 1/16 4W1-2 Phase 36V 1.8A 1/32 8W1-2 Phase 1/64 16W1-2 Phase 1/128 32W1-2 Phase... -
Page 13: Spi Mode Of Tmc Driver
Shenzhen Big Tree Technology Co., Ltd. BIGTREETECH 3.2.3 SPI Mode of TMC Driver For example, TMC2130, TMC5160, TMC5161... Use 4 jumper caps for each to connect the position of the red box in the figure, and the subdivision and driver current is set by firmware. -
Page 14: Installing The Core Board
Shenzhen Big Tree Technology Co., Ltd. BIGTREETECH 3.3 Installing the Core Board M8P+CM4: Pay attention to the direction, as shown below. M8P+CB1: Pay attention to the direction, as shown below. 14 / 39... -
Page 15: Voltage Selection Of Cnc Fans
Shenzhen Big Tree Technology Co., Ltd. BIGTREETECH 3.4 Voltage Selection of CNC Fans Set the output voltage to 5V, 12V, or 24V with a jumper cap. Note: Please confirm the fan's operating voltage before choosing a voltage. Our company is not responsible for fan burnout caused by wrong selection. -
Page 16: Bltouch Wiring
Shenzhen Big Tree Technology Co., Ltd. BIGTREETECH 3.6 BLTouch Wiring 3.7 Auto Shutdown Module(Relay V1.2) Wiring 16 / 39... -
Page 17: Exp1+Exp2 And Lcd Screen Wiring
Shenzhen Big Tree Technology Co., Ltd. BIGTREETECH 3.8 EXP1+EXP2 and LCD Screen Wiring 3.9 RGB Wiring 17 / 39... -
Page 18: Filament Runout Detection Wiring
Shenzhen Big Tree Technology Co., Ltd. BIGTREETECH 3.10 Filament Runout Detection Wiring 3.11 40 Pin GPIO 18 / 39... -
Page 19: Dsi/Csi Connection
Shenzhen Big Tree Technology Co., Ltd. BIGTREETECH 3.12 DSI/CSI Connection 3.13 Proximity Switch Wiring Always on (NPN type), no need to short-circuit via a jumper cap, 24V as an example, as shown in the following figure: 19 / 39... -
Page 20: Wiring Of The 4-Wire Cnc Fan And The Water Cooling Device(12V As An Example, As Shown In The Following Figure:)
Shenzhen Big Tree Technology Co., Ltd. BIGTREETECH Always off (PNP type), need to short-circuit via a jumper cap, 24V as an example, as shown in the following figure: 3.14 Wiring of the 4-wire CNC Fan and the Water Cooling Device... -
Page 21: Raspberry Pi Cm4 Setup Steps
Shenzhen Big Tree Technology Co., Ltd. BIGTREETECH Raspberry PI CM4 Setup steps 4.1 Download OS Image If CM4 core board is used, You can directly download the images of Fluidd or Mainsail, also can download the OS image from the official website of Raspberry Fluidd: https://github.com/fluidd-core/FluiddPI/releases... -
Page 22: Write Os Image
Shenzhen Big Tree Technology Co., Ltd. BIGTREETECH 4.3 Write OS Image 4.3.1 CM4 LITE Version (Micro SD Card) 1. Plug the Micro SD card into the computer via a card reader. 2. Select Operating System. 3. Select "Use Custom", then select a custom.img from your computer. - Page 23 Shenzhen Big Tree Technology Co., Ltd. BIGTREETECH Click the setting icon in the lower right corner “Enable SSH”and click“SAVE”, There are other features that can be set in this menu. Please modify them according to your own needs. Details are as follows:...
- Page 24 Shenzhen Big Tree Technology Co., Ltd. BIGTREETECH 6. Select the Micro SD card and click "WRITE" (Writing the image will format the Micro SD card. Be careful not to select the wrong storage device, otherwise, the data will be formatted).
-
Page 25: Cm4 Emmc Version(Note: Emmc Version Will Not Tun The System From The Micro Sd Card.)
Shenzhen Big Tree Technology Co., Ltd. BIGTREETECH 4.3.2 CM4 eMMC Version(Note: eMMC version will not tun the system from the Micro SD card.) 1. Install rpiboot For Windows: http://github.com/raspberrypi/usbboot/raw/master/win32/rpiboot_setup.exe For Mac and Linux: https://github.com/raspberrypi/usbboot#building 2. Push the DIP switch 4 (USB OTG) and 3 (RPIBOOT) to ON to enter BOOT mode. -
Page 26: System Settings (Cm4)
Shenzhen Big Tree Technology Co., Ltd. BIGTREETECH 4.4. System Settings (CM4) 4.4.1 USB 2.0 Hub Ports MANTA M8P is designed with a USB 2.0 Hub, in order to save power consumption, the USB port of CM4 is disabled by default. If you want to enable it, you need to add the following content to the config.txt file:... -
Page 27: Bigtreetech Cb1 Setup Steps
Shenzhen Big Tree Technology Co., Ltd. BIGTREETECH BIGTREETECH CB1 Setup steps 5.1 Download OS Image If BIGTREETECH CB1 core board is used, You can only download and install the system image provided by BIGTREETECH: https://github.com/bigtreetech/CB1/releases 5.2 Download and Install Raspberry Pi Imager Install the official Raspberry Pi Imager: https://www.raspberrypi.com/software/... - Page 28 Shenzhen Big Tree Technology Co., Ltd. BIGTREETECH 3. Select "Use Custom", then select a custom.img from your computer. 4. Select the Micro SD card and click "WRITE" (Writing the image will format the Micro SD card. Be careful not to select the wrong storage device, otherwise, the data will be formatted).
-
Page 29: Wifi Setting
Shenzhen Big Tree Technology Co., Ltd. BIGTREETECH 5. Wait for the writing to finish. 5.4 WIFI Setting note:skip this step if you are using ethernet port not using WIFI CB1 cannot directly use the Raspberry Pi Imager software to set the WiFi name and password like CM4. -
Page 30: Install Klipper With Kiauh Script
Shenzhen Big Tree Technology Co., Ltd. BIGTREETECH 5.5 Install Klipper with kiauh Script 1. Download kiauh: git clone -b CB1 --depth 1 https://github.com/bigtreetech/kiauh.git 2. Run kiauh: ./kiauh/kiauh.sh On the left side of the Main Menu: install, remove, upgrade, etc. On the right side of the Main Menu: show the installation status. -
Page 31: Checkout Klipper Branch
Shenzhen Big Tree Technology Co., Ltd. BIGTREETECH 4. During the installation process, when prompted for confirmation, you can select the configuration by default. After the installation is complete, back to the Main Menu to ensure that the installed software is in the 'Installed' status. - Page 32 Shenzhen Big Tree Technology Co., Ltd. BIGTREETECH 3. Select 6 to enter Settings, then select 2 to enter the checkout Klipper repository. 0 is the official repository of Klipper, it is recommended not to modify it, it can be used to restore; 1 is the Klipper repository after we added our own modification function.
-
Page 33: Fix Klipperscreen
Shenzhen Big Tree Technology Co., Ltd. BIGTREETECH 5.7 Fix KlipperScreen KlipperScreen cann’t be displayed directly on CB1. You need to follow the following steps to repair it. On the kiauh script Main Menu, select F to enter the Custom Function Menu, and then select 2 to fix. -
Page 34: Configure The Motherboard
Shenzhen Big Tree Technology Co., Ltd. BIGTREETECH the motherboard Configure 6.1 ssh connect to device 1. Install the ssh application Mobaxterm: https://mobaxterm.mobatek.net/download-home-edition.html 2. Insert Micro SD card to MANTA M8P, wait for system to load after power on, aprox. 1-2min 3. - Page 35 Shenzhen Big Tree Technology Co., Ltd. BIGTREETECH 6. Open Mobaxtermand click “Session”, and click “SSH”,inset the device IP into Remote host and click “OK” (note: your computer and the device needs to be in the same network) 7. Input the login name and password to enter the SSH terminal interface...
-
Page 36: Compile Firmware
Shenzhen Big Tree Technology Co., Ltd. BIGTREETECH 6.2 Compile firmware 1. After ssh successfully connected to the device, enter in terminal: cd ~/klipper/ make menuconfig Compile with the configuration shown below(if the options below is not available, please update you Klipper source code to the newest version) * [*] Enable extra low-level configuration options * Micro-controller Architecture (STMicroelectronics STM32) --->... -
Page 37: Firmware Update
Shenzhen Big Tree Technology Co., Ltd. BIGTREETECH 6.3 Firmware update 6.3.1 Update using SD Card 1. Rename klipper.bin to ”firmware.bin”, Copy to the SD card root directory, insert the SD card into the SD card slot of the MANTA M8P, click the “reset”... -
Page 38: Configure Klipper
Shenzhen Big Tree Technology Co., Ltd. BIGTREETECH 6.4 Configure Klipper Enter your device IP address into your browser to open the webUI,find the reference config for motherboard in the directory shown below,if there is no such config available, update your klipper source code to the newest version or download from github: https://github.com/bigtreetech/Manta-M8P... - Page 39 2. Pay attention to the heat dissipation of CM4 and CB1. The CM4/CB1 may become quite hot if the running application consumes too many system resources. Other resources for this product can be found on https://github.com/bigtreetech/. If you cannot find the resources you need, you can contact our after-sales support.
Need help?
Do you have a question about the MANTA M8P V1.0 and is the answer not in the manual?
Questions and answers