Table of Contents
Advertisement
Advertisement
Table of Contents

Related Manuals for Haier DW60BI


Summary of Contents for Haier DW60BI
- Page 1 60cm Fully Integrated Dishwasher DW60BI 0120505374...
-
Page 2: Safety Is A Good Habit To Get Into
- After removing the packing, check to make sure that the appli- ance is not damaged. If in doubt, contact a qualified professional. - The dishwasher must only be used by adults for the washing of household dishes and cooking utensils. -
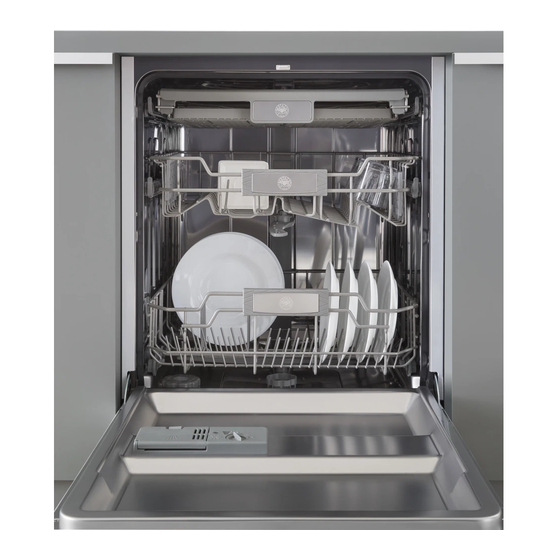
Page 3: Close-Up View (Interior)
Close-up View (Interior) Upper Rack Top Spray Arm Lower Rack Bottom Spray Arm Width Depth Height Capacity Mains water pressure Power voltage Maximum load Washing Filter Detergent and Rinse Aid Dispenser Salt Container Cap Third Sprayer Technical characteristics 60 cm 58 cm 82 cm 12 standard place settings... -
Page 4: Water Hardness
Salt Salt The hardness of the water varies from place to place. If hard water is used in the dishwasher, deposits will form on the dishes and utensils. The appliance is equipped with a special softener that uses a salt specifically designed to eliminate lime and minerals from the water. -
Page 5: Detergent And Rinse Aid
Detergent and Rinse Aid Detergent Detergent specifically intended for use with dishwashers must be used. The dispenser must be refilled before the start of each wash cycle following the instructions provided in the "Wash Cycle Table". The detergent dispenser is located on the inside panel the door. -
Page 6: Loading The Dishwasher
Loading the Dishwasher Before placing the dishes in the dishwasher, remove the larger food particles to prevent the filter from becoming clogged, which results in reduced performance. If the pots and pans have baked-on food that is extremely hard to remove, we recommend that they be allowed to soak before they are washed. -
Page 7: Starting The Appliance
After having completed all of the installation steps in the preced- ing paragraphs, turn on the water to the unit, partially open the door of the dishwasher, and press the ON-OFF button "A" lo- cated on the control panel. The "B" indicator light will come on. -
Page 8: Wash Cycle Table
Wash Cycle Table Cycle Cycle Selection Information Very dirty dishes, pots and pans. (Not to be used with deli- cate items) Heavy Duty Normally dirty dishes, pots and pans. Stan- dard daily cycle. Normal Wash (EN50242) Normally dirty dishes, pots and pans without dried on residue. -
Page 9: Energy Saving Tips
If absolutely necessary, it can be positioned on its back. Seals One of the factors that cause odors to form in the dishwasher is food that remains trapped in the seals. Periodic cleaning with a damp sponge will prevent this from occurring. -
Page 10: Troubleshooting
OFF, and wait a few minutes. You can power the dishwasher on, try it again , if the dishwasher still does not function and/or the problem persists, contact the nearest... -
Page 11: Installation
Levelling the Appliance Once the appliance is positioned, adjust the feet (screw them in or out) to adjust the dishwasher, making it level. In any case, the appliance should not be inclined more than 2˚. If the appliance is level, it will help ensure proper performance. - Page 12 Installation Diagram The symbol on the product or on its packaging indicates that this product may not be treated as household waste. Instead it shall be handed over to the applicable collection point for the recycling of electrical and electronic equipment. By ensuring this product is disposed of correctly, you will help prevent potential negative consequences for the environ- ment and human health, which could otherwise be caused by inappropriate waste handling of this product.
Need help?
Do you have a question about the DW60BI and is the answer not in the manual?
Questions and answers