Advertisement
Quick Links
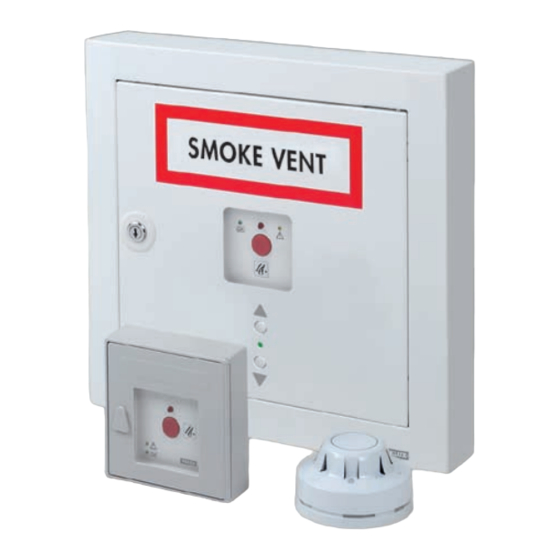
kFX 100/101/102/103/104
English:
instructions for control system package
DEutsch:
Anleitung für RWA-steuersystem
FRAnçAis :
notice pour le kit système de commande
DAnsk:
Vejledning til styresystempakke
nEDERlAnDs:
instructies voor bedieningsset
itAliAno:
istruzioni per il sistema di alimentazione e controllo
EspAñol:
instrucciones para el sistema de control de
evacuación de humos
ČEsky:
návod pro sadu s řídicím systémem
polski:
instrukcje dla pakietu systemu sterowania
VAS 451914-0709
Advertisement

Related Manuals for Velux KFX 100


Summary of Contents for Velux KFX 100
- Page 1 100/101/102/103/104 English: instructions for control system package DEutsch: Anleitung für RWA-steuersystem FRAnçAis : notice pour le kit système de commande DAnsk: Vejledning til styresystempakke nEDERlAnDs: instructies voor bedieningsset itAliAno: istruzioni per il sistema di alimentazione e controllo EspAñol: instrucciones para el sistema de control de evacuación de humos...
- Page 2 Resolución de problemas Fehlersuche Zapojení přívodu el. Branchement de Instrukce pro případ Dépannage l'alimentation energie chyby v systému Fejlfinding Podłączenie zasilania Tilslutning af strøm- Rozwiązywanie prob- forsyning Problemen oplossen lemów Aansluiten van stroom- voorziening 2 VELUX VELUX 3...
- Page 3 • Falls die Rauch- und Wärmeabzugsanlage mit einem VELUX Windableitblech KFD • If the smoke ventilation system is equipped with VELUX wind deflector KFD, the ausgestattet ist, muss bei Besichtigungen überprüft werden, dass das Windableit- wind deflector must be inspected for damage and for loose screws and nuts.
-
Page 4: Installation
• Hvis brandventilationsanlægget er forsynet med en VELUX vinddeflektor KFD, skal • Si l'exutoire de fumées est équipé d'un déflecteur de vent KFD VELUX, il est nécessaire det i forbindelse med eftersyn kontrolleres, at vinddeflektoren er ubeskadiget, og at de vérifier lors de l'inspection que le déflecteur n'est pas endommagé... - Page 5 • Bij ventileren wordt het dakvenster maximaal 200 mm geopend. prodotto product • Questo prodotto è stato realizzato per l'uso con prodotti originali VELUX. L'utilizzo con • Dit product is ontwikkeld om aan te sluiten op VELUX producten. Aansluiting op altri prodotti può provocare danni o malfunzionamenti.
-
Page 6: Instalación
špatnou funkci. • Este producto ha sido diseñado para su uso con productos originales VELUX. Su • Tento výrobek splňuje požadavky směrnice EMC pro použití v domácnosti, conexión a otros productos puede causar averías o funcionamiento incorrecto. - Page 7 • Jeżeli system wentylacji oddymiającej jest wyposażony w deflektor wiatrowy VELUX KFD podczas kontroli musi być sprawdzone, czy jest on nieuszkodzony i czy śruby i nakrętki są mocno dokręcone. • Pozbywanie się baterii i odpadów elektrycznych musi być zgodne z przepisami dotyczącymi odpadów elektrycznych obowiązującymi w danym kraju.
- Page 8 : Cable negro : Černý drát : Etiquetas : Štítky polski: Zawartość pakietu systemu sterowania : Centrala sterująca : Detektor dymu : Przycisk stłuczeniowy : Klucz : Ramka : Baterie podtrzymujące zasilanie : Czarny przewód : Etykiety 14 VELUX VELUX 15...
- Page 9 : Fusible batterie 630 mA : Branchements batterie : Coup de poing brise-glace : Touches pour ventilation Pour le branchement de l'interrupteur de ventilateur et du détecteur de pluie, voir la notice incluse dans chaque composant individuel. 16 VELUX VELUX 17...
- Page 10 : Comfortventilatieknoppen : Tlačítka k větrání Pro zapojení doplňkového spínače a dešťového senzoru následujte Zie voor de aansluiting van de ventilatieknop en de regensensor, de bij het VELUX product bijgesloten inbouwinstructies. instrukce přiložené k jednotlivým výrobkům. polski: centrala sterująca (schemat podłączeń)
- Page 11 **) Apart te bestellen bij VEluX. **) Disponibile su richiesta. **) Disponible por separado en VEluX. **) samostatně k dispozici u společnosti VEluX. **) osobno dostępne w firmie VEluX. L2 L1 Mains fuse Mains connection 230 V...
- Page 12 être conforme aux Normes Nationales/Européennes. 90 m Différence de potentiel maximale dans les câbles : 2 V. 145 m 3 x 4 mm² intensité de fonctionnement : le total de toutes les intensités. 72.5 m *) 2 x 2 conductors in parallel • 2 x 2 Leiter parallel • 2 x 2 conducteurs en parallèle 2 x 2 ledere parallelt • 2 x 2 paralelle geleiders • 2 x 2 conduttori in parallelo 2 x 2 conductores en paralelo • 2 x 2 paralelní vodiče • 2 x 2 przewody równolegle 22 VELUX VELUX 23...
- Page 13 22. Przewód musi być chroniony zgodnie z normami krajowymi/europejskimi. Dopuszczalny maksymalny spadek napięcia elektrycznego w prze- wodzie: 2 V. natężenie operacyjne: Suma natężeń wszystkich silników. 24 VELUX VELUX 25...
- Page 14 Przejdź na stronę 32. Instalacja na ścianie (patrz strona 27) Instalacja w niszy w ścianie z cegły/betonu (patrz strony 28-29) Instalacja w niszy w ścianie w drewnianej ramie (patrz strony 30-31) 26 VELUX VELUX 27...
- Page 15 . Noter qu'ils peuvent être placés de deux façons suivant commande l'épaisseur de l'enduit. Percer des trous dans la maçonnerie et insérer des chevilles. Positionner les accessoires de fixation contre la maçonnerie et les fixer à l'aide des vis . Poursuivre en page 32. 28 VELUX VELUX 29...
- Page 16 32. polski: instalacja w niszy w ścianie w drewnianej ramie Przymocuj zaczepy w tylnej części ramki centrali sterującej . Ustaw centralę sterującą w niszy i dociągnij wkręty od środka . Przejdź na stronę 32. 30 VELUX VELUX 31...
- Page 17 Rückseite der Glastür angebrachter Jumper) muss entfernt werden und an der letzten oder einzigen - d.h. von der Steuerzentrale am weitesten weg platzierten - RWA-Hauptbedienstelle montiert werden. Das Endmo- nEDERlAnDs: installatie: Breekglas punt KFK 100/101/102/103/104 dul J1 in sonstigen RWA-Hauptbedienstellen muss entfernt werden. Die 32 VELUX VELUX 33...
- Page 18 único pulsador de emergencia – es decir, en el pulsador más lejano al sistema de control. Debe desmontarse cualquier otro módulo terminal conectado a cualquier otro pulsador. El primer pulsador adicional debe conectarse en paralelo a las terminales, que estan ya asignadas a los 34 VELUX VELUX 35...
- Page 19 Rauchmelder in einer Reihe angeschlossen werden. steraansluiting biedt geen mogelijkheid tot controle. Rauchmelder KFA 100 müssen immer hintereinandergeschaltet werden, wodurch sichergestellt wird, dass die ganze Reihe von der Steuerzentrale bis zum letzten Rauchmelder überwacht wird. Eine Sternschaltung ist daher nicht zulässig. 36 VELUX VELUX 37...
- Page 20 Ke každému řídicímu systému může být zapojeno až deset kouřových senzorů. Kouřové senzory KFA 100 musí být instalovány sériově, aby bylo zajištěno, že kompletní vedení vedoucí od řídicího systému k poslednímu senzoru je monitorováno. Hvězdicové připojení těchto spínačů kontrolu funkčnosti neumožňuje. 38 VELUX VELUX 39...
- Page 21 Branchement secteur : retirer 3 cm maximum de gainage du câble moteur. S'assurer que cette partie de câble ne peut rentrer en contact avec les parties métalliques du système de commande. Prendre toutes dispositions pour satisfaire la réglementation locale 40 VELUX VELUX 41...
- Page 22 Veďte kabel, jak je znázorněno a upevněte jej pomocí kabelové cavi delle batterie, tale tensione viene temporaneamente interrotta. svorky. Sconnettere l'alimentazione di rete prima di togliere le batterie. kryt: Upevněte ochranný kryt, jak je znázorněno. nB! le batterie tampone devono essere sostituite ogni quattro anni! 42 VELUX VELUX 43...
- Page 23 Poprowadź przewód tak jak pokazano na rysunku i przy- Wind/ melder mocuj go zaciskiem. Regen Regen osłona: Zamocuj osłonę tak jak pokazano na rysunku. Wind/ Wind/ Regen Regen Rauch melder Rauch Wind/ melder Regen Wind/ Regen Rauch melder Wind/ Regen 44 VELUX VELUX 45...
- Page 24 Bemærk: Motorerne kan stoppes i den ønskede position ved at trykke på Lüftertaste. Das Fenster wird bei einmaliger Betätigung der unteren begge knapper samtidigt Lüftertaste ganz geschlossen. hinweis: Die Motoren lassen sich bei gleichzeitiger Betätigung beider Tasten in der gewünschten Position stoppen 46 VELUX VELUX 47...
- Page 25 I motori possono essere bloccati in qualunque posizione premendo poznámka: Motory mohou být zastaveny v jakékoliv pozici pokud jsou entrambi i tasti simultaneamente obě tlačítka stisknuty současně 48 VELUX VELUX 49...
- Page 26 Kabely nesmí být přehozeny, to by způsobilo selhání integrovaného koncového modulu. polski: Podłącz zielony przewód zintegrowanej końcówki modułu do ostatniego lub jedynego silnika. Przewodów nie można zamieniać; mo- głoby to spowodować nieprawidłowe działanie zintegrowanej końcówki modułu. 50 VELUX VELUX 51...
- Page 27 L'ingresso del rilevatore di fumi può essere utilizzato per ricevere un segnale anche da rilevatore esterno al sistema VELUX. In questo caso è necessario comandare la chiusura di un contatto pulito utilizzando il modulo illustrato in figura. Per maggiori info contattare la sede VELUX.
- Page 28 The green light-emitting diode remains illuminated as the built-in thermal cut-out is irreversibly destroyed. Therefore the entire printed circuit board must be replaced. 54 VELUX VELUX 55...
- Page 29 Den røde lysdiode i styresystemet og de tilsluttede brandtryk commande ou du coup de poing brise-glace. La fenêtre se referme et le lyser. Den gule lysdiode for fejlmelding i styresystemet og de tilsluttede brandtryk blinker. 56 VELUX VELUX 57...
- Page 30 1 secondo. La finestra si apre. (La funzione di ventilazione luminosos rojos del sistema de control y los pulsadores de emergencia viene automaticamente bloccata). conectados se apagaran y la señal acústica se parara. 58 VELUX VELUX 59...
- Page 31 Zapala się również zielona dioda wskazując na nieod- nad 70°C, okno se otevírá automaticky. wracalne zniszczenie wbudowanego wyłącznika termicznego. Należy wymienić całą tablicę z obwodem drukowanym. signály: Červená světélkující dioda v ovládacím systému a zapojených poplachových požárních spínačích svítí. Žlutá světélkující dioda pro 60 VELUX VELUX 61...
- Page 32 . Uchovejte návod na vnitřní straně dvířek polski: Należy umieścić dostarczoną etykietę, SYSTEM ODDYMIANIA , na froncie centrali sterującej, jak pokazano na rysunku . Proszę prze- chowywać instrukcje w środku centrali sterującej z tyłu drzwiczek jak pokazano na rysunku 62 VELUX VELUX 63...
- Page 33 64 VELUX VELUX 65...
- Page 34 66 VELUX VELUX 67...
- Page 35 68 VELUX VELUX 69...
- Page 36 70 VELUX VELUX 71...
- Page 37 VELUX Österreich GmbH 045/6173666 02245/32 3 50 VELUX Australia Pty. Ltd. VELUX-Japan Ltd. 1300 859 856 0570-00-8145 VELUX Bosna i Hercegovina d.o.o. VELUX Lietuva, UAB 033/626 493, 626 494 (85) 270 91 01 VELUX Belgium VELUX Latvia SIA (010) 42.09.09...
Need help?
Do you have a question about the KFX 100 and is the answer not in the manual?
Questions and answers