Table of Contents
Advertisement
Quick Links
www.pce-group-europe.com
PCE- Deutschland Gmb H & Co. KG
Tel: +49 029 03 976 99-0
Fax: +49 029 03 976 99-29
info@warensortiment.de
www.warensortiment.de
PCE Group Ibérica S.L.
Tel: +34 967 543 548
Fax: +34 967 543 542
info@pce-iberica.es
www.pce-iberica.es
PCE Group Italia S.R.L.
Tel: + 39 0583 975 114
Fax: +39 0583 974 824
info@pce-italia.it
www.pce-italia.it
USER MANUAL
PCE-LSM
Advertisement
Table of Contents

Related Manuals for PCE Health and Fitness LSM


Summary of Contents for PCE Health and Fitness LSM
- Page 1 Fax: +49 029 03 976 99-29 info@warensortiment.de www.warensortiment.de PCE Group Ibérica S.L. Tel: +34 967 543 548 Fax: +34 967 543 542 info@pce-iberica.es www.pce-iberica.es PCE Group Italia S.R.L. Tel: + 39 0583 975 114 Fax: +39 0583 974 824 info@pce-italia.it www.pce-italia.it USER MANUAL PCE-LSM...
-
Page 2: Table Of Contents
Contents: 1. Introduction ......................3 2. Completeness ......................3 3. Balance description ....................4 4. Keys and indicators ....................6 5. Technical data ......................7 6. Security rules......................8 7. Preparations – working environment ..............9 8. Preparing a balance to work................. 10 9. -
Page 3: Introduction
Introduction AD series balances are destined for laboratory weighing where high accuracy is required. AD6F balances are designed for precise paint weighing in automatic paint pouring process. All balances are metrologically tested - calibration or legal verification certificate on demand. Legal verification is required for balances used in some applications: direct trade, pharmaceutical prescriptions, medical and pharmaceutical analysis, goods packing and others. -
Page 4: Balance Description
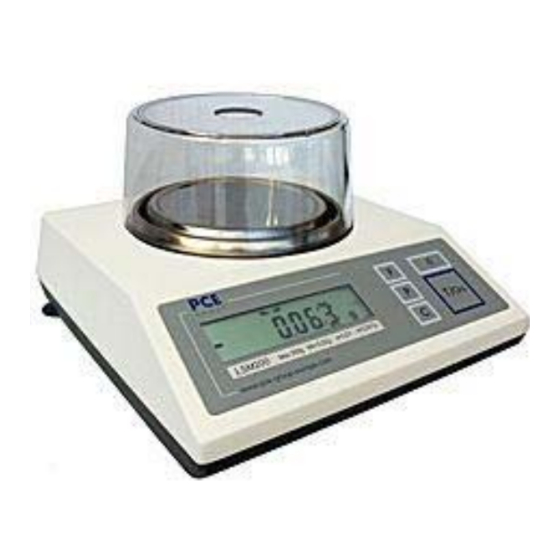
3. Balance description FRONT VIEW Balances 50-AD600: 1 – pan 2 – pan support (under the pan) 3 – pan ring 4 – LCD display 5 – keys 6 – rotating legs 7 – water level Balances AD510, AD1000-AD3000 and AD2.5-AD5: 1 –... - Page 5 Balances AD6-AD12: 1 – pan 2 – pan support (under the pan) 3 – pan ring 4 – LCD display 5 – keys 6 – rotating legs 7 – water level REAR VIEW Printer or computer Feeder ~230V Feeder RS232C Adjust switch RxD (receiver) TxD (transmitter)
-
Page 6: Keys And Indicators
4. Keys and indicators MODE →T← - tare (subtract package weight from weighed mass), →0← - zeroing (balances for direct sale use only) - data output (print / transmission), - calibration/ navigation, - mode switch, MENU - menu, - switch-off (standby), result stabilisation, indicator bar indicator... -
Page 7: Technical Data
5. Technical data Type AD50 AD60 AD100 AD200 AD300 AD500 AD600 Capacity (Max) 100g 200g 300g 500g 600g Min load (Min) 0,02g 0,02g 0,02g 0,02g 0,02g 0,02g 0,04g Reading unit (d) 0,001g 0,001g 0,001g 0,001g 0,001g 0,001g 0,002g Verification unit (e) 0,01g 0,01g 0,01g... -
Page 8: Security Rules
6. Security rules To avoid electrical shock or damage of a balance or connected peripheral devices, it is necessary to follow the security rules below. • All repairs and necessary regulations can be made by authorised personnel only. • To avoid fire risk use a feeder of an appropriate type (supplied with a balance). -
Page 9: Preparations - Working Environment
7. Preparations – working environment +33°C +18°C When choosing a location to set up the balance, remember the following rules to ensure proper working conditions and user-friendly operating: setup the balance on an even, flat surface leaving necessary room for easy access, maintain proper working temperature, avoid strong air drafts, vibrations, dust, big temperature changes and humidity over 90%, avoid locations with extreme heat radiation and electromagnetic or magnetic fields. -
Page 10: Preparing A Balance To Work
8. Preparing a balance to work 1. Take all content out of a package. 2. Place the balance on a stable ground not affected by mechanical vibrations and airflows. 3. Level the balance with rotating rear legs 6 so that the air bubble in water-level at the back of the balance is in the middle. -
Page 11: Start-Up
9. Start-up After switching-on, balance performs automatic self-test. Program version AC-... ------- Zeroing. 0.000g Ready to work. -
Page 12: Operation Principles
10. Operation principles 1. Weighed sample should be placed in the centre of the pan. 2. In direct sale use (d=e), make sure that zero indicator is displayed. If not, press and wait until zero indication and zero indicator appears. In other balances the key does not operate. -
Page 13: Balance Checking
11. Balance checking As weight indication depends on gravitational acceleration, it is advised to check balance indication accuracy before and after series of measurement using any load with known weight. To check a balance with legal verification use calibration weight as stated in Technical Data table with valid calibration certificate. - Page 14 Operation sequence: 0.00g Remove a protective mark from a calibration MENU switch at the back of a balance. CALIbr Switch to Pr ON position using small screwdriver CAL oFF (signalised on a display). Press MENU to call special functions. Press →T← CAL on to choose CALIbr and CAL on.
-
Page 15: Connecting A Balance To A Computer Or A Printer
13. Connecting a balance to a computer or a printer The balance may send data to a computer or a printer via RS232C interface. RS232C When cooperating with a computer, the balance sends weighing result after initialising signal from a computer or after pressing key. -
Page 16: Special Functions Description
14. Special functions description All balances, beside basic functions like weighing and tare, are equipped with the set of additional functions. Standard set of special functions include: - pieces counting, - autozeroing, - serial port working mode setting, - serial port parameters setting, - percentage weighing, - weighing unit change (grams / carats / pounds) - prescriptions making... -
Page 17: Legend
15. Legend - loaded pan - unloaded pan - press a key when ... (on left) - forced change - automatic change 16. Normal weighing 0.00 g When a pan is empty and indication is different than zero press →T← key. Weighing result should be read when the indicator "... -
Page 18: Weigh Summing (Recipe)
18. Weigh summing (rECIPE) 0.00 g This function enable to weigh few ingredients MENU in one container and to display aggregated sum of all ingredients. The function has the following options: rECIPE -rEC oFF – leave the function and display aggregated sum of all ingredients, -rEC on –... -
Page 19: Pieces Counting (Pcs)
19. Pieces counting (PCS) 12.05 g This function enables to count identical pieces, e.g. turnbuckles or buttons. A measurement is performed in two phases: 0.00 g - first phase - single piece weight calculation on the basis of defined pieces amount (5, 10, 20, 50, 100, 200 or 500 pieces), 23.04 g MENU... -
Page 20: Autozeroing (Autotar)
20. Autozeroing (AUtOtAr) 0.01g MENU When AUtotAr function is activated, a balance automatically keeps zero indication if a pan is empty or if zero indication was acquired by pressing →T← key. AUtOtAr To leave the function press MENU key, then with →T←... -
Page 21: Serial Port Setting (Rs232)
22. Serial port setting (rS232) 0.00g MENU The function enables to set the following transmission parameters (standard parameters underlined): - transmission speed (bAud: 1200, 4800, rS 232 9600), - the number of bits in a byte (bit: 7, 8). - parity control (PArItY: 0, 1; Odd: 0, 1), baud - network number when working in multistand computer system (when working as a single... -
Page 22: Date And Time Setting (Date) - Optional
23. Date and time setting (dAtE) - optional This function enables to set current date and 0.00g MENU time internal balance clock enable/disable date and time on weighing result printouts. dAtE Options: - dAt oFF – deactivate date printout, - dAt on – activate date printout (using key), dAt oFF -dAt SEt –... -
Page 23: Percentage Weighing (Percent)
24. Percentage weighing (PErCEnt) This function enables to display weighing 0.00 g result as a percentage of a reference sample. 100% A measurement is performed in two phases: - first phase – weighing a reference sample, 19.07 g MENU - second phase – measuring specific sample as a percentage of the reference sample. -
Page 24: Weighing Unit Selection (Unit)
25. Weighing unit selection (UnIt) Use this function to choose weighing unit: 1.60g MENU - carats (1 ct= 0,2 g), - pounds (1 lb=0,454kg), UnIt - grams. The example at the left presents how to set CArAt carats as weighing unit. 8.00 26. -
Page 25: Maintenance And Repairs Of Small Defects
27. Maintenance and repairs of small defects 1. A balance should be kept clean. 2. Take care that no dirt gets between a casing and a pan. If found any, remove a pan (lift it up), remove dirt and then replace a pan. 3. - Page 26 Declaration of Conformity AXIS Spółka z o.o. 80-125 Gdańsk, ul. Kartuska 375B confirm with all responsibility that scales: AD50, AD60, AD100, AD200, AD300, AD500, AD600, AD250, AD510, AD1000, AD2000, AD3000, AD2.5, AD5, AD6, AD6F, AD10, AD12 marked with CE mark comply with the following: 1.
- Page 27 Notes...
- Page 28 In this direction will find a vision of the measurement technique: http://www.industrial-needs.com/measuring-instruments.htm NOTE: "This instrument doesn’t have ATEX protection, so it should not be used in potentially explosive atmospheres (powder, flammable gases)."...
Need help?
Do you have a question about the LSM and is the answer not in the manual?
Questions and answers