Table of Contents
Advertisement
Quick Links
Handheld Rotation Meter PCE-155
Date of creation: 15/12/2014
Date of last change: 16.03.2015
PCE Americas Inc.
711 Commerce Way
Suite 8
Jupiter
FL-33458
USA
From Outside US: +1
Tel: (561) 320-9162
Fax: (561) 320-9176
info@pce-americas.com
www.pce-instruments.com/us
Manual
Version 1.0
PCE Instruments UK Ltd.
Southpoint Business Park
Hampshire / Southampton
United Kingdom, SO31 4RF
From Outside UK: +44
Tel: (0) 2380 98703 0
Fax: (0) 2380 98703 9
info@industrial-needs.com
www.pce-instruments.com/english
www.industrial-needs.com
Units 12/13
Ensign way
Advertisement
Table of Contents

Related Manuals for PCE Instruments PCE-155


Summary of Contents for PCE Instruments PCE-155
- Page 1 From Outside UK: +44 Tel: (561) 320-9162 Tel: (0) 2380 98703 0 Fax: (561) 320-9176 Fax: (0) 2380 98703 9 info@pce-americas.com info@industrial-needs.com www.pce-instruments.com/us www.pce-instruments.com/english www.industrial-needs.com Manual Handheld Rotation Meter PCE-155 Version 1.0 Date of creation: 15/12/2014 Date of last change: 16.03.2015...
-
Page 2: Table Of Contents
5.5.2 Use ............................... 21 Perform measurements ......................22 5.6.1 Contact-free measurements ......................22 5.6.2 Contact measurements ........................ 23 Input / Output ..........................23 Batteries............................ 24 Disposal ......................... 25 Contact ........................25 PCE Instruments UK ........................ 25 PCE Americas .......................... 25... -
Page 3: Introduction
Please read this manual carefully and completely before you use the device for the first time. The device may only be used by qualified personnel and repaired by PCE Instruments personnel. There is no warranty of damages or injuries caused by non-observance of the manual. -
Page 4: Technical Specification
Manual 3 Technical specification Display Alphanumerical LCD with 5 digits 1 … 200.000 Summarizer Accuracy Optical detection: ± 0,01 % of the shown value contact sensor: ± 0,05 % of the shown value (rpm) 0,001 … 10 rpm (depending on the measuring Resolution area) 5 cm …... -
Page 5: Lcd Description
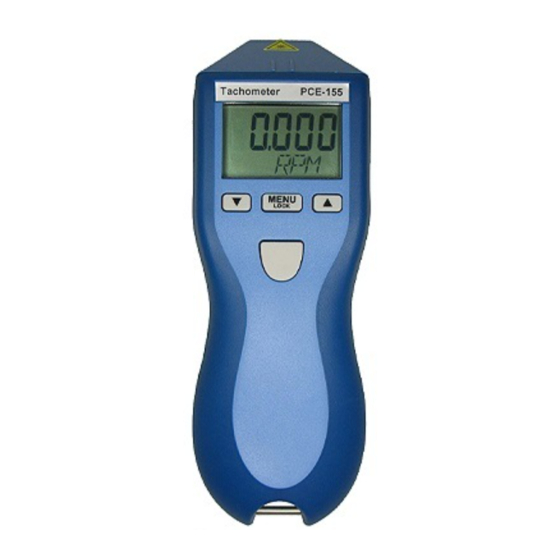
Manual 1. Battery compartment 2. Belt clip 3. Start / reset 4. Tripod socket (on the bottom of the device) 5. MIN / down 6. LCD 7. Menu / lock / select 8. MAX / up LCD description Indicator of activation. Flashes when an input signal is detected. When dealing with higher frequencies, the indicator will appear constantly. -
Page 6: Instructions
Manual 5 Instructions Measurement 5.1.1 Contact-free measurement The contact-free measurement can be performed internally (by m of the laser) or externally (by applying an optical sensor to the instrument). Clean the shaft. Apply the reflexion tape. For small shafts, a small piece of reflexion tape can be used. 5.1.2 Contact measurement In order to perform contact measurements, use the indented adaptor (RCA). -
Page 7: Tachometer Mode
Manual Tachometer mode 5.2.1 Settings 1. Switch on the device The last measurement will be displayed. 1a. To toggle: Press and hold the button. Device is locked. 2. Activate setup mode 3. Go to mode selection 4. Choose tachometer mode (TACH) Repeat until TACH shows up. - Page 8 Manual 5. Save and continue 6. Go to parameter selection 7. Choose your parameter Repeat until the desired parameter is displayed. 8. Save and continue 9. Go to the area where you can select the position of the decimal point 10.
-
Page 9: Tachometer Operation
Manual 11. Save and continue 12. Leave setup mode The handheld rotation meter remembers all settings (including the locking function) when being switched off and on again. 5.2.2 Tachometer operation 5.2.2.1 Measurement Press and hold Lock 5.2.2.2 Call up the maximum value Max. -
Page 10: Speed Mode
Manual 5.2.2.3 Call up the minimum value Min. speed 5.2.2.4 In case the device is locked Reset max. / min. value 5.2.2.5 Switch off the device or make use of the auto power off function after 90 seconds of inactivity. Speed mode 5.3.1 Settings... - Page 11 Manual 1a. To toggle: Press and hold the button in order to set / delete the locking function Press and hold Locked 2. Go to setup mode 3. Go to mode selection The last chosen mode will be displayed. 4. Choose speed mode (RATE) Switches between RATE and TOTAL.
- Page 12 Manual 6. Go to parameter selection Choose between CRPS, CRPM or CRPH. 7. Choose the parameter Repeat until the desired parameter is displayed. 8. Save and continue Rotating units Linear units 8a. (Linear units only): Area to choose the measurement wheel Last chosen measurement wheel will be displayed.
-
Page 13: Use
Manual 9. Go to the area where you can select the position of the decimal point Select “NONE”, “1”, “2” or “3”. 10. Select the decimal point Repeat until the decimal point is displayed. 11. Save and continue 12. Leave setup mode and start your measurements The handheld rotation meter remembers all settings (including locking function) when being switched off and on again. - Page 14 Manual 5.3.2.2 Retrieve the maximum value Max. speed 5.3.2.3 Retrieve the maximum value Min. speed 5.3.2.4 In case the device is locked Reset max. / min. value. 5.3.2.5 Switch off the device or make use of the auto power off function after 90 seconds of inactivity.
-
Page 15: Summing Mode
Manual Summing mode 5.4.1 Settings 1. Switch on the device Different messages for external or internal use are displayed. Internal use or external sensor: The last parameters that were chosen are displayed. External measuring module: “EXTRN”, then rolling message, then last chosen parameter. 2. - Page 16 Manual 4. Choose summing-mode (TOTAL) Repeat until TOTAL is displayed. 5. Save and continue 6. Go to parameter selection Different messages for external or internal use are displayed. Internal use or external sensor: count only (COUNT) External measuring module: rotating measurement (REV) linear: INCH, FEET, YARDS, CM, METRES 7.
- Page 17 Manual 8. Save and continue COUNT OR REV linear 8a. (Linear measurements / parameters only): Area to choose the measurement wheel Last chosen measurement wheel will be displayed. 8b. Choose the measurement wheel Switches between 10CM and 12IN. 8c. Save and continue 9.
-
Page 18: Use
Manual 11. Save and continue 12. Leave setup mode and start your measurements The handheld rotation meter remembers all settings (including locking function) when being switched off and on again. 5.4.2 5.4.2.1 Measurement Press and hold Lock 5.4.2.2 Retrieve the maximum value Max. -
Page 19: Timer Mode
Manual 5.4.2.4 In case the device is locked Reset max. / min. value 5.4.2.5 Switch off the device or make use of the auto power off function after 90 seconds of inactivity. Timer mode 5.5.1 Settings 1. Switch on the device The last chosen parameters are displayed. - Page 20 Manual 2. Go to setup-mode 3. Go to mode selection The last chosen mode will be displayed. 4. Choose timer mode (TIMER) Repeat until “TIMER” is displayed. 5. Save and continue 6. Go to timer selection Choose MAN or AUTO. 7.
-
Page 21: Use
Manual 8. Save and continue 9. Leave setup mode and start your measurements ”DONE”: The chosen parameter is displayed. 5.5.2 5.5.2.1 Measurement 5.5.2.1.1 Manual measurement Every time you press the button the measurement is started or stopped. 5.5.2.1.2 Automatic measurement The measurement is started or stopped by triggering via an external sensor. -
Page 22: Perform Measurements
Manual 5.5.2.3 Turn measurement When the timer is used it stops after the time has elapsed. To continue you need to press the button again. 5.5.2.4 Switch off the device or make use of the auto power off function after 90 seconds of inactivity. Perform measurements 5.6.1 Contact-free measurements... -
Page 23: Contact Measurements
Manual 5.6.2 Contact measurements Rotating measurement Linear measurements Attention: Only work with moderate contact pressure. Avoid direct contact with loose hair or clothing when operating with turning machines. Hold the device at the end. Do not use the device (with a contact sensor) for machines that have more than 20000 rpm. -
Page 24: Batteries
Manual Batteries If the following symbol appears, you will have to replace the batteries. Two 1,5 V “AA” Alkaline batteries need to be inserted. Both batteries need to point in the same direction. -
Page 25: Disposal
In order to comply with the EU directive 2012/19/EU we take our devices back. We either re-use them or give them to a recycling company which disposes of the devices in line with law. If you have any questions, please contact PCE Instruments. 7 Contact If you have any questions about our range of products or measuring instruments please contact PCE Instruments.
Need help?
Do you have a question about the PCE-155 and is the answer not in the manual?
Questions and answers