Table of Contents
Advertisement
Advertisement
Table of Contents

Related Manuals for Electrolux EKV 5605 X


Summary of Contents for Electrolux EKV 5605 X
- Page 1 Electric cooker INSTRUCTION BOOK EKV 5605 X...
- Page 2 ELECTRIC COOKER Instruction book ELEKTRICKÝ SPORÁK SE SKLOKERAMICKOU Návod k použití VARNOU DESKOU SKLOKERAMICKÝ SPORÁK Návod na používanie ÜVEGKERÁMIA FŐZŐFELÜLETŰ TŰZHELY Használati útmutató...
- Page 3 WARNINGS It is most important that this instruction book should be retained with the appliance for future reference. Should the appliance be sold or transferred, always ensure that the book is left with the appliance in order that the new owner can get to know the functions of the appliance and the relevant warnings.
-
Page 4: Table Of Contents
CONTENTS Instructions for the Installer Technical features Installation Location Electrical connections Instructions for the User Use and care Before the first use of the oven Controls Oven function control knob Thermostat control knob Using the fan oven Using the conventional oven Grilling Electric timer Cooking zones... -
Page 5: Instructions For The Installer
INSTRUCTIONS FOR THE INSTALLER TECHNICAL FEATURES Dimensions Height 858-868 mm Width 500 mm Depth 600 mm Oven Capacity 45 litres Double ring cooking zone front left Ø 120/180 mm 700/1700 W Single ring cooking zone back left Ø 140 mm 1200 W Single ring cooking zone front right Ø... -
Page 6: Installation
INSTALLATION It is mandatory that all operations required for the Before your appliance is connected to the mains installation carried QUALIFIED electricity supply, check to ensure that the PERSONNEL in accordance with existing rules voltage and the frequency shown on the rating and regulations. -
Page 7: Electrical Connections
ELECTRICAL CONNECTIONS Any electrical work required to install After installation and connecting, the this hob and the supply cable should be cable must be placed so that it cannot at any carried out by a qualified electrician or point reach a temperature of more than 50°C competent person, in accordance with the above the ambient temperature. -
Page 8: Instructions For The User
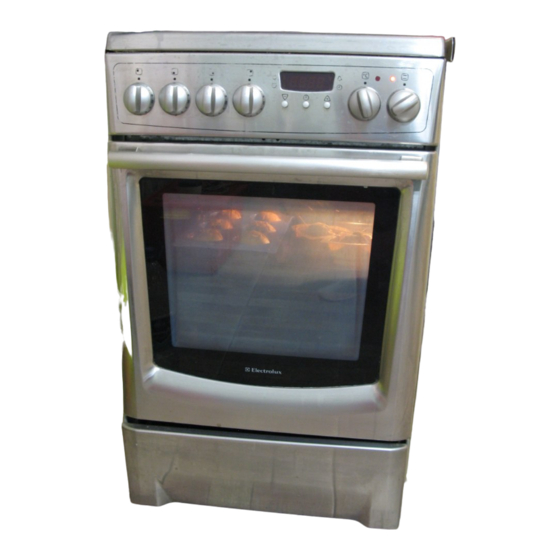
INSTRUCTIONS FOR THE USER USE AND CARE A. Glass ceramic hob B. Control panel C. Door handle D. Oven door E. Drawer F. Adjustable feet CONTROL PANEL MULTIFUNCTION 1. Back left heat zone control knob 5. Electric timer 2. Front left heat zone control knob 6. -
Page 9: Before The First Use Of The Oven
USE OF APPLIANCE Before the First Use of the Oven Remove all packaging, both inside and outside the oven, before using the oven. Before first use, the oven should be heated without food. During this time, an unpleasant odour may be emitted. This is quite normal. 1. -
Page 10: Controls
CONTROLS Oven Function Control Knob Defrost – (NB: This is NOT a cooking position). This position is intended to assist in thawing of frozen foods. Fan cooking – Thermaflow cooking; this system will allow you to roast and bake at the same time with very little flavour transference, and on any shelf. -
Page 11: Using The Fan Oven
USING THE FAN OVEN The fan oven can be used to heat foods through without thawing first, e.g. fruit tarts, mince pies, sausage rolls, and other small pastry items. Use The Fan Oven a temperature of 190-200°C and allow 20-40 The air inside the oven is heated by the element minutes (depending on the quantity of food in around the fan situated behind the back panel. -
Page 12: Using The Conventional Oven
USING THE CONVENTIONAL OVEN When using this setting, heat comes from both DO NOT place dishes directly onto the oven the top and bottom elements. This allows you to base as it becomes very hot and damage may cook on a single level and is particularly suitable occur. - Page 13 LED timer with time control The operation of this timer is done via 3 buttons. The functions of the buttons are: Time setting knobs Mode button With this arrangement it is possible to select the following four functions: Operation period Operation stop Minute minder Time-of-day...
-
Page 14: Cooking Zones
Operation stop In order to set an operation stop, the mode button has to be pressed repeatedly until the is flashing. Then the desired operation stop (time frame between time-of-day + 1 minute and time-of-day minus 1 minute) can be set using the plus and minus buttons. -
Page 15: Cooking Equipment
COOKING EQUIPMENT Specially tested cooking and frying pans for ceramic hobs exist.The following advice should be considered to achieve an optimal energy consumption as well as to avoid that overboiling food can be burnt onto the cooking zones. Cooking pans with aluminium or copper bottoms are unsuitable use. - Page 16 Accessories delivered with the appliance The following accessories are supplied with your appliance : • Shelf for placing dishes on (roast, pastry mounds). The dish should be put in the middle of the shelf to balance the weight. • Backing tray •...
-
Page 17: Maintenance And Cleaning
MAINTENANCE AND CLEANING The oven should be kept clean at all You can obtain glass scrapers and ceramic times. A build-up of fats or other glass cleaners from your specialist retailers. foodstuffs could result in a fire. Before cleaning, ensure all control Burnt on Soilage knobs are in the OFF position, and 1. -
Page 18: Oven Bulb Replacement
Cleaning the oven door locking parts For a more complete cleaning of the oven door, it is advisable to disassemble it in the following way: Open the door completely. Turn the two locking parts on the hinge arms to 170°; Partially close the door, to a 30 angle Lift the door and pull out... -
Page 19: Something Not Working
SOMETHING NOT WORKING If the appliance is not working correctly, please carry out the following checks, before contacting your local Electrolux Service Centre. IMPORTANT: If you call out an engineer to a fault listed below, or to repair a fault caused by incorrect use or installation, a charge will be made even if the appliance is under guarantee. -
Page 20: Guarantee Conditions
GUARANTEE CONDITIONS Guarantee stipulated in the contract 2 years starting from setting into function the • if the user modified the material or took off manufacturer will replace the damaged parts the marking or the serial numbers; except cases mentioned chapter •... - Page 21 The symbol on the product or on its packaging indicates that this product may not be treated as household waste. Instead it shall be handed over to the applicable collection point for the recycling of electrical and electronic equipment. By ensuring this product is disposed of correctly, you will help prevent potential negative consequences for the environment and human health, which could otherwise be caused by inappropriate waste handling of this...
- Page 22 Symbol na výrobku alebo na jeho obale znamená, že s výrobkom sa nesmie zaobchádzať ako s domovým odpadom. Namiesto toho ho treba odovzdať v zbernom stredisku na recykláciu elektrických alebo elektronických zariadení. Zabezpečte, že tento výrobok bude zlikvidovaný správnym postupom, aby ste predišli negatívnym vplyvom na životné prostredie a ľudské...
- Page 23 From the Electrolux Group. The world’s No.1 choice The Electrolux Group is the world’s largest producer of powered appliances for kitchen, cleaning and outdoor use. More than 55 million Electrolux Group products (such as refrigerators, washing machines, vacuum cleaners, chain saws and lawn...
Need help?
Do you have a question about the EKV 5605 X and is the answer not in the manual?
Questions and answers