
Related Manuals for Zip SEE372


Summary of Contents for Zip SEE372
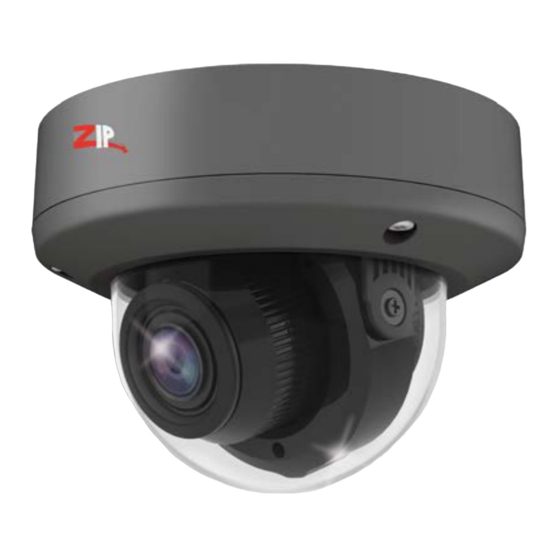
- Page 1 Instruction Manual SEE372 2MP Anti-Vandal Dome 2.8-12mm Motorised Lens © 2022 System Q Ltd ZipDVR.com...
-
Page 2: Table Of Contents
Table of Contents Part 1 Introduction 1 SEE372 ..........................1 Part 2 Tools & Handy Extras Part 3 Connections & Dipswitches Part 4 Dipswitch 4-In-1 Technology Part 5 Mounting 1 Anti-Vandal Dome ......................3 Part 6 Motorised Lens Part 7 OSD Menu 1 2MP OSD Menu - Motorised .................... -
Page 3: Part 1 Introduction
This Anti-Vandal Dome with a tough metal exterior is ideal for both outdoor and indoor uses. This 2MP model is compatible with most current DVRs on the market including the new Zip DVR Lite model. It suits domestic installations and commercial jobs with a limited budget. -
Page 4: Part 3 Connections & Dipswitches
xSEE372 Connections & Dipswitches The camera has a 2.1mm socket which requires 12V DC, use a regulated power supply rated above the current draw of the camera. The camera is polarity sensitive so connections must be correctly made. The camera has a standard BNC connector for the 4-in-1 video output, the output can be changed to AHD, CVI or CVBS if required. -
Page 5: Part 5 Mounting
Index Mounting 5.1 Anti-Vandal Dome A template is provided in the box for marking the hole positions for the fixing screws. © 2022 System Q Ltd ZipDVR.com... -
Page 6: Part 6 Motorised Lens
xSEE372 Motorised Lens To access the Motorised Lens via coaxitron:- 1. Click on the image in Live view 2. Click on the PTZ button at the bottom of the screen 3. Use Zoom + and - to zoom in and out, the camera should automatically focus when Zoom +/- is released 04/04/2022 ZipDVR.com... -
Page 7: Part 7 Osd Menu
Index OSD Menu Access to the camera menu is by Coaxitron. For the ZIP DVRs, ZIP Coaxitron is set as default. To access the Cameras Menu via coaxitron:- 1. Click on the image in Live view 2. Click on the PTZ button at the bottom of the screen 3. - Page 8 xSEE372 BRIGHTNESS 0 ~ 100 (Default 31) EXPOSURE MODE GLOBAL / BLC / FLC 0 ~ 7 (Default 4) RETURN MODE ATW / MWB RGAIN 0 ~ 32 (Default 20) BGAIN 0 ~ 32 (Default 21) DAY / NIGHT MODE EXT / AUTO / COLOR / BW RETURN IMAGE ENHANCE...
- Page 9 Index SAVE – EXIT EXIT © 2022 System Q Ltd ZipDVR.com...
-
Page 10: Part 8 Troubleshooting
B. If set to CVBS, then this is a low quality video output for legacy systems (analogue - CVBS), when using a 2 MegaPixel DVR or above then use another video format, like HD-TVI. C. Reset the camera menu via Zip Coaxitron – OSD Menu D. -
Page 11: Part 9 General Maintenance
Index C. Use thicker gauge copper cabling to reduce the voltage drop to the camera, using thicker cable will reduce the resistance between the camera and the power supply and therefore reduce the voltage dropped along the cable. D. Ensure that the BNC – BNC lead that is connected between the camera and DVR has no shorts between the ground and the centre core (positive) or open circuits along the centre core (positive) or open circuits along the ground. -
Page 12: Part 10 Specification
Specification 10.1 SEE372 Resolution Lens Type 2.8-12mm Motorised Lens Image Output 1 Volt Peak-Peak 75 ohm Min.Illumination 0 Lux IR On Day/Night Mechanical (True Day-Night) IR Range Input Voltage 12V DC Current Consumption 500mA (IR On) IP Rating IP66... -
Page 13: Part 11 Conditions
WEE/CG0783SS collection point as defined by your local council. 11.3 Copyright © Copyright 2022 Zip is a registered trademark of System Q Ltd, Chesterfield. Derbyshire. S40 2WB © 2022 System Q Ltd ZipDVR.com... -
Page 15: Index
Index Index - M - Maintenance - 2 - Motorised Lens Mounting 2.1mm DC Socket - O - - 4 - OSD Menu Output 4-In-1 Technology - P - - A - Power Adjustment - S - - B - Settings Specification - T -...
Need help?
Do you have a question about the SEE372 and is the answer not in the manual?
Questions and answers