Table of Contents
Advertisement
Quick Links
Advertisement
Table of Contents

Subscribe to Our Youtube Channel
Related Manuals for Canon Scan Kiosk II


Summary of Contents for Canon Scan Kiosk II
- Page 1 Version 2.0 User’s Guide 18001-20-UD2-001...
- Page 2 This page is intentionally left blank. Scan Kiosk II V2.0 User’s Guide...
-
Page 3: Table Of Contents
Entering Characters Using the Virtual Keyboard ........15 1.3.2 Entering Characters Using a USB Keyboard ..........18 Chapter 2 Using Scan Kiosk II V2.0 ............. 19 Logging On ...................... 19 Scanning to an E-Mail Address ................ 22 Scanning to an FTP Server ................29 Scanning to a Shared Folder ................ - Page 4 3.3.5 Exporting an Address ................223 3.3.6 Importing an Address ................228 Showing the Operation History ..............237 Displaying the Version Information ..............241 Logging Off ....................243 Powering OFF the Device ................244 Scan Kiosk II V2.0 User’s Guide...
-
Page 5: Preface
PC. This manual instructs the user on how to use Scan Kiosk II V2.0. This manual does not provide instructions on how to specify Windows settings on the tablet, or how to configure Scan Kiosk II V2.0. -
Page 6: Displays Used In This Manual
When this manual is in its native PDF form, the blue underlined text represents a hyperlink to the corresponding sections of this manual or to external Web sites. For example: See Chapter 1, “Introduction,” on p. 11. Likewise, all entries in the Table of Contents are hyperlinks. Scan Kiosk II V2.0 User’s Guide... -
Page 7: Legal Notices
Legal Notices Trademarks Canon and the Canon logo are registered trademarks, of Canon Inc. in the United States and may also be trademarks or registered trademarks in other countries. imageFORMULA is a trademark of Canon Electronics Inc. Microsoft, Windows, Windows Server, and Internet Explorer are registered trademarks of Microsoft Corporation in the United States and are trademarks or registered trademarks of Microsoft Corporation in other countries. -
Page 8: Important Safety Instructions
• Avoid exposing the product to rapid changes in temperature. If the room in which the product is installed is cold, but rapidly heated, water droplets (condensation) may form inside the product. • Avoid locations near equipment that generate a magnetic field, such as speakers, televisions, or radios. Scan Kiosk II V2.0 User’s Guide... -
Page 9: Power
• Keep the area around the power plug clear of objects, so that the power cord can be disconnected easily in an emergency. • Use only the AC adapter provided with this product. Also, do not use the AC adapter provided with any other electrical devices. Scan Kiosk II V2.0 User’s Guide... -
Page 10: Handling
Also, turn OFF the power, and disconnect the AC adapter from the product and disconnect the power cord from the power outlet for safety when the product will not be used for an extended period of time, such as during consecutive holidays. Scan Kiosk II V2.0 User’s Guide... -
Page 11: Chapter 1 Introduction
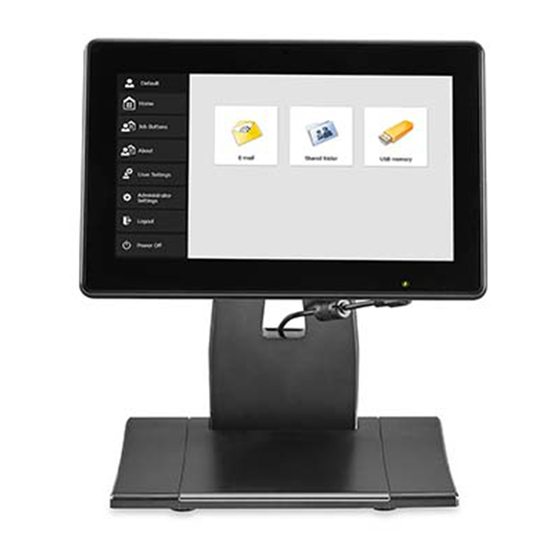
Chapter 1 Introduction This chapter provides an overview of the Scan Kiosk II V2.0 solution, the parts and functions of the product, how to enter characters on the pop-up virtual keyboard, and an overview of the User settings. Overview Scan Kiosk II V2.0 consists of a desktop Windows tablet PC and stand, support for a specific series of DR scanners, and optional USB keyboard. -
Page 12: Parts And Their Functions
Tablet PC Stand: Provides a stable platform to which the tablet PC must be attached. ¯ Touch Panel Display: Touch this screen to operate the Scan Kiosk II V2.0 application. Bottom View ¬ Serial Ports: Not used in this configuration. - Page 13 Press [Power Off] to shut down and power OFF the system. Press [E-mail] to start the scan-to-e-mail flow, and access the Address selection screen. [E-mail] is only displayed if the Administrator configured an e-mail server. Press [FTP] to start the scan-to-FTP flow. Scan Kiosk II V2.0 User’s Guide...
- Page 14 Press [USB memory] to start the scan-to-USB memory flow. Press [FAX] to start the scan-to-fax flow. [FAX] is only displayed if the Administrator configured a Fax server. Press [Printer] to start the scan-to-print flow. Scan Kiosk II V2.0 User’s Guide...
-
Page 15: Entering Characters
If you touch a text box and the pop-up virtual keyboard appears, enter characters using the keys displayed on the touch panel display. IMPORTANT Certain keys on the keyboard, such as [CTRL] and [ALT] only work in the Maintenance (Windows Administrator) mode. Scan Kiosk II V2.0 User’s Guide... - Page 16 • The [ENTER] key ( ) acts as if you pressed [OK] on the screen. It does not move you to the next line in a field. Scan Kiosk II V2.0 User’s Guide...
- Page 17 2. When you have entered all characters, press [] to close the keyboard. Scan Kiosk II V2.0 User’s Guide...
-
Page 18: Entering Characters Using A Usb Keyboard
If a virtual keyboard appears, press [] to close the virtual keyboard. IMPORTANT The ENTER key on the USB keyboard is only used to enter line breaks, and to log in on the Log In screen. Scan Kiosk II V2.0 User’s Guide... -
Page 19: Chapter 2 Using Scan Kiosk Ii V2.0
This chapter describes how to use the Scan Kiosk II V2.0 solution. It also shows how to log on to Scan Kiosk II V2.0 (if configured), and how to use Job Buttons, scan to a shared folder, an e-mail address (if a mail server is configured), and to USB memory. - Page 20 If the Administrator configured the List Type Login screen, select your user name from the list ➞ enter your password in the [Password] text box. For instructions on entering characters from the pop-up virtual keyboard or USB keyboard, see “Entering Characters,” on p. 15. Scan Kiosk II V2.0 User’s Guide...
- Page 21 ➞ enter your password in the [Password] text box. For instructions on entering characters from the pop-up virtual keyboard or USB keyboard, see “Entering Characters,” on p. 15. 2. Press [Login]. The Home screen appears. Scan Kiosk II V2.0 User’s Guide...
-
Page 22: Scanning To An E-Mail Address
The Administrator must set up a mail server before you can send a scanned document to an e-mail address. The Home screen only shows [E-mail] if a mail server has been configured. 1. From the Scan Kiosk II V2.0 Home screen, press [E-mail]. The Address selection screen appears. Scan Kiosk II V2.0 User’s Guide... - Page 23 [Shared Address Book]: Contains all of the shared registered destinations that are stored on the device. [LDAP Address Book]: If an LDAP server is configured by the Administrator, you can search the LDAP server for addresses. Scan Kiosk II V2.0 User’s Guide...
- Page 24 To filter the list by name or number, press [ 4. Press [Next]. If you do not want to scan and send your document to the selected address, press [Back]. The Scan/Send Settings screen appears. Scan Kiosk II V2.0 User’s Guide...
- Page 25 Scan/Send Settings screen, scanning starts immediately without displaying the continue to scan confirmation screen in step 6, and the Address Confirmation screen in step 9. Scanning starts. A preview screen appears with a confirmation message. Scan Kiosk II V2.0 User’s Guide...
- Page 26 ➞ press [Continue] to scan more documents. When you are finished scanning, press [Complete]. Press [Complete] to go to the Preview and Send screen. Press [Cancel] if you do not want to scan images, and return to the Scan/Send Settings screen. Scan Kiosk II V2.0 User’s Guide...
- Page 27 Press [Back] to return to the previous page. IMPORTANT When you press [Scan more pages], the Scan/Send Settings screen appears. You can change the scan conditions, and then press [Check image and send] to return to the Send screen. Scan Kiosk II V2.0 User’s Guide...
- Page 28 The scanned images are sent, and the screen returns to the screen set for Screen after sending in Send Settings on the Scan/Send Settings screen. Scan Kiosk II V2.0 User’s Guide...
-
Page 29: Scanning To An Ftp Server
IMPORTANT The Administrator must set up an FTP server before you can send a scanned document to it. 1. From the Scan Kiosk II V2.0 Home screen, press [FTP]. The Address selection screen appears. Scan Kiosk II V2.0 User’s Guide... - Page 30 [Shared Address Book]: Contains all of the shared registered destinations that are stored on the device. [LDAP Address Book]: If an LDAP server is configured by the Administrator, you can search the LDAP server for addresses. Scan Kiosk II V2.0 User’s Guide...
- Page 31 To filter the list by name or number, press [ 4. Press [Next]. If you do not want to scan and send your document to the selected FTP server, press [Back]. The Scan/Send Settings screen appears. Scan Kiosk II V2.0 User’s Guide...
- Page 32 Scan/Send Settings screen, scanning starts immediately without displaying the continue to scan confirmation screen in step 6, and the Address Confirmation screen in step 9. Scanning starts. A preview screen appears with a confirmation message. Scan Kiosk II V2.0 User’s Guide...
- Page 33 ➞ press [Continue] to scan more documents. When you are finished scanning, press [Complete]. Press [Complete] to go to the Preview and Send screen. Press [Cancel] if you do not want to scan images, and return to the Scan/Send Settings screen. Scan Kiosk II V2.0 User’s Guide...
- Page 34 Press [Back] to return to the previous page. IMPORTANT When you press [Scan more pages], the Scan/Send Settings screen appears. You can change the scan conditions, and then press [Check image and send] to return to the Send screen. Scan Kiosk II V2.0 User’s Guide...
- Page 35 The scanned images are sent, and the screen returns to the screen set for Screen after sending in Send Settings on the Scan/Send Settings screen. Scan Kiosk II V2.0 User’s Guide...
-
Page 36: Scanning To A Shared Folder
Scanning to a Shared Folder This section describes how to scan to a shared folder. 1. From the Scan Kiosk II V2.0 Home screen, press [Shared folder]. The Address selection screen appears. Scan Kiosk II V2.0 User’s Guide... - Page 37 [Shared Address Book]: Contains all of the registered destinations that are stored in a shared folder on an Address Book Server. [LDAP Address Book]: If an LDAP server is configured by the Administrator, you can search the LDAP server for shared folders. Scan Kiosk II V2.0 User’s Guide...
- Page 38 To filter the list by name or number, press [ 4. Press [Next]. If you do not want to scan and send your document to the selected folder, press [Back]. The Scan/Send Settings screen appears. Scan Kiosk II V2.0 User’s Guide...
- Page 39 Scan/Send Settings screen, scanning starts immediately without displaying the continue to scan confirmation screen in step 6, and the Address Confirmation screen in step 9. Scanning starts. A preview screen appears with a confirmation message. Scan Kiosk II V2.0 User’s Guide...
- Page 40 ➞ press [Continue] to scan more documents. When you are finished scanning, press [Complete]. Press [Complete] to go to the Preview and Send screen. Press [Cancel] if you do not want to scan images, and return to the Scan/Send Settings screen. Scan Kiosk II V2.0 User’s Guide...
- Page 41 Press [Back] to return to the previous page. IMPORTANT When you press [Scan more pages], the Scan/Send Settings screen appears. You can change the scan conditions, and then press [Check image and send] to return to the Send screen. Scan Kiosk II V2.0 User’s Guide...
- Page 42 If an error message appears, press [OK], check the send destination, and then try to send the scanned images again. The scanned images are sent, and the screen returns to the screen set for Screen after sending in Send Settings on the Scan/Send Settings screen. Scan Kiosk II V2.0 User’s Guide...
-
Page 43: Scanning To Usb Memory
This section describes how to scan to a USB memory stick. 1. Place the document you want to scan into the scanner. 2. Insert your USB memory stick into one of the USB ports on the Scan Kiosk II V2.0 tablet PC. - Page 44 You can also press [Down] to go into the directory of folders on the USB memory stick that is displayed. <Free disk space xx MB> shows how much space is left on your USB memory stick. The folders on the USB memory stick appear in the list. Scan Kiosk II V2.0 User’s Guide...
- Page 45 If you want to delete all files on your USB memory stick, press [Format]. If you do not want to scan and send your document to the selected folder on the USB memory stick, press [Back]. 6. Press [Next]. The Scan/Send Settings screen appears. Scan Kiosk II V2.0 User’s Guide...
- Page 46 Scan/Send Settings screen, scanning starts immediately without displaying the continue to scan confirmation screen in step 8, and the Address Confirmation screen in step 10. Scanning starts. A preview screen appears with a confirmation message. Scan Kiosk II V2.0 User’s Guide...
- Page 47 ➞ press [Continue] to scan more documents. When you are finished scanning, press [Complete]. Press [Complete] to go to the Preview and Send screen. Press [Cancel] if you do not want to scan images, and return to the Scan/Send screen. Scan Kiosk II V2.0 User’s Guide...
- Page 48 Press [Back] to return to the previous page. IMPORTANT When you press [Scan more pages], the Scan/Send Settings screen appears. You can change the scan conditions, and then press [Check image and send] to return to the Send screen. Scan Kiosk II V2.0 User’s Guide...
- Page 49 If an error message appears, press [OK], check the send destination, and then try to send the scanned images again. The scanned images are sent, and the screen returns to the screen set for Screen after sending in Send Settings on the Scan/Send Settings screen. Scan Kiosk II V2.0 User’s Guide...
-
Page 50: Scanning To A Fax Server
The Administrator must set up a fax server before you can send a scanned document to it. The Home screen only shows [FAX] if a fax server has been configured. 1. From the Scan Kiosk II V2.0 Home screen, press [FAX]. The Address selection screen appears. - Page 51 [Shared Address Book]: Contains all of the shared registered destinations that are stored on the device. [LDAP Address Book]: If an LDAP server is configured by the Administrator, you can search the LDAP server for addresses. Scan Kiosk II V2.0 User’s Guide...
- Page 52 To filter the list by name or number, press [ 4. Press [Next]. If you do not want to scan and send your document to the selected fax address or number, press [Back]. The Scan/Send Settings screen appears. Scan Kiosk II V2.0 User’s Guide...
- Page 53 Scan/Send Settings screen, scanning starts immediately without displaying the continue to scan confirmation screen in step 6, and the Address Confirmation screen in step 9. Scanning starts. A preview screen appears with a confirmation message. Scan Kiosk II V2.0 User’s Guide...
- Page 54 ➞ press [Continue] to scan more documents. When you are finished scanning, press [Complete]. Press [Complete] to go to the Preview and Send screen. Press [Cancel] if you do not want to scan images, and return to the Scan/Send Settings screen. Scan Kiosk II V2.0 User’s Guide...
- Page 55 Press [Back] to return to the previous page. IMPORTANT When you press [Scan more pages], the Scan/Send Settings screen appears. You can change the scan conditions, and then press [Check image and send] to return to the Send screen. Scan Kiosk II V2.0 User’s Guide...
- Page 56 The scanned images are sent, and the screen returns to the screen set for Screen after sending in Send Settings on the Scan/Send Settings screen. Scan Kiosk II V2.0 User’s Guide...
-
Page 57: Scanning To A Printer
Scanning to a Printer This section describes how to scan to printer. 1. From the Scan Kiosk II V2.0 Home screen, press [Printer]. The Print Settings screen appears. Scan Kiosk II V2.0 User’s Guide... - Page 58 2. Enter the IP address of the printer you want to use in the [Printer IP address] text box. If you want to connect to the printer through a firewall, select the [Use passive mode] check box. IMPORTANT The destination printer must have the passive mode enabled, as well. Scan Kiosk II V2.0 User’s Guide...
- Page 59 3. If the destination printer requires user credentials, enter your user name in the [User name] text box ➞ enter your password in the [Password] text box. If you want your credentials saved to the database, select the [Save password] check box. Scan Kiosk II V2.0 User’s Guide...
- Page 60 The result is displayed under <Check SNMP enabled printer status>. 5. Press [Next]. If you do not want to scan and send your document to the selected printer, press [Back]. The Scan/Send Settings screen appears. Scan Kiosk II V2.0 User’s Guide...
- Page 61 Scan/Send Settings screen, scanning starts immediately without displaying the continue to scan confirmation screen in step 7, and the Address Confirmation screen in step 10. Scanning starts. A preview screen appears with a confirmation message. Scan Kiosk II V2.0 User’s Guide...
- Page 62 ➞ press [Continue] to scan more documents. When you are finished scanning, press [Complete]. Press [Complete] to go to the Preview and Send screen. Press [Cancel] if you do not want to scan images, and return to the Scan/Send Settings screen. Scan Kiosk II V2.0 User’s Guide...
- Page 63 Press [Back] to return to the previous page. IMPORTANT When you press [Scan more pages], the Scan/Send Settings screen appears. You can change the scan conditions, and then press [Check image and send] to return to the Send screen. Scan Kiosk II V2.0 User’s Guide...
- Page 64 The scanned images are sent, and the screen returns to the screen set for Screen after sending in Send Settings on the Scan/Send Settings screen. Scan Kiosk II V2.0 User’s Guide...
-
Page 65: Specifying The Scan And Send Settings
This section describes how to specify the scan and send settings. The procedure below demonstrates setting the scan and send settings from the E-mail screen, but the procedure is the same for all the Scan Kiosk II V2.0 user functions. IMPORTANT The Home screen only shows [E-mail] if a mail server has been configured. - Page 66 [Shared Address Book]: Contains all of the shared registered destinations that are stored on the device. [LDAP Address Book]: If an LDAP server is configured by the Administrator, you can search the LDAP server for addresses. Scan Kiosk II V2.0 User’s Guide...
- Page 67 To filter the list by name or number, press [ 4. Press [Next]. If you do not want to scan and send your document to the selected address, press [Back]. The Scan/Send Settings screen appears. Scan Kiosk II V2.0 User’s Guide...
- Page 68 Under <Scan Settings>, select the paper size of the document that you want to scan. Use the scroll bar on the right to scroll through the list of paper sizes. The default paper size is ‘Auto size’. Scan Kiosk II V2.0 User’s Guide...
- Page 69 Select to scan your document in 256-level grayscale. [Color]: Select to scan your document in 24-bit color. [Auto color detect.]: Select to have the scanner detect whether a document is in color or black-and-white, and scan it accordingly. Scan Kiosk II V2.0 User’s Guide...
- Page 70 From the Resolution drop-down list, select the resolution in which you want to scan your document. The default scanning resolution is ‘150dpi’. Scan Kiosk II V2.0 User’s Guide...
- Page 71 [Skip Blank Page]: Select if you want to scan both sides of the document, and skip any blank pages in your document. [Folio]: Select if you want to scan both sides of a document that is folded in half, and create a single scanned image. Scan Kiosk II V2.0 User’s Guide...
- Page 72 6. To specify the detailed scan settings, press [Detailed Settings]. The Detailed Settings screen appears. Scan Kiosk II V2.0 User’s Guide...
- Page 73 <Double feed detection by Ultrasonic>. [Double feed detection by Ultrasonic] is grayed out if ‘Folio’ is selected as the Scanning Side. The Detect Double Feed Setting screen appears. Scan Kiosk II V2.0 User’s Guide...
- Page 74 ➞ press [OK]. If you do not want to specify the ‘Double feed detection by Ultrasonic’ setting, press [Cancel]. IMPORTANT This setting is effective only when documents overlap by 1.97” (50 mm) or more. Scan Kiosk II V2.0 User’s Guide...
- Page 75 1.38" (35 mm) longer or shorter than the reference length. • Set <Double feed detection by length> to ‘OFF’ if you are scanning a document that contains pages of different lengths. Scan Kiosk II V2.0 User’s Guide...
- Page 76 Select [Auto] to rotate the scanned image correctly based on the orientation of the text. If you do not want to specify the angle of the scanned image, press [Cancel]. The document orientation is set. Scan Kiosk II V2.0 User’s Guide...
- Page 77 If you do not want to remove a border around a scanned image, press [OFF]. If you want to remove the punch holes from a scanned document, press [ON] next to <Remove Punch Hole>. To continue specifying the Detailed Scan Settings, press []. Scan Kiosk II V2.0 User’s Guide...
- Page 78 If you do not want to specify the <Rotate +180 degrees Back Side> setting, press [OFF]. IMPORTANT • To use this setting, you must set the Scanning Side to ‘Duplex’ or ‘Skip Blank Page’. • Set <Document orientation> to any setting other than ‘Auto’. Scan Kiosk II V2.0 User’s Guide...
- Page 79 If you want to make sure that the scanned image is straight (not askew), press the button next to <Deskew>. Scan Kiosk II V2.0 User’s Guide...
- Page 80 Detects if the image and contents in the image are skewed while the document is being scanned, and corrects the image. If you do not want to correct the skewed images of scanned documents, press [Cancel]. 6.7.2 Press [OK]. The Deskew settings are complete. Scan Kiosk II V2.0 User’s Guide...
- Page 81 If you want to process the scanned image so that the background is smooth, press [ON] next to <Background smoothing>. If you do not want to set the Background smoothing setting, press [OFF]. Scan Kiosk II V2.0 User’s Guide...
- Page 82 Specify this setting when scanning thin documents with text or images on both sides. 6.9.1 To specify the Bleed-through reduction setting, press [ON] next to <Use bleed through reduction>. The bleed-through scale is activated. Scan Kiosk II V2.0 User’s Guide...
- Page 83 • Make sure to adjust the bleed-through reduction level to match the type of document you are scanning. • Bleed-through reduction cannot be set when [Text enhance] is selected as the Scanning mode. 6.9.3 Press [OK]. The Bleed-through reduction settings are complete. Scan Kiosk II V2.0 User’s Guide...
- Page 84 (or isolated 3 x 3 white dots on black backgrounds), press [ON] next to <Erase Dot>. If you do not want to specify the Erase Dot setting, press [OFF]. To continue specifying the Detailed Scan Settings, press []. Scan Kiosk II V2.0 User’s Guide...
- Page 85 6.11 If you want to remove protrusions in contours in scanned images, press [ON] next to <Erase Notch>. If you do not want to remove protrusions from scanned images, press [OFF]. Scan Kiosk II V2.0 User’s Guide...
- Page 86 Press [+] to the desired level to darken lines and text, or press [-] to lighten text and lines in a scanned document ➞ press [OK]. If you do not want to adjust the darkness of lines and text, press [Cancel]. The Character Emphasis settings are complete. Scan Kiosk II V2.0 User’s Guide...
- Page 87 To adjust the contrast of scanned images, press the button next to <Contrast>. 6.13.1 Press [Low] or [High] to adjust the contrast of colors in the scanned image. 6.13.2 Press [OK]. The contrast level is set. Scan Kiosk II V2.0 User’s Guide...
- Page 88 <Back side Brightness/contrast>. IMPORTANT The <Back side Brightness/contrast> button only activates when ‘Duplex’ or ‘Skip Blank Page’ is selected as the scanning side. Scan Kiosk II V2.0 User’s Guide...
- Page 89 A green check mark appears in the check box, and the Back side contrast scale activates. 6.14.2.1 Press [Low] or [High] to adjust the back side contrast level. 6.14.3 Press [OK]. The Back side Brightness/contrast levels are set. Scan Kiosk II V2.0 User’s Guide...
- Page 90 If you want to detect the color of your document automatically, and scan it accordingly, press the button next to <Auto Color Detection Settings>. IMPORTANT The < Auto Color Detection Settings > button only activates when the Scanning mode is set to ‘Auto color detect’. Scan Kiosk II V2.0 User’s Guide...
- Page 91 6.15.2 From the Mode in case of binary, select the scanning mode to use when a black-and-white document is detected. 6.15.3 Press [OK]. The Auto Color Detection Settings are complete. Scan Kiosk II V2.0 User’s Guide...
- Page 92 7. Press [OK]. The Detailed Scan Settings are complete. If you do not want to specify the Detailed Scan Settings, press [Cancel]. Scan Kiosk II V2.0 User’s Guide...
- Page 93 8. To manually adjust the brightness of the scanned image, press the scale marker, and move it to the desired brightness setting, or press [Dark] or [Bright] until the desired brightness setting appears. Scan Kiosk II V2.0 User’s Guide...
- Page 94 9. If you want to view your user name and e-mail address details, press [Details] ➞ view your information ➞ press [Back] to return to the Scan/Send Settings screen. Scan Kiosk II V2.0 User’s Guide...
- Page 95 10. Specify the Send Settings. 10.1 If you want to change the file format of your scanned image, press [File Format] ➞ press [TIFF], [JPEG], or [PDF]. Scan Kiosk II V2.0 User’s Guide...
- Page 96 Multi page settings: Select [Single page (Front/back separate file)] to send each side of each page as a separate image file. Select [Multi page] to send one image file that contains multiple pages. Scan Kiosk II V2.0 User’s Guide...
- Page 97 10.1.2 If you selected [JPEG], press [High Compression] or [High Quality] to select the compression rate of the JPEG file ➞ press [OK]. Scan Kiosk II V2.0 User’s Guide...
- Page 98 Select the Security Settings check box ➞ press Security Settings: [Settings] ➞ proceed to step 10.1.3.1. Create PDF/A-compliant file: Press [ON] or [OFF] to send the PDF document as a PDF/A-compliant file. If set to ‘ON’, you cannot set Security Settings. Scan Kiosk II V2.0 User’s Guide...
- Page 99 PDF document can print or make changes ➞ press the [Enable copying of text, images, and accessibility] check box to enable these items. 10.1.3.5 Press [OK]. The Security Settings are complete. Scan Kiosk II V2.0 User’s Guide...
- Page 100 10.1.4 Press [OK]. The File Format settings are complete. If you do not want to specify the File Format settings, press [Cancel]. Scan Kiosk II V2.0 User’s Guide...
- Page 101 If you do not want to select the Deskew and Prescan modes, press the check boxes again to clear the check marks. Scan Kiosk II V2.0 User’s Guide...
- Page 102 Set the action to perform when there is already a same named file file of the same name at the destination. exists: You can select to display a message to confirm that you want to overwrite the file, abort sending, or cancel sending. Scan Kiosk II V2.0 User’s Guide...
- Page 103 Home screen (or Job Button screen, if the Home screen has been restricted by the Scan Kiosk II V2.0 Administrator). Logout: If you logged on to Scan Kiosk II V2.0, you are logged out after your image file is sent. If you did not log on, [Logout] is not displayed.
-
Page 104: Specifying The Batch Separation Settings
When a blank page or patch code sheet is detected, the scanned image file is automatically separated into batch files. The procedure below demonstrates setting the Batch Separation settings from the E-mail screen, but the procedure is the same for all the Scan Kiosk II V2.0 user functions. IMPORTANT •... - Page 105 [Shared Address Book]: Contains all of the shared registered destinations that are stored on the device. [LDAP Address Book]: If an LDAP server is configured by the Administrator, you can search the LDAP server for addresses. Scan Kiosk II V2.0 User’s Guide...
- Page 106 To filter the list by name or number, press [ 4. Press [Next]. If you do not want to scan and send your document to the selected address, press [Back]. The Scan/Send Settings screen appears. Scan Kiosk II V2.0 User’s Guide...
- Page 107 5. Press [Send Settings]. 6. Press [] or [] until [Batch Separation] appears ➞ press the button next to <Batch separation>. Scan Kiosk II V2.0 User’s Guide...
- Page 108 [Specified Pages]: Select to perform batch separation after a specified number of pages are scanned. If you selected [Blank Page], press [OK]. The scanned file is separated after a blank page is detected. Scan Kiosk II V2.0 User’s Guide...
- Page 109 Record the paper separated file setting. IMPORTANT • Print the PATCH T and PATCH II patterns on letter-size paper. • If a patch code sheet is enlarged or reduced before printing, the patch code may not be recognized. Scan Kiosk II V2.0 User’s Guide...
- Page 110 If you selected [Specified Pages], enter the number of pages to scan before batch separation occurs. 8. Press [OK]. If you do not want to specify the Batch Separation settings, press [Cancel]. The Batch Separation settings are complete. Scan Kiosk II V2.0 User’s Guide...
-
Page 111: Chapter 3 Configuring User Settings
This section describes how to configure your User Administration Settings for the Scan Kiosk II V2.0 application. 1. Log on to Scan Kiosk II V2.0. For instructions on logging on to Scan Kiosk II V2.0, see “Logging On,” on p. 19. - Page 112 2. From the Scan Kiosk II V2.0 Home screen, press [User Settings]. The User Settings screen appears. 3. Press [User Administration]. The User Administration screen appears. To go back to the previous screen, press [Back]. Scan Kiosk II V2.0 User’s Guide...
- Page 113 NOTE If you logged on to a domain, you can select [Use Address registered in LDAP server] in the [Mail Address] field. Press [] to go to page 2 of the User Administration settings. Scan Kiosk II V2.0 User’s Guide...
- Page 114 Book] or [Shared Address Book]. The default address book is ‘My Address Book’. The Shared Address Book is stored in the Scan Kiosk II V2.0 application. Any user who logs on to Scan Kiosk II V2.0 can use the Shared Address Book.
- Page 115 The Shared Job Button screen is configured by the Administrator, and any user who logs on to Scan Kiosk II V2.0 can use the shared job buttons. Scan Kiosk II V2.0 User’s Guide...
- Page 116 The default screen is the Home screen. If you want your initial screen to be the Job Button screen, select [Job Button screen]. IMPORTANT If the Administrator has restricted the use of the Home screen, only the Job Button screen is displayed as the <Screen after Login> setting. Scan Kiosk II V2.0 User’s Guide...
- Page 117 Your e-mail address is displayed, even if it has not been registered in the address book. The default <Send to my mailbox> setting is ‘OFF’. Press [] to go to page 1 of the User Administration settings. Scan Kiosk II V2.0 User’s Guide...
- Page 118 5. If necessary, press [Custom file name] to create a custom file name that is appended to your scanned files. The Custom File Name screen appears. Scan Kiosk II V2.0 User’s Guide...
- Page 119 Device Name name in the file name. Select the [Enable] check box to include a counter in the file name, and then specify the starting value and Counter number of digits used for the counter. Scan Kiosk II V2.0 User’s Guide...
- Page 120 The file name changes as you make your selections, as shown at the bottom of the item list. NOTE The [String] check box is always selected. You cannot clear the check box. All other check boxes can be cleared. Scan Kiosk II V2.0 User’s Guide...
- Page 121 [Reset to default order]. The order of the items returns to the default order. 5.1.5 Press [OK] to return to the Custom File name screen. If you do not want to specify these settings, press [Cancel]. Scan Kiosk II V2.0 User’s Guide...
- Page 122 Next to <Custom file name> at the top of the screen, the file name changes, as you make your selections. To change the order (position) of any of the items in the file name, see step 5.1.2. Scan Kiosk II V2.0 User’s Guide...
- Page 123 To change the order of any of the items in the file name, see step 5.1.2. NOTE You cannot use these characters in the text string: / : ? * “ < > Scan Kiosk II V2.0 User’s Guide...
- Page 124 Next to <Custom file name> at the top of the screen, the file name changes, as you make your selections. To change the order of any of the items in the file name, see step 5.1.2. Scan Kiosk II V2.0 User’s Guide...
- Page 125 To change the order of any of the items in the file name, see step 5.1.2. Press [] to go to the next page of the Custom File Name settings. Scan Kiosk II V2.0 User’s Guide...
- Page 126 If you want to add the device’s name to the file name, press the [Enable] check box next to <Device name>. The [Enable] check box may have already been selected from the <Set the order of information> screen. See, step 5.1.3. Scan Kiosk II V2.0 User’s Guide...
- Page 127 You can specify from ‘1’ to ‘9’ digits for the counter. 5.10 Press [OK]. The Custom File Name settings are complete. If you want to cancel specifying the custom file name settings, press [Cancel]. The screen returns to the User Administration screen. Scan Kiosk II V2.0 User’s Guide...
- Page 128 6. If necessary, press [Index settings] to specify the content of index files (metadata) that is attached to the user’s scanned image files. The Index Settings screen appears. Scan Kiosk II V2.0 User’s Guide...
- Page 129 Press [XML] or [CSV] to select the file format of the index files. ‘CSV’ is the default file format. Scan Kiosk II V2.0 User’s Guide...
- Page 130 Press the button next to <Set the order of information> to configure the order of the items that are included in the index file, and enable Index items on the Index settings screen. Scan Kiosk II V2.0 User’s Guide...
- Page 131 The items are added, as you make your selections, as shown at the bottom of the item list. NOTE The [Index string] check box is always selected. You cannot clear the check box. All other check boxes can be cleared. Scan Kiosk II V2.0 User’s Guide...
- Page 132 6.2.2, as you make your selections. To change the order of any of the index items, see step 6.2.2. NOTE You cannot use these characters in the text string: & “ ‘ < > Scan Kiosk II V2.0 User’s Guide...
- Page 133 6.2.2, as you make your selections. To change the order of any of the index items, see step 6.2.2. Press [] to continue specifying the Index settings. Scan Kiosk II V2.0 User’s Guide...
- Page 134 ‘Date’ is the default field name. To change the order of any of the index items, see step 6.2.2. Repeat step 6.6 to specify the Time settings. The time set on the device is used. Scan Kiosk II V2.0 User’s Guide...
- Page 135 The [Enable] check box may have already been selected from the <Set the order of information> screen. See step 6.2.1. ‘Device’ is the default field name. To change the order of any of the index items, see step 6.2.2. Scan Kiosk II V2.0 User’s Guide...
- Page 136 Then, enter a name for the Destination Path field. Press the [Sheets] check box to include the number of images Sheets in the scanned file. Then, enter a name for the Sheets field. The Index settings are complete. Scan Kiosk II V2.0 User’s Guide...
- Page 137 7. Press [OK]. The User Administration settings are complete. Scan Kiosk II V2.0 User’s Guide...
-
Page 138: Configuring The Job Button Settings
Configuring the Job Button Settings This section describes how to configure your Job Button Settings for the Scan Kiosk II V2.0 application. 3.2.1 Creating a New Job Button and Specifying the Job Button Settings This section shows how to create a new job button, and specify the job button settings. - Page 139 3. Press [Job Button Settings]. The Job Button Settings screen appears. To go back to the previous screen, press [Back]. Scan Kiosk II V2.0 User’s Guide...
- Page 140 4. From the Job Button Type drop-down list, select the type of Job Button you want to create. If you select [Shared Job Button], any user who logs on to Scan Kiosk II V2.0 can use your shared job button.
- Page 141 5. Press [Edit] ➞ [New Job Button]. The New Job Button screen appears. Scan Kiosk II V2.0 User’s Guide...
- Page 142 6. Specify the Job Button Settings. To specify on which device this job button appears, select the device from the Device drop-down list. Scan Kiosk II V2.0 User’s Guide...
- Page 143 NOTE Job buttons are sorted and displayed by job button name. If you want to display job buttons in a particular order, insert sequential letters or numbers before the name. Scan Kiosk II V2.0 User’s Guide...
- Page 144 If necessary, from the Color of Job Button drop-down list, select a color for the job button. ‘Blue’ is the default job button color. Scan Kiosk II V2.0 User’s Guide...
- Page 145 [Skip Scan Setting Screen]: After the job button is pressed, scanning starts automatically. [Display Scan Setting Screen]: After the job button is pressed, the Scan Settings screen is displayed. Scan Kiosk II V2.0 User’s Guide...
- Page 146 Press the [File name] text box ➞ enter a baseline name for the 6.5.1 scanned image file. For instructions on entering characters from the virtual keyboard or USB keyboard, see “Entering Characters,” on p. 15. Scan Kiosk II V2.0 User’s Guide...
- Page 147 [Display the file name entry screen]: Select to provide the user the option to change the file name. [Skip the file name entry screen]: Select if you do not want the user to change the file name. Scan Kiosk II V2.0 User’s Guide...
- Page 148 5 “Configuring the User Administration Settings,” on p. 118. 6.5.4 Press [OK]. The Custom File Name Settings are complete. If you do not want to specify the Custom File Name Settings, press [Cancel]. Scan Kiosk II V2.0 User’s Guide...
- Page 149 “Specifying the Scan and Send Settings,” on p. 65. You can also press [Edit Address Book], and add new addresses to your address book. If you do not want to specify the Scan and Send Settings, press [Cancel]. Scan Kiosk II V2.0 User’s Guide...
- Page 150 Press [ON] to attach index files (metadata) to the scanned image file after you press the job button, and to activate the When you select this Job Button drop-down list. ‘OFF’ is the default setting. Scan Kiosk II V2.0 User’s Guide...
- Page 151 To configure additional Index settings, press [] or []. For instructions, see step 6 “Configuring the User Administration Settings,” on p. 128. 6.7.3 Press [OK]. The Index Settings are complete. If you do not want to specify the Index Settings, press [Cancel]. Scan Kiosk II V2.0 User’s Guide...
- Page 152 If you want to return the Job Button Settings to their default settings, press [Default]. If you do not want to specify the Job Button Settings, press, [Cancel]. The Job Button Settings are complete, and the Job Button Settings screen is displayed. Scan Kiosk II V2.0 User’s Guide...
-
Page 153: Modifying The Job Button Settings
1. Log on to Scan Kiosk II V2.0. For instructions on logging on to Scan Kiosk II V2.0, see “Logging On,” on p. 19. 2. From the Scan Kiosk II V2.0 Home screen, press [User Settings]. The User Settings screen appears. Scan Kiosk II V2.0 User’s Guide... - Page 154 3. Press [Job Button Settings]. The Job Button Settings screen appears. To go back to the previous screen, press [Back]. Scan Kiosk II V2.0 User’s Guide...
- Page 155 4. From the Job Button Type drop-down list, select the type of Job Button you want to modify. Scan Kiosk II V2.0 User’s Guide...
- Page 156 6. Modify the job button settings, as shown in steps 6 and 7 of “Creating a New Job Button and Specifying the Job Button Settings,” on p. 138. The Job Button Settings are complete. Scan Kiosk II V2.0 User’s Guide...
-
Page 157: Copying A Job Button
1. Log on to Scan Kiosk II V2.0. For instructions on logging on to Scan Kiosk II V2.0, see “Logging On,” on p. 19. 2. From the Scan Kiosk II V2.0 Home screen, press [User Settings]. The User Settings screen appears. Scan Kiosk II V2.0 User’s Guide... - Page 158 3. Press [Job Button Settings]. The Job Button Settings screen appears. To go back to the previous screen, press [Back]. Scan Kiosk II V2.0 User’s Guide...
- Page 159 4. From the Job Button Type drop-down list, select the type of Job Button you want to modify. Scan Kiosk II V2.0 User’s Guide...
- Page 160 5. Select the check box next to the job button that you want to copy ➞ press [Edit] ➞ [Copy]. The Copy screen appears. Scan Kiosk II V2.0 User’s Guide...
- Page 161 6. Press [OK]. A duplicate job button with the same name as the copied button is created. Scan Kiosk II V2.0 User’s Guide...
- Page 162 7. If you want to modify the copied job button, select the copied job button ➞ press [Edit] ➞ [Modify]. Scan Kiosk II V2.0 User’s Guide...
- Page 163 “Creating a New Job Button and Specifying the Job Button Settings,” on p. 138. The new job button appears on the Job Button Settings screen, as shown below. The Job Button Settings are complete. Scan Kiosk II V2.0 User’s Guide...
-
Page 164: Deleting A Job Button
1. Log on to Scan Kiosk II V2.0. For instructions on logging on to Scan Kiosk II V2.0, see “Logging On,” on p. 19. 2. From the Scan Kiosk II V2.0 Home screen, press [User Settings]. The User Settings screen appears. Scan Kiosk II V2.0 User’s Guide... - Page 165 3. Press [Job Button Settings]. The Job Button Settings screen appears. To go back to the previous screen, press [Back]. Scan Kiosk II V2.0 User’s Guide...
- Page 166 4. From the Job Button Type drop-down list, select the type of Job Button you want to modify. Scan Kiosk II V2.0 User’s Guide...
- Page 167 5. Select the check box next to the job button that you want to delete ➞ press [Edit] ➞ [Delete]. A confirmation message appears. 6. Press [Yes] to delete the job button. If you do not want to delete the selected job button, press [No]. The job button is deleted. Scan Kiosk II V2.0 User’s Guide...
-
Page 168: Exporting A Job Button
1. Log on to Scan Kiosk II V2.0. For instructions on logging on to Scan Kiosk II V2.0, see “Logging On,” on p. 19. 2. From the Scan Kiosk II V2.0 Home screen, press [User Settings]. The User Settings screen appears. Scan Kiosk II V2.0 User’s Guide... - Page 169 3. Press [Job Button Settings]. The Job Button Settings screen appears. To go back to the previous screen, press [Back]. Scan Kiosk II V2.0 User’s Guide...
- Page 170 4. From the Job Button Type drop-down list, select the type of Job Button you want to modify. Scan Kiosk II V2.0 User’s Guide...
- Page 171 5. Select the check box next to the job button that you want to export ➞ press [Edit] ➞ [Export]. You can export multiple job buttons at the same time. Scan Kiosk II V2.0 User’s Guide...
- Page 172 If the connection is successful, ‘OK’ is displayed. If the connection failed, ‘NG’ (No Good) is displayed. For instructions on entering characters from the virtual keyboard or USB keyboard, see “Entering Characters,” on p. 15. Scan Kiosk II V2.0 User’s Guide...
- Page 173 Press the [Password] text box ➞ enter the user’s password. For instructions on entering characters from the virtual keyboard or USB keyboard, see “Entering Characters,” on p. 15. 8. Press the [Domain / Workgroup] text box ➞ enter the domain or workgroup name. Scan Kiosk II V2.0 User’s Guide...
- Page 174 [Browse] to navigate to the folder. If you press [Browse] and have entered invalid user credentials, you must enter the user credentials again to gain access to the folder on the server, and then press [OK], as shown below. Scan Kiosk II V2.0 User’s Guide...
- Page 175 10. Press [OK]. The Job Button Export settings are complete. Scan Kiosk II V2.0 User’s Guide...
-
Page 176: Importing A Job Button
1. Log on to Scan Kiosk II V2.0. For instructions on logging on to Scan Kiosk II V2.0, see “Logging On,” on p. 19. 2. From the Scan Kiosk II V2.0 Home screen, press [User Settings]. The User Settings screen appears. Scan Kiosk II V2.0 User’s Guide... - Page 177 3. Press [Job Button Settings]. The Job Button Settings screen appears. To go back to the previous screen, press [Back]. Scan Kiosk II V2.0 User’s Guide...
- Page 178 4. From the Job Button Type drop-down list, select the type of Job Button you want to modify. Scan Kiosk II V2.0 User’s Guide...
- Page 179 5. Press [Edit] ➞ [Import]. The Import screen appears. Scan Kiosk II V2.0 User’s Guide...
- Page 180 If the connection is successful, ‘OK’ is displayed. If the connection failed, ‘NG’ (No Good) is displayed. For instructions on entering characters from the virtual keyboard or USB keyboard, see “Entering Characters,” on p. 15. Scan Kiosk II V2.0 User’s Guide...
- Page 181 Press the [Password] text box ➞ enter the user’s password. For instructions on entering characters from the virtual keyboard or USB keyboard, see “Entering Characters,” on p. 15. 8. Press the [Domain / Workgroup] text box ➞ enter the domain or workgroup name. Scan Kiosk II V2.0 User’s Guide...
- Page 182 If you press [Browse] and your user credentials are not found, you must enter the correct user credentials, the domain of the folder on the server, and then press [OK], as shown below. If you do not want to correct your user credentials, press [Cancel]. Scan Kiosk II V2.0 User’s Guide...
- Page 183 [Replaces the whole data]: Deletes all currently registered job buttons, and overwrites them with the imported job buttons. [Appends data]: Adds the imported job buttons to the currently registered job buttons. Scan Kiosk II V2.0 User’s Guide...
- Page 184 11. Press [OK]. The Job Button Import settings are complete. Scan Kiosk II V2.0 User’s Guide...
-
Page 185: Configuring The Address Book Settings
If you cannot access the [Edit] button on the Address Book Settings screen, the Administrator may have restricted the editing of My Address Book and Shared Address Book. For more information, please contact your Scan Kiosk II V2.0 Administrator. 3.3.1 Creating a New Address This section shows how to create a new address. - Page 186 2. From the Scan Kiosk II V2.0 Home screen, press [User Settings]. The User Settings screen appears. Scan Kiosk II V2.0 User’s Guide...
- Page 187 3. Press [Address Book Settings]. The Address Book Settings screen appears. To go back to the previous screen, press [Back]. Scan Kiosk II V2.0 User’s Guide...
- Page 188 4. From the Address Book type drop-down list, select the address book type (Shared Address Book or My Address Book) ➞ from the Address type drop-down list, select the address type you want to create. If you do not want to create a new address, press [Back]. Scan Kiosk II V2.0 User’s Guide...
- Page 189 5. Press [Edit] ➞ [New]. The New Address screen appears. Scan Kiosk II V2.0 User’s Guide...
- Page 190 If you selected [E-mail] in step 4, press the [Name] text box ➞ enter a name for the sender’s e-mail address ➞ press the [E-mail address] text box ➞ enter the sender’s e-mail address ➞ press [OK]. Scan Kiosk II V2.0 User’s Guide...
- Page 191 You can select [SMB], [WebDAV], or [WebDAV over SSL]. IMPORTANT Select [WebDAV] or [WebDAV over SSL] to activate the Port number and Use HTTP proxy settings. Press the [Name] text box ➞ enter the name to appear in the 5.2.2 address book. Scan Kiosk II V2.0 User’s Guide...
- Page 192 If necessary, press [Connection test] to test the connection to the computer. If the connection is successful, ‘OK’ is displayed. If the connection failed, ‘NG’ (No Good) is displayed. Scan Kiosk II V2.0 User’s Guide...
- Page 193 If [WebDAV] or [WebDAV over SSL] was selected in step 5.2.1, press the [Port number] text box ➞ enter the port number for the HTTP connection. The standard WebDAV port number is ‘80’. The standard WebDAV over SSL port number is ‘443’. Scan Kiosk II V2.0 User’s Guide...
- Page 194 You must add a backslash (\) to the end of the folder path. This enables users to create folders on the root of the share. 5.2.6 Press [] to continue to specify the Shared Folder settings. Scan Kiosk II V2.0 User’s Guide...
- Page 195 If [SMB] was selected in step 5.2.1, enter the Fully Qualified Domain or Workgroup name that is associated with the user in the [Fully Qualified Domain/Workgroup] text box. If a different protocol, other than [SMB] is selected, the Fully Qualified Domain/Workgroup field is grayed-out. Scan Kiosk II V2.0 User’s Guide...
- Page 196 (Secure Shell) data stream. If you want to connect to the FTP server through a firewall, select the [Use passive mode] check box. If you selected [SFTP], the [Use passive mode] check box is grayed out. Scan Kiosk II V2.0 User’s Guide...
- Page 197 Press the [Name] text box ➞ enter the IP address or host name of 5.3.3 the FTP server. If necessary, press [Connection test] to test the connection to the server. If the connection is successful, ‘OK’ is displayed. If the connection failed, ‘NG’ (No Good) is displayed. Scan Kiosk II V2.0 User’s Guide...
- Page 198 If you press [Browse], you must enter the user credentials, and then press [OK]. IMPORTANT You must add a backslash (\) to the end of the folder path. This enables users to create folders on the root of the share. Scan Kiosk II V2.0 User’s Guide...
- Page 199 If necessary, press the [Port number] text box ➞ enter the port 5.3.6 number of the FTP server. The Port number is populated automatically, depending on the Protocol you selected in step 5.3.1. 5.3.7 Press [] to continue to specify the FTP settings. Scan Kiosk II V2.0 User’s Guide...
- Page 200 Authentication] as the Authentication Method, press the [Password] text box ➞ enter your password to gain access to the FTP server. If you want to save your password, select the [Save password] check box. Scan Kiosk II V2.0 User’s Guide...
- Page 201 If you selected [FTP] as the Protocol and you want to use an FTP Proxy Server, select the [Use FTP proxy] check box. 5.3.13 Press [OK]. The new FTP server settings are complete. If you do not want to specify the FTP server settings, press [Cancel]. Scan Kiosk II V2.0 User’s Guide...
- Page 202 Press the [Name] text box ➞ enter the fax machine’s name. 5.4.1 Press the [FAX number] text box ➞ enter the fax number ➞ 5.4.2 press [OK]. The FAX settings are complete. If you do not want to specify a FAX address, press [Cancel]. Scan Kiosk II V2.0 User’s Guide...
- Page 203 If you selected [Group] in step 4, press [Edit] ➞ [New]. Press the [Name] text box ➞ enter a name for the group. 5.51 5.5.2 To add addresses to the group, press [Add]. The address list appears. Scan Kiosk II V2.0 User’s Guide...
- Page 204 ➞ from the Address type drop-down list, select the address types (only E-mail and Shared folders are supported) you want displayed in the list. Scan Kiosk II V2.0 User’s Guide...
- Page 205 The addresses are added to the group. 5.5.5 Press [OK]. The Address Book Settings screen appears. 6. Press [OK]. The New Address settings are complete. If you do not want to specify the New Address settings, press [Cancel]. Scan Kiosk II V2.0 User’s Guide...
-
Page 206: Modifying An Address
1. Log on to Scan Kiosk II V2.0. For instructions on logging on to Scan Kiosk II V2.0, see “Logging On,” on p. 19. 2. From the Scan Kiosk II V2.0 Home screen, press [User Settings]. The User Settings screen appears. Scan Kiosk II V2.0 User’s Guide... - Page 207 3. Press [Address Book Settings]. The Address Book Settings screen appears. To go back to the previous screen, press [Back]. Scan Kiosk II V2.0 User’s Guide...
- Page 208 4. From the Address Book type drop-down list, select the address book type (Shared Address Book or My Address Book) ➞ from the Address type drop-down list, select the address type you want to modify. To go back to the previous screen, press [Back]. Scan Kiosk II V2.0 User’s Guide...
- Page 209 5. Select the address you want to modify from the list ➞ press [Detail Info]. The Detailed Information screen for the address appears. Scan Kiosk II V2.0 User’s Guide...
- Page 210 6. Check the detailed information for the selected address ➞ determine what information needs to be changed ➞ press [Back]. Scan Kiosk II V2.0 User’s Guide...
- Page 211 7. Make sure that the user you want to modify is still selected ➞ press [Edit] ➞ [Modify]. 8. Modify the address. For information on modifying the address, see steps 5.1 to 6 of “Creating a New Address,” on p. 185. Scan Kiosk II V2.0 User’s Guide...
-
Page 212: Copying An Address
1. Log on to Scan Kiosk II V2.0. For instructions on logging on to Scan Kiosk II V2.0, see “Logging On,” on p. 19. 2. From the Scan Kiosk II V2.0 Home screen, press [User Settings]. The User Settings screen appears. Scan Kiosk II V2.0 User’s Guide... - Page 213 3. Press [Address Book Settings]. The Address Book Settings screen appears. To go back to the previous screen, press [Back]. Scan Kiosk II V2.0 User’s Guide...
- Page 214 4. From the Address Book type drop-down list, select the address book type (Shared Address Book or My Address Book) ➞ from the Address type drop-down list, select the address type you want to modify. To go back to the previous screen, press [Back]. Scan Kiosk II V2.0 User’s Guide...
- Page 215 5. Select the address you want to copy from the list ➞ press [Edit] ➞ [Copy]. The Address Copy screen appears. Scan Kiosk II V2.0 User’s Guide...
- Page 216 7. Make sure a check mark appears by the address you selected in step 5 ➞ press [OK]. The copied address appears in the list. If you do not want to copy the address, press [Cancel]. Scan Kiosk II V2.0 User’s Guide...
- Page 217 8. If you want to modify the copied address, select the copied address ➞ press [Edit] ➞ [Modify]. Depending on the address type you selected, the settings screen for that address type appears. Scan Kiosk II V2.0 User’s Guide...
- Page 218 9. Modify the address, as necessary ➞ press [OK]. For instructions on specifying the address settings, see “Creating a New Address,” on p. 185. The new address appears in the address list, as shown below. Scan Kiosk II V2.0 User’s Guide...
-
Page 219: Deleting An Address
1. Log on to Scan Kiosk II V2.0. For instructions on logging on to Scan Kiosk II V2.0, see “Logging On,” on p. 19. 2. From the Scan Kiosk II V2.0 Home screen, press [User Settings]. The User Settings screen appears. Scan Kiosk II V2.0 User’s Guide... - Page 220 3. Press [Address Book Settings]. The Address Book Settings screen appears. To go back to the previous screen, press [Back]. Scan Kiosk II V2.0 User’s Guide...
- Page 221 4. From the Address Book type drop-down list, select the address book type (Shared Address Book or My Address Book) ➞ from the Address type drop-down list, select the address type you want to modify. To go back to the previous screen, press [Back]. Scan Kiosk II V2.0 User’s Guide...
- Page 222 5. Select the address you want to delete ➞ press [Edit] ➞ [Delete]. A confirmation screen appears. 6. Press [Yes]. If you do not want to delete the address, press [No]. The address is deleted from the address book. Scan Kiosk II V2.0 User’s Guide...
-
Page 223: Exporting An Address
1. Log on to Scan Kiosk II V2.0. For instructions on logging on to Scan Kiosk II V2.0, see “Logging On,” on p. 19. 2. From the Scan Kiosk II V2.0 Home screen, press [User Settings]. The User Settings screen appears. Scan Kiosk II V2.0 User’s Guide... - Page 224 3. Press [Address Book Settings]. The Address Book Settings screen appears. To go back to the previous screen, press [Back]. Scan Kiosk II V2.0 User’s Guide...
- Page 225 4. From the Address Book type drop-down list, select the Address Book type (Shared Address Book or My Address Book) ➞ from the Address type drop-down list, select the kind of addresses you want to export. Scan Kiosk II V2.0 User’s Guide...
- Page 226 5. Select the addresses you want to export ➞ press [Edit] ➞ [Export]. You can export multiple addresses at the same time. Scan Kiosk II V2.0 User’s Guide...
- Page 227 6. Enter the necessary information for each item ➞ press [OK]. For instructions, see “Exporting a Job Button,” on p. 168. The export starts, and a confirmation message appears. Press [Yes]. The Export settings are complete. Scan Kiosk II V2.0 User’s Guide...
-
Page 228: Importing An Address
1. Log on to Scan Kiosk II V2.0. For instructions on logging on to Scan Kiosk II V2.0, see “Logging On,” on p. 19. 2. From the Scan Kiosk II V2.0 Home screen, press [User Settings]. The User Settings screen appears. Scan Kiosk II V2.0 User’s Guide... - Page 229 3. Press [Address Book Settings]. The Address Book Settings screen appears. To go back to the previous screen, press [Back]. Scan Kiosk II V2.0 User’s Guide...
- Page 230 4. From the Address Book type drop-down list, select the Address Book type (Shared Address Book or My Address Book) to where you want to import the address book data. Scan Kiosk II V2.0 User’s Guide...
- Page 231 5. Press [Edit] ➞ [Import]. You can import multiple addresses at the same time. Scan Kiosk II V2.0 User’s Guide...
- Page 232 If the connection is successful, ‘OK’ is displayed. If the connection failed, ‘NG’ (No Good) is displayed. For instructions on entering characters from the virtual keyboard or USB keyboard, see “Entering Characters,” on p. 15. Scan Kiosk II V2.0 User’s Guide...
- Page 233 Press the [Password] text box ➞ enter the user’s password. For instructions on entering characters from the virtual keyboard or USB keyboard, see “Entering Characters,” on p. 15. 8. Press the [Domain / Workgroup] text box ➞ enter the domain or workgroup name. Scan Kiosk II V2.0 User’s Guide...
- Page 234 If you press [Browse] and your user credentials are not found, you must enter the correct user credentials, the domain of the folder on the server, and then press [OK], as shown below. If you do not want to correct your user credentials, press [Cancel]. Scan Kiosk II V2.0 User’s Guide...
- Page 235 [Appends data]: Select this setting to add the imported address book data to the current address book. If you do not want to specify the Import settings, press [Cancel]. Scan Kiosk II V2.0 User’s Guide...
- Page 236 11. Press [OK]. A confirmation message appears. 12. Press [Back] to return to the Address Book Settings screen. The Import settings are complete. Scan Kiosk II V2.0 User’s Guide...
-
Page 237: Showing The Operation History
Showing the Operation History This section describes how to view and delete your Scan Kiosk II V2.0 operation history. The operation history list is in order by the most recent date and time. 1. Log on to Scan Kiosk II V2.0. - Page 238 3. Press [Show Operation History]. The Show Operation History screen appears. To go back to the previous screen, press [Back]. Scan Kiosk II V2.0 User’s Guide...
- Page 239 ➞ press [Detail Info]. You can select only one operation at a time. To scroll through the history list, press [] or []. If you do not want to view the operation history, press [Back]. Scan Kiosk II V2.0 User’s Guide...
- Page 240 5. View the detailed information ➞ press [Back]. The Show Operation History screen appears. Scan Kiosk II V2.0 User’s Guide...
-
Page 241: Displaying The Version Information
Displaying the Version Information This section shows how to display and verify the Scan Kiosk II V2.0 version information. 1. From the Scan Kiosk II V2.0 Home screen, press [About]. The version information screen appears. If you do not want to display the version information, press [Close]. - Page 242 2. View the version information ➞ press [Close]. The Home screen appears. Scan Kiosk II V2.0 User’s Guide...
-
Page 243: Logging Off
Logging Off This section shows you how to log off the Scan Kiosk II V2.0 tablet PC if the Administrator configured log on credentials for you. 1. From any Scan Kiosk II V2.0 screen, press [Logout]. You are immediately logged off the device. -
Page 244: Powering Off The Device
Powering OFF the Device This section shows you how to power OFF the Scan Kiosk II V2.0 tablet PC properly. 1. From any Scan Kiosk II V2.0 screen, press [Power Off]. A confirmation screen appears. 2. Press [Yes]. If you do not want to power OFF the device, press [No].
Need help?
Do you have a question about the Scan Kiosk II and is the answer not in the manual?
Questions and answers