
Related Manuals for procontrol IP Stecker

Summary of Contents for procontrol IP Stecker
- Page 1 ® PROCONTROL Plug-in socket from the Internet User and Installation Manual IP Stecker V12 August 2018...
- Page 2 – whether in whole or in part – by the prior written permission of the author. Procontrol Electronics Ltd can change the document and software at any time without giving any notice Procontrol Electronics Ltd. takes no responsibility for the accuracy of the software or...
-
Page 3: Table Of Contents
Product setup ......................14 IPStecker remote control function ..............15 Testing the IPStecker connection ................16 1. Web browser / IP Stecker Online ............... 17 1. Plugs – Remote access of powers sockets ....................18 2. Events – User operations log ........................18 3. -
Page 5: Ip Stecker
Welcome Thank you for choosing a Procontrol product. Procontrol Electronics Ltd has grown to an important national company of developing and manufacturing software, hardware, electronic devices, access control, time-attendance systems, queue control, client caller and access protection systems since 1981. -
Page 6: Safety Precautions
Modifying or copying of this device or láng vagy hő hatásának, mivel az eszköz parts is prohibited! olyankor felrobbanhat. Procontrol Ltd. is not liable for using of this Only use the product for it’s intended device and the consequences of the purpose! application. -
Page 7: Introduction
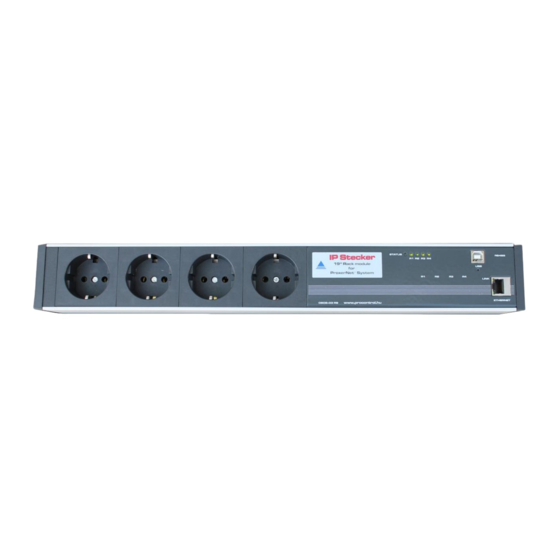
Introduction IP Stecker is an Ethernet plug-in bar, which can control 230V sockets on an Ethernet network. Types: • IPStecker 4 – indoor use IPStecker 4 • IP Stecker 3 Industrial – IP54 casing IP Stecker 3 Industrial Plans for Product Enhancement From the current R9D series, the above type is available with Ethernet and USB connectivity. -
Page 8: Features
Features Type IPStecker 4 Picture 0802-03-R9C Revision 141106 Part number 4 sockets Number of remotable switched sockets 10/100BaseT Ethernet interface o Web /internet browser o Telnet o Command prompt remote control, Perl script, PHP script Remote abilities o PCSW protokoll Can be used in all operation system, with all browsers: Microsoft Compatibility Internet Explorer, Opera, Mozilla Firefox, Netscape,... - Page 9 USB (I2C) - prepared for later developments under development Smart Metering: current and voltage measurement functions IP Stecker 3 Industrial Types 0802-03-R9D Revision Part number 141010 Number of remotable switched sockets sockets 10/100BaseT Ethernet interface • Web /internet browser • Telnet Remote abilities •...
-
Page 10: Factory Reset
* A Special communication protocol developed by Procontrol, which allows the implementation and communication of IPStecker with other Procontrol manufactured products and systems. Attention! Maximum number of devices using switching power supply is 2/socket. Factory reset The device has a hidden reset button to reset the factory settings. - Page 11 Press and hold the button for at least 5 seconds. If this is done, you will be running the original factory settings after restarting the device. To reset to factory settings, press and hold the reset button for 5 seconds. After restarting the unit will start with the factory settings.
-
Page 12: What Kind Of Ethernet Network We Have
What kind of Ethernet network we have? (Estimation of Ethernet network topology) Connect the device to a free end point (or directly to your PC) of an established Ethernet network as following. Ethernet on PC network is not everywhere accessible, therefore we suggest two solutions for testing your device: 1. -
Page 13: Directly Wired Connection Between Terminal And Pc
2. Directly Wired Connection between Terminal and PC If a network SWITCH is not available, but you want to connect it directly to the Ethernet socket of your PC, you need a special Cross-Over wire. Connect the device to your PC’s built in connector through the Cross-Over patch cable. -
Page 14: Ethernet Data Connection Establishment
Ethernet data connection establishment Product setup Connect the socket strip to a 230V mains socket outlet. Use a grounded outlet only. Connect the Ethernet network cable, then turn on the power switch of the device (I O labeled rocker switch). After about 10 seconds the device is available on the computer network with default connection settings. -
Page 15: Ipstecker Remote Control Function
Debian linux – telnet • PCSW protocol port 1001 Secret internal protocol of Procontrol Ltd., used to edit system parameters and for firmware upgrades. Only for system administration purposes • Through web port 80 instead of web browser, even scheduled, or command line remote control, Perl script, PHP script. -
Page 16: Testing The Ipstecker Connection
Testing the IPStecker connection • Ping test: enter following command into the command line: PING 192.168.0.250 • If you receive a reply, you can try with your browser according to description below. If you do not receive any reply, check as follows. FIREWALL DIFFICULTIES: A well operating firewall may prevent the program from running correctly... -
Page 17: Web Browser / Ip Stecker Online
1. Web browser / IP Stecker Online Power of the IPStecker’s sockets can be individually switched on and off through a web browser. Access to the control page can be password protected. FIREWALL DIFFICULTIES A well operating firewall may prevent the program from running correctly. -
Page 18: Plugs - Remote Access Of Powers Sockets
Sections of the web interface: 1. Plugs – Remote access of powers sockets • The first section of the IPStecker’s user interface displays the current status of power socket strip. A powered plug is marked green (ON), an unpowered plug is marked red (OFF). -
Page 19: User - User Settings
3. User – User settings (Operation of the IPStecker is not affected by the settings in this section) Each plug can be renamed (according to the connected devices e.g.) by the user for easier identification in this section. The names given here are displayed in the User name column of the first section. -
Page 20: Connection - Connection Settings
4. Connection – Connection settings Parameters of the connection with the IPStecker can be changed here: IP address, default gateway, subnet mask, TCP/IP port. 5. Security – Security settings A password can be set here to access the IPStecker’s web interface. The password can be changed any time inside the control page. -
Page 21: Date Time - Date And Time Settings
The Current state column gives information if a password is required to enter the web interface. If you do not wish to use a password, just leave the New settings field empty and click the Save setting button. The next login can be done without using a password. To restore password controlled access, it is only needed to type in a new password and click the Save setting button. -
Page 22: Save Settings - Saving Settings Of Plugs
During a power failure, or a blackout the IP Stecker’s non-volatile memory "remembers" the latest switching states and settings and re-establishes them when the power supply is restored. So the IP Stecker operates unchanged until you give a new command. This function can be turned off. -
Page 23: Ping Settings - Automatic Plug Restart (Automatic Restart Of Crashed Systems E.g., Reset)
9. Ping settings – Automatic plug restart (automatic restart of crashed systems e.g., RESET) With this function any number of operations checking signal can be sent out at any time to devices connected to the network. A device crash or a network failure is easily detectable with this method, and the malfunctioning device connected to the specific plug can be restarted. - Page 24 ATTENTION! ALWAYS USE THE SAVE BUTTON AFTER SETTINGS MODIFICATION AND DATA ENTRY!!
-
Page 25: Telnet
2. Telnet Some functions of the IPStecker is available via Telnet. If a password was set to access the device, it will be also required to establish a Telnet connection. To access the IPStecker this way, create a command prompt: type in Start menu / Run window “cmd”; in case of Windows 98: command;... -
Page 26: Command Line Remote Control Through User Developed Program (Sdk)
3. Command line remote control through user developed program (SDK) Remote control of the IPstecker through command prompt is also possible by downloading a utility software (Perlscript), which is available free of charge from www.activeperl.com. Perl script usage: 1. Install Perl interpreter to the computer. (interpreter / motor / engine) 2. - Page 27 ”. Select the option of alternative setup path (advanced) and click „Continue Select the option „No search. I select the setup driver”: In the next window click on „My disc” and browse „usbser.info” file:...
- Page 28 Click „Continue” and Windows executes the driver setup. The device is now available in your system as a serial port device.
- Page 29 Command line interface: You can control the device by a simple line command user interface. Attach it with a USB wire, from your user kit, to your PC and start „Terminal” software, from your user kit. ▪ COM Port: select the COM Portot, which you connected with your device ▪...
-
Page 30: Contact To The Manufacturer
Contact to the manufacturer If any remark, question or request occurs to you contact us as follows: Procontrol Electronics Ltd. Internet: www.procontrol.hu Email: info at procontrol dot hu Hardware manufacturing/service: 6725 Szeged, Cserepes sor 9/b. Tel: (62) 444-007 Fax: (62) 444-181...