
Subscribe to Our Youtube Channel
Related Manuals for Gaggenau AL200190


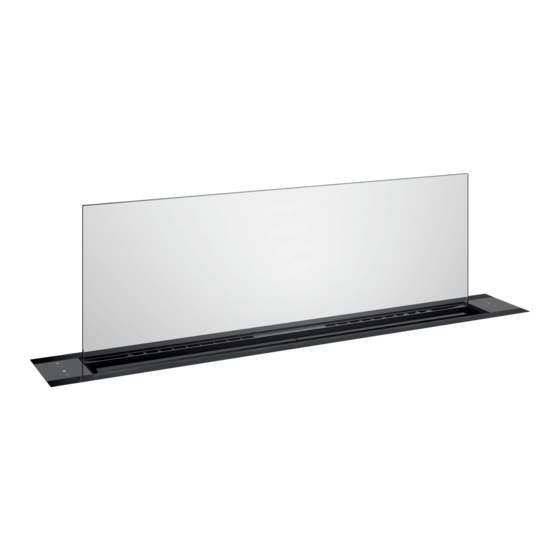
Summary of Contents for Gaggenau AL200190
- Page 1 Gaggenau en User manual and installation instructions AL200180 AL200190 Extractor hood...
-
Page 2: Table Of Contents
en Safety 1.2 Intended use Table of contents This appliance is designed only to be built into kitchen units. Read the special installation instructions. INFORMATION FOR USE The appliance can only be used safely if it is Safety .............. 2 correctly installed according to the safety in- structions. -
Page 3: Safety
Safety en Children may breathe in or swallow small WARNING ‒ Risk of fire! parts, causing them to suffocate. Fatty deposits in the grease filters may catch ▶ Keep small parts away from children. fire. ▶ Do not let children play with small parts. ▶... -
Page 4: Avoiding Material Damage
en Avoiding material damage WARNING ‒ Risk of electric shock! WARNING ‒ Risk of explosion! If the appliance or the power cord is dam- Highly caustic alkaline or highly acidic clean- aged, this is dangerous. ing agents in conjunction with aluminium parts in the interior of the appliance may cause ex- ▶... -
Page 5: Environmental Protection And Saving En- Ergy
Environmental protection and saving energy en 3 Environmental protection and saving energy 3.1 Disposing of packaging If cooking produces large amounts of steam, select a higher fan speed in good time. The packaging materials are environmentally compat- ¡ The odours are distributed around the room less. ible and can be recycled. -
Page 6: Familiarising Yourself With Your Appliance
en Familiarising yourself with your appliance 5 Familiarising yourself with your appliance 5.1 Controls Fan setting 1 You can use the control panel to configure all functions Fan setting 2 of your appliance and to obtain information about the Fan setting 3 operating status. - Page 7 Basic operation en 7.4 Switching on intensive mode 7.10 Sensor control If particularly strong odours or vapours develop, you In automatic mode, a sensor in the appliance detects can use intensive mode. the intensity of the cooking and roasting fumes. De- pending on the setting of the sensor sensitivity, the op- Note: Intensive mode 1 can be set in the Home Con- timum fan setting is automatically switched on.
- Page 8 en Home Connect 7.14 Switching on Ambient Light 7.15 Switching on Guided Air With the Guided Air function, the cooking vapour is Notes ¡ You can switch the Ambient Light on and off in the routed in such a way that it can be optimally collected Home Connect app.
-
Page 9: Hob-Based Hood Control
Hob-based hood control en Notes 8.5 Data protection ¡ You can continue to use your appliance as normal Please see the information on data protection. while updates are downloading. Depending on your The first time your appliance is registered on a home personal settings in the app, software updates can network connected to the Internet, your appliance will also be set to download automatically. - Page 10 en Cleaning and servicing Carefully insert the glass pane as far as it will go WARNING ‒ Risk of burns! into the guides. The appliance becomes hot during operation. Allow the appliance to cool down before cleaning. ▶ WARNING ‒ Risk of injury! Components inside the appliance may have sharp edges.
-
Page 11: Cleaning And Servicing
Cleaning and servicing en Note: The appliance frame is sensitive. Remove the Observe the information regarding the cleaning grease filter cartridges vertically. Do not pull the agents. grease filter cartridges over the appliance frame. Place the grease filters loosely into the dishwasher. Do not clean heavily soiled grease filters with Remove the grease filter cartridges. -
Page 12: Troubleshooting
en Troubleshooting a The appliance flap closes and the appliance switches off. 11 Troubleshooting You can rectify minor faults on your appliance yourself. WARNING ‒ Risk of electric shock! Read the troubleshooting information before contacting Incorrect repairs are dangerous. after-sales service. This will avoid unnecessary costs. Repairs to the appliance should only be carried out ▶... -
Page 13: Customer Service
You can find out which accessories are available for – 80 cm your appliance in our catalogue, in the online shop or Long Life recirculation kit AA200892 from our after-sales service. – 90 cm www.gaggenau.com Installation kit for remov- AA200910 able fans Accessories Order number Installation kit for seam-... -
Page 14: Declaration Of Conformity
BSH Hausgeräte GmbH hereby declares that the appli- A detailed Declaration of Conformity can be found on- ance with Home Connect functionality conforms to the line at www.gaggenau.com/gb among the additional basic requirements and other relevant provisions of Dir- documents on the product page for your appliance. -
Page 15: Installation Instructions
Installation instructions en 17.1 Included with the appliance After unpacking all parts, check for any damage in transit and completeness of the delivery. 17.2 Appliance dimensions You will find the dimensions of the appliance here Observe the dimensions of the unit. -
Page 16: 17.3 Secure Installation
en Installation instructions Risk of poisoning from flue gases being 17.3 Secure installation drawn back in. Follow these safety instructions when in- ▶ If an extractor hood with an open-flued heat stalling the appliance. production source is installed, the power WARNING ‒ Risk of poisoning! supply for the extractor hood must be Risk of poisoning from flue gases being provided with a suitable safety switch. - Page 17 Installation instructions en egory III and according to the installation Changes to the electrical or mechanical as- regulations. sembly are dangerous and may lead to mal- ▶ When installing the appliance, check that functions. the connection cable is not trapped or ▶...
- Page 18 en Installation instructions ¡ Include a ventilation opening in the base with a ¡ To surface-mount the hob and the appliance, you re- cross-section of 80 cm². quire special accessories which are not included in the scope of delivery. Observe the enclosed installa- tion instructions for special accessories.
- Page 19 Installation instructions en Place the appliance on a soft surface and remove Pull the cable connection into the strain relief and the transport lock. remove the transport lock . Stick the sealing in the designated groove and Note: To ensure that the appliance is not yet fully in- trim it ...
- Page 20 en Installation instructions Slide the fan box into the guide, connect the pipe- Align the appliance to the hob and tension it work and screw the fan box tightly back in place. against the worktop . Support the appliance from below and remove the Insert the drip tray and snap it into place.
- Page 24 BSH Hausgeräte GmbH Carl-Wery-Straße 34 81739 München, GERMANY www.gaggenau.com Valid within Great Britain: Imported to Great Britain by BSH Home Appliances Ltd. Grand Union House Old Wolverton Road Wolverton, Milton Keynes MK12 5PT United Kingdom...
Need help?
Do you have a question about the AL200190 and is the answer not in the manual?
Questions and answers