
Related Manuals for Gaggenau AL400122


Summary of Contents for Gaggenau AL400122
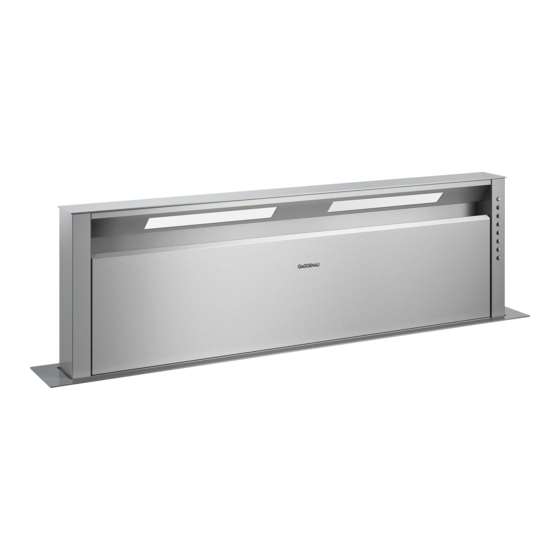
- Page 1 Gaggenau en User manual and installation instructions AL400122, AL400192 Extractor hood...
-
Page 2: Table Of Contents
en Safety Do not use the appliance: Table of contents ¡ On boats or in vehicles. ¡ With an external timer. 1.3 Restriction on user group USER MANUAL This appliance may be used by children aged Safety .............. 2 8 or over and by people who have reduced Avoiding material damage........ -
Page 3: Safety
Safety en WARNING ‒ Risk of poisoning! WARNING ‒ Risk of fire! Risk of poisoning from flue gases being Fatty deposits in the grease filters may catch drawn back in. Room-air-dependent heat-pro- fire. ducing appliances (e.g. gas, oil, wood or coal- ▶ Never operate the appliance without a operated heaters, continuous flow heaters or grease filter. -
Page 4: Avoiding Material Damage
en Avoiding material damage Changes to the electrical or mechanical as- Incorrect repairs are dangerous. sembly are dangerous and may lead to mal- ▶ Repairs to the appliance should only be functions. carried out by trained specialist staff. ▶ Do not make any changes to the electrical ▶... -
Page 5: Operating Modes
Operating modes en 3.2 Saving energy If cooking produces large amounts of steam, select a higher fan speed in good time. If you follow these instructions, your appliance will use ¡ The odours are distributed around the room less. less power. Switch the appliance off when you are not using it. Ensure that there is sufficient ventilation when cook- ¡... -
Page 6: Familiarising Yourself With Your Appliance
en Familiarising yourself with your appliance 5 Familiarising yourself with your appliance 5.1 Controls Switch fan setting on or off Switch fan setting on or off You can use the control panel to configure all functions of your appliance and to obtain information about the Switch fan setting ... - Page 7 Cleaning and servicing en 7.3 Switching on the appliance 7.10 Switching on intermittent ventilation Requirement: The appliance is fully extended. Press . With intermittent ventilation, the appliance switches the ▶ ventilation on and off at regular intervals. a The appliance starts at fan setting 2. Press , or ...
- Page 8 en Cleaning and servicing 8.2 Cleaning the appliance 8.4 Opening the filter cover Clean the appliance as specified. This will ensure that Grip the filter cover in the middle and pull it up- the different parts and surfaces of the appliance are wards. not damaged by incorrect cleaning or unsuitable clean- ing products.
-
Page 9: Cleaning And Servicing
Cleaning and servicing en Clean the grease filter holder in the appliance using Remove the grease drain channels. ▶ a damp cloth. 8.6 Cleaning grease filters manually The grease filters filter the grease from the cooking va- pour. Regularly cleaned grease filters guarantee a high level of grease removal. -
Page 10: Troubleshooting
en Troubleshooting Slide the filter cover onto the bolts of the holder. 8.15 Fitting the filter cover Lift up the filter cover on the front side until it locks Grip the filter cover on the side with both hands. into position. 9 Troubleshooting You can rectify minor faults on your appliance yourself. -
Page 11: Customer Service
Customer Service en 10 Customer Service If you have any queries on use, are unable to rectify The contact details for Customer Service can be found faults on the appliance yourself or if your appliance in the enclosed Customer Service directory or on our needs to be repaired, contact Customer Service. - Page 12 en Installation instructions 12.1 Scope of delivery 12.2 Appliance dimensions After unpacking all parts, check for any damage in You will find the dimensions of the appliance here transit and completeness of the delivery.
- Page 13 Installation instructions en 12.3 Installation accessories Support rod as a beam for the worktop and as a replacement for the cupboard frame Use original accessories. These have been made espe- cially for your appliance. Here, you can find an over- Order number view of your appliance's installation accessories.
-
Page 14: 12.4 Secure Installation
en Installation instructions Risk of poisoning from flue gases being 12.4 Secure installation drawn back in. Follow these safety instructions when in- ▶ If an extractor hood with an open-flued heat stalling the appliance. production source is installed, the power WARNING ‒ Risk of poisoning! supply for the extractor hood must be Risk of poisoning from flue gases being provided with a suitable safety switch. - Page 15 Installation instructions en Grease deposits in the grease filter may catch Incorrect installation is dangerous. fire. ▶ Connect and operate the appliance only in ▶ Never work with naked flames close to the accordance with the specifications on the appliance (e.g. flambéing). rating plate.
- Page 16 AL400122 with two re- mote fan units. 12.7 Instructions for the exhaust air pipe ¡ For operation in the EU: The appliance AL400122 is only intended for circulating-air mode in accordance The appliance manufacturer does not provide any war- with EU66/2014.
- Page 17 Installation instructions en Drill holes with a diameter of 6 mm four times. Removing the transit bolts Unscrew the 2 panels on the front side of the appli- ance. Ensure that the angle of the cut surface to the work- top is 90°. Unscrew the 2 screws on the underside of the appli- ance.
- Page 18 en Installation instructions Preparing the appliance Screw the fastening bracket to the appliance and to the bottom of the unit using the enclosed sheet Attach the connecting piece to the appliance with ▶ metal screws. the exhaust air duct facing down. Installing the control unit Installing the appliance Keeping the appliance level, insert it into the unit...
- Page 19 Installation instructions en Observe the cabling for a fan module. Establishing the piping Select the exhaust air duct depending on the install- ation position. For the exhaust air duct, observe the installation in- structions for the fan module. Select the connecting piece depending on the in- stallation position, and secure it to the appliance.
- Page 20 en Installation instructions available at the installation site. The contact is closed Checking the functionality when the fan is switched on, and is opened when the Connect the control unit and fan module to the fan is switched off. power supply and check that they work correctly. Work must only be carried out on the additional switch- If the appliance does not work, check the plug con- ing output by a qualified electrician in accordance with...
- Page 21 Installation instructions en Unscrew the cover plate. Press and hold the reset button until both LEDs light up continuously. Press the reset button for approx. 5 seconds. ‒ Release the reset button within 5 seconds. ‒ Screw on the cover plate. Check that the system is working correctly.
- Page 24 Gaggenau Hausgeräte GmbH Carl-Wery-Straße 34 81739 München GERMANY www.gaggenau.com Valid within Great Britain: Imported to Great Britain by BSH Home Appliances Ltd. Grand Union House Old Wolverton Road Wolverton, Milton Keynes MK12 5PT United Kingdom...
Need help?
Do you have a question about the AL400122 and is the answer not in the manual?
Questions and answers