Table of Contents
Advertisement
Quick Links
INSTRUCTIONS
SZ2-ILA
Transmitted illumination attachment
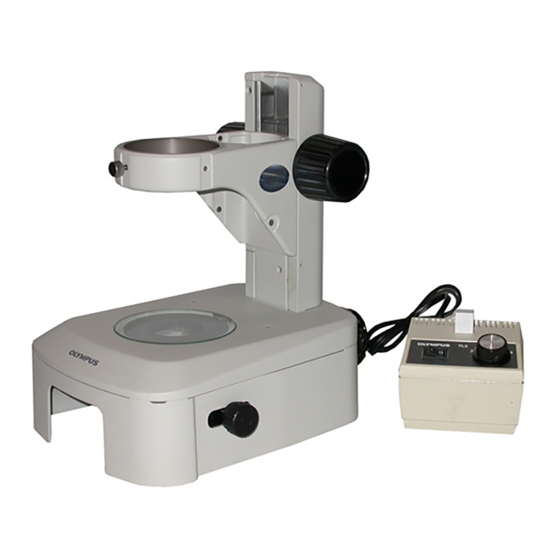
This instruction manual is for the Olympus SZ2-ILA Transmitted Illumination Attachment.
Optical Microscope Accessory
To ensure the safety, obtain optimum performance and to familiarize yourself fully with the
use of this equip-ment, we recommend that you study this manual thoroughly before operating
the system. Retain this instruction manual in an easily accessible place near the work desk
for future reference.
For details of products other than SZX-SDO2, see "1 System chart" (P. 2) and "6 Assembly" (P. 7).
Advertisement
Table of Contents

Summary of Contents for Olympus SZ2-ILA
- Page 1 INSTRUCTIONS SZ2-ILA Transmitted illumination attachment This instruction manual is for the Olympus SZ2-ILA Transmitted Illumination Attachment. Optical Microscope Accessory To ensure the safety, obtain optimum performance and to familiarize yourself fully with the use of this equip-ment, we recommend that you study this manual thoroughly before operating the system.
-
Page 3: Table Of Contents
SZ2-ILA Contents Correct assembly and adjustments are critical for this unit to manifest its full performance. If you are going toassemble this unit by yourself, please read “6 Assembly” (P. 7). For the assemblies of the modules for which instruction manuals are available, refer to their instruction manuals. -
Page 5: Important
SZ2-ILA Important The transmitted illumination attachment enables transmitted light observation when it is placed under the SZ2-ST standard stand for the SZ2 series microscopes. Safety precautions 1. The illumination light may be pointed downward with certain mirror angles. As this makes the desktop surface hot, do not place an object that is vulnerable to heat or easily flammable below the transmitted light illumination attachment. -
Page 6: System Chart
Light guide illuminator SZ2-CLS* ø45 mm frameless filter Power supply BX3M-PSLED Filter holder LED lamp housing BX3M-LEDT Standard stand SZ2-ST Flexible light guide SZ2-CLGSF Lamp housing adapter SZ2-LHAD Collector lens SZ2-LGCL Transmitted light guide adapte Transmitted illumination SZ2-TLGAD attachment SZ2-ILA... -
Page 7: Nomenclature
SZ2-ILA Nomenclature Transmitted illumination attachment SZ2-ILA Stage glass Fresnel lens SP-C Illuminator mount port Mirror Planar mirror / Light scattering Planar mirror / Light scattering scattering mirror mirror Filter holder Mirror rotation / sliding knob Rotation: 360° Sliding: 30 mm... -
Page 8: Transmitted Light Observation
Transmitted light observation If you have not assembled the transmitted illumination attachment yet, please read “6 Assembly” (P. 7). Using the Mirror Rotation/Sliding Knob Set the main switch of the power supply to “ ” (ON) and adjust the brightness with the intensity control knob. For details of the power supply, see the instruction manual provided separately. -
Page 9: Troubleshooting Guide
Under certain conditions, performance of the unit may be adversely affected by factors other than defects. If problems occur, please review the following list and take remedial action as needed. If you cannot solve the problem after checking the entire list, please contact Olympus. Problem... -
Page 10: 5 Specifications
Lighting types Rotation/sliding of the planar and light scattering filters. Oblique illumination possible. Combined stand SZ2-ST (Standard Stand) Combined stage height: 92.5 mm Weight Approx. 1.1 kg (SZ2-ILA only) Illumination system Power source See the instruction manual provided separately. Power consumption ·... -
Page 11: 6 Assembly
The modules shown in the following figure are merely the typical examples. For other applicable modules that are not given below, please consult your Olympus representative or the latest catalogues. When assembling the microscope, make sure that all parts are free of dust and dirt, and avoid NOTE scratching any parts or touching glass surfaces. -
Page 12: Optional Modules
Optional modules For the mounting methods, see “6 Assembly” (P. 7). 7-1 Simplified polarization system SZ-POL-2 Cross-nicol adjustment and observation Drop the polarizer below the stage glass so that the index dot ( ) can be viewed horizontally. Turn on the transmitted light source, look through the eyepieces and rotate the analyzer so that the field of view is darkest (cross-Nicol condition). - Page 13 Memo...
- Page 14 Memo...
- Page 16 Manufactured by Shinjuku Monolith, 2-3-1 Nishi-Shinjuku, Shinjuku-ku, Tokyo 163-0914, Japan Distributed by AX6615 07 Issued in March, 2019...


Need help?
Do you have a question about the SZ2-ILA and is the answer not in the manual?
Questions and answers