Advertisement
Quick Links
Configuring the DM-100 Gen III for Gilbarco
G-Site/Passport Interface Quick Guide
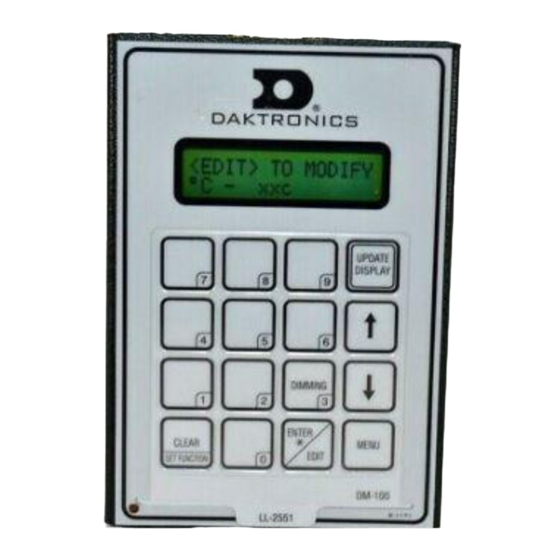
Handheld Controller Use and Setup
The first time you use your DM-100 handheld controller you may need to set the function to GAS PRICE
as described below.
LCD Screen
CURRENT FUNCTION
GAS PRICE
CHANGE FUNCTION?
PRESS SET FUNCT
SELECT FUNCTION
GAS PRICE
{}
Menu
1. Press the MENU key.
2. Press the Up and Down Arrow keys to select between
Diagnostics Menu or Display Menu.
Diagnostics Menu
Press the MENU key followed by ENTER to select the Diagnostics Menu.
Display Status
1. Press the MENU key followed by ENTER to select the Diagnostics Menu.
2. Press ENTER to open the Display Status menu item.
LCD Screen
DISPLAY STATUS
ENT TO SELECT
DISPLAY STATUS
GET STATUS
SELECT DISPLAY
SIGN 1 LINE 1 }
DD2294804
Rev 04
05 October 2021
Action/Information Shown
For indoor installation only: Plug the wall pack transformer into a 120 VAC power
outlet, and connect it to the DM-100.
This display appears briefly.
If GAS PRICE is shown on the bottom line of the LCD during startup, do nothing.
The controller automatically defaults to previous Gas Price settings.
If a function other than GAS PRICE is shown on the bottom line of the LCD during
startup, press the SET FUNCTION key while the second LCD prompt is displayed.
Press the Up and Down Arrow keys until the gas price option is shown.
Press the ENTER key to accept.
Action/Information Shown
Press ENTER to get display status.
Press the Down Arrow key to move to another sign and line number.
Press ENTER to view Display Status menu items:
Driver Firmware Version
•
Dim Level
•
Dimming Mode (Automatic or Manual)
•
Light Sensor Status
•
Com1 Device Detection
•
201 Daktronics Drive
Brookings, SD 57006-5128
www.daktronics.com/support
800.325.8766
Page 1 of 10
Menu Items
Diagnostics Menu
Display Menu
Display Status
Price Options
Detect Displays
Configuration
Test Patterns
POS Settings
COM Diagnostics
POS Price Offset
About
Modem
DIAGNOSTICS MENU
ENT TO BEGIN
Advertisement

Subscribe to Our Youtube Channel
Summary of Contents for Daktronics DM-100 Gen III
- Page 1 Configuring the DM-100 Gen III for Gilbarco G-Site/Passport Interface Quick Guide Page 1 of 10 Handheld Controller Use and Setup The first time you use your DM-100 handheld controller you may need to set the function to GAS PRICE as described below.
-
Page 2: Test Patterns
Configuring the DM-100 Gen III for Gilbarco G-Site/Passport Interface Quick Guide Page 2 of 10 Detect Displays 1. Press the MENU key followed by ENTER to select the Diagnostics Menu. 2. Press the Down Arrow key to reach Display Detection. -
Page 3: Select Baud Rate
Configuring the DM-100 Gen III for Gilbarco G-Site/Passport Interface Quick Guide Page 3 of 10 COM Diagnostics 1. Press the MENU key followed by ENTER to select the Diagnostics Menu. 2. Press the Down Arrow key to reach COM Diagnostics. - Page 4 G-Site/Passport Interface Quick Guide Page 4 of 10 LCD Screen Action/Information Shown DIAGNOSTICS This menu is only used for internal Daktronics testing purposes. POS STATUS About ABOUT 1. Press the MENU key followed by ENTER to select the Diagnostics Menu.
- Page 5 Configuring the DM-100 Gen III for Gilbarco G-Site/Passport Interface Quick Guide Page 5 of 10 Display Menu 1. Press the MENU key. DISPLAY MENU ENT TO BEGIN 2. Press the Down Arrow key to reach Display Menu. 3. Press ENTER to select the Display Menu.
- Page 6 Configuring the DM-100 Gen III for Gilbarco G-Site/Passport Interface Quick Guide Page 6 of 10 Configuration 1. Press the MENU key. 2. Press the Down Arrow key to reach Configuration. 3. Press ENTER to open Configuration. LCD Screen Action/Information Shown Press ENTER to begin editing line information.
- Page 7 Configuring the DM-100 Gen III for Gilbarco G-Site/Passport Interface Quick Guide Page 7 of 10 PoS Settings 1. Press the MENU key. 2. Press the Down Arrow key to reach Display Menu, and then press ENTER. 3. Press the Down Arrow key to reach PoS Settings.
- Page 8 Configuring the DM-100 Gen III for Gilbarco G-Site/Passport Interface Quick Guide Page 8 of 10 Modem 1. Press the MENU key. 2. Press the Down Arrow key to reach Display Menu, and then press ENTER. 3. Press the Down Arrow key to reach Modem.
- Page 9 Configuring the DM-100 Gen III for Gilbarco G-Site/Passport Interface Quick Guide Page 9 of 10 The following prompt is shown for both MANUAL and AUTOMATIC dimming selections: LCD Screen Action/Information Shown Press the Up and Down Arrow keys to modify the display’s current intensity.
- Page 10 Configuring the DM-100 Gen III for Gilbarco G-Site/Passport Interface Quick Guide Page 10 of 10 9. On the DM-100, press Menu > Detect Displays to verify all networks and displays are detected. 10. Verify all displays and lines are detected.


Need help?
Do you have a question about the DM-100 Gen III and is the answer not in the manual?
Questions and answers