Table of Contents
Advertisement
Quick Links
Congratulations on the purchase of
Wi-Fi
your emporiaSUPEReasy!
connection or
mobile data tariff
The emporiaSUPEReasy was developed in cooperation with our
required
customers. You will have lots of fun with it, because it not only
enables you to make phone calls and send text messages,
but also discover the Internet and the world of apps.
It's the perfect smartphone for beginners!
In addition, detailed
step-by-step instructions
are provided
www.emporia.eu
on our website
for a wide range of tasks such
as creating a WhatsApp group.
We hope your emporiaSUPEReasy brings you plenty of joy.
SUPEReasy
Sincerely,
Eveline Pupeter
emporia Telecom
User manual
Advertisement
Table of Contents

Subscribe to Our Youtube Channel
Related Manuals for EMPORIA SUPEReasy


Summary of Contents for EMPORIA SUPEReasy
- Page 1 It's the perfect smartphone for beginners! In addition, detailed step-by-step instructions are provided www.emporia.eu on our website for a wide range of tasks such as creating a WhatsApp group. We hope your emporiaSUPEReasy brings you plenty of joy. SUPEReasy Sincerely, Eveline Pupeter emporia Telecom User manual...
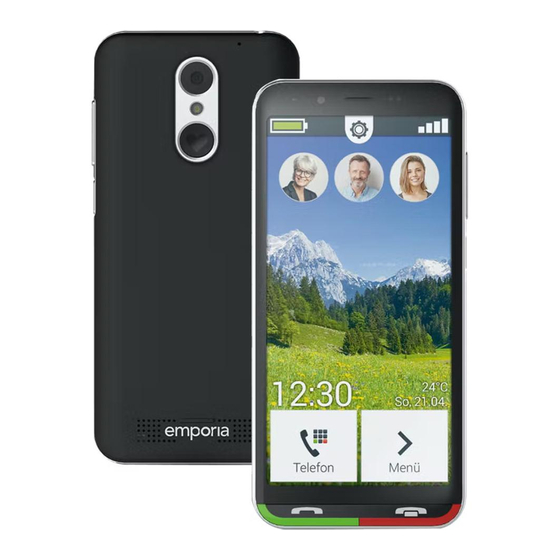
- Page 2 › YOUR MOBILE PHONE AT A GLANCE Headset port USB port Front-facing camera lens Loudspeaker (receiver) Touchscreen Green button (see page 27) • Short press: phone book • Long press: overview of all the open apps Red button (see page 28) •...
- Page 3 Your mobile phone at a glance Volume buttons (see page 28) On/Off button(see page 27) • Short press: sleep mode • Long press: turn the phone on or off • Double press: camera Camera lens Torch/flash Emergency button (optional) (see page 61) Battery cover (Two versions: one with the emergency button and one without it)
-
Page 4: Table Of Contents
Basic Android™ und Google settings ..... 16 Installing the emporia app....... 22... - Page 5 Emporia keyboard........
-
Page 6: Preparation
Wi-Fi connection or mobile data tariff required SUPEREASY User manual User manual The contents of this package are not suitable for young children and include small parts that can be swallowed. Google, Android and Google Play are trademarks of Google LLC. - Page 7 You can purchase these cards from electronics stores. What to do if a part is defective or missing › Please contact the Emporia Service Centre Monday-friday 08:00-04:00 service@emporiatelecom.co.uk • UK-Hotline: +44 1923 947778 www.emporiatelecom.co.uk/support/contact...
-
Page 8: Inserting A Sim Card, A Memory Card And The Battery
Preparation 1.2 Inserting a SIM card, a memory card and the battery Always disconnect the phone from the charger and turn the phone off before removing the battery cover. Take off the battery cover. › Begin with the recess in the bottom left-hand corner of the cover. - Page 9 Preparation Insert the SIM card. › The SIM card slot is located on the right above the battery compartment and the memory card slot. Slide the card in with the contacts facing down. Always use a tariff with a data package when using a smartphone. This will save you additional costs when transferring data while using the Internet.
- Page 10 Preparation Insert the data card (optional). › The memory card slot is located on the right above the battery compartment. Slide your data card into the slot with the gold contact facing down. Only use a memory card that is compatible with this phone, such as a microSD®...
- Page 11 Preparation Insert the battery. › Insert the battery, making sure the gold contacts of the battery and the phone are touching each other. Press the battery cover down onto the phone until it clicks into place on each side. Only use batteries, chargers and accessories that are permitted for this phone.
-
Page 12: Putting The Phone Into Operation
2. PUTTING THE PHONE INTO OPERATION 2.1 Charging the battery Before you use the phone for the first time, charge the battery for at least four hours. If you don't charge the phone for this period of time, the battery life could be reduced. Never connect the phone to the charger or a PC if a battery has not been inserted. - Page 13 Setting up your tablet Using a computer › • Plug the phone into a USB port on your computer. If necessary, disconnect the USB cable from the mains plug to do this. Charging your phone via a computer will take longer than charging it with the charging cable.
-
Page 14: Turning On The Phone
• The emporia logo will appear on the screen and a melody is played. When you turn your phone on the first time, the start-up process can take up to two minutes. The emporia logo will be on the screen when this is happening. Please do not interrupt this process. -
Page 15: Entering A Pin Code
Setting up your tablet 2.3 Entering a PIN code Enter the four-digit PIN code for your SIM card when asked to do so and confirm the entry. Your PIN code (personal identification number) will be a four-digit number combination and is intended to protect your SIM card and therefore your phone from misuse. -
Page 16: Using The Phone For The First Time
3. USING THE PHONE FOR THE FIRST TIME 3.1 Basic Android™ und Google settings When you use your smartphone for the first time, you need to select a number of settings. Selecting a language › English has been preselected as the 100 % standard system language. - Page 17 Using the phone for the first time Connecting to a Wi-Fi network › If possible, establish a Wi-Fi connection, 100 % so that future updates and downloads Connecting to a Wi-Fi network Connect to a network in order to download don't use your mobile data. apps or copy data.
- Page 18 Using the phone for the first time • You can check the password is correct again if you tap on Show password. To do this, 100 % MyWi-Fi Security swipe up in the display window until you WPA2 PSK Connecting to a Wi-Fi network Password Connect to a network in order to download see the checkbox.
- Page 19 Using the phone for the first time Set up a Google account › In the next step, you will be asked to sign in 100 % with your Google account. Enter your Gmail Signing in Sign in with your Google account. address and the password for the account to Learn more Email address or phone number...
- Page 20 Using the phone for the first time settings carefully and disable any individual functions you don't require. Then tap on ACCEPT. Selecting a search provider › • Select the Internet search engine provider whose service you want your phone to use when carrying out a search query. Protecting your smartphone ›...
- Page 21 Changing the wallpaper and font size › Finally, you can personalise your smartphone's wallpaper and adjust the font size. These settings will be applied to all your phone's system, but not to the emporia app. Now complete the installation process.
-
Page 22: Installing The Emporia App
To do this, check the box next to "I have read and I agree to all of the above." Confirm your selection by tapping on Next. Setting the emporia app as the home screen › Select the following settings to make... - Page 23 Male Female Email • Your smartphone will now start up with email the emporia interface every time. After the emporia app has been installed, Finish Step 3/3 the screen lock is activated as standard. Unlocking the screen › • Tap and hold the button with the padlock symbol or press and hold the green button.
-
Page 24: Emporia Interface
4. EMPORIA INTERFACE The following key fields and display symbols are located on the display: Battery icon: Tapping on the battery icon will open the battery information. Gear icon : (see page 50) Tapping on the gear icon will 12:30 open Quick settings. - Page 25 Icon bar symbols › Battery icon: Indicates the battery's charge status If you tap on the icon, it will show you the charge status as a percentage. Alarm clock: the alarm clock is on Silent: the silent audio profile is on Flight mode: Flight mode is on Signal strength: Indicates reception quality.
-
Page 26: Using The Phone
5. USING THE PHONE 5.1 Battery-saving mode and locking the screen If you don't use your phone for a certain period of time, the screen will switch to battery-saving mode and go black. You can reactivate the screen by pressing the on/off button briefly. -
Page 27: Buttons On The Phone
Using the phone Functions on the locked screen › If the screen is locked with the Swipe function, tap and hold the padlock icon. The symbol will then change to an open padlock and the phone will beep. If you have locked your screen with a PIN, you will have to enter your chosen code in order to unlock the screen. - Page 28 Using the phone Red button › • Tap briefly on this button to undo your last action. • Tapping and holding the red button will take you straight back to the home screen. Volume buttons › The volume buttons on the side of your phone allow you to adjust the volume, mute the phone when it is ringing or mute the alarm clock.
-
Page 29: Keyboard On The Screen
Using the phone 5.3 Keyboard on the Screen Whenever text input is necessary and you tap on the text input field, the software keyboard will automatically appear on the bottom half of the screen. There are several different keyboards, which you can access by tapping the grey buttons: Switch to the keyboard with capital letters. -
Page 30: Phone
6. PHONE This app enables you to make and receive calls and manage your contacts. Telephone › There are three ways of entering a phone Back Find number to make a call: Phone book Phone book: • Select a contact from the list Keypad Letzte Anrufe and tap on the name. - Page 31 Phone Accepting or rejecting a call › If you are called, you can accept the call by pressing the green key briefly or reject the call by pressing the red key. Options during a phone call › Loudspeaker Mute Mute Bluetooth Bluetooth Keypad Keypad...
-
Page 32: Phone Book (Contancts)
Phone 6.1 Phone book (contancts) The phone book displays all the contacts Back Find available on the phone. Add contact Mailbox Searching for a contact › Emergency To find a saved contact in the phone book, My phone number enter the first letters of the contact you are Favourites looking for in the search field. - Page 33 Phone Transferring contacts from your old phone to › your smartphone You have several options for transferring your contacts from your old phone to your smartphone: • Importing contacts from your SIM card The easiest thing to do is add the contacts from your old phone by transferring them with your SIM card.
- Page 34 Phone However, if you are using a new SIM card, e.g. because you have bought a new tariff for your smartphone, there are other options. Your specialist dealer can use a SIM card reader to transfer data from one SIM card to the other. •...
- Page 35 Phone • Delete contacts Select Delete to delete several contacts at once. Tap the box next to the contacts, you want to delete. Then select Delete to remove the selected contacts. Open and edit contacts › If you want to open a contact, Find Back tap on the picture ...
-
Page 36: Mailbox
6.4 Emergency call The emporia emergency call feature enables you to call up to five people in an emergency. Detailed instructions for setting up the emergency call function can be found in chapter... -
Page 37: My Favourites
Phone 6.5 My favourites You can specify three contacts that are already stored in your phone book as favourites. • Tap on Phone and open Phone book – My favourites. • Tap on one of the three placeholders. • Select a contact from the list. This contact will now be displayed as a favourite. -
Page 38: Menu
7. MENU The emporia apps will be displayed here, as well as other Google apps and system apps. The apps are listed in alphabetical order. Favourite apps › You can set up to seven apps as Favourite apps, which are then displayed at the top of the list. -
Page 39: Messages
Menu 7.1 Messages This application enables you to send and receive text messages (SMSs) and multimedia messages (MMSs). Writing a message › Select Write message. Enter the text using the keyboard on the screen. Sending a message › Enter a recipient that you want to send the message to. Select the field To or select Send on the keyboard. - Page 40 Menu Reading a message › A notification will inform you when you have received a message. On the start page, the number of new messages is then displayed in a red circle next to the message symbol. Tap on a new message in Messages to read it. You can also tap on the notification itself to read the new message.
- Page 41 Menu Forwarding a message › Open the message sequence that contains the message you want to forward. Tap on the message and select Forward in the options. The text will be copied into a new SMS message. Here you edit the text if necessary, add the recipient and then send the message.
-
Page 42: Camera
Menu 7.2 Camera Open the Camera app under Menu. Under Options you can switch to Video mode, switch from the Back camera to the Front camera and set the Picture size. To release the shutter, press the camera icon on the screen. Enlarge or reduce the image section (zoom) ›... -
Page 43: Photo Album
Menu 7.3 Photo Album The photo album displays all your photos as thumbnails and sorts them chronologically by month. You can adjust the number of photos displayed at a time using the + and - buttons, which are shown briefly when you open the photo album. Open photo album ›... - Page 44 Menu Send and copy a photo › Open a photo and select Options. With Share you can send the photo via Bluetooth, e-mail, MMS, etc. You can copy the photos to a PC when you make a USB cable connection. If you want to send more than one photo at the same time, tap and hold on one photo on the photo album overview screen.
- Page 45 Menu Connecting to a PC to transfer data › You can plug your smartphone into your PC and then transfer data easily. To do this, plug the USB connector end of the USB cable supplied with the phone into your PC and the other end into your phone.
-
Page 46: Info-Centre
Menu 7.4 Info-Centre This application provides you with an overview of all the notifications you have received regarding various apps. They can include missed calls, new messages and update notices for installed apps. Opening a notification › Open the Info centre and tap on a notification in the list displayed. -
Page 47: Email
Open the app and enter your email address and password. Your account is now set up on your phone. If you want to use the emporia email app, you need the following information in order to set up your account: • Your personal email address •... -
Page 48: System Updates
The installation was successful. If you receive a notification informing you of a system update, a new version of the emporia software is available. Please install this update as instructed to bring your phone's software up to... -
Page 49: Suggested Apps
Menu 7.7 Suggested Apps Under Suggested Apps you will find a selection of useful applications to download or use Google Play Store. 7.8 Play Store You can also install other apps from the Internet any time. To do this, turn on Wi-Fi or enable mobile data usage. You will find lots of helpful apps available for download in the "Google Play Store", for example. -
Page 50: Quick Settings
8. QUICK SETTINGS 8.1 Wi-Fi To set up a Wi-Fi connection, you need the name of the Wi-Fi network (network SSID) and the corresponding password. If you already have a Wi-Fi network at home, you can usually find this information on the underside of the Wi-Fi router. Enabling the Wi-Fi function on ›... - Page 51 Quick Settings Selecting and connecting to a Wi-Fi › • Tap on the Wi-Fi text button MyWi-Fi Security A list of available Wi-Fi networks will now WPA2 PSK Password be displayed. Show password • Tap on the network you want to connect Advanced options your phone to.
-
Page 52: Bluetooth
Quick Settings 8.2 Bluetooth Bluetooth is a wireless connection between electronic devices. It enables you to connect your phone to other Bluetooth-compatible devices such as a hands-free kit or an external speaker. Turning on Bluetooth › Open Quick settings and turn on Bluetooth in More settings. - Page 53 Quick Settings Coupling a Bluetooth device › Select the device you want to connect to your phone. Usually you will have to enter a code on your phone or the Bluetooth device for the connection to be established. In most cases, this code will be 0000 or 1234. You will find information on this in the user guide for the Bluetooth device.
-
Page 54: Nfc
Quick Settings 8.3 NFC NFC (near-field communication) is a communication standard used to transfer data wirelessly. It enables data to be transferred between devices that are very close to each other relatively easily. What is NFC used for? › • Contactless payment •... -
Page 55: Mobile Data
Quick Settings 8.4 Mobile data If you allow your phone to use mobile data, you can use the Internet, receive notifications, etc. any time. Back • Open Quick settings on the home screen Quick settings Torch by tapping on the gear icon. Alarm clock •... -
Page 56: Audio Profiles
8.5 Audio profiles • Media volume: Volume for media such as audio files and videos • Call volume: Volume for telephone conversations • Ringtone volume: Volume for the ringtone and the notification tone • Alarm volume: Volume at which the alarm rings •... -
Page 57: Wallpaper
8.7 Date and time Here you can select settings for the date, time, time zone and the formats you would like these displayed in. 8.8 Language and input Specify the language for your phone and select settings for the emporia keyboard here. -
Page 58: Emporia Keyboard
• Vibrate on keypress: The phone vibrates every time a button on the Emporia keyboard is pressed. • Sound on keypress: Every press of a button on the Emporia keyboard is accompanied by a clicking sound. • Pop-up on keypress: Every time a button on the keyboard is... - Page 59 Quick Settings The following text correction settings can be selected: • Block offensive words • Spellcheck • Auto-correction • Show correction suggestions The following advanced settings can be selected: • Suggestions for next word • Double-space full stop • Language switch key •...
-
Page 60: Display
Quick Settings 8.10 Display Select settings for the screen such as Brightness, Night light, Adaptive brightness and Advanced – Screen timeout. 8.11 Security settings To prevent your phone from being misused by other people, you can set a screen lock and a SIM card lock here. -
Page 61: Emergency Call Function
Emergency call function 9. EMERGENCY CALL FUNCTION Your phone is equipped with an emergency call function. You can use it to call for help quickly in an emergency. button has been preset to be off, as this function will only work efficiently if it is adapted to your needs. Read the instructions carefully and set the emergency function according to your needs. - Page 62 Emergency call function Who do I call in an emergency? › Any one of your saved contacts can be set as an emergency contact. The emergency call function only distinguishes between private individuals and help organisations. • A private individual must confirm your emergency call. This ensures that your call does not go through to an answerphone or a voicemail.
- Page 63 Emergency call function What happens after the emergency button is pressed? › If you press and hold the button on the back of the phone for three seconds, the emergency call sequence will begin. Warning tone › A continuous warning tone will start sounding immediately to draw the attention of people nearby to you.
- Page 64 Emergency call function Emergency call message › Private emergency contacts will be sent a text informing them of the incoming emergency call. You will receive an emergency call An audible warning signal will sound when you answer the call. Please press the 0 key three times to establish the connection.
- Page 65 If it is not possible to get through to the second contact, the third contact will be called automatically, and so on. All five contacts will be called a maximum of five times. After this, your emporia phone will automatically answer any incoming calls for one hour. Emergency call status ›...
- Page 66 Emergency call function What does the emergency call recipient have to do? › If you have set a private individual as an emergency contact, they will have to confirm your emergency call as follows: • An automatic announcement will be played when the call is answered.
- Page 67 Emergency call function 1. Select a position in your list of emergency contacts. 2. Contacts will open. Tap on a contact you want to be notified in an emergency. 3. Specify whether the contact is a private individual or a help organisation and then confirm your selection by tapping on Next.
-
Page 68: Appendix
The warranty is only valid if original batteries supplied by emporia have been used. To the maximum extent permitted by applicable law, emporia is under no circumstances responsible for the following situations: •... - Page 69 Appendix Technical details › • Dimensions: 138.2 × 66 × 10.65 mm • Weight: 155 g • Battery: Li-ion 3.8 V, 2500 mAh, 9.5 Wh (replaceable) • AC adapter: input: 100 - 240 V AC, 50/60 Hz, 0.3 A; output: DC 5.0 V, 1.5 A, 7.5 W •...
- Page 70 Appendix Frequencies › • BT: 2402 MHz - 2480 MHz Transmitter power: < 0.0055 W • BT LE: 2402 - 2480 MHz Transmitter power: < 0.0019 W • GPS: 1575.42 - 1575.42 MHz • FM: 87.6 MHz - 107.9 MHz •...
- Page 71 Appendix Declaration of conformity (DOC) › emporia telecom GmbH + CoKG (Industriezeile 36, 4020 Linz, Austria) hereby declares that the emporiaSUPEREASY (SE) telecommunication or radio device complies with Directive 2014/53/EU and UK Radio Equipment Regulations (S.I. 2017 No. 1206). The full text of the EU declaration of conformity can be viewed on this web page: https://www.emporia.eu/doc...
- Page 72 Appendix Safety instructions › Please read all the safety information in this user guide carefully and follow the advice. This is the only way you will avoid hazards and infringements. • Turn off your phone in hospitals and whenever you are near medical equipment. There should always be a distance of at least 20cm between a pacemaker and the phone when it is on.
- Page 73 Appendix meet the RF exposure requirements and should be avoided. Only use the device's built-in antenna or an approved antenna. • This device complies with the essential requirements and other relevant provisions of Directive 2014/53/EU. All the important radio test cases have been written.
- Page 74 Misprints, errors and technical changes excepted. PartNo: SE_BDA-V2_11107-EN | 202203 | English...
Need help?
Do you have a question about the SUPEReasy and is the answer not in the manual?
Questions and answers
how to introduce back istme?