Table of Contents
Advertisement
Quick Links
Advertisement
Table of Contents

Related Manuals for V-ZUG CookTop V6000 I905


Summary of Contents for V-ZUG CookTop V6000 I905
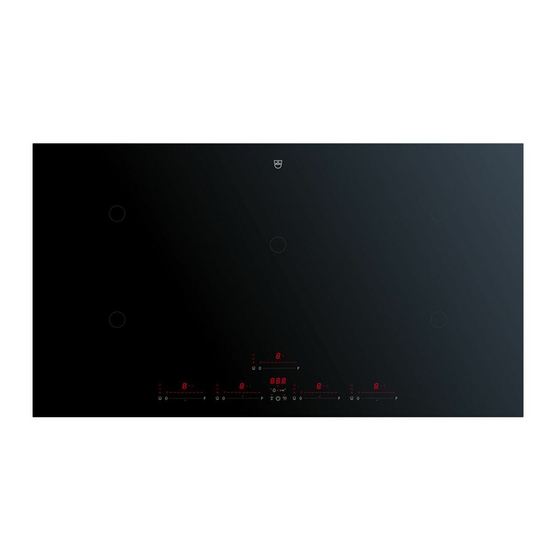
- Page 1 Operating instructions CookTop V6000 I905 Induction hob...
- Page 2 Validity These operating instructions apply to: Model designation Model number Type CookTop V6000 I905 31114 CTI6T95MMSOLD Variations depending on the model are noted in the text. © V-ZUG Ltd, CH-6302 Zug, 2022...
-
Page 3: Table Of Contents
Contents Changing user settings ........ 20 Safety precautions 4 Care and maintenance 20 Symbols used............ 4 General safety precautions........ 4 Cleaning agent ............ 21 Appliance-specific safety precautions .... 4 Trouble-shooting 22 Instructions for use.......... 5 Error messages............. 22 Using for the first time 8 Other possible problems........ -
Page 4: Safety Precautions
Safety precautions Symbols used Cleaning and user mainten- ance shall not be undertaken Denotes important safety precau- tions. by children without supervi- Failure to observe said precautions sion. can result in injury or in damage to ▪ If an appliance is not the appliance or fittings! equipped with a mains cable Information and precautions that... -
Page 5: Instructions For Use
1 Safety precautions ▪ WARNING: The appliance ▪ Do not operate the appliance and its accessible parts get using an external time switch hot during use. Be careful not or a separate remote control to touch the heating ele- system. ments. - Page 6 1 Safety precautions ▪ The appliance corresponds to recog- Caution: Risk to life nized technology standards and the rel- ▪ Packaging material, e.g. plastic film and evant safety regulations. Proper use of polystyrene, can be dangerous for chil- the appliance is essential to avoid dam- dren and animals.
- Page 7 1 Safety precautions ▪ The hob is designed to be used – signs of use, such as scratches or the wear and tear from pans and cookware, are normal. The more intensively it is used, the greater the signs of use; however, the appliance remains in perfect work- ing order and therefore does not give a right of complaint.
-
Page 8: Using For The First Time
Using for the first time The appliance must be installed and connected to the electricity supply in accord- ance with the separate installation instructions. Have a qualified fitter/electrician carry out the necessary work. All traces of adhesive must be removed before the appliance is used for the first time. -
Page 9: How Induction Hobs Function
3 Your appliance Displays Cooking zone power level Corresponding cooking zone for slider Operating time activated Timer activated Bridging function activated Operating time / timer Activated operating time for the Pause activated cooking zone Melting function activated Hob switched on Keep warm function activated Wipe protection activated / Restore available... -
Page 10: Cookware
3 Your appliance For even frying, the pan must be centred on . The diameter of the base of the pan should not be greater than the diameter of the cooking zone. If a large pan covers both circles, both heating zones can be switched on together with the bridging function. -
Page 11: Optiglass
3 Your appliance General notes on cookware ▸ As far as possible ensure that the dia- meter of the base of the cookware is the same size as the upper diameter of the cookware. ▸ We advise against the use of cook- ware with a pressed base as this type of cookware does not work with all in- duction hobs. -
Page 12: Operation
4 Operation Illumination ▸ Halogen or LED light bulbs are recommended for illuminating hobs with the OptiGlass coating. The use of fluorescent tube lighting to illuminate hobs with the OptiGlass coating causes the glass surface to shimmer. Operation Switching the appliance on and off ▸... -
Page 13: Melting Function
4 Operation Power Cooking method level Resume cooking, reducing, Vegetables, potatoes, sauces, fruit, fish stewing, steaming Resume cooking, braising Pasta, soup, braised meat Gentle frying Rösti, omelettes, breaded fried foods, sausages Frying, deep frying Meat, chips Flash frying Steak Fast heating Boiling water Melting function With the melting function... -
Page 14: Powerplus
4 Operation PowerPlus All the cooking zones are equipped with the PowerPlus booster. When PowerPlus is switched on, the cooking zone selected works at extra high power for 10 minutes. PowerPlus can be used, for instance, to heat a large quantity of water quickly. -
Page 15: Automatic Boost
4 Operation Switching the bridging function off ▸ Touch both sliders at the same time. – Both cooking zones revert to the previous settings. – Each cooking zone can be regulated individually again. 4.11 Automatic boost Do not leave the hob unattended when using the automatic boost. Risk of food boiling over, burning on and igniting! All the cooking zones are equipped with a selectable automatic boost. -
Page 16: Timer
4 Operation Changing the operating time ▸ Touch the button. – flashes in the display. ▸ Touch the slider for the required cooking zone. – The remaining operating time for the cooking zone selected is displayed. – The display for the cooking zone illuminates. ▸... -
Page 17: Childproof Lock
4 Operation – The first time the button is touched, illuminates in the display. ▸ The first time the button is touched, illuminates in the display. The standard value can be adjusted in the user settings. To quickly change the duration of the timer, press and hold the button. -
Page 18: Restore Function
5 OptiLink 4.15 Restore function If the appliance has been inadvertently switched off with the button, the settings that were being used can be restored within 6 seconds. ▸ Switch the appliance on. – The indicator light for the button flashes for 5 seconds. ▸... -
Page 19: Deactivating Optilink
6 User settings – The appliances are connected and OptiLink is active. Deactivating OptiLink Terminating the connection between the range hood and the hob: ▸ Access the user setting (see page 20). ▸ Select the user setting. ▸ Touch or swipe slider 1 to select the setting. -
Page 20: Changing User Settings
7 Care and maintenance Changing user settings ▸ With the appliance switched off, simultaneously hold the buttons de- pressed for 2 seconds. – An acoustic signal is emitted. ▸ Touch both sliders left of display 3. – An acoustic signal is emitted. –... -
Page 21: Cleaning Agent
7 Care and maintenance ▸ Remove melted plastic while still warm using a glass ceramic hob scraper. The sur- face of the glass ceramic hob could otherwise become damaged. ▸ Remove limescale stains when cool with a small amount of mild vinegar cleaner or lemon juice. -
Page 22: Trouble-Shooting
8 Trouble-shooting Trouble-shooting You may be able to trouble-shoot the following errors yourself. If not, note down the error message in full (message and E numbers) and then call Customer Services or report it to us online. Error messages Display Possible cause Solution flashes alternately... -
Page 23: Other Possible Problems
8 Trouble-shooting Display Possible cause Solution illuminate ▪ An object (e.g. paper) under- ▸ Remove any objects in the neath the hob is obstructing drawer underneath the the air intake. hob. ▸ Touch any button to ac- knowledge the error. ▸... -
Page 24: Technical Data
9 Technical data Problem Possible cause Solution The appliance is not ▪ The fuse or circuit breaker for ▸ Change the fuse. working and all the dis- electrical installations in the ▸ Reset the circuit breaker. plays are dark. home is defective. ▪... - Page 25 10 Disposal Disposal 10.1 Packaging Never allow children to play with packaging material due to the danger of injury or suffocation. Store the packaging material in a safe location or dispose of it in an environmentally-friendly way. 10.2 Safety Render the appliance unusable to prevent accidents caused by improper use (e.g. through children playing): ▸...
- Page 26 One Pancras Square 6 Scotts Road Gridiron Building Scotts Square #03-11/12/13 N1C 4G London 228209 Singapore GREAT BRITAIN SINGAPORE V-ZUG Hong Kong Co. Ltd. GÜRELLER 12/F, 8 Russell Street Anchor Sit.3A/1-2 Çayyolu Causeway Bay 06690 ÇANKAYA/ANKARA HONG KONG TURKEY Frigo 2000 S.p.A Private enterprise "Stirion"...
- Page 27 Index Addresses of the importers ......26 Noise during cooking........11 Appliance Notes ..............29 Disposal............ 25 Switching on and off ........ 12 Appliance overview ..........8 Operating and display elements...... 8 Appliance-specific safety precautions Buttons.............. 8 ................ 4 Displays ............ 9 Automatic boost ..........
- Page 28 Ending before time ........ 17 Finished ............ 17 Setting............ 16 Type............... 2 User settings............. 19 Changing............ 20 Switching off before time ...... 20 Using for the first time........8 Validity..............2 Warranty extensions ........31 Wipe protection ..........18...
- Page 29 Notes...
- Page 31 V‑ZUG service centre. Technical questions, accessories, warranty extensions V-ZUG is happy to help you with any general administrative or technical queries, to take your orders for accessories and spare parts and to inform you about our progressive service agreements.
- Page 32 ▸ Touch « » on the slider to heat a large quantity of water quickly. To switch cooking zone off ▸ Touch « » on the slider. To switch appliance off ▸ Touch the button. 1078198-06 V-ZUG Ltd, Industriestrasse 66, CH-6302 Zug info@vzug.com, www.vzug.com...
Need help?
Do you have a question about the CookTop V6000 I905 and is the answer not in the manual?
Questions and answers