Table of Contents
Advertisement
Quick Links
Advertisement
Table of Contents

Related Manuals for V-ZUG CookTop V4000 I604


Summary of Contents for V-ZUG CookTop V4000 I604
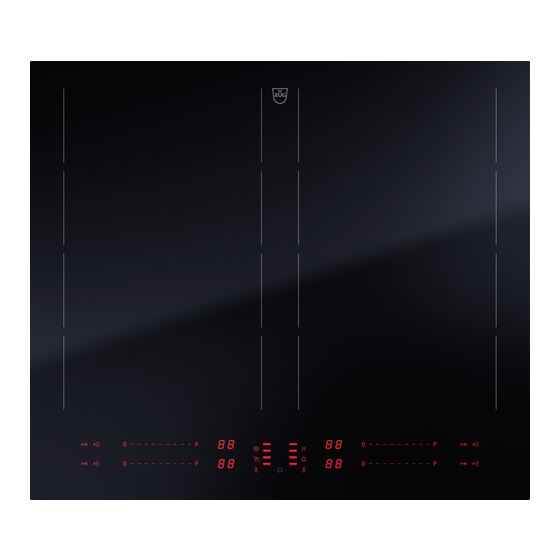
- Page 1 Operating instructions CookTop V4000 I604 | I804 Induction hob...
- Page 2 Validity These operating instructions apply to: Model designation Type CookTop V4000 I604 CTI4T-31157 CookTop V4000 I804 CTI4T-31158 Variations depending on the model are noted in the text. © V-ZUG Ltd, CH-6302 Zug, 2022...
-
Page 3: Table Of Contents
Contents Connecting the hob to the range hood.... 20 2 Deactivating OptiLink ........... 20 Safety precautions 4 User settings 21 Symbols used............ 4 Changing user settings ........ 21 General safety precautions........ 4 Restoring the factory settings ...... 22 Appliance-specific safety precautions .... -
Page 4: Safety Precautions
Safety precautions Symbols used Cleaning and user mainten- ance shall not be undertaken Denotes important safety precau- tions. by children without supervi- Failure to observe said precautions sion. can result in injury or in damage to ▪ If an appliance is not the appliance or fittings! equipped with a mains cable Information and precautions that... -
Page 5: Instructions For Use
1 Safety precautions ▪ WARNING: The appliance Instructions for use and its accessible parts get Before using for the first time ▪ The appliance must be installed and hot during use. Be careful not connected to the electricity supply in to touch the heating ele- accordance with the separate installa- ments. - Page 6 1 Safety precautions ▪ The heated surface will remain hot for How to avoid damaging the appliance some time after it is switched off and ▪ In case of overheating, switch the hot- will cool down only slowly to room tem- plate off and allow it to cool down com- perature.
- Page 7 1 Safety precautions ▪ There is no such thing as completely scratch-proof glass; scratches can even develop on sapphire glass, which is used in watches. The glass ceramic used is of the best quality available on the market.
-
Page 8: Using For The First Time
Using for the first time The appliance must be installed and connected to the electricity supply in accord- ance with the separate installation instructions. Have a qualified fitter/electrician carry out the necessary work. All traces of adhesive must be removed before the appliance is used for the first time. -
Page 9: Operating And Display Elements
3 Appliance description Operating and display elements Buttons Operating time Bridging function per ZoneFlex cooking zone Multi-function button Slider Appliance ON/OFF PowerPlus Pause cooking ON/OFF and re- store function User settings Wipe protection ON/OFF Timer Displays Digital display Timer The digital displays show the The timer is displayed in the digital power level, user settings and op- display at the bottom right and can... -
Page 10: Zoneflex Cooking
3 Appliance description ZoneFlex cooking A maximum of two items of cookware can be operated on any one ZoneFlex cooking zone. The hob detects cookware with a diameter of ø10 cm or larger, shows its position in the pan detection display and activates the corresponding slider. Pans with different diameters can be placed freely on the ZoneFlex cooking zones one behind the other. -
Page 11: Cookware
3 Appliance description Cookware Suitable cookware Only cookware with a magnetic base (ø 10 cm to 22 cm) is suitable for use with the in- duction hob. This can be checked in the following ways: ▪ A magnet sticks anywhere on the base of the cookware. ▪... - Page 12 3 Appliance description General notes on cookware ▸ As far as possible ensure that the dia- meter of the base of the cookware is the same size as the upper diameter of the cookware. ▸ We advise against the use of cook- ware with a pressed base as this type of cookware does not work with all in- duction hobs.
-
Page 13: Operating The Appliance
4 Operating the appliance Operating the appliance Switching the appliance on ▸ Hold the button depressed for 1 second. – An acoustic signal is emitted and the slider animation runs for a maximum 2 seconds. – The , buttons illuminate for 30 seconds. The displays disappear after 30 seconds. -
Page 14: Bridging Function
4 Operating the appliance Bridging function As soon as cookware is detected on the ZoneFlex cooking zone, the assigned cooking zone areas are automatically activated. Cooking zone areas can be assigned manually to cookware using the bridging function if no power is being delivered to the ZoneFlex cooking zone. -
Page 15: Operating Time
4 Operating the appliance Switching PowerPlus on ▸ Touch « » on the slider for the required cooking zone area. – illuminates in the digital display. – After 10 minutes it automatically switches back to power level . Removing the cookware interrupts PowerPlus. PowerPlus is resumed as soon as the cookware is placed back on the cooking zone areas. -
Page 16: Melting Function
4 Operating the appliance The operating time can also be increased or reduced quickly: ▸ To increase the operating time quickly, press and hold the right half of the slider ▸ To reduce the operating time quickly, press and hold the left half of the slider The default value can be adjusted in the user settings (see page 21). -
Page 17: Simmer Function
4 Operating the appliance Switching the keep warm function off ▸ Touch « » on the slider for the required cooking zone area or touch the button. – If no other entry is made and the other cooking zone areas are switched off, the ap- pliance switches off after 10 seconds. -
Page 18: Childproof Lock
4 Operating the appliance Changing the timer ▸ Touch the button. – The timer duration selected appears in the digital display for the timer. ▸ To change the duration of the timer, swipe the slider for the timer left or right. -
Page 19: Pause Cooking
4 Operating the appliance 4.13 Pause cooking With this function, the power level of all the cooking zone areas that are switched on can be switched to for up to 10 minutes. After pause cooking, operation can be resumed using the previous settings. Switching pause cooking on ▸... -
Page 20: Switching The Cooking Zone Area Off
5 OptiLink 4.17 Switching the cooking zone area off ▸ Touch « » on the slider for the required cooking zone area. – The cooking zone area is switched off. – If the cooking zone area is still hot, Illuminates in the digital display as long as there is a risk of burns. -
Page 21: User Settings
6 User settings User settings The following user settings can be set and saved individually: User setting Setting value Factory set- ting Button tone loudness Medium High Acoustic signal loud- ness Medium High Acoustic signal when No acoustic signal the timer is up Ends after 10 seconds Ends after 1 minute PowerPlus time... -
Page 22: Restoring The Factory Settings
7 Care and maintenance ▸ To save the change, hold the button depressed for 2 seconds. – An acoustic signal is emitted. – The appliance is switched off. ▸ To exit user settings without saving any change, touch the button. If no entry is made, the user settings are exited automatically after 1 minute. -
Page 23: Cleaning Agent
7 Care and maintenance Cleaning For good results, follow these cleaning instructions. ▸ To clean thoroughly, remove most of the soiling using a hob scraper or a special cleaning sponge for glass ceramic hobs. ▸ Add a few drops of a suitable Cleaning agent (see page 23) to the cold hob surface and rub over the surface using kitchen towel or a clean cloth. -
Page 24: Trouble-Shooting
8 Trouble-shooting Trouble-shooting You may be able to trouble-shoot the following errors yourself. If not, note down the error message in full (message and E numbers) and then call Customer Services or report it to us online. Error messages Display Possible cause Solution flashes alternately... - Page 25 8 Trouble-shooting Display Possible cause Solution flashes ▪ An interruption in the power ▸ Touch any button to ac- supply. knowledge the message. ▸ The appliance can be used again as normal. illuminate ▪ Object (e.g. pan, dish) on the ▸...
-
Page 26: Other Possible Problems
8 Trouble-shooting If a cooking zone area has been running for longer without any settings being changed, the appliance switches the cooking zone area off automatically, after how much time depends on the power level set. Power level / Function Safety shut-off after hrs.:mins. - Page 27 9 Technical data Problem Possible cause Solution OptiLink is not working ▪ The connection was not suc- ▸ Deactivate OptiLink on the cessful. hob. ▸ Re-establish the connec- tion. ▪ If the problem could not be ▸ Note down the serial num- resolved: ber (SN) of the appliance.
- Page 28 10 Disposal 10.3 Disposal The «crossed‐out wheeled bin» symbol requires the separate collection of waste ▪ electrical and electronic equipment (WEEE). Such equipment can contain hazardous, environmentally harmful materials. ▪ These appliances are to be handed over to a designated collection point for the recyc- ling of electrical and electronic equipment and must not be disposed of with unsorted household waste.
- Page 29 Index Terminating connection to range hood ................ 20 Acoustic signal ..........21 How induction hobs function ......9 Appliance Disposal............ 28 Switching off .......... 9, 20 Keep warm function ......9, 13, 16 Switching on .......... 9, 13 Switching off .......... 17 Appliance overview ..........
- Page 30 Product fiche............. 27 User setting........... 21 Queries .............. 31 ZoneFlex cooking zone ......8, 10 Quick instructions ..........32 Range hood Connecting to hob........ 20 Terminating connection to hob .... 20 Reducing ............13 Residual heat indicator ........14 Restore function ........... 9, 19 Resume cooking..........
- Page 31 Your repair order Call the free service number 0800 850 850 to contact your nearest V-ZUG service centre. You can arrange an on-site visit by us by phone if you wish. General queries, accessories and service agreement V-ZUG will be happy to help you with any general administrative or technical queries, to accept your orders for accessories and spare parts and to inform you about our pro- gressive service agreements.
- Page 32 To switch appliance off ▸ Hold the button depressed for 1 second. 1146976-03 V-ZUG Ltd, Industriestrasse 66, CH-6302 Zug Tel. +41 58 767 67 67, Fax +41 58 767 61 61 info@vzug.com, www.vzug.com Service Centre: Tel. 0800 850 850...
Need help?
Do you have a question about the CookTop V4000 I604 and is the answer not in the manual?
Questions and answers