Sign In
Upload
Download
Table of Contents
Contents
Add to my manuals
Delete from my manuals
Share
URL of this page:
HTML Link:
Bookmark this page
Add
Manual will be automatically added to "My Manuals"
Print this page
×
Bookmark added
×
Added to my manuals
Manuals
Brands
HP Manuals
Controller
MR Gen10 Plus
User manual
HP MR Gen10 Plus User Manual
Hide thumbs
1
2
Table Of Contents
3
4
5
6
7
8
9
10
11
12
13
14
15
16
17
18
19
20
21
22
23
24
25
26
27
28
29
30
31
32
33
34
35
36
37
38
39
40
41
42
43
44
45
46
47
48
49
50
51
52
53
54
55
56
57
58
59
60
61
62
63
64
65
66
67
68
69
70
71
72
73
74
75
76
77
78
79
80
81
82
83
84
85
86
87
88
89
90
91
92
93
94
95
96
97
98
99
100
101
102
103
104
105
106
107
108
109
110
111
112
113
114
115
116
117
118
119
120
121
122
123
124
125
126
127
128
129
130
131
132
133
134
135
136
137
138
139
140
141
142
143
144
145
146
147
148
149
150
151
152
153
154
155
156
157
158
159
160
161
162
163
164
165
166
167
168
169
170
171
172
173
174
175
176
177
178
179
page
of
179
Go
/
179
Contents
Table of Contents
Troubleshooting
Bookmarks
Table of Contents
Table of Contents
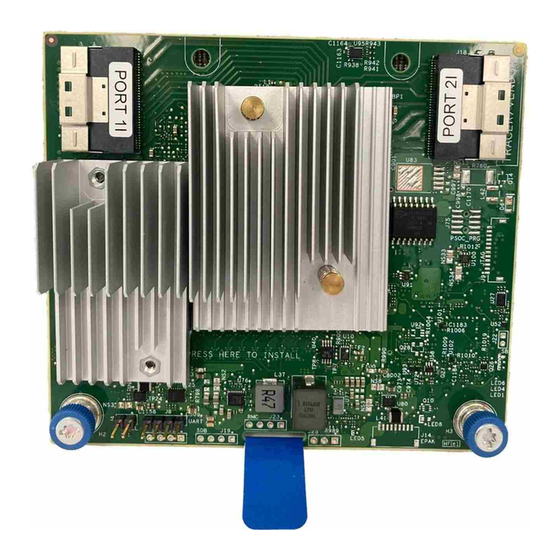
HPE MR Gen10 Plus Controller
Features
Controller Supported Features
Operating Environments
RAID Technologies
Transformation
Drive Technology
Security
Reliability
IO Performance Mode
RAID Technologies
Selecting the Right RAID Type for Your IT Infrastructure
Selecting RAID for Fault Tolerance
Selecting RAID for Write Performance
Selecting RAID for Usable Capacity
Selecting RAID for the Storage Solution
Mixed Mode (RAID and JBOD)
Striping
Raid
Mirroring
RAID 1 and RAID 1+0 (RAID 10)
Read Load Balancing
Parity
Raid
Raid
Raid
Raid
Parity Groups
Initialize
Fast Initialization
Full Initialization
No Initialization
Regenerative Writes
Backed-Out Writes
Full-Stripe Writes
Spare Drives
Dedicated Spare
Global Spare
Drive Rebuild
Foreign Configuration Import
Transformation
Array Transformations
Expand Array
Replace Drive
Logical Drive Transformations
Transportable Controller
Expand Logical Drive
Migrate RAID Level
Drive Technology
Hot-Plug Drive LED
Consistency Check
Dynamic Sector Repair
Online Drive Firmware Update
Predictive Drive Failure
Patrol Read
Security
Drive Erase
Simple
Normal
Thorough
Sanitize
Self-Encrypting Drive
Reliability
Cache Error Checking and Correction (ECC)
Thermal Monitoring
Performance
Manage SAS Storage Link Speed
Manage Pcie Storage Interface
Fastpath
Cache
Read Policy
Write Policy
I/O Policy
Drive Caching
Strip Size Selection
Installation
Installing in a Configured Server
Installing in an Unconfigured Server
Installing the Operating System with the Controller Driver
Configuring Boot Controller Options
Selecting a Boot Mode
Changing the Legacy BIOS Boot Order
Connecting Storage Devices
Connecting Internal Storage
Cable Part Numbers
Configuration
Array and Controller Configuration
MR Storage Administrator
Storcli
UEFI System Utilities
Using UEFI System Utilities
Configuration in UEFI System Utilities
Viewing Controller Information and Performing Common Actions
Configuration Management
Creating a Logical Drive
Selecting Drives to Include in a Logical Drive
Creating a Profile-Based Logical Drive
Importing Secured Foreign Drive
Viewing Array Properties
Viewing Global Spare Drives
Making a JBOD
Making an Unconfigured Good Drive
Clearing a Configuration
Controller Management
Managing the Controller
Advanced Controller Management
Clearing Controller Events
Saving Controller Events
Saving a Serial Log
Enabling Drive Security
Disabling Drive Security
Changing Drive Security Settings
Changing Drive Security Key Management Mode
Managing Link Speed
Managing Advanced SW Options
Scheduling a Consistency Check
Setting Factory Defaults
Configuring Advanced Controller Properties
Configuring Cache and Memory Settings
Configuring Patrol Read Settings
Configuring Spare Settings
Configuring Task Rates
Logical Drive Management
Viewing and Configuring Properties of a Logical Drive
Deleting a Logical Drive
Initializing a Logical Drive
Locating a Physical Drive Associated with a Logical Drive
Erasing a Logical Drive
Drive Management
Viewing Drive Properties
Locating a Drive
Initializing a Drive
Placing a Drive Offline
Erasing a Drive
Making a JBOD
Making an Unconfigured Good Drive
Making a Bootable Drive
Assigning a Global Spare Drive
Unassigning a Global Spare Drive
Sanitizing an Unconfigured Good Drive
Maintenance
System Maintenance Tools
Updating Software and Firmware
Diagnostic Tools
Troubleshooting Resources
Models
HPE MR Gen10 Plus Controller
Energy Pack Options
HPE Smart Storage Battery
HPE Smart Storage Hybrid Capacitor
Energy Pack Specifications
Specifications
Memory and Storage Capacity Conventions
RAID Conventions
Controller Specifications
Websites
Support and Other Resources
Accessing Hewlett Packard Enterprise Support
Accessing Updates
Remote Support
Customer Self Repair
Warranty Information
Regulatory Information
Documentation Feedback
Advertisement
Quick Links
1
Hpe Mr Gen10 Plus Controller
2
Controller Supported Features
3
Raid Technologies
Download this manual
HPE MR Gen10 Plus Controller User Guide
HPE MR Gen10 Plus Controller User Guide
Part Number: 30-9E6EB4E3-002
Published: April 2022
Edition: 2
Table of
Contents
Previous
Page
Next
Page
1
2
3
4
5
Advertisement
Table of Contents
Need help?
Do you have a question about the MR Gen10 Plus and is the answer not in the manual?
Ask a question
Questions and answers
Related Manuals for HP MR Gen10 Plus
Controller HP StorageWorks P2000 Firmware Release Notes
Iscsi msa system controller firmware release notes (10 pages)
Controller HP MSM7XX Reference Manual
Access controller; mobility controller (206 pages)
Controller HP MSM7xx Management And Configuration Manual
(658 pages)
Controller HP 166207-B21 - Smart Array 5302/32 RAID Controller Reference Manual
Smart array controllers configuring arrays (112 pages)
Controller HP MSM720 Specification
Msm controller series (27 pages)
Controller HP MSM720 Installation Manual
(25 pages)
Controller HP MSM720 Installation Manual
(33 pages)
Controller HP MSM760 Quick Start Manual
(8 pages)
Controller HP MSM760 Quick Start
(2 pages)
Controller HP MSM765zl Reference Manual
Msm7 series controllers cli (244 pages)
Controller HP P Class 450/500/550/600/650/700/750 Specifications
Hp p class 450/500/550/600/650/700/750: specifications (3 pages)
Controller HP MSM710 Installation Manual
Access controller/mobility controller (27 pages)
Controller HP MSM710 Quick Start Manual
(6 pages)
Controller HP HPE MR Gen11 User Manual
(60 pages)
Controller HP D5970A - NetServer - LCII Configuration Manual
Integrated hp netraid controller configuration guide (141 pages)
Controller HP 3100ES - Smart Array RAID Controller Manual
Raid 1(+0): breaking mirrors and rebuilding drives (9 pages)
This manual is also suitable for:
Mr216i-a gen10 plus
Mr216i-p gen10 plus
Mr416i-a gen10 plus
Mr416i-p gen10 plus
Table of Contents
Print
Rename the bookmark
Delete bookmark?
Delete from my manuals?
Login
Sign In
OR
Sign in with Facebook
Sign in with Google
Upload manual
Upload from disk
Upload from URL


Need help?
Do you have a question about the MR Gen10 Plus and is the answer not in the manual?
Questions and answers