
Related Manuals for Tenmars TM-102


Summary of Contents for Tenmars TM-102
- Page 1 DIGITAL CLAMP METER TM-102 User’s manual HB2TM1020010 www.eastern-energy.net Email: info@ete.co.th...
-
Page 2: Table Of Contents
CONTENTS 1. General Description & Specifications .... 1 2. Name and Funtions ........3 3. Calibration Procedures ........6 4. Measurement Preparation ......7 5. Operating precautions ........7 6. Measurement..........8 www.eastern-energy.net Email: info@ete.co.th... -
Page 3: General Description & Specifications
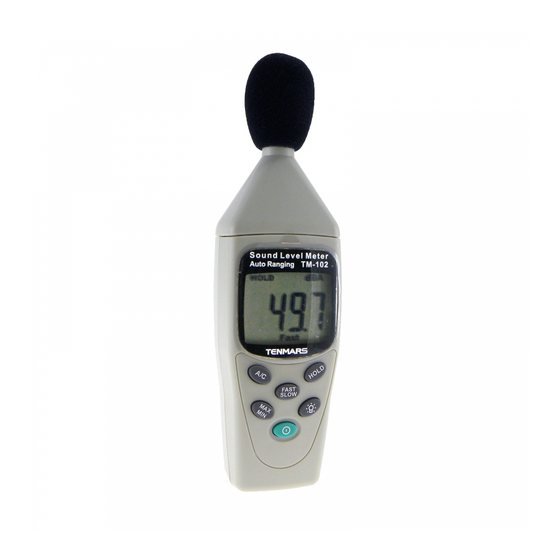
TM-102 Thank you for using our Sound Level Meter. To ensure that you can get the most from it, we recommend that you read and follow the manual carefully before use. This unit conforms to the IEC651 Type2, ANSI S1.4 Type2 for Sound Level Meters. - Page 4 TM-102 k. MAX/MIN:Hold readings for the Maximum and Minimum value. DATA HOLD:The reading data shown on LCD can be locked while pressing the button m. Low Battery Indication: Replace battery as LCD display “ ”. n. Power Supply: 9V NEDA 1604,IEC 6F22,JIS 006P battery×1pcs.
-
Page 5: Name And Funtions
TM-102 2. NAME AND FUNTIONS 1. Windscreen 2. Display 3. DATA HOLD button 4. Frequency weighting select button 5. Time weighting select button 6. Maximum/Minimum hold button 7. Backlight button 8. Power button 9. Microphone 10. Battery Cover Windscreen If you operate at wind speed over 10m/sec, please put protective accessories-windscreen in front of the microphone. - Page 6 TM-102 Display a. Low battery indication b. DATA HOLD indication c. Maximum indication d. Minimum indication e. A-Weighting f. C-Weighting g. Slow response h. Fast response i. Sound level read out Power button. The key for 1sec to turn the sound level meter ON or OFF.
- Page 7 TM-102 SLOW:for checking average level of fluctuation noise. HOLD button. The reading data shown on LCD can be locked while pressing the button. Backlight button. Press the button you enable the display backlight to easy readings in dark environments. Press more than 1 second to disable backlight, which however it automatically OFF after 15 seconds.
-
Page 8: Calibration Procedures
TM-102 3. CALIBRATION PROCEDURES Using a standard Acoustic Calibrator(94dB,1KHz Sine wave) Acoustic calibrator Sound level meter 1. Make the button settings. Display:dBA Time weighting:FAST 2. Insert the Microphone nozzle carefully into the insertion hole of the calibrator. 3. Press A/C button then press the HOLD button, hold the 2 buttons at the same time more than 1 second. -
Page 9: Measurement Preparation
TM-102 The 94 dB calibration process can be repeated until the meter reads 94.0 dB. Recalibration cycle:1 year. 4. MEASUREMENT PREPARATION 1. Battery Loading Remove the battery cover on the back and put in one 9V Battery. 2. Battery Replacement When the battery voltage drops below the operating voltage, the mark appears. -
Page 10: Measurement
TM-102 6. MEASUREMENT 1. Open battery cover and install a 9 Volt battery in battery compartment. 2. Turn on power and select the desired response time and weighting. If the sound source consists of short bursts or only catching sound peak, set response to FAST.
Need help?
Do you have a question about the TM-102 and is the answer not in the manual?
Questions and answers