Table of Contents
Advertisement
Quick Links
Advertisement
Chapters
Table of Contents
Troubleshooting

Related Manuals for Bellini BP470EC


Summary of Contents for Bellini BP470EC
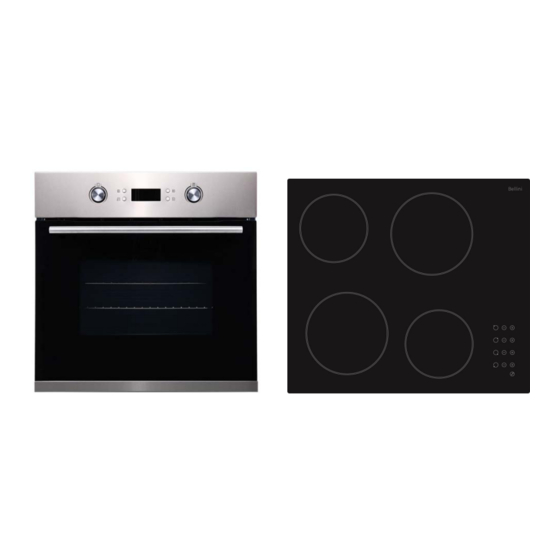
- Page 1 INSTALLATION & OPERATION INSTRUCTIONS 60cm Electric Oven & 60cm Ceramic Cooktop BP470EC GSM Retail Australia Pty Ltd ABN: 53 007 582 475 For Warranty and technical queries: 1300 373 199 Aust 0800 764 912 NZ V5 Aug22 www.belliniappliances.com.au...
- Page 2 Model No. BOM609CX FINELINE: 5103646 Aus Only BOM609CX-F INCLUDED IN BUILDERS PACKS: BP370EG & BP470EC GSM Retail Australia Pty Ltd ABN: 53 007 582 475 For Warranty and technical queries: 1300 373 199 Aust 0800 764 912 NZ www.belliniappliances.com.au u...
- Page 3 Th ank you Thank you for choosing Bellini Appliances. All Bellini appliances carry a 3 year In Home warranty, be sure to retain your installation and user manual and receipt. For all warranty and technical queries please contact Australia 1300 373 199...
-
Page 4: Table Of Contents
Content Safety instructions----------------------------- 2 Product description---------------------------- 4 Installation----------------------------------------7 Start Using your Oven--------------------------9 Troubleshooting --------------------------------12 Maintenance and cleaning -------------------13 Warranty------------------------------------------ 15... -
Page 5: Safety Instructions
The manual should be kept in a safe place for future reference. In case of failure, only the Authorised Technical Service may repair this oven. Otherwise the guarantee will be null and void. All Bellini Appliances are for domestic use only. - Page 6 To reduce the risk of fire, do not place or install Do not use the door as a shelf. this unit in areas where the ventilation or Do not push down when the oven door is open. circulation ducts may become blocked.
-
Page 7: Product Description
Product Description Function Selection Knob Select what function you want or +/- time digit Plus/minus Knob Increase/decrease temperature or time digit To enter into minute minder program before Minute Minder Button cooking start. LED display 1. To tell which function you choose 5. - Page 8 Accessory Name Picture Quantity Baking tray 1 pair Grill rack Screws(ST4x3 ) 0 2 pairs and Distant holder Rubber stopper Technical Specifications product dimensions usable electrical max. power (h x w x d) mm net weight capacity connection rating 70 litres 595 x 595 x 575 Approx.
-
Page 9: Installation
Installation WARNING! Please follow the points below when installing the appliance available from the vinyl-wrap supplier. Use an Authorized Person As stated in the local municipal building codes GSM cannot accept responsibility for damage and other relevant statutory regulations: caused by installation into low temperature Wiring connections must be in accordance with tolerant cabinets. - Page 10 Hard Wired Appliances : When making the mains supply conductor connections to the terminal block within the terminal box , please ensure that minimum clearances are being maintained between individual conductors and conductors/ connectors to the adjacent metal surfaces of the terminal box itself , where possible add heat shrink sleeves to any bare conductor end/connectors prior to securing.
-
Page 11: Start Using Your Oven
Start Using Your Oven Preparing Your Oven Please remove all stickers, leaflets and boxes from the door and from the floor of the oven before operation. Please wipe out the oven interior prior to operation with warm soapy water and polish dry with a soft clean cloth. - Page 12 Function Description Switch off function Oven Light Enables the user to observe the progress of cooking without opening the door The circulation of air at room temperature enables quicker thawing of frozen food, Defrost (Without the use of any heat). It's a gentle but quick way to speed up the defrosting time and thawing of ready-made dishes and cream filled produce etc.
- Page 13 Work With Timer Timer function enables you to set the oven start cooking at desired time and duration. O’clock setting – You need to set up current O’clock time before timer or minute minder function. 1. When the first time oven connects to power supplier, LED display shows “0:00”, a beep will be sounded and oven enters into standby mode.
- Page 14 Work With Minute Minder The oven has a Minute Timer built inside to give a sound alert when time is up, but oven keep heating. This feature can remind you turn over food or add some condiment after a period of time of cooking. 1.
-
Page 15: Troubleshooting
Troubleshooting In the event of an emergency, you should: Switch OFF all controls of the appliance Disconnect the mains plug Call the service centre Some minor faults can be fixed by referring to the instructions given in the table below. Before calling the ... -
Page 16: Maintenance And Cleaning
Maintenance and Cleaning WARNING! Before cleaning your oven, or performing maintenance, disconnect it from the power supply. Do not use steam cleaners. Do not line the oven bottom with aluminium foil, as the consequent accumulation of heat could compromise the cooking and even damage the enamel. ... - Page 17 Replacement of the Oven Light Bulb WARNING! In order to avoid the possibility of an electric shock ensure that the appliance is disconnected from the power supply before replacing the bulb. Set all control knobs to the “OFF” position (● / 0) ...
-
Page 18: Warranty
Consumer until the expiry of three (3) year (Warranty Period). If within the Warranty Period a manufacturing defect is discovered in the Bellini product or it fails to perform to the Company’s specifications as a result of some defect in materials, components or workmanship (Defect) then the Company will, at its option, repair the Bellini product or supply a replacement Bellini product free of charge. - Page 19 1.10 If you are required to transport the Bellini product to the Company or its service agent, you must ensure it is safely disconnected by a qualified tradesman and securely packed and insured. The Company does not accept any responsibility for loss or damage of the Bellini product prior to it being received by the Company or its service agent.
- Page 20 INSTALLATION & OPERATION INSTRUCTIONS 60cm Built In Ceramic Cooktop Model No. BC604TG BC604TG-F FINELINE: 5103045 - Aus & NZ GSM Retail Australia Pty Ltd ABN: 53 007 582 475 For Warranty and technical queries: 1300 373 199 Aust 0800 764 912 NZ www.belliniappliances.com.au u...
- Page 21 Thank you Thank you for choosing Bellini Appliances. All Bellini appliances carry a 3 year In Home warranty, be sure to retain your installation and user manual and receipt. For all warranty and technical queries please contact Australia 1300 373 199...
- Page 22 Content Safety instructions----------------------------- 2 Product description---------------------------- 4 Installation----------------------------------------5 Start using your appliance--------------------8 Maintenance and troubleshooting---------13 Warranty----------------------------------------- 14...
-
Page 23: Safety Instructions
The manual should be kept in a safe place for future reference. In case of failure, only the Authorised Technical Service may repair this hob. Otherwise the guarantee will be null and void. All Bellini Appliances are for domestic use only. - Page 24 Young children should be supervised to ensure that Safety when cleaning they do not play with the appliance. For cleaning, the appliance must be switched off and cooled down. To avoid small children and pets unintentionally For safety reasons, the cleaning of the switching the appliance on, we recommend ...
-
Page 25: Product Description
Product description 1. max. 1800 W zone 2. max. 1200 W zone 3. max. 1800 W zone 4. max. 1200 W zone 1. Zone choosing key 2. Child lock 3. Power level control Accessory Name Picture Quantity ( for reference only, physical unit maybe different) User Manual Fixing Bracket Screw M 4x10... -
Page 26: Installation
Installation Selection of installation equipment Cut out the work surface according to the sizes shown in the drawing. For the purpose of installation and use, a minimum of 50mm space shall be preserved around the hole. Be sure the thickness of the work surface is at least 30mm. Please select heat-resistant work surface ... - Page 27 Before locating the fixing brackets The unit should be placed on a stable, smooth surface (use the packaging). Do not apply force onto the controls protruding from the hob. Fix the hob on the work surface by screw four brackets on the bottom of hob (see picture) after installation. ...
- Page 28 Yellow / Green Black Brown Blue If the total number of heating unit of the appliance you choose is not less than 4, the appliance can be connected directly to the mains by single-phase electric connection, as shown below. Yellow / Green Black Brown Blue...
-
Page 29: Start Using Your Appliance
Start using your appliance Description Explanation Control to Increase/decrease Power setting of the zones, from 1 to 9, for example, this display power shows power selected at level 5 Touch it to lock keys(display shows “Lo”) and press and hold for a while to unlock. - Page 30 Start cooking Power on the unit After power on, the buzzer beeps once, all the indicators light up for 1 second then go out, indicating that the ceramic hob has entered the state of standby mode. Place a suitable pan on the cooking zone that you wish to use. Make sure the bottom of the pan and the surface of the cooking zone are clean and dry.
- Page 31 Locking the Controls • You can lock the controls to prevent unintended use (for example children accidentally turning the cooking zones on). • When the controls are locked, all the controls except for the ON/OFF keys are disabled. To lock Touch the child lock key.
- Page 32 Cooking tips: Heat setting Suitability • delicate warming for small amounts of food 1 - 2 • melting chocolate, butter, and foods that burn quickly • gentle simmering • slow warming • reheating 3 - 4 • rapid simmering • cooking rice •...
- Page 33 Choosing the right Cookware Do not use cookware with jagged edges or a curved base. Make sure that the base of your pan is smooth, sits flat against the glass, and is the same size as the cooking zone. Always centre your pan on the cooking zone. Always lift pans off the ceramic hob –...
-
Page 34: Maintenance And Troubleshooting
Maintenance & Troubleshooting Caution: Before maintenance or cleaning is carried out, the cooktop should be disconnected from the main power supply. Ensure that the cooktop is switched off at the wall socket and the plug removed. Spills and splashes will not harden and stick to the glass, as it hardly heats up. ... -
Page 35: Warranty
Consumer until the expiry of three (3) year (Warranty Period). If within the Warranty Period a manufacturing defect is discovered in the Bellini product or it fails to perform to the Company’s specifications as a result of some defect in materials, components or workmanship (Defect) then the Company will, at its option, repair the Bellini product or supply a replacement Bellini product free of charge. - Page 36 1.10 If you are required to transport the Bellini product to the Company or its service agent, you must ensure it is safely disconnected by a qualified tradesman and securely packed and insured. The Company does not accept any responsibility for loss or damage of the Bellini product prior to it being received by the Company or its service agent.
Need help?
Do you have a question about the BP470EC and is the answer not in the manual?
Questions and answers