
Related Manuals for Eneo IND Series


Summary of Contents for Eneo IND Series
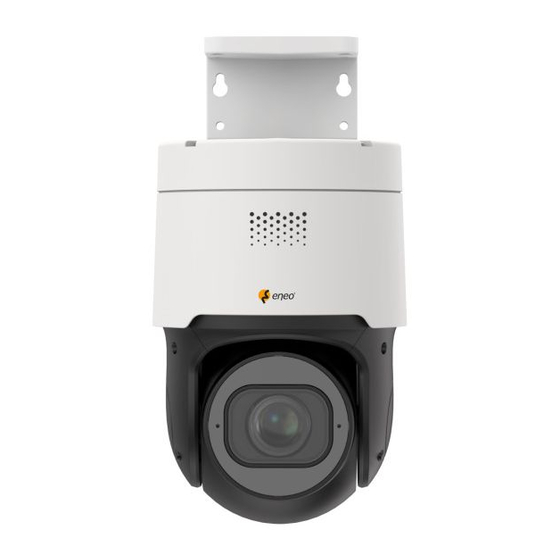
- Page 1 User Manual Network Camera, Day/Night IND- & INB-Series INP-58M2812M0A Learn more about eneo IN series on our YouTube channel.
-
Page 2: Table Of Contents
User Manual Table of Contents Introduction ................................... 4 Statement: ..................................4 CAUTION ..................................4 1、Overview ................................. 5 1.1、Range of Application ............................ 5 1.2、Product Description ............................5 1.3、Operation Environment ..........................6 2、Device Connection..............................6 2.1、Connection to PC ............................6 2.2、Connection to router/switch ........................6 3、Network Connection &... - Page 3 User Manual 8.5.2.2、Record Schedule ......................28 8.5.3、Capture ............................28 8.5.3.1、Capture configuration ....................... 28 8.5.3.2、Capture Schedule ......................28 8.6、Event ................................29 8.6.1、Setup .............................. 29 8.6.1.1、Motion Setup ........................29 8.6.1.2、Sound Detection Setup ....................30 8.6.1.3、Deterrence Setup......................31 8.6.1.4、Video Tampering Setup ....................32 8.6.2、Alarm ..............................
- Page 4 User Manual 8.8.3、FTP ..............................60 8.8.4、RTSP ............................. 60 8.8.5、DDNS ............................. 61 8.8.6、HTTPS ............................61 8.8.7、IP Filter ............................62 8.9、Device ................................. 62 8.9.1、Disk Management ........................62 8.9.2、Audio Setting ..........................63 8.9.3、Cloud .............................. 64 8.10、System ..............................64 8.10.1、General ............................64 8.10.1.1、Date and time ........................64 8.10.1.2、Daylight Saving Time (DST) ..................
-
Page 5: Introduction
User Manual Introduction Thank you for using our network camera products. Our network camera products are integrated and developed for network video monitoring, including Storage Network Bullet, Wireless Storage Network Bullet, IR Network Dome, IR Network Weather-Proof Cameras and High-Speed Network Ball. High- performance single SOC chips are used in media processor for audio/video acquisition, compression and transmission/transfer. -
Page 6: 1、Overview
User Manual 1、Overview 1.1、Range of Application The network cameras with powerful image processing capacity may be applied at various public places such as mall, supermarket, school, factory and workshop, as well as in environments requiring HD video image such as bank and traffic control system, as shown below: 1.2、Product Description An IP camera is a digital online surveillance camera embedded with Web server and capable of independent operation, giving user access to real-time monitoring through web browser or client software... -
Page 7: Operation Environment
User Manual 1.3、Operation Environment Operating system: Windows XP / Windows 7/ 8/10/11 / MacOS 10 or above CPU: Intel I3 or above Memory: 2G or higher RAM: 1G or higher Display: 1024 × 768 or higher resolution Browser: IE10 or higher version; Chrome 57 or higher version, Firefox 52 or higher version, Edge 41 or higher version;... -
Page 8: 3、Network Connection & Ip Assignment
If necessary, uncheck “DHCP”. Make the necessary settings and confirm with “OK”. The camera settings are updated. Now you can also perform a factory reset of the camera inside the eneo Site Manager. For further information, please refer to the eneo Site Manager Quick Start Guide. -
Page 9: 4、Web Log In
User Manual 4、Web Log in 4.1、Initial login In the first time accessing the web of the camera, you have to set an admin password to activate your device. the interface as shown in Figure 4.1.1 will be popped up. Click to check password requirements: 1、The password should be 8-15 characters, including letters, numbers or special characters. -
Page 10: Log-In
User Manual Set a new password, click OK to save, the interface shown as Figure 4.1.2 will pop up. You can check to choose the corresponding password reset method, or cancel the setting directly without checking, and the password reset function will not be enabled. Figure 4.1.2 ①、Security Question Configuration:... -
Page 11: Reset Password
User Manual 4.3、Reset Password After the device is activated, you should properly keep the password. When you forget the password, there are three methods to reset. At the first access, you have to configure at least one password resetting method. For details please refer to section 4.2- <Log in> 4.3.1、Security Question Configuration Go to the <Recover password>... -
Page 12: Super Code
User Manual 4.3.3、Super Code On the user login interface, Click <Recover Password> Select the <Super Code> option Calculate one super code through a <Super code> tool 1、Input the system time 2、Input the Mac address of Device 3、Click <Generate> Then you will get a 6-digital code. Input the <Super Code>... -
Page 13: 5、Plug-In Installation
User Manual 5、Plug-in Installation Use IE browser to log in, you need to install the plug-in to preview the image normally. When the prompt in Figure 5.1.1 appears, please download and install the plug-in according to the prompt. Figure 5.1.1 Note: Programs without plug-ins are supported. -
Page 14: Recording Status
User Manual the main stream. Mobile stream: The bandwidth and requirements for the PC are the lowest, but the image is also the worst. Main menu switching bar: Switch the function interface of the web. The web terminal has 4 menus: Live, Playback, Remote Setting, and Local Settings. -
Page 15: 7、Playback
User Manual 7、Playback The camera not only needs to allow us to see the real-time image, but also needs to save the image information so that it can be retrieved and viewed when needed. 7.1、General Playback The playback function is mainly composed of General video search and AI search functions. The following figure shows the video search. -
Page 16: Picture Search
User Manual 7.2、Picture Search Click <Playback> menu Set Search condition, such as type, date and time etc. and click <Search> The matched video files show in the search results display area. When camera enable <auto-capture> function, you can search and play these pictures auto captured. -
Page 17: Smart Ai
User Manual 7.4、Smart AI Log in with a plug-in free browser to playback smart AI. Refer to below Figure The blue in the processing bar stand for the alarm triggered by human. 1、Select <Smart> option 2、Select the <date> you desire to search, and click search and you will be prompted with the date of the video file. -
Page 18: Face Detection
User Manual 7.5、AI 7.5.1、Face Detection The camera performs face recognition function, stores the captured face images to the TF card, and saves the image related information at the same time. During the search, you can quickly retrieve the face capture that meets the user's requirements as needed, and quickly locate the video according to the capture. -
Page 19: Pid&Lcd
User Manual Vehicle> (Note: Non-motorized Vehicle refer to the bike, motor-bicycle & electric bicycle.) Click <Search> to search for the human & vehicle snapshot. Display area of Searching images: will display the searched face snapshot according to Search and Comparison result. Double-click the images to playback the video which was recorded before and after the detection. -
Page 20: Face Attendance
User Manual Set the <End time> of searching for human & Vehicle capturing Set the <minimum time interval> between two snapshots of the same target during search to increase its accuracy Similarity: allow you set the minimum similarity value to other reference pictures when matching and comparing repeat customers. - Page 21 User Manual database group. When selecting <By Face>, system will pop up the following interface. Click <Select Images> and choose a face you desired, then will popup the below window: Click <Alarm Group> and click <Search> again. All faces under this group will be searched. Select one face you desire to proceed the face attendance.
-
Page 22: License Plate
User Manual “○”stand for Absence Green line refers to Start time and End time Click one <Name> to check one person’s attendance info. At the lower right, display the detailed time processing bar, and the time information matching this person will be marked with a red bar. Click the Red bar to popup to the corresponding fast playback interface. -
Page 23: 8、Remote Setting
User Manual For example: If set three characters and there are a car with license plate B594SB in the Allow List, one car with license plate B734KB pass by the detection area, At this time alarm will be triggered. Click <Search> All the images which meet the Search Request will be displayed in the display area. -
Page 24: Image Control
User Manual 8.2、Image Control Image control is to directly control and modify graphics parameters, such as color to black mode, wide dynamic, backlight supplement, etc. The interface is shown as below. Image Setting: allow you set image mode, it include three modes. Full color –... - Page 25 User Manual function, you need to set the start and end time of night vision. <IR-CUT Delay>:Allow you switch between day and night through IR-cut, the duration of IR-CUT need to be determined. For example, when switching the night vision, the night vision switch will only be performed when the camera is in the dark and the holding time exceeds the set threshold time.
-
Page 26: Video Cover
User Manual 8.3、Video Cover In actual application scenario, some areas are not suitable for monitoring and recording. Those areas can be hidden in the video through this function. The interface is shown in the figure below. Enable:Switch to turn on the function. Cover Area:Set the area that needs to be covered on the monitoring screen. -
Page 27: Record
User Manual 8.5、Record This menu allows you to configure the preview and recording parameters. 8.5.1、Encode This menu allows you to configure the image quality of recorded video or network transmission. Generally, the main stream is the quality of the recorded video that will be saved in the HDD; the sub stream is the preview video quality through remote access (such as Web client and CMS). -
Page 28: Record
User Manual 8.5.2、Record 8.5.2.1、Record Parameters Record parameters can be set by this menu. Stream Mode: The video stream to be saved in the SD card in recording mode. The default is the main stream. Record: Check to enable record. Pre-Record: If this option is enabled, the IPC will start recording a few seconds before the alarm event occurs. -
Page 29: Record Schedule
User Manual 8.5.2.2、Record Schedule The camera would automatically start/stop record according to the configured record schedule. Drag the mouse cursor on time bar to configure its record schedule. 8.5.3、Capture 8.5.3.1、Capture configuration Normal Interval: refer to time interval of capturing during normal record. Alarm Interval: refer to time interval of capture when triggered motion, I/O alarm and PIR alarm Auto Capture: Set <auto Capture>... -
Page 30: Event
User Manual Normal: When the area is marked in green, it means that the channel takes a normal capturing at the corresponding time of the area. Motion: When the area is marked in yellow, it means that the channel takes a motion capture at the corresponding time of the area. -
Page 31: Sound Detection Setup
User Manual 8.6.1.2、Sound Detection Setup When the camera detects a change in the connected audio and meets the requirements of the alarm detection setting, an alarm will be triggered. Enable:Turn on/off sound detection. Rise:The alarm will be triggered only when the volume rises steeply. Rise Sensitivity: Fine-tuning sound rise sensitive detection, and the sensitivity can be set to 1-100. -
Page 32: Deterrence Setup
User Manual 8.6.1.3、Deterrence Setup When the camera supports white light and the image control is set to day/night mode, this menu allows you configure white light deterrence parameters; When the alarm linkage of deterrence is triggered, the white light will be automatically turned on for deterrence. When camera is set to Full Colour mode, The menu can’t be configured, Drag the left mouse to delimit the deterrence area in the right window. -
Page 33: Video Tampering Setup
User Manual 1、Turn on the light 2、Set the duration of warm light deterrence 3、Select Deterrence Mode – you can choose Light warning or Light Strobe 4、Turn on Siren 5、Set Siren Level, Siren Duration 6、Turn on Enforcer Light and set Enforce Light Duration Note: When image control is set to full color mode, the menu only allow you configure Siren and Enforcer parameters. -
Page 34: Alarm
User Manual 8.6.2、Alarm The menu allow you configure the alarm parameters 8.6.2.1、Motion Alarm Latch Time:Set the external alarm triggering time when motion is detected. Post Recording:Set the duration of the device's recording after the event occurs. There are 5s, 10 s, 20s, and 30s optional. -
Page 35: I/O Alarm
User Manual 8.6.2.2、I/O Alarm This is an optional feature that can only be used if your device supports I/O sensors and an external I/O alarm device is connected. Alarm Type:Three types are optional:Normally open, normally close and Off. Select a type that matches your sensor type, or select "Off"... -
Page 36: Sound Detection Alarm
User Manual 8.6.2.3、Sound Detection Alarm Latch Time:Set the external alarm triggering time when motion is detected. Post Recording:Set the duration of the device's recording after the event occurs. There are 5s, 10 s, 20s, and 30s optional. The default recording time is 5s. The max is 30s. Send Email:Set the camera to send email to your mailbox when it detects sound. - Page 37 User Manual Latch Time:Set the external alarm triggering time when video tampering is detected. Send Email:Set the camera to send email to your mailbox when the event occurs FTP Picture Upload: Upload the alarm picture to the FTP server after the alarm is triggered. FTP Video Upload: Upload the alarm video to the FTP server after the alarm is triggered.
-
Page 38: Setup
User Manual 8.7、AI 8.7.1、Setup When the camera trigger AI intelligent alarm, the corresponding alarm function needs to be enabled in the setup menu. The functions will consume the computing power of the camera. Due to the limited performance of the camera, HM, RSD and other functions can be opened at the same time, while PID, LCD, SOD, FD, PD &... - Page 39 User Manual Multi Angle: Push the side face image of the target Customize: Customize the face angle of the target that can be pushed. There are <Roll Range>, <Pitch Range>, <Yaw Range> and <Picture Quality> etc. parameters to display. Roll Range:Set <Roll Range> parameter. When the angle does not meet the set limit, faces can be detected, but push is not performed.
-
Page 40: Pd&Vd
User Manual 8.7.1.2、PD&VD It help to identify the person or vehicle shapes in the detection areas, and generate an alarm and record the corresponding snapshot according to setting parameters. Enable:Enable/Disable PD&VD function Sensitivity: Set its sensitivity parameters, its range is 0~100. The higher the detection sensitivity, the better it can detect the target of people or vehicles, but the higher the false alarm will be Enable/Disable Dynamic Marking option Snap Mode: set the capture mode. - Page 41 User Manual this area.
-
Page 42: Pid
User Manual 8.7.1.3、PID Alarm will be triggered when a specific target enters or leaves the warning area. Enable/Disable PID function: Set Sensitivity level, the higher the sensitivity, the smaller the detectable target Enable Dynamic Marking option Detection Type:Allow you select Pedestrian, VD and Non-motorized Vehicle Pedestrian: Alarm is triggered when Pedestrian enter into the perimeter intrusion area Motor Vehicle: Alarm is triggered when cars enter into the perimeter intrusion area Non-Motorized Vehicle: Alarm is triggered when bike, motor bicycle etc. -
Page 43: Sod
User Manual Enable/Disable PID function Set Sensitivity level, the higher the sensitivity, the smaller the detectable target Enable Dynamic Marking option Detection Type:Allow you select Pedestrian, VD and Non-motorized Vehicle Pedestrian: Alarm is triggered when Pedestrian enter into the perimeter intrusion area Motor Vehicle: Alarm is triggered when cars enter into the perimeter intrusion area Non-Motorized Vehicle: Alarm is triggered when bike, motor bicycle etc. - Page 44 User Manual 8.7.1.6、CC CC refers to Cross Counting function. Count the line crossing of specific objects in the monitoring area. Enable/Disable CC function Set Sensitivity level, the higher the sensitivity, the smaller the detectable target. It can also be used to detect distant targets in the scenario.
- Page 45 User Manual 8.7.1.7、HM Go to <HM> option to detect the personnel activity information in one designated area. This function only supports data recording, not trigger one alarm. Enable/Disable HM function. Rule Number: Set the Rule line number. The CC function only support one rule line Rule Switch: allow you enable/disable the current rule number.
- Page 46 User Manual mode to monitor the crowd density in the area. Full Screen:Monitor all the areas detected by cameras Customize: monitor the area selected by quadrilateral frame Under the <Customize> option, you will set the Rule line number. The CD function only support one rule line Rule Switch: allow you enable/disable the current rule number.
-
Page 47: Lpd
User Manual Detection Area: Set the detection area with one octagonal frame of QD function statistics. Display Counting Area: display the count of Queue Detection statistics. How to adjust the position of Counting please refer the section 8.1 - <Live> 8.7.1.10、LPD LPD function allows you recognize if the vehicle is Unfamiliar vehicles or vehicles entered into the database. -
Page 48: Rsd
User Manual 8.7.1.11、RSD For abnormal sound detection, different detection types can be set according to the requirements of the application scene, such as baby crying, gunshot, dog barking, etc. when the camera detects the set sound, it will trigger an alarm. 1、Enable the function 2、Set Sensitivity level. -
Page 49: Recognition
User Manual 8.7.2、Recognition 8.7.2.1、Face Recognition The device supports the face picture comparison alarm and face capture based on Face Recognition feature. The system establishes the database basis of face comparison through the database management function. Note: the modification of the database takes a short period of time for the system to reload before it takes full effect Alarm Strategy:... -
Page 50: License Plate Management
User Manual Select one images from the display area and right-click the mouse, then you can find its info of the image, covering <Detail Information> <Move to…><Edit><Delete> Right-click and select the <Detail Information>, you can check the detail info of the selected images. Select the <Move to…>... - Page 51 User Manual CVS format (detail CVS format please refer to below). Check the license plate info you need to import and click <Import> to add the LP info into the group. Click <Delete> to remove the unnecessary LP info (Shown as below). Note: It support to add up to 5000 LP information.
-
Page 52: Alarm
User Manual Check <All> to select all the License Plate info. Click one data to edit the License Plate information Click <Save> When the icon change to , that means your modification succeed. 4)Select the <Delete> to remove the selected License Plate info. 5)Check the LP info and Select the <Move to…>... -
Page 53: Fd、Ad、Pd&Vd、Pid、Lcd、Sod、Cc、Cd、Qd、Lpd、Rsd
User Manual 8.7.3.1、FD、AD、PD&VD、PID、LCD、SOD、CC、CD、QD、LPD、RSD The camera detects an alarm event and directly generate an alarm response 1、Alarm Type:AD alarm is a specific options. There are three modes to alarm according to whether the captured target wears a mask. Close:Disable AD alarm NO Mask:An alarm is triggered when it is found that the target is not wearing a mask. - Page 54 User Manual 8.7.3.2、FR Group Name:Edit the current Group Name. When pushing the alarm, the group name will be prompted. Enable/Disable Face Recognition Alarm Policy: you can customize the <Alarm Policy> Note: the previous three groups can’t be modified. Similarity: set the similarity value, the alarm will be triggered when the Similarity is larger than the value.
-
Page 55: Fa(Face Attendance
User Manual 8.7.3.3、FA(Face Attendance) FA (face attendance) function is to search for the matching face of different groups (excluding stranger groups) saved in SD card at the specified time, generate attendance files according to the captured records and send them to the associated mailbox. Enable the switch to auto generate FA file Send Email: Set the time of sending email Set <On duty>... -
Page 56: Human & Vehicle Detection
User Manual Time: The reference time of the search mode. Search Mode:Support 5 modes – Day, Week, Month, Quarter and Year Set the <Group> which need to be searched. Click Search Enter one export file name and click the <Export> button Display Area: Display the current search result in the form of Chart on the Display area. -
Page 57: Heat Map Statistics
User Manual Detection Type:Set the corresponding alarm model required by the data. For example, data triggered by Motion cannot be searched by other types. Cross Type:There is Cross In and Cross Out to select. Export:Enter the export file name and click Export to export current searching data. System time:Reference time of the currently selected report type Mode:Allow you select two modes –... -
Page 58: Network
User Manual 8.8、Network This menu allows you to configure network parameters such as PPPoE, DHCP and SNMP. The most common type is DHCP. In most cases, the network type is DHCP unless you manually set a static IP. If you need to authenticate the user name and password to connect to the network, please select PPPoE. 8.8.1、General 8.8.1.1、General It automatically gets the IPv4 parameters from the network if the device is connected the router using... -
Page 59: Pppoe
User Manual 8.8.1.2、PPPoE PPPoE, Point-to-Point Protocol over Ethernet, is a network protocol for encapsulating point-to-point Protocol (PPP) frame inside Ethernet frames. It is mainly used with ADSL service where individual user connect to the ADSL transceiver (modem) over Ethernet and in plain Metro Ethernet network. Enable <PPPoE>... -
Page 60: Port Configuration
User Manual 8.8.1.4、Port Configuration Web Port: This is the port you use to log in to the IPC remotely (for example, using a web client). If other application is using port 80, please change it. Client Port: This is the port that IPC will use to send information (for example, using a mobile application). -
Page 61: Ftp
User Manual If your email server need SSL or TSL verification, please enable Encryption option, if you are not confirmed, please set to Auto Enter SMTP Port, SMTP Server, your email address and Password etc. to configure the option Configure the time interval between IPC notification emails Click Test, and confirm you received the test email. -
Page 62: Ddns
User Manual 8.8.5、DDNS This menu allows you configure DDNS setting. DDNS provide a static IP address to simplify IPC remote access. To use DDNS service, please apply an account on the webpage of DDNS service provider. Enable DDNS option Select one preferred DDNS server (DDNS_3322, DDNDNS, NO_IP, some support CHANGEIP DNSEXIT)... -
Page 63: Ip Filter
User Manual 8.8.7、IP Filter This function can set the allow list and block list of camera. Enable:Enable or disable filter function. After enabling, allow list and block list are optional. Restricted Type:Select the list (allow list and block list) to be set. Start Address:Enter the start address. -
Page 64: Audio Setting
User Manual 1、Select Mounting Type, There are NFS & SMB/CIFS type. NFS does not need to enter the NAS account and password, while SMB / CIFS needs to enter the NAS account and password. 2、Enter User Name, Password, Server IP and Directory Name 3、Set Disk Size 4、Click Test to verify if NAS is connected 5、Click Add NetHDD... -
Page 65: Cloud
User Manual 8.9.3、Cloud The camera can upload snapshots or videos to cloud services through Dropbox, which is a free service that allows you to easily store and share pictures. Before enabling cloud storage services, we recommend that you create a Dropbox account by using mail as user name. -
Page 66: Daylight Saving Time (Dst)
User Manual needs to be set by yourself, while NTP synchronization will perform time calibration via network. Date Format:Set the date format. Time Zone: Select the time zone related to your area or city. Time Format: Select the preferred time format. System Time:Click the box to change the date and time. -
Page 67: Multi-User Management
User Manual 8.10.2、Multi-user management This menu allows you to configure user name, password and user permissions The system supports the following user types: ADMIN —System Administrator: The administrator can fully configure the system, and can change the administrator password and user password, and enable/disable password protection. USER —... -
Page 68: System Maintenance
User Manual Select one of the disabled users and click "Editing" icon. Check <Enable> Edit <User Name> Input <password> you desired Input the <Password> again Click <Save> Input admin’s password for verification purpose. Check user permissions Click <All> to select all the permissions Click <Clear>... -
Page 69: Load Default
User Manual Configuration Log, Alarm Log, Account Log, Record Log, Storage Log and Network Log etc. 4、Click the drop-down menu under the <Minor Type> option, you will find the following options: Under the <System> option, you will check the system setup, reboot, auto reboot, upgrade, Change, NTP and ALL ... -
Page 70: Upgrade
User Manual 8.10.3.3、Upgrade The menu can upgrade the device’s firmware. 1、Automatic Detection: Enable the option, system will auto detect online upgrade F/W; 2、Username: Input the FTP server name 3、Password: Input the FTP server password. 4、FTP/HTTP URL address: Input online upgrade address. Details format please refer to the example shown as the menu bottom 5、Click <Save>... -
Page 71: Parameters Management
User Manual 8.10.3.4、Parameters Management The menu allows you export the configured main parameters to your PC, or import the exported configured file to your device. Import File: Click <Import File> to popup the Path Window Select the parameters file from your PC Click <Import>... -
Page 72: Developer Mode
User Manual 8.10.3.6、Developer Mode The menu allows you export P2P info of IP camera to your PC. Input the exporting parameter file at the <Export RS P2P Log> column Click <Export> 8.10.4、System Information This menu allows you to view system information, such as camera ID, model name, MAC address, firmware version, etc. -
Page 73: 9、Local Settings
User Manual 9、Local Settings This menu allows you to set the save path of recording, downloading and snapshot files, as well as the format of recording and snapshot. Note: Programs without plug-ins are supported. If you use Safari 12 and above, Chrome57 and above, Firefox 52 and above, Edge 41 and other browsers for web access, this menu can be ignored. - Page 74 VIDEOR E. Hartig GmbH Exclusive distribution through special- ised trade channels only. VIDEOR E. Hartig GmbH Carl-Zeiss-Straße 8 63322 Rödermark/Germany Tel. +49 (0) 6074 / 888-0 Technical changes reserved Fax +49 (0) 6074 / 888-100 www.videor.com...
Need help?
Do you have a question about the IND Series and is the answer not in the manual?
Questions and answers