
Related Manuals for Hyster J007


Summary of Contents for Hyster J007
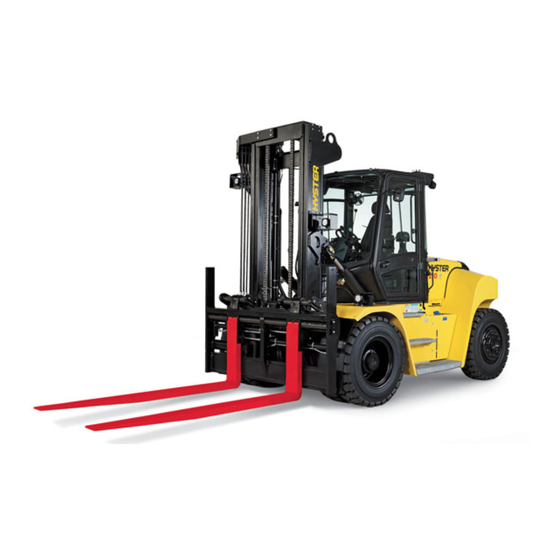
- Page 1 Hyster J007 (H190HD2, H210HD2, H230HD2, H230HDS2, H250HD2, H280HD2) Forklift Service Repair Manual...
- Page 2 HYDRAULIC CONTROL SYSTEM H8.0-12.0XM-6 (H190-280HD ) [J007]; H13.0-14.0XM-6 (H300-330HD ) [H019]; H16.0XM-6 (H360HD ) [H019]; H10.0-12.0XM-12EC (H360HD -EC) [H019]; H13-16XM-6, H10-12XM-12EC (H300-360HD H360HD -EC) [J019]; H8-12XM-6, H10XMS-6 (H190-280HD H230HDS) [K007]; H16XM-9, H18XM-7.5, H16XM-12, H18XM-9 (H360-36HD, H360-48HD) [A238] PART NO. 4034399...
- Page 3 • Keep the tools clean and in good condition. • Always use HYSTER APPROVED parts when making repairs. Replacement parts must meet or ex- ceed the specifications of the original equipment manufacturer. • Make sure all nuts, bolts, snap rings, and other fastening devices are removed before using force to remove parts.
-
Page 4: Table Of Contents
Loaded Speed Reduction Screen ........................22 Temperature Protection Screen ........................23 Anti-Stall Screen ............................24 Calibration Screen ............................25 Calibrating the Connected Levers/Joystick Without the Interface Software ........26 Calibrating the Connected Levers/Joystick With the Interface Software ..........26 Profile Configuration Screen ........................26 ©2014 HYSTER COMPANY... - Page 5 Calibrating the Joystick Without the Hydraulic User Interface Program ............ 36 Fault Codes ................................37 Controller Pinning ..............................46 This section is for the following models: H8.0-12.0XM-6 (H190-280HD2) [J007]; H13.0-14.0XM-6 (H300-330HD2) [H019]; H16.0XM-6 (H360HD2) [H019]; H10.0-12.0XM-12EC (H360HD2-EC) [H019]; H13-16XM-6, H10-12XM-12EC (H300-360HD2, H360HD2-EC) [J019];...
- Page 6 Thanks very much for your reading, Want to get more information, Please click here, Then get the complete manual NOTE: If there is no response to click on the link above, please download the PDF document first, and then click on it. Have any questions please write to me: admin@servicemanualperfect.com...
-
Page 7: General
2200 SRM 1481 General General This SRM describes the electronic hydraulic control Hydraulic System 1900SRM1478 system, and its interaction with the Hydraulic User Diagrams 8000SRM1500 Interface Program. Electrical System 2200SRM1499 See the following resources for additional information: Description The hydraulic system is operated through an elec- •... - Page 8 Description 2200 SRM 1481 1. INPUT FOR HYDRAULIC CONTROLLER 5. AUXILIARY OUTPUT OF THE HYDRAULIC 2. HYDRAULIC CONTROLLER CONTROLLER 3. LIFT/LOWER OUTPUT OF THE HYDRAULIC 6. APC 200 CONTROLLER 7. INSTRUMENT PANEL 4. TILT FORWARD/BACKWARD OUTPUT OF THE 8. ENGINE CONTROL MODULE (ECM) HYDRAULIC CONTROLLER Figure 1.
-
Page 9: Control Valve
2200 SRM 1481 Description CONTROL VALVE Cycling the ignition key resets the LED to Green. The LED will immediately turn Red if the fault Hydraulic oil flow through the control valve is de- condition continues. termined by the position of the spools. The position of each spool depends on the electrical controller ANALOG INPUTS signal received at the actuation module for that... -
Page 10: Temperature Sensor
Description 2200 SRM 1481 Temperature Sensor Some of the following interrupt functions can be configured in the Hydraulic User Interface program A temperature sensor at the bottom of the hy- from the Truck Configuration Screen: draulic tank has a resistance between 700 and 2000 Ω, depending on the hydraulic oil temperature. -
Page 11: Can Bus Communication
2200 SRM 1481 Description Load Moment Interrupt (Optional) Analog outputs are used for the lift, tilt, and auxili- ary functions. This function disables the lift and backward tilt functions via a pressure switch in the main control Digital Outputs valve. This function also limits the maximum load that can be lifted. -
Page 12: Anti-Stall (Standard)
Description 2200 SRM 1481 Anti-Stall (Standard) High Temperature Protection (Optional) The Anti-Stall feature prevents the engine from The High Temperature Protection feature limits ve- stalling by reducing the hydraulic output for the hicle speed to 10 km/h (6 mph) when hydraulic oil lift, tilt, and auxiliary functions. -
Page 13: Settings
2200 SRM 1481 Description SETTINGS Depending on the preselection of the pumps, the dealer can choose the settings for the mast and the Several parameters of the hydraulic controller are accompanying carriage. adjustable and can be set using the Hydraulic User •... -
Page 14: General Functions Of The Interface
1. A PC with the Hydraulic User Interface Pro- gram installed and a free USB port. After starting the program, a warning message dis- 2. An IFAK interface (Hyster part number plays. See Figure 3. This warning message is gen- 1532578) and a IFAK Interface Cable (Hys-... - Page 15 General Functions of the Interface Table 2. Hydraulic User Interface Program Overview Hydraulic User Interface Program Screen Access Level Name Main Screen Subscreen Dealer Affected Parameters Start Screen Hyster Not applicable Reminder Screen Hyster Not applicable • Aux Type/Front-end selection • Truck setup selection...
- Page 16 General Functions of the Interface 2200 SRM 1481 Table 2. Hydraulic User Interface Program Overview (Continued) Hydraulic User Interface Program Screen Access Level Name Main Screen Subscreen Dealer Affected Parameters Calibration Not applicable Screen • Lift Limit Max • Lowering Limit Max •...
-
Page 17: Start Screen
2200 SRM 1481 General Functions of the Interface Start Screen Figure 4. Start Screen The Start Screen displays automatically upon The truck’s serial number is programmed into the start up of the Hydraulic User Interface Program hydraulic controller with the ROP (Read-Only Pa- and provides basic information about the system rameter) File. -
Page 18: Reminder Screen
General Functions of the Interface 2200 SRM 1481 Reminder Screen Figure 5. Reminder Screen The Reminder screen is an additional reminder to Basic Screen Layout of the Hydraulic User the user to always click on the Download Param- Interface Program eters button or press the F4 key to save a changed parameter to the hydraulic controller. - Page 19 2200 SRM 1481 General Functions of the Interface 1. TRUCK CONFIGURATION SCREEN ICON 5. VALVE SETTINGS SCREEN ICON 2. FEATURES SCREEN ICON 6. DIAGNOSTIC SCREEN ICON 3. CALIBRATION SCREEN ICON 7. ACTIVE ERROR SCREEN ICON 4. FLOW SETTINGS SCREEN ICON 8.
- Page 20 General Functions of the Interface 2200 SRM 1481 Following is a brief description of each screen: 5. Valve Settings Screen Displays the settings for the electric/hydraulic 1. Truck Configuration Screen valves. (Service Technician level only). Contains all basic truck configuration settings 6.
-
Page 21: Truck Configuration Screen
2200 SRM 1481 General Functions of the Interface Truck Configuration Screen Figure 7. Truck Configuration Screen... - Page 22 General Functions of the Interface 2200 SRM 1481 NOTE: Check your Parts Manual to make sure this drop-down list box representing the active mode. software applies to the Lift Truck you are servicing. When clicked on, this link will take the user to the appropriate mode definition subscreen.
-
Page 23: Mode Definition Screen
2200 SRM 1481 General Functions of the Interface Mode Definition Screen Figure 12. Mode Definition Screen NOTE: The arrow icon that displays in the upper Up to three lever profiles can be defined for analog functions. The icon to the right of the lever profile left of the screen acts as a back button, indicating the active screen is a subscreen. -
Page 24: Default Flow Settings Screen
General Functions of the Interface 2200 SRM 1481 Default Flow Settings Screen Figure 13. Default Flow Settings Screen NOTE: The arrow icon that displays in the upper and press the F4 key to save the pump setting to the controller. Changing pump settings can only be left of the screen acts as a back button, indicating the active screen is a subscreen. -
Page 25: Load Moment Interrupt Screen
2200 SRM 1481 General Functions of the Interface Load Moment Interrupt Screen Figure 14. Load Moment Interrupt Screen NOTE: The arrow icon that displays in the upper The Cut Out Pressure value is set from where the left of the screen acts as a back button, indicating Load Moment Interrupt is inactive.
Need help?
Do you have a question about the J007 and is the answer not in the manual?
Questions and answers