Table of Contents
Advertisement
Advertisement
Table of Contents

Related Manuals for Cedima CF 13.3 B


Summary of Contents for Cedima CF 13.3 B
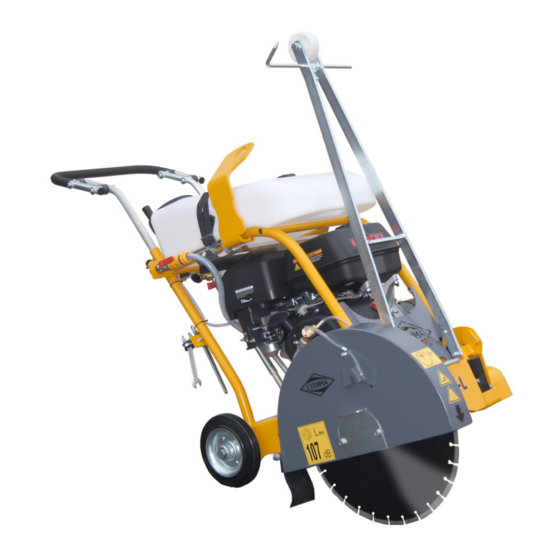
- Page 1 • • Joint cutters Joint cutters • Diamond drilling • Table saws • Wall saws • Wire saws • Hydraulic units CF•13.3 B / • Special machinery CF•13.3 B-L Change index 000 Issue date 2021-11-05 Translation of the original operating manual Operating manual maintenance manual and safety notes...
- Page 2 Trademark is a registered trademark of CEDIMA® Diamantwerkzeug- und Maschinenbauges. mbH Celle/Germany • CEDIMA® • Technical Documentation • All rights reserved according to ISO 16016 • Changes serving technical progress reserved •...
-
Page 3: Ec Declaration Of Conformity
This declaration of conformity immediately becomes invalid if changes are incorporated to the ma- chine which have not been approved by us! Bob Siemsen (General Manager) Celle, 2021-09-17 • CEDIMA® • Technical Documentation • All rights reserved according to ISO 16016 • Changes serving technical progress reserved •... - Page 4 Troubleshooting – What if . . .? Chapter 9 Return of machines / disposal Chapter 10 Annex 10.0 Terms of warranty • CEDIMA® • Technical Documentation • All rights reserved according to ISO 16016 • Changes serving technical progress reserved •...
-
Page 5: General Product Information
The engine can be stopped quickly, also in normal operation, by the emergency stop button (3). • CEDIMA® • Technical Documentation • All rights reserved according to ISO 16016 • Changes serving technical progress reserved •... - Page 6 General product information Joint cutter CF•13.3 B Figure 1.1 Figure 1.2 • CEDIMA® • Technical Documentation • All rights reserved according to ISO 16016 • Changes serving technical progress reserved •...
-
Page 7: Technical Data
* The maximum cutting depth is specified for CEDIMA® diamond saw blades with 100% segment height ** The operating manual of the engine is decisive! *** During the cutting work, higher values can occur! • CEDIMA® • Technical Documentation • All rights reserved according to ISO 16016 • Changes serving technical progress reserved •... -
Page 8: Accessories Supplied
For information about selecting the correct diamond saw blade, refer to the current price list and the current joint cutter brochure. For special applications please ask CEDIMA® directly. For further accessories refer to the current CEDIMA® price list. • CEDIMA® • Technical Documentation • All rights reserved according to ISO 16016 • Changes serving technical progress reserved •... - Page 9 DANGER Warning of hot surface! • CEDIMA® • Technical Documentation • All rights reserved according to ISO 16016 • Changes serving technical progress reserved •...
-
Page 10: Basic Safety Instructions
Plastic hammer check filling level! Spirit level, align component, machine horizontally or vertically Torque spanner Finger pressure test approx. 5 mm • CEDIMA® • Technical Documentation • All rights reserved according to ISO 16016 • Changes serving technical progress reserved •... -
Page 11: Organisational Measures
• Adhere to the legally prescribed preventive maintenance the work. and inspection intervals or those specified in this operat- ing manual. • The operator must • CEDIMA® • Technical Documentation • All rights reserved according to ISO 16016 • Changes serving technical progress reserved •... -
Page 12: Selection And Qualification Of Personnel
• Never use the machine in a way that might be contrary manufacturer must be adhered to in order to avoid the to safe working practices. loosening of the tool. • CEDIMA® • Technical Documentation • All rights reserved according to ISO 16016 • Changes serving technical progress reserved •... - Page 13 Pay attention to the protection classes. After cleaning, remove the covers/tapes completely. • CEDIMA® • Technical Documentation • All rights reserved according to ISO 16016 • Changes serving technical progress reserved •...
- Page 14 (consult qualified electrician and in accordance with the applica- CEDIMA®). ble electrical engineering rules. • CEDIMA® • Technical Documentation • All rights reserved according to ISO 16016 • Changes serving technical progress reserved •...
-
Page 15: Transporting The Machine
• Fluids or lubricants must not penetrate into the soil or sembling and operating the machine. public sewage system. • CEDIMA® • Technical Documentation • All rights reserved according to ISO 16016 • Changes serving technical progress reserved •... -
Page 16: Preparation And Operation
Lifting the front plate out of the detent Figure 4.4 • CEDIMA® • Technical Documentation • All rights reserved according to ISO 16016 • Changes serving technical progress reserved •... - Page 17 3. Put the water container back onto the joint cutter (sec- tion 4.9.2)! CF•13.3 B - Water container removed and fuel filler lid open Figure 4.6a • CEDIMA® • Technical Documentation • All rights reserved according to ISO 16016 • Changes serving technical progress reserved •...
-
Page 18: Adjusting The Push Handle
Remove plug from V-ribbed belt guard cover, V-ribbed belt check through control opening Figure 4.10 Observe the minimum insertion length of the push handle Figure 4.8 • CEDIMA® • Technical Documentation • All rights reserved according to ISO 16016 • Changes serving technical progress reserved •... -
Page 19: Adjusting The Parking Brake
Cutting shaft, saw blade lifted, CF•13.3 B/CF•13.3 B-L braked with parking brake Figure 4.11 CF•13.3 B / CF•13.3 B-L braked with parking brake Figure 4.12 • CEDIMA® • Technical Documentation • All rights reserved according to ISO 16016 • Changes serving technical progress reserved •... - Page 20 Complaints on saw blades can only be accepted if there is a saw blade guard hood! remaining diamond segments' height of 20 %! Careful with hands and fingers! • CEDIMA® • Technical Documentation • All rights reserved according to ISO 16016 • Changes serving technical progress reserved •...
- Page 21 Cutting shaft nut, clamping ring, saw blade pressure flange dismounted Figure 4.19 Lift up and remove the blade guard Figure 4.17 • CEDIMA® • Technical Documentation • All rights reserved according to ISO 16016 • Changes serving technical progress reserved •...
- Page 22 Diamond saw blade with left-hand thread cutting shaft nut on the right side of the cutting shaft Figure 4.23 Remount the saw blade pressure flange and clamping ring Figure 4.21 • CEDIMA® • Technical Documentation • All rights reserved according to ISO 16016 • Changes serving technical progress reserved •...
- Page 23 Do not subject the diamond segments of the saw blade to hard impacts as this can destroy them! • CEDIMA® • Technical Documentation • All rights reserved according to ISO 16016 • Changes serving technical progress reserved •...
- Page 24 Cutting shaft nut, clamping ring, saw blade pressure flange dismount- Figure 4.30 Dismount any mounted saw blade (section 4.6.3)! Cutting shaft guard, dismounted Figure 4.28 • CEDIMA® • Technical Documentation • All rights reserved according to ISO 16016 • Changes serving technical progress reserved •...
- Page 25 Figure 4.33 Lifting saw blade guard with water connection and front visor from the saw blade guard holder Figure 4.36 • CEDIMA® • Technical Documentation • All rights reserved according to ISO 16016 • Changes serving technical progress reserved •...
- Page 26 Left side of cutting shaft, saw blade guard plugged to saw blade guard holder Figure 4.38 Tightening screw at the saw blade guard holder Figure 4.41 • CEDIMA® • Technical Documentation • All rights reserved according to ISO 16016 • Changes serving technical progress reserved •...
- Page 27 Clamping diamond saw blade with right-hand thread cutting shaft nut on the left side of the cutting shaft Figure 4.44 • CEDIMA® • Technical Documentation • All rights reserved according to ISO 16016 • Changes serving technical progress reserved •...
- Page 28 0 mm Setting the pointer of the cutting depth indication to 0, tightening clamping screw and lock nut Figure 4.49 • CEDIMA® • Technical Documentation • All rights reserved according to ISO 16016 • Changes serving technical progress reserved •...
- Page 29 Connecting hose with Gardena coupling connected to the pressur- ised water shut-off valve, hose guide for left-hand cut here demon- strated on the CF•13.2 B Figure 4.53 • CEDIMA® • Technical Documentation • All rights reserved according to ISO 16016 • Changes serving technical progress reserved •...
- Page 30 (dismounted, lying) to 23 litres (on the joint cutter), stopping the engine! depending on the position! Let the heat baffle plate cool down (figures 4.57 and 4.58)! • CEDIMA® • Technical Documentation • All rights reserved according to ISO 16016 • Changes serving technical progress reserved •...
- Page 31 Securing the water container with rubber strap to the right of the water container control/shut-off valve Figure 4.59 joint cutter frame Figure 4.57 • CEDIMA® • Technical Documentation • All rights reserved according to ISO 16016 • Changes serving technical progress reserved •...
-
Page 32: Starting The Engine
Cutting shaft, saw blade lifted, braked with parking brake Figure 4.60 The filled water container and increases the stability when starting the engine! • CEDIMA® • Technical Documentation • All rights reserved according to ISO 16016 • Changes serving technical progress reserved •... - Page 33 Cutting shaft, saw blade lifted, CF 13.3 B braked with parking brake • 13.3 B right, engine operating elements Figure 4.63a • Figure 4.64 • CEDIMA® • Technical Documentation • All rights reserved according to ISO 16016 • Changes serving technical progress reserved •...
- Page 34 OFF, 0 13.3 B front, switching the engine (ignition) switch to OFF • Figure 4.66 • CEDIMA® • Technical Documentation • All rights reserved according to ISO 16016 • Changes serving technical progress reserved •...
-
Page 35: Cutting Operation
The operator is standing behind the push handle of ting depth (see cutting depth indication). Hold tight the the CF•13.3 B / CF•13.3 B-L (see section 4.3)! joint cutter, • CEDIMA® • Technical Documentation • All rights reserved according to ISO 16016 • Changes serving technical progress reserved •... - Page 36 8. Clean the joint cutter (the diamond saw blade), 9. Perform maintenance and care work according to chap- ter 6. • CEDIMA® • Technical Documentation • All rights reserved according to ISO 16016 • Changes serving technical progress reserved •...
-
Page 37: Maintenance And Care
• Do not flush any bearings else there is a risk of running dry! • After cleaning, remove the covers/tapes completely! • CEDIMA® • Technical Documentation • All rights reserved according to ISO 16016 • Changes serving technical progress reserved •... -
Page 38: Tightening Torques
120 °C (DIN 51 502, KP2K-20, NLGI-class, DIN 51 818)! If possible, use biologically fast degradable lubricants and formwork oils according to RAD-UZ64! • CEDIMA® • Technical Documentation • All rights reserved according to ISO 16016 • Changes serving technical progress reserved •... - Page 39 Maintenance and care CF•13.3 B / CF•13.3 B-L Maintenance intervals for the CEDIMA® joint cutter CF•13.3 B / CF•13.3 B-L • CEDIMA® • Technical Documentation • All rights reserved according to ISO 16016 • Changes serving technical progress reserved •...
-
Page 40: Maintenance Works
To do so, let the cutting shaft drive start up shortly, see section 4.10, and immediately switch OFF the joint cutter (engine) again. • CEDIMA® • Technical Documentation • All rights reserved according to ISO 16016 • Changes serving technical progress reserved •... - Page 41 Figure 6.4 6. Saw blade holder flange pulled off the left side of the cutting shaft, parallel key Figure 6.6 • CEDIMA® • Technical Documentation • All rights reserved according to ISO 16016 • Changes serving technical progress reserved •...
- Page 42 8. V-ribbed belt guard cover dismounted. Release V-ribbed belt Figure 6.8 10. Unscrewing the studs Figure 6.10 Release the V-ribbed belt according to section 6.7.1! • CEDIMA® • Technical Documentation • All rights reserved according to ISO 16016 • Changes serving technical progress reserved •...
- Page 43 Do not tilt the grooved pulley! Do not use force! 12. Taper clamping bush removed from grooved pulley of cutting shaft Figure 6.12 • CEDIMA® • Technical Documentation • All rights reserved according to ISO 16016 • Changes serving technical progress reserved •...
- Page 44 19. Plug the sleeve onto the left side of the cutting shaft grooved pulley on the cutting shaft Figure 6.17 Figure 6.15 • CEDIMA® • Technical Documentation • All rights reserved according to ISO 16016 • Changes serving technical progress reserved •...
- Page 45 23. Push the saw blade holder flange with the cutting shaft 21. V-ribbed belt guard cover mounted with screws nut onto the left cutting shaft side Figure 6.21 Figure 6.19 • CEDIMA® • Technical Documentation • All rights reserved according to ISO 16016 • Changes serving technical progress reserved •...
- Page 46 Dismount the diamond saw blade so that you can adjust the joint cutter engine horizontally! Hold the engine oil drain hose with a second open- ended spanner! • CEDIMA® • Technical Documentation • All rights reserved according to ISO 16016 • Changes serving technical progress reserved •...
- Page 47 CF•13.3 B / CF•13.3 B-L (figures 6.25 and 6.26), When mounting the heat baffle plate, pay attention to the position at the CF•13.3 B / CF•13.3 B-L frame! • CEDIMA® • Technical Documentation • All rights reserved according to ISO 16016 • Changes serving technical progress reserved •...
-
Page 48: Transport And Storage
CF•13.3 B / CF•13.3 B-L frame for lashing (figures 7.2 and 7.4)! Transport position of the push handle Figure 7.2 • CEDIMA® • Technical Documentation • All rights reserved according to ISO 16016 • Changes serving technical progress reserved •... - Page 49 – protected from extreme vibrations, – protected from other negative physical and chemical impact! Handle pushed in Figure 7.5 • CEDIMA® • Technical Documentation • All rights reserved according to ISO 16016 • Changes serving technical progress reserved •...
- Page 50 CEDIMA® or a qualified work shop! All works and repairs on the petrol-engine must only be performed by an authorized qualified work-shop or directly by CEDIMA®. • CEDIMA® • Technical Documentation • All rights reserved according to ISO 16016 • Changes serving technical progress reserved •...
- Page 51 Align front visor according to left or right cut Saw blade is too heavily loaded Reduce the feed Bad saw blade tension Return saw blade to manufacturer • CEDIMA® • Technical Documentation • All rights reserved according to ISO 16016 • Changes serving technical progress reserved •...
- Page 52 ® The joint cutter can be delivered free of charge at CEDIMA® or at a point of acceptance appointed by CEDIMA®. • CEDIMA® • Technical Documentation • All rights reserved according to ISO 16016 • Changes serving technical progress reserved •...
-
Page 53: Terms Of Warranty
– Control potentiometers and manual switching elements – Securing elements such as dowels, anchors, screws and bolts Page 1 of 2 pages • CEDIMA® • Technical Documentation • All rights reserved according to ISO 16016 • Changes serving technical progress reserved •... - Page 54 13. The place of fulfilment and exclusive place of jurisdiction for both parties is Celle. CEDIMA® Diamantwerkzeug- und Maschinenbaugesellschaft mbH, Celle January 2005 Page 2 of 2 pages • CEDIMA® • Technical Documentation • All rights reserved according to ISO 16016 • Changes serving technical progress reserved •...
- Page 56 CEDIMA® Diamantwerkzeug- und Maschinenbaugesellschaft mbH Lärchenweg 3 • 29227 Celle/Germany Tel. +49 (0) 5141-88 54-1 00 • Fax +49 (0) 5141-88 54-1 11 Internet: www.cedima.com • E-mail: info@cedima.com...
Need help?
Do you have a question about the CF 13.3 B and is the answer not in the manual?
Questions and answers