Table of Contents
Advertisement
Available languages
Available languages
Quick Links
Advertisement
Table of Contents

Related Manuals for universalblue UBH2303-21


Summary of Contents for universalblue UBH2303-21
-
Page 2: Table Of Contents
Horno multifunción digital Multifunction digital oven ÍNDICE ESPAÑOL 1. INSTRUCCIONES DE SEGURIDAD ..........3 2. CARACTERÍSTICAS DEL PRODUCTO .......... 10 3. INSTALACIÓN ................12 4. LIMPIEZA DEL APARATO............. 19 5. PANEL DE CONTROL ..............22 6. USO DEL ELECTRODOMÉSTICO ..........28 7. -
Page 3: Español
ESPAÑOL Felicidades por haber adquirido este producto. Le recomendamos que dedique algún tiempo a leer cuidadosamente este Manual de Instrucciones / Instalación con el fin de hacer un buen uso del mismo. Lea cuidadosamente todas las instrucciones de seguridad antes de utilizar el aparato y conserve este Manual de Instrucciones / Instalación para poder consultarlo en el futuro. - Page 4 Tomar precauciones para evitar tocar resistencias del horno. Mantener alejados del horno a los niños menores de 8 años a no ser que estén bajo la vigilancia constante de un adulto. Este horno no puede ser utilizado por niños de 8 años o más o por personas con facultades físicas, sensoriales o mentales reducidas, con falta de experiencia y conocimientos, o a menos que sea bajo...
- Page 5 Impedir que los niños se acerquen al horno durante su uso, especialmente cuando esté utilizando el grill. Asegúrese de que el horno esté desconectado antes de cambiar la bombilla interior para evitar un riesgo de electrocución. Deberá implementarse un medio de desconexión en la instalación eléctrica fija...
- Page 6 Si no va a utilizar el horno durante mucho tiempo, le recomendamos que lo desenchufe. Si el cable de alimentación resulta dañado, éste deberá ser sustituido por el fabricante o por su servicio técnico autorizado para evitar cualquier riesgo.
- Page 7 Siempre llame a un Centro de Asistencia Técnica autorizado e insista en piezas de repuesto originales si se requieren reparaciones. Las reparaciones hechas por personas incompetentes pueden causar daños. Seguridad eléctrica Conecte el aparato a un enchufe con conexión a tierra protegido por un fusible que cumpla con los valores especificados en el cuadro de especificaciones técnicas.
- Page 8 ADVERTENCIA: Para evitar descargas eléctricas, asegúrese de que el circuito del dispositivo esté abierto antes de cambiar la lámpara. ADVERTENCIA: Corte todas las conexiones del circuito de suministro antes de acceder a las terminales. No use cables cortados o dañados o cables de ex- tensión que no sean el cable original.
- Page 9 Se requiere un interruptor omnipolar capaz de desconectar la fuente de alimentación para la instalación. desconexión fuente alimentación debe proporcionarse con un interruptor o un fusible integrado instalado en una fuente de alimentación fija de acuerdo con el código de construcción.
-
Page 10: Características Del Producto
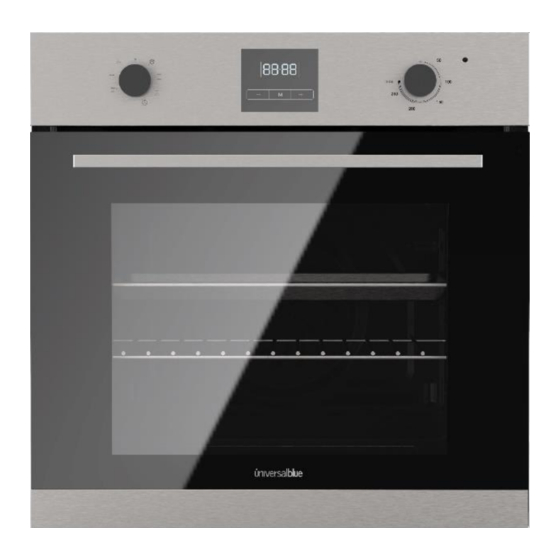
Regulation 1907/2006/EC (REACH–Restriction Chemicals) 2. CARACTERÍSTICAS DEL PRODUCTO UBH2303-21 Horno digital multifunción Frontal de 60 cm Dimensiones del producto (A x F x A) (cm): 58 x 60 x 59 Capacidad 64 litros 0+8 funciones (grill + fan) Puerta: dos cristales Mandos mecánicos y panel digital (+ táctil) - Page 11 Función grill Potencia: 2170 W Color negro e inox Panel de control Tirador Puerta Luz indicadora Guías internas Bandeja Rejilla...
-
Page 12: Instalación
3. INSTALACIÓN INSTALACIÓN DEL HORNO EN SU ESPACIO EN LA COCINA Coloque el horno en el espacio reservado para este electrodoméstico en la cocina; puede colocarse debajo de una superficie de trabajo o en un armario vertical. Fije el horno en su lugar mediante dos tornillos utilizando los dos agujeros de fijación situados en el marco del horno. - Page 13 posterior del horno y la pared o superficie contigua deberá haber un mínimo de 45 mm. La instalación debe ser realizada por un técnico autorizado de acuerdo con las pautas. Nuestra empresa no se responsabiliza por los daños a personas, animales o propiedades debidos a una instalación incorrecta.
- Page 14 La sección trasera de la cabina en la unidad de cocina debe retirarse para proporcionar u mejor flujo de aire. No se recomienda instalar el dispositivo cerca de refrigeradores o congeladores, de l contrario, el rendimiento de dichos dispositivo se vería afectado por el calor irradiado. ...
- Page 16 FIJACIÓN DEL HORNO EN SU COMPARTIMIENTO Coloque el horno en su compartimiento. Abra la puerta del horno. Fije el horno en su compartimiento de la cocina con los dos fijadores “A”, que encajan en los agujeros del marco del horno, y con los dos tornillos “B”...
- Page 17 Antes de suministrar electricidad al dispositivo: Coloque el horno de manera que sea más fácil alcanzar el enchufe utilizado para la conexión eléctrica o el interruptor bipolar. No deje que el cable de electricidad toque las superficies calientes cuando se coloque y no lo sujete a la tapa del horno. Póngase en contacto con el servicio autorizado más cercano si el cable eléctrico está...
- Page 18 conexión a tierra de acuerdo con las normas. Nuestra empresa no se hace responsable de los daños a personas, animales o propiedades debido a la falta de conexión a tierra adecuada del dispositivo. CUANDO SE INSTALE INICIALMENTE EL DISPOSITIVO: Ajuste el control de temperatura al nivel máximo (250ºC MAX).
-
Page 19: Limpieza Del Aparato
4. LIMPIEZA DEL APARATO Para un buen aspecto y funcionamiento, mantener el horno limpio. El moderno diseño del horno facilita su mantenimiento, reduciéndolo al mínimo. Los elementos del horno que entren en contacto con los alimentos deberán ser limpiados regularmente. LIMPIEZA GENERAL ... - Page 20 No limpiar con un chorro de vapor. NOTA: El fabricante de este aparato no se responsabiliza de los daños causados por productos químicos o limpieza abrasiva. Quitar las bandejas de rejilla lateral del horno Es posible quitar y limpiar las bandejas de rejilla laterales en las que se colocan fácilmente las bandejas y las rejillas.
- Page 21 Coloque las bisagras correctamente y empuje hacia abajo para montar la puerta del horno extraída correctamente. Todo el vidrio utilizado en este aparato ha sido sometido a un tratamiento especial de seguridad. En el caso de rotura, el vidrio se rompe en pequeñas piezas cuadradas y lisas que no son peligrosas porque no son afiladas.
-
Page 22: Panel De Control
5. PANEL DE CONTROL BOTÓN DE SELECCIÓN DE FUNCIÓN: Establece las posiciones de trabajo del horno TEMPORIZADOR DIGITAL: Lea las instrucciones a continuación BOTÓN DE AJUSTE DE TEMPERATURA: Se usa para ajustar la temperatura del hornoentre 50- 250°C cuando se trabaja. - Page 23 FUNCIÓN OFF: En esta posición el horno está apagado DESCONGELACIÓN: sólo está activo el ventilador, que hace circular el aire a la temperatura adecuada y ayuda a descongelar los alimentos. FUNCIÓN DE CALENTADOR SUPERIOR E INFERIOR: Se utiliza con frecuencia para cocinar sólo en una bandeja. Freír equilibradamente ambas partes del alimento, hace que sea crujiente.
- Page 24 FUNCIÓN VENTILADOR TURBO + CALEFACTOR INFERIOR: el ventilador y los calefactores inferiores se activan al mismo tiempo. M = botón de selección de funciones (-) = botón menos (+) = botón más (-) (+) juntos = manual Icono del temporizador Icono de cocción Cocción automática Cierre de seguridad...
- Page 25 punto comienza a parpadear. A continuación, puede restablecer la hora actual. ¡Importante! Si no se ajusta la hora, no es posible el correcto funcionamiento del horno. FUNCIONAMIENTO MANUAL Si el programador no está en modo semiautomático o totalmente automático, funciones horno pueden manejar...
- Page 26 CANCELAR LA CONFIGURACIÓN Cancelar los ajustes de la función automática: Pulse simultáneamente los botones (-) y (+). Cancela los ajustes del temporizador. Pulse el botón M para seleccionar los ajustes del temporizador. Pulse los botones (-) y (+). AJUSTE DE FIN DE COCCIÓN Si quieres que el horno se apague a una hora determinada, puedes programar el temporizador de cocción.
- Page 27 Pulse el botón M hasta que "dur "y "0.00" parpadeen en la pantalla, junto al icono de cocción automática (por ejemplo, la hora actual es 17:30). Ajuste el tiempo de cocción con los botones (+) y (-), entre 1 minuto y 10 horas.
-
Page 28: Uso Del Electrodoméstico
Si se activa con el funcionamiento del horno o con una programación seleccionada (fin de cocción o inicio y fin de cocción), el bloqueo impide modificar la programación. Desactivación: toque el botón (+) durante unos 5 segundos. NOTA: en caso de corte de corriente, cuando se restablezca el suministro eléctrico, la cerradura seguirá... - Page 29 Los hornos continuarán cocinando a la temperatura actual usando menos energía si la tapa se cierra unos minutos antes de cocinar. Luz de Termostato Ilumina esta luz cada vez que el temostato funciona e intenta fijar la temperatura de cocinado y se apaga cuando el horno alcance a la temperatura antes determinada.
-
Page 30: Intrucciones Para Cocinar
7. INTRUCCIONES PARA COCINAR Para un asado perfecto, el horno debe precalentarse a la temperatura decocción preajustada. Solo se puede cocinar carne muy grasa en el horno apartir de frío. Nunca use sartenes poco profundas o la bandeja de goteo como sartenes para asar, para ensuciar las paredes del horno lo menos posible, evite las salpicaduras de grasa, los jugos se queman rápidamente y se produce humo. -
Page 31: Información Inherente Medioambiente
Aberturas de ventilación Una vez finalizada la cocción, la temperatura de la cavidad será de más de 70 grados. La ventilación a través de las aberturas seguirá funcionandodurante 15 minutos después de haber finalizado la cocción con el horno. 8. INFORMACIÓN INHERENTE MEDIOAMBIENTE Este aparato se ha marcado de acuerdo con la Directiva Europea... - Page 32 desperdicios eléctricos y electrónicos o bien entregar al vendedor en el momento de comprar un nuevo aparato. La adecuada recogida de este aparato contribuye a evitar posibles repercusiones negativas para el ambiente o la salud de las personas. eliminación debe hacerse respetando reglamentos...
-
Page 33: Servicio Postventa
9. SERVICIO POSTVENTA Problema Causa probable Qué hacer El horno no funciona. Suministro eléctrico dis- Verifique el suministro de ponible. energía. El horno se detiene durante la El enchufe se sale de la toma de Vuelva a instalar el enchufe en cocción. - Page 34 El horno no calienta. La puerta está abierta. Cierre la puerta y reinicie. Controles del horno no ajustados sección sobre correctamente. funcionamiento del horno y reinicie el horno. Fusible disparado o interruptor Sustituya el fusible o reinicie el automático apagado. interruptor.
- Page 35 Para hacer uso de la garantía acuda al centro donde compró este producto o bien contacte con nosotros de cualquiera de las siguientes formas: o A través del email sat@universalblue.es, adjuntando la factura de compra e indicando sus datos de contacto y brevemente qué problema presenta su producto.
- Page 36 Puedes descargar este manual en nuestra página web: www.universalblue.es *Universal for Engineering Industries Spain, S.L. se reserva el derecho de hacer cualquier cambio en las especificaciones y características de los productos sin previo aviso, debido a la mejora continua de los productos. Las imágenes aquí mostradas son orientativas, por lo que puede haber pequeñas diferencias entre las imágenes y el producto que haya adquirido.
-
Page 37: English
ENGLISH Congratulations on the purchase of your product. We recommend you to spend some time to read this Instruction Manual in order to fully understand how to use it correctly.. Read all the safety instructions carefully before use and keep this Instruction / Installation Manual for future reference. - Page 38 Keep children under 8 years of age away from the oven unless they are under the constant supervision of an adult. This oven can not be used by children of 8 years or older or by persons with reduced physical, sensory or mental faculties, lack of experience and knowledge, or unless under supervision or following instructions on their use in a safe and secure way.
- Page 39 mental faculties, or lack of experience and knowledge, unless under supervision or following instructions on their use by the person responsible for their safety. WARNING: Children less than 8 years of age shall be kept away unless continuously supervised. CAUTION: Cooking process shall be supervised. Cooking process shall always be supervised.
- Page 40 Use only the temperature probe recommended for this oven. Do not use a steam cleaner. IMPORTANT: The oven produces hot air or steam during the cooking process. Be very careful when opening the door. The user must not replace the appliance's power cord.
- Page 41 Intended use This product has been designed for domestic use. Commercial use is not permitted. This appliance may only be used for cooking purposes. It shall not be used for other purposes like heating a room. This appliance shall not be used to heat plates under the grill, drying clothes or towels by hanging them on the handle or for heating purposes.
- Page 42 service agent or an equally qualified personnel to prevent a hazardous situation. Never wash the appliance by spraying or pouring water on it. There is a risk of electrocution. WARNING: To avoid electric shock, ensure that the device circuit is open before changing the lamp. WARNING: Cut off all supply circuit connections before accessing the terminals.
- Page 43 An omnipolar switch capable to disconnect power supply is required for installation. Disconnection from power supply shall be provided with a switch or an integrated fuse installed on fixed power supply according to building code. Appliance is equipped with a type ‘’Y’’ cord cable. ...
-
Page 44: Product Features
2. PRODUCT FEATURES UBH2303-21 Multifunction digital oven 60 cm width Product dimensions (A x F x A) (cm): 58 x 60 x 59 Capacity: 64 L 0+8 functions (grill + fan) Two door glasses Knobs and digital panel (+ touch control) -
Page 45: Installation
3. INSTALLATION Place the oven in the space reserved for this appliance in the kitchen; It can be placed under a work surface or in a vertical cabinet. Secure the oven in place with two screws using the two fixing holes in the oven frame. - Page 46 adequate ventilation, respect the measurements and installation distances indicated. It is important NOT to COVER the front of the oven. This part can not be placed behind any door for decorative purposes. IMPORTANT In order for the oven to function properly, the space for the oven housing must be adequate.
- Page 47 For safety reasons, direct contact with the electric oven parts should be avoided. The insulation and protection parts must be installed in such a way that they can not be removed with any tool. The oven must be installed as in the Figure to provide a more effective air flow.
- Page 49 FIXING THE OVEN IN ITS COMPARTMENT Place the oven in its compartment. Open the oven door. Secure the oven in your kitchen compartment with the two "A" fasteners, which fit into the holes in the oven frame, and with the two "B" wood screws. ELECTRIC CONNECTION ...
- Page 50 Position the oven so that it is easier to reach the socket used for the electrical connection or the bipolar switch. Do not let the power cord touch the hot surfaces when it is placed and do not attach it to the oven lid. Contact the nearest authorized service center if the power cord is damaged.
- Page 51 damages to people, animals or properties due to the failure to ground the device properly. WHEN THE DEVICE IS INSTALLED INITIALLY: Set the Temperature Control to maximum level. (250 C MAX) Set the Function button as Top and Bottom Grill (and + Fan if available).
-
Page 52: Cleaning The Appliance
4. CLEANING THE APPLIANCE General cleaning Before performing any cleaning or maintenance task, unplug the oven. Set all the controls in the OFF position. Wait until the inside of the oven cools until it is only slightly hot;... - Page 53 REMOVING OVEN DOOR You can remove and clean the oven DOOR easily. You must follow the procedures below to remove the DOOR Open the DOOR completely. Push the 2 hinges shown in the picture backwards. Hold the DOOR and close up to the first stopping place. Pull the raised DOOR away from its mounted location.
-
Page 54: Panel Control
Unscrew the glass cover and replace the bulb with another of the same type. Screw the glass cover back in place. 5. PANEL CONTROL... - Page 55 FUNCTION SELECTION BUTTON: Sets the oven working positions TEMPERATURE ADJUSTMENT BUTTON: Used for setting the oven temperature between 50-250 °C when working. Only put to max. position for grill function. OFF FUNCTION: The product won't work in this position. TOP HEATER FUNCTION: Only the top heater is functional. It is used to toast the top of pre-cooked food or used for pre- heated food.
- Page 56 M = select function button (-) = minus button (+) = plus button (-) (+) together = manual Timer icon Cooking icon Automatic cooking icon Key lock icon SETTING THE TIME OF DAY (24 H CLOCK) After plugging in or reconnecting to a power source after current decay, “0.00”, and “AUTO”...
- Page 57 SETTING THE MINUTE MINDER You can activate the minute minder at any time, regardless the activity state of other programmerfunctions. The measured time ranges from 1 minute to 23 hours 59 minutes. Press button M until the minute minder icon starts to flash, and the display shows “0.00”.
- Page 58 Press button M until the “dur” and “0.00” flashes on the digits, beside automatic cooking iconflashes. Set the cooking time using buttons (+) and (-), within the range from 1 minute to 10 hours. The set time is memorized after about 7 seconds; the current time is shown again.
- Page 59 and the automatic cooking icon starts to flash again. Return control and thermostat knobs to the OFF position. Press button (-) ,(+)or M to cancel signal and to return to the manual operation. SAFETY LOCK This digital timer has a function that locks the oven or the programmings set.The lock does not work when the timer is active.
-
Page 60: Using Your Appliance
6. USING YOUR APPLIANCE ENERGY EFICIENCY Ovens with high efficiency in electricity use and heat insulation should be preferred. Frequently opening the oven lid causes cold air outside the oven to enter inside, thereby causing energy loss. Therefore, oven lid shouldn't be opened if not necessary. -
Page 61: Instructions For Cooking
NOTICE ON THE PLACEMENT OF THE GRILLS: For safe use of the grills, it is imperative to always place them between the side rails of the oven. This will ensure proper removal of the grill and hot food will not slip or fall. 7. -
Page 62: Environmental Information
VENTILATION OPENINGS Once the cooking is finished, the temperature of the cavity will be more than 70 degrees. The ventilation through the openings will continue to work for 15 minutes after cooking has been completed with the oven. 8. ENVIRONMENTAL INFORMATION This appliance is labelled in compliance with European directive 2012/19/EU for Waste Electrical and Electronic Equipment (WEEE). -
Page 63: After-Sales Service
This appliance requires specialist waste disposal. For further information regarding the treatment, recover and recycling of this product please contact your local council, your household waste disposal service, or the shop where you purchased it. For more detailed information about treatment, recovery and recycling of this product, please contact your local city office, your household waste disposal service or the shop where you purchased the product. - Page 64 Oven not installed in a Make sure clearances location with good specified operating ventilation. instructions are maintained. More than one plugs in a Use only one plug for each wall socket. wall socket. Outer surface of the oven Oven not installed in a Make sure clearances...
- Page 65 repeating frequently, call an electrician. Smoke coming out during When operating the oven for Smoke comes out from the operation. the first time heaters. This is not a fault. After 2-3 cycles, there will be no more smoke. Food on heater. Let the oven to cool down and clean food residues from the ground of the oven...
- Page 66 To make use of the guarantee go to the store where you purchased this product or contact us by: o By email, sat@universalblue.es. Please, attach the invoice, add your contact details and explain briefly what the issue is.
- Page 67 Download this manual in our web site: www.universalblue.es *Universal for Engineering Industries Spain, S.L. reserves the right to make any change in the specifications and features of the products without prior notice, due to the continuous improvement of the products. The images shown here are illustrative, so there may be slight differences between the images and the product you have purchased.
- Page 68 www.universalblue.es...
Need help?
Do you have a question about the UBH2303-21 and is the answer not in the manual?
Questions and answers