Table of Contents
Advertisement
Available languages
Available languages
Quick Links
Advertisement
Table of Contents

Related Manuals for universalblue UBH2306-21


Summary of Contents for universalblue UBH2306-21
-
Page 2: Table Of Contents
Horno multifunción cristal blanco/negro White/black glass multifunction oven ÍNDICE ESPAÑOL 1. INSTRUCCIONES DE SEGURIDAD ..........3 2. CARACTERÍSTICAS DEL PRODUCTO .......... 10 3. INSTALACIÓN ................13 4. LIMPIEZA DEL APARATO............. 20 5. PANEL DE CONTROL ..............23 6. USO DEL ELECTRODOMÉSTICO ..........25 7. -
Page 3: Español
ESPAÑOL Felicidades por haber adquirido este producto. Le recomendamos que dedique algún tiempo a leer cuidadosamente este Manual de Instrucciones / Instalación con el fin de hacer un buen uso del mismo. Lea cuidadosamente todas las instrucciones de seguridad antes de utilizar el aparato y conserve este Manual de Instrucciones / Instalación para poder consultarlo en el futuro. - Page 4 Tomar precauciones para evitar tocar resistencias del horno. Mantener alejados del horno a los niños menores de 8 años a no ser que estén bajo la vigilancia constante de un adulto. Este horno no puede ser utilizado por niños de 8 años o más o por personas con facultades físicas, sensoriales o mentales reducidas, con falta de experiencia y conocimientos, o a menos que sea bajo...
- Page 5 Impedir que los niños se acerquen al horno durante su uso, especialmente cuando esté utilizando el grill. Asegúrese de que el horno esté desconectado antes de cambiar la bombilla interior para evitar un riesgo de electrocución. Deberá implementarse un medio de desconexión en la instalación eléctrica fija...
- Page 6 Si no va a utilizar el horno durante mucho tiempo, le recomendamos que lo desenchufe. Si el cable de alimentación resulta dañado, éste deberá ser sustituido por el fabricante o por su servicio técnico autorizado para evitar cualquier riesgo.
- Page 7 Siempre llame a un Centro de Asistencia Técnica autorizado e insista en piezas de repuesto originales si se requieren reparaciones. Las reparaciones hechas por personas incompetentes pueden causar daños. Seguridad eléctrica Conecte el aparato a un enchufe con conexión a tierra protegido por un fusible que cumpla con los valores especificados en el cuadro de especificaciones técnicas.
- Page 8 ADVERTENCIA: Para evitar descargas eléctricas, asegúrese de que el circuito del dispositivo esté abierto antes de cambiar la lámpara. ADVERTENCIA: Corte todas las conexiones del circuito de suministro antes de acceder a las terminales. No use cables cortados o dañados o cables de ex- tensión que no sean el cable original.
- Page 9 Se requiere un interruptor omnipolar capaz de desconectar la fuente de alimentación para la instalación. desconexión fuente alimentación debe proporcionarse con un interruptor o un fusible integrado instalado en una fuente de alimentación fija de acuerdo con el código de construcción.
-
Page 10: Características Del Producto
Regulation 1907/2006/EC (REACH–Restriction Chemicals) 2. CARACTERÍSTICAS DEL PRODUCTO UBH2306-21 Horno multifunción de cristal Frontal de 60 cm Dimensiones del producto (A x F x A) (cm): 58 x 60 x 59 Capacidad 64 litros 0+6 funciones (grill + fan) Puerta: dos cristales Mandos mecánicos (ruletas) - Page 11 Función grill Potencia: 2170 W Color blanco UBH2307-21 Horno multifunción de cristal Frontal de 60 cm Dimensiones del producto (A x F x A) (cm): 58 x 60 x 59 Capacidad 64 litros 0+6 funciones (grill + fan) Puerta: dos cristales Mandos mecánicos (ruletas) Luz interior Accesorios del horno: 1 bandeja plana y 1 rejilla (esmaltadas)
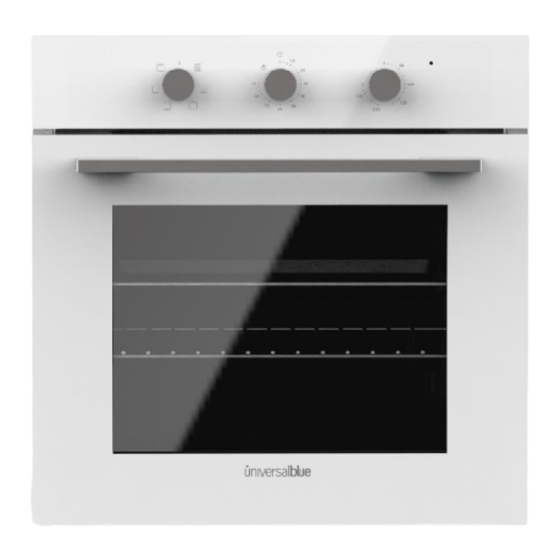
- Page 12 Panel de control Tirador Puerta Luz indicadora Guías internas Bandeja Rejilla...
-
Page 13: Instalación
3. INSTALACIÓN INSTALACIÓN DEL HORNO EN SU ESPACIO EN LA COCINA Coloque el horno en el espacio reservado para este electrodoméstico en la cocina; puede colocarse debajo de una superficie de trabajo o en un armario vertical. Fije el horno en su lugar mediante dos tornillos utilizando los dos agujeros de fijación situados en el marco del horno. - Page 14 posterior del horno y la pared o superficie contigua deberá haber un mínimo de 45 mm. La instalación debe ser realizada por un técnico autorizado de acuerdo con las pautas. Nuestra empresa no se responsabiliza por los daños a personas, animales o propiedades debidos a una instalación incorrecta.
- Page 15 La sección trasera de la cabina en la unidad de cocina debe retirarse para proporcionar u mejor flujo de aire. No se recomienda instalar el dispositivo cerca de refrigeradores o congeladores, de l contrario, el rendimiento de dichos dispositivo se vería afectado por el calor irradiado. ...
- Page 17 FIJACIÓN DEL HORNO EN SU COMPARTIMIENTO Coloque el horno en su compartimiento. Abra la puerta del horno. Fije el horno en su compartimiento de la cocina con los dos fijadores “A”, que encajan en los agujeros del marco del horno, y con los dos tornillos “B”...
- Page 18 Antes de suministrar electricidad al dispositivo: Coloque el horno de manera que sea más fácil alcanzar el enchufe utilizado para la conexión eléctrica o el interruptor bipolar. No deje que el cable de electricidad toque las superficies calientes cuando se coloque y no lo sujete a la tapa del horno. Póngase en contacto con el servicio autorizado más cercano si el cable eléctrico está...
- Page 19 conexión a tierra de acuerdo con las normas. Nuestra empresa no se hace responsable de los daños a personas, animales o propiedades debido a la falta de conexión a tierra adecuada del dispositivo. CUANDO SE INSTALE INICIALMENTE EL DISPOSITIVO: Ajuste el control de temperatura al nivel máximo (250ºC MAX).
-
Page 20: Limpieza Del Aparato
4. LIMPIEZA DEL APARATO Para un buen aspecto y funcionamiento, mantener el horno limpio. El moderno diseño del horno facilita su mantenimiento, reduciéndolo al mínimo. Los elementos del horno que entren en contacto con los alimentos deberán ser limpiados regularmente. LIMPIEZA GENERAL ... - Page 21 No limpiar con un chorro de vapor. NOTA: El fabricante de este aparato no se responsabiliza de los daños causados por productos químicos o limpieza abrasiva. Quitar las bandejas de rejilla lateral del horno Es posible quitar y limpiar las bandejas de rejilla laterales en las que se colocan fácilmente las bandejas y las rejillas.
- Page 22 Coloque las bisagras correctamente y empuje hacia abajo para montar la puerta del horno extraída correctamente. Todo el vidrio utilizado en este aparato ha sido sometido a un tratamiento especial de seguridad. En el caso de rotura, el vidrio se rompe en pequeñas piezas cuadradas y lisas que no son peligrosas porque no son afiladas.
-
Page 23: Panel De Control
5. PANEL DE CONTROL BOTÓN DE SELECCIÓN DE FUNCIÓN: Establece las posiciones de trabajo del horno TEMPORIZADOR: Lea las instrucciones a continuación BOTÓN DE AJUSTE DE TEMPERATURA: Se usa para ajustar la temperatura del horno entre 50- 250°C cuando se trabaja. FUNCIÓN OFF: En esta posición el horno está... - Page 24 VENTILADOR + RESISTENCIA SUPERIOR E INFERIOR: El aire caliente circula dentro del horno para una cocción más uniforme. Se utiliza para alimentos que se quieren blandos por dentro y crujientes por fuera. FUNCIÓN DE CALENTADOR SUPERIOR E INFERIOR: Se utiliza con frecuencia para cocina...
-
Page 25: Uso Del Electrodoméstico
Con el interruptor, el tiempo de funcionamiento del horno se puede configurar máximo a 90 minutos. Es posible determinar manual el tiempo de cocina más largo. Para configurarlo manualmente alienar el botón de reloj en el sentido antihorario con símbolo . - Page 26 lo tanto consumen menos energía sin cambiar la temperatura del horno. El calor residual después de la comida cocinada en el horno debe usarse para otra comida. Ahorrarás energía de esta manera. El precalentamiento debe realizarse por un corto tiempo (10 minutos como máximo).
-
Page 27: Intrucciones Para Cocinar
AVISO SOBRE LA COLOCACIÓN DE LAS PARRILLAS: Para un uso seguro de las parrillas, es imperativo colocarlas siempre entre los raíles laterales del horno. Ello garantizará una correcta retirada de la parrilla y que los alimentos calientes no se deslicen ni se caigan. - Page 28 pronto sugerirá posibles variaciones a los valores mostradosen la tabla. Aberturas de ventilación Una vez finalizada la cocción, la temperatura de la cavidad será de más de 70 grados. La ventilación a través de las aberturas seguirá funcionandodurante 15 minutos después de haber finalizado la cocción con el horno.
-
Page 29: Información Inherente Medioambiente
8. INFORMACIÓN INHERENTE MEDIOAMBIENTE Este aparato se ha marcado de acuerdo con la Directiva Europea 2012/19/EU referente eliminación de los Desperdicios de Aparatos Eléctricos y Electrónicos (RAEE). El símbolo del que consta en el aparato indica que el producto al final de su vida útil no se debe tratar como basura doméstica normal, sino que se debe llevar a los centros de recogida diferenciada de desperdicios eléctricos y electrónicos o bien entregar al vendedor en... -
Page 30: Servicio Postventa
reciclaje más cercana de su localidad o tienda habitual. Se ruega cumplir con sus obligaciones legales y contribuir a la protección de nuestro medio ambiente. 9. SERVICIO POSTVENTA Problema Causa probable Qué hacer El horno no funciona. Suministro eléctrico dis- Verifique el suministro de ponible. - Page 31 cocina. Esto no es un error del aparato. Sale vapor de una grieta en la puerta del horno. Hay agua dentro del horno. El ventilador de refrigeración El ventilador funciona durante un Esto no es una falla del seguirá funcionando tras cierto período para la ventilación aparato;...
- Page 32 No están cubiertos por la garantía los daños causados durante el transporte, negligencia o mal uso, montaje o instalación incorrecta, así como las influencias externas, tales como: rayos atmosféricos o eléctricos, inundaciones, humedad, etc. Tampoco estarán cubiertos por la garantía los daños causados como consecuencia de inadecuada instalación, conexión de alimentación (eléctrica, agua, gas), desagüe y evacuación.
- Page 33 A través del email sat@universalblue.es, adjuntando la factura de compra e indicando sus datos de contacto y brevemente qué problema presenta su producto. o A través del teléfono (0034) 968 893691. o En la siguiente dirección: UNIVERSAL FOR ENGINEERING INDUSTRIES SPAIN, SL C/ Decenio N1, P.I.
-
Page 34: English
ENGLISH Congratulations on the purchase of your product. We recommend you to spend some time to read this Instruction Manual in order to fully understand how to use it correctly.. Read all the safety instructions carefully before use and keep this Instruction / Installation Manual for future reference. - Page 35 Keep children under 8 years of age away from the oven unless they are under the constant supervision of an adult. This oven can not be used by children of 8 years or older or by persons with reduced physical, sensory or mental faculties, lack of experience and knowledge, or unless under supervision or following instructions on their use in a safe and secure way.
- Page 36 mental faculties, or lack of experience and knowledge, unless under supervision or following instructions on their use by the person responsible for their safety. WARNING: Children less than 8 years of age shall be kept away unless continuously supervised. CAUTION: Cooking process shall be supervised. Cooking process shall always be supervised.
- Page 37 Use only the temperature probe recommended for this oven. Do not use a steam cleaner. IMPORTANT: The oven produces hot air or steam during the cooking process. Be very careful when opening the door. The user must not replace the appliance's power cord.
- Page 38 Intended use This product has been designed for domestic use. Commercial use is not permitted. This appliance may only be used for cooking purposes. It shall not be used for other purposes like heating a room. This appliance shall not be used to heat plates under the grill, drying clothes or towels by hanging them on the handle or for heating purposes.
- Page 39 service agent or an equally qualified personnel to prevent a hazardous situation. Never wash the appliance by spraying or pouring water on it. There is a risk of electrocution. WARNING: To avoid electric shock, ensure that the device circuit is open before changing the lamp. WARNING: Cut off all supply circuit connections before accessing the terminals.
- Page 40 An omnipolar switch capable to disconnect power supply is required for installation. Disconnection from power supply shall be provided with a switch or an integrated fuse installed on fixed power supply according to building code. Appliance is equipped with a type ‘’Y’’ cord cable. ...
-
Page 41: Product Features
2. PRODUCT FEATURES UBH2306-21 Multifunction glass oven 60cm width Product dimensions (A x F x A) (cm): 58 x 60 x 59 Capacity: 64 L 0+6 functions (grill + fan) Two door glasses Control: knobs Inner light Accesories: 1 flat tray and 1 grid (enamel) - Page 42 Alarm sound Timer Hidden knobs Child lock Grill function Power: 2170 W Color: black Panel control Handle Door Indicator light Internal guidelines Flat tray Grid...
-
Page 43: Installation
3. INSTALLATION Place the oven in the space reserved for this appliance in the kitchen; It can be placed under a work surface or in a vertical cabinet. Secure the oven in place with two screws using the two fixing holes in the oven frame. - Page 44 INSTALLATION WARNINGS The dimensions and materials of the cabinet or cabinet in which the built-in oven will be installed must be correct and must be resistant to temperature increases. Install as shown in the Figure. The walls of the furniture in which the oven is installed must be resistant to heat.
- Page 46 FIXING THE OVEN IN ITS COMPARTMENT Place the oven in its compartment. Open the oven door. Secure the oven in your kitchen compartment with the two "A" fasteners, which fit into the holes in the oven frame, and with the two "B" wood screws. ELECTRIC CONNECTION ...
- Page 47 Before supplying electricity to the device: Position the oven so that it is easier to reach the socket used for the electrical connection or the bipolar switch. Do not let the power cord touch the hot surfaces when it is placed and do not attach it to the oven lid.
-
Page 48: Cleaning The Appliance
damages to people, animals or properties due to the failure to ground the device properly. WHEN THE DEVICE IS INSTALLED INITIALLY: Set the Temperature Control to maximum level. (250 C MAX) Set the Function button as Top and Bottom Grill (and + Fan if available). - Page 49 Wait until the inside of the oven cools until it is only slightly hot; Cleaning is easier if the oven is a little hot. Wipe the surfaces with a soft cloth, a sponge or a soft damp sponge and then dry them with a cloth. ...
- Page 50 REMOVING OVEN DOOR You can remove and clean the oven door easily. You must follow the procedures below to remove the door. Open the door completely. Push the 2 hinges shown in the picture backwards. Hold the door and close up to the first stopping place. Pull the raised door away from its mounted location.
-
Page 51: Panel Control
Screw the glass cover back in place. 5. PANEL CONTROL FUNCTION SELECTION BUTTON: Sets the oven working positions TIMER: read the followings intructions... - Page 52 TEMPERATURE ADJUSTMENT BUTTON: Used for setting the oven temperature between 50-250 °C when working. Only put to max. position for grill function. OFF FUNCTION: The product won't work in this position. DEFROST FUNCTION: Only turbo fans work in this position, circulates the air at room temperature around frozen food and thaws them.
-
Page 53: Using Your Appliance
working duration can be set to 90 minutes maximum. It is possible to set longer cooking periods manually. For manual use, align the clock button counter clockwise to the symbol. You oven will start working at this position. It will continue working for the duration of your choosing. - Page 54 Preheating should be done for a short time (10 minutes the most). Frozen meals should be deiced before cooking in the oven. Combustible, inflammable materials that ignite easily must be kept away from the oven. Ovens must be installed on a location far from inflammable environments.
-
Page 55: Instructions For Cooking
7. INSTRUCTIONS FOR COOKING For perfect roasting, the oven has to be pre-heated to the pre-set cooking temperature. Only very fatty meat can be cooked with the oven starting from cold. Never use shallow pans or the drip-tray as pans for roasts, to dirty the walls of the oven as little as possible, avoid the fat splattering, the juices burning quickly and smoke being produced. -
Page 56: Environmental Information
experience will soon suggest possible variations to the values shown in the table. VENTILATION OPENINGS Once the cooking is finished, the temperature of the cavity will be more than 70 degrees. The ventilation through the openings will continue to work for 15 minutes after cooking has been completed with the oven. -
Page 57: After-Sales Service
The packaging materials are recyclable product. These materials can be deposited in public collection point for recycling. For devices containing batteries or rechargeable batteries, these parts must be removed and disposed of in clearly marked recycling bins. Please go to the nearest recycling bin in your location or common store. - Page 58 Lamp might be failed. Replace with a lamp with same specifications. Electric shock when No proper grounding. Make sure power supply is touching the oven. grounded properly. Ungrounded wall socket is used. Problem Possible Cause What to Do Water dripping. Water steam Let the oven cool down and...
- Page 59 Oven does not cook well. Oven door opened Do not open oven door frequently during cooking. frequently, if the food you are cooking does not require turning. If you open the door frequently internal temperature drops therefore cooking result will be influenced.
- Page 60 To make use of the guarantee go to the store where you purchased this product or contact us by: o By email, sat@universalblue.es. Please, attach the invoice, add your contact details and explain briefly what the issue is.
- Page 61 www.universalblue.es...
Need help?
Do you have a question about the UBH2306-21 and is the answer not in the manual?
Questions and answers