Samsung RH68B Series User Manual
Hide thumbs
Also See for RH68B Series:
- User manual (408 pages) ,
- User manual (96 pages) ,
- User manual (196 pages)

Related Manuals for Samsung RH68B Series


Summary of Contents for Samsung RH68B Series
- Page 1 Refrigerator User manual RH68B**/RH69B** SEUK Free Standing Appliance Untitled-1 1 2022-03-25 6:06:25...
-
Page 2: Table Of Contents
Contents Safety information What you need to know about the safety instructions Important safety symbols and precautions: Important safety precautions Severe warning signs for transportation and site Critical installation warnings Installation cautions Critical usage warnings Usage cautions Cleaning cautions Critical disposal warnings Additional tips for proper usage Instructions about the WEEE Installation... - Page 3 Appendix Safety Instruction Install Instruction Temperature Instruction Information for model and ordering spare parts English Untitled-1 3 2022-03-25 6:06:25...
-
Page 4: Safety Information
Safety information Before using your new Samsung Refrigerator, please read this manual thoroughly to ensure that you know how to operate the features and functions that your new appliance offers safely and efficiently. What you need to know about the safety instructions •... - Page 5 • Never start up an appliance showing any signs of damage. If in doubt, consult your dealer. The room must be 1 m in size for every 8 g of R-600a refrigerant inside the appliance. The amount of refrigerant in your particular appliance is shown on the identification plate inside the appliance.
-
Page 6: Important Safety Symbols And Precautions
Safety information - If the refrigerating appliance is left empty for long periods, switch off, defrost, clean, dry, and leave the door open to prevent mould developing within the appliance. Important safety symbols and precautions: Please follow all safety instructions in this manual. This manual uses the following safety symbols. -
Page 7: Important Safety Precautions
Important safety precautions Warning; Risk of fire / flammable materials WARNING • When positioning the appliance, ensure the supply cord is not trapped or damaged. • Do not locate multiple portable socket-outlets or portable power supplies at the rear of the appliance. •... - Page 8 • If the product is equipped with LED lamps, do not disassemble the Lamp Covers and LED lamps yourself. - Contact a Samsung service center. - Use only the LED Lamps provided by the manufacturer or its service agents.
- Page 9 • For the most efficient use of energy, please keep the all inner fittings such as baskets, drawers, shelves on the position supplied by manufacturer. • To get the best energy efficiency of this product, please leave all shelves, drawers and baskets on their original position.
-
Page 10: Severe Warning Signs For Transportation And Site
Safety information - Allow clearance to the right, left, back and top when installing. This will help reduce power consumption and keep your energy bills lower. This appliance is intended to be used in household and similar applications such as - staff kitchen areas in shops, offices and other working environments;... -
Page 11: Critical Installation Warnings
- This appliance contains a small amount of isobutane refrigerant (R-600a), a natural gas with high environmental compatibility that is, however, also combustible. When transporting and installing the appliance, care should be taken to ensure that no parts of the refrigerating circuit are damaged. •... - Page 12 Safety information • If the wall socket is loose, do not insert the power plug. - There is a risk of electric shock of fire. • Do not use a power cord that has cracks or abrasion damage along its length or at either end. •...
- Page 13 • If any dust or water is in the refrigerator, pull out power plug and contact your Samsung Electronics service center. - Otherwise there is a risk of fire. • Do not stand on top of the appliance or place objects (such as laundry, lighted candles, lighted cigarettes, dishes, chemicals, metal objects, etc.) on the appliance.
- Page 14 Safety information • Children should be supervised to ensure that they do not play with the snap rings used for door adjustment or the water tube clips. - There is risk of death by suffocation if a child swallows a snap ring or water tube clip. Keep the snap rings and water tube clips out of children’s reach.
-
Page 15: Installation Cautions
Installation cautions CAUTION • Allow sufficient space around the refrigerator and install it on a flat surface. - If your refrigerator is not level, cooling efficiency and durability can be declined. • Allow the appliance to stand for 2-3 hours before loading foods after installation and turning on. - Page 16 Safety information • Do not touch the inside walls of the freezer or products stored in the freezer with wet hands. - This may cause frostbite. • Do not put a container filled with water on the refrigerator. - If spilled, there is a risk of fire or electric shock. •...
- Page 17 - Products that require strict temperature controls must not be stored in the refrigerator. • If you smell pharmaceutical or smoke, pull out power plug immediately and contact your Samsung Electronics service center. • If any dust or water is in Refrigerator, pull out power plug and contact your Samsung Electronics service center.
- Page 18 Safety information • Do not use or place any substances sensitive to temperature such as flammable sprays, flammable objects, dry ice, medicine, or chemicals near or inside of the refrigerator. • Do not use a hair dryer to dry the inside of the refrigerator.
- Page 19 • If the refrigerator emits a burning smell or smoke, unplug the refrigerator immediately and contact your Samsung Electronics service center. - Failing to do so may result in an electric or fire hazards.
-
Page 20: Usage Cautions
Safety information Usage cautions CAUTION • Do not refreeze thawed food. - Frozen and thawed food will develop harmful bacteria faster than fresh. - The second thaw will break down even more cells, leaching out moisture and changing the integrity of the product. - Page 21 • Service Warranty and Modification. - Any changes or modifications performed by a 3rd party on this finished appliance are not covered under Samsung warranty service, nor is Samsung responsible for safety issues that result from 3rd party modifications. • Do not block the air vents inside the refrigerator.
- Page 22 Safety information • When the refrigerator got wet by water, pull out the power plug and contact your Samsung Electronics service center. • Do not strike or apply excessive force to any glass surface. - Broken glass may result in a personal injury and/or property damage.
-
Page 23: Cleaning Cautions
Cleaning cautions CAUTION • Do not spray water directly on the inside or outside the refrigerator. - There is a risk of fire or electric shock. • Do not use a hair dryer to dry the inside of the refrigerator. •... - Page 24 Safety information • Before cleaning or performing maintenance, unplug the appliance from the wall socket. - Failing to do so may result in an electric shock or fire. • Use a clean sponge or soft cloth and a mild detergent in warm water to clean the refrigerator.
-
Page 25: Critical Disposal Warnings
Critical disposal warnings WARNING • Please dispose of the packaging material from this product in an environmentally friendly manner. • Ensure that none of the pipes on the back of the refrigerator are damaged prior to disposal. • When disposing of this refrigerator, remove the door/ door seals and door latch so that small children or animals cannot become trapped inside. -
Page 26: Additional Tips For Proper Usage
Safety information Additional tips for proper usage • In the event of a power failure, call the local office of your electric company and ask how long the failure is going to last. - Most power failures that are corrected in an hour or two will not affect your refrigerator temperatures. -
Page 27: Instructions About The Weee
This product and its electronic accessories should not be mixed with other commercial wastes for disposal. For information on Samsung’s environmental commitments and product regulatory obligations, e.g. REACH, WEEE or Batteries, visit our sustainability page available via www. -
Page 28: Installation
Installation Follow these instructions carefully to ensure a proper installation of this refrigerator and to prevent accidents before using it. WARNING • Use the refrigerator only for its intended purpose as described in this manual. • Any servicing must be performed by a qualified technician. •... -
Page 29: Refrigerator At A Glance
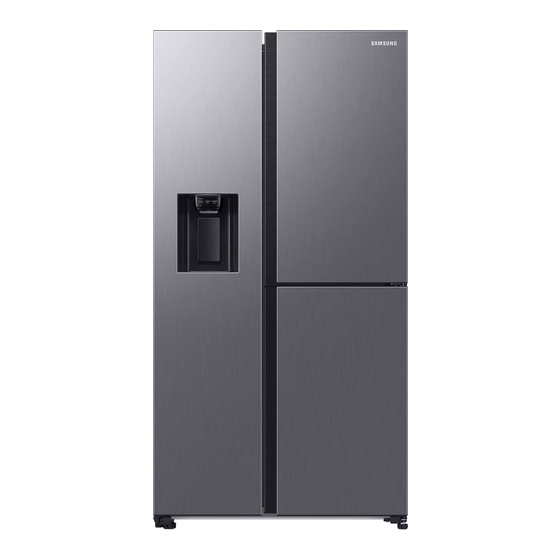
Refrigerator at a glance The actual appearance of your refrigerator may differ, depending on the model and the country. Type A English Untitled-1 29 2022-03-25 6:06:27... - Page 30 Installation Type B English Untitled-1 30 2022-03-25 6:06:27...
- Page 31 01 AutoFill pitcher * A. Freezer B. Beverage Center ** 02 Water dispenser ** C. FSR door * 03 Freezer shelves 04 Multipurpose freezer bin 05 Dried food and meat storage drawer 06 Refrigerator bin 07 Refrigerator shelves 08 Vegetable drawer 09 Multipurpose drawer 10 Ice maker bucket ** 11 Water tank *...
-
Page 32: Step-By-Step Installation
Installation NOTE The design of the egg container may differ with the model. CAUTION For normal models, do not change the position of the freezer shelves. Freezer shelves have different lengths, and if you change the position, you may damage the product when closing the door. - Page 33 Clearance See the pictures and table below for space requirements for installation. Depth “A” Width “B” Height “C” 1747 Overall Height “D” 1780 (unit: mm) 01 more than 50 mm recommended 02 165° 03 170° 04 564 mm 05 1726 mm 06 610 mm 07 912 mm 08 29 mm (without handle)
- Page 34 Installation STEP 2 Spacing (applicable models only) 1. Open the door and locate the provided spacer. 2. Unpack the spacer and attach it to the rear of the refrigerator as shown. It helps ventilate air to the rear wall and save power consumption.
- Page 35 STEP 4 Adjust the levelling feet CAUTION • The refrigerator must be levelled on a flat, solid floor. Failing to do so can cause damage to the refrigerator or physical injury. • Levelling must be performed with an empty refrigerator. Make sure no food items remain inside the refrigerator.
- Page 36 Installation STEP 5 Adjust the door height as well as the door gap To adjust the height of a door The height of a door can be adjusted using the clamp nut and the height nut on the front bottom of each door. 1.
- Page 37 To adjust the gap between the door and the main body of the refrigerator If one of the doors sticks out more than the other, you can use the gap adjustor at the top of the fridge door to align the two doors. 1.
- Page 38 • Samsung takes no responsibility for the water line installation. If water leaks occur, contact the installer of the water line.
- Page 39 • Samsung takes no responsibility for the water line installation. If water leaks occur, contact the installer of the water line.
- Page 40 Installation To connect the water filtering hose to the water line 1. Loosen and remove the compression nut (a) from the water line of the refrigerator, and insert it to the water filtering hose. 2. Tighten up the compression nut (a) to connect the water filtering hose and the water line.
- Page 41 Ordering a new filter To purchase a new water filter (part type: HAFEX/EXP), contact a local Samsung service centre. To mount the water filter into place 1.
- Page 42 • Do not use third-party water filters. Use only Samsung-provided or -approved filters. • Unapproved filters may leak and damage the refrigerator, causing electric shock. Samsung holds no responsibility for any damage that may occur from use of third party water filters.
- Page 43 CAUTION When adjusting the length of the water line tubing, make sure to smooth out the cut surface at a right angle. This is to prevent a water leak. NOTE • A newly installed filter may cause the water dispenser to spurt water briefly. This is because air has entered the water line.
-
Page 44: Door Removal For Entrance
Installation Door removal for entrance If the refrigerator cannot pass through the entrance due to its size, follow these instructions: Tools required (not provided) These tools are used for removing the doors. Phillips screwdriver Flat-head Socket spanner Allen spanner screwdriver (10 mm) (5 mm) Disconnect the water line... - Page 45 Detach the doors CAUTION The door may fall off or over and damage itself during any of these steps. To prevent an accident, use extreme caution when performing these steps. 1. Use a Phillips screwdriver to unscrew the hinge covers (A) on the top of each door.
- Page 46 Installation 6. Gently lift the clamp. NOTE To prevent damage to the clamp or injuries, do not lift the clamp forcefully. 7. Pull the clamp to remove. 8. Open the door by 90 degrees. While holding the door, remove the hinge. CAUTION If you remove the hinge without holding the door, the door may fall and cause...
- Page 47 To reattach the fridge door After you have moved the refrigerator to its final location, reattach the doors by following the removal instructions in reverse order. CAUTION To prevent water leaks from the dispenser, the water line must be fully connected. Make sure both tubes of the water line are inserted fully to the center of transparent coupler (A) or the guidelines (B).
- Page 48 Installation Reattach the doors CAUTION • Before reattaching the doors, make sure all the electrical connectors are properly connected. • The freezer door must be reattached before the fridge door. • Take care when removing the door to ensure that it does not fall on you. •...
- Page 49 4. Press the clamp as shown. 5. Connect the electrical harness. 6. Connect the wire connectors. CAUTION • Make sure the wire connectors are connected properly. Otherwise, the display will not operate. 7. Connect the water tube. - This step does not apply to the models without the AutoFill pitcher and the water dispenser.
-
Page 50: Operations
Operations Feature panel Type 1 Type 2 Type 3 Type 4 English Untitled-1 50 2022-03-25 6:06:38... - Page 51 • Displays the current or desired temperature of the freezer. • indicates that the Power Freeze function is on. 01 Freezer indicator • indicates that the freezer is operating in Fridge mode. • indicates that the freezer is off. • Displays the current or desired temperature of the fridge. 02 Fridge indicator •...
- Page 52 Operations Setting the desired temperature or function 1. Tap any button ( , , or ) to wake up the display. - This step may not apply to some models. 2. Tap to select the fridge or freezer. - The selected compartment’s indicator blinks. - The degrees Celsius symbol (°C) does not blink.
- Page 53 • Available selection: (Power Freeze) -23 °C -22 °C -21 °C -20 °C -19 °C -18 °C -17 °C -16 °C -15 °C (Fridge) • Power Freeze speeds up the freezing process at maximum fan speed. The freezer keeps running at full speed for 50 hours and then returns to the previous temperature.
-
Page 54: Turning On Or Off The Autofill Pitcher
Operations Turning on or off the AutoFill Pitcher You can turn on or off the AutoFill Pitcher in fridge. 1. Tap any button ( , , or ) to wake up the display. - This step may not apply to some models. 2. -
Page 55: Dispenser Panel (Applicable Models Only)
Dispenser panel (applicable models only) 01 Water / Lock 02 Cubed Ice 03 Crushed Ice 01 Water / Lock (3 sec) To dispense chilled water, press Water. The corresponding Water indicator turns on. To prevent use of the dispenser panel buttons and the dispenser lever, press and hold Water for more than 3 seconds. -
Page 56: Special Features
Operations Special features The refrigerator features user-oriented devices that you can use to benefit from. Beverage Center To use the autofill pitcher, drink cold or purified water, press handle to open the Beverage Center and FSR door. A. Fridge door handle B. - Page 57 To fill the Water pitcher 1. Grasp a handle groove of the lid, and then pull up to open the lid. 2. Put tea leaves or fruit to your taste into the infuser. NOTE If you want to keep the infused water in its initial concentration, turn the AutoFill Pitcher function off.
- Page 58 Operations CAUTION • We recommend consuming fruit infused water within 24 hours. After that, the infused water can spoil over time. • You must clean the water pitcher after you have consumed the infused water. Also clean the water pitcher if you haven't used it for a long time. •...
- Page 59 If the indicator does not stop blinking after draining, there might be a system failure. Contact your local Samsung service center. NOTE • You must clean the water pitcher after you have consumed the infused water. You must also clean the water pitcher if you have not used it for a long time or left the full pitcher for more than three days.
- Page 60 Operations Water dispenser (applicable models only) To dispense chilled water, open the Beverage Center and press the dispenser lever. NOTE • The dispenser will stop dispensing if you keep pushing the dispenser lever for about 1 minute. To dispense more water, release and push the lever again. •...
- Page 61 Water/Ice dispenser (applicable models only) Using the dispenser, you can dispense water with or without ice. The water dispenser offers 3 options: chilled water, cubed ice, and crushed ice. To dispense chilled water, press Water on the dispenser panel. Put a water glass under the dispenser, and then push the dispenser lever.
- Page 62 Operations Ice maker (applicable models only) The refrigerator has a built-in ice maker that automatically dispenses ice so that you can enjoy filtered water with cubed or crushed ice. Ice making After you have installed your refrigerator and plugged it in, follow these instructions to ensure proper ice making and to keep the ice bucket full of ice: 1.
- Page 63 3. Reinsert the water tank and fit into the dispenser mechanism. Make sure the front side (with the front lid) of the tank faces to the front. CAUTION • Make sure the water tank fits into the shelf. Otherwise, the water tank may not operate properly.
- Page 64 4. You will hear another chime if the ice maker operates properly. NOTE If this symptom continues, contact the water line installer or a local Samsung service centre. CAUTION • Do not press the button repeatedly after the ice tray is filled with ice or water. Water may overflow or ice may be jammed.
- Page 65 To secure more storage space (applicable models only) If you do not use the ice maker and need more storage space, remove the icemaker bucket (A). Then, insert the Freezer guide (Optional) (B) into the icemaker bucket’s place. CAUTION If the icemaker bucket has been removed, you must turn the ice maker off.
- Page 66 Operations Icemaker bucket If you do not dispense ice for an extended period, ice may form clumps inside the bucket. If this happens, remove and empty the icemaker bucket. 1. To remove the icemaker bucket, gently lift it up and pull out slowly while holding the handgrips with both hands.
- Page 67 Water pressure If you want to check how much water flows into the ice tray, follow these steps. 1. Remove the ice bucket. 2. Press the button (A) on the bottom of the ice maker. Normally, the ice tray fills with water in a few minutes.
- Page 68 Operations For first-time use • Let the ice maker make ice for 1-2 days. • Discard the first 1-2 buckets of ice to remove impurities in the water supply system. Diagnosis • The overall design and/or accessories may differ with the model. •...
- Page 69 Ice making (applicable models only) Twist ice maker 1. Open the freezer door, and slide open the ice tray. 2. Fill the tray with water up to the maximum level (A) marked on the inner rear of the tray. 3. Slide the tray back into position. NOTE The ice making time depends on your temperature settings.
-
Page 70: Maintenance
Maintenance Handle and care Shelves (fridge/freezer) / Wine rack (applicable models only) 1. Pull out the shelf (or wine rack) a little. Then, while lifting the rear side, pull out. 2. Twist the shelf (or wine rack) diagonally to remove. CAUTION •... - Page 71 Drawers Gently lift up the front of the drawer and slide out. Vegetable / Dried food and meat storage drawer To remove the vegetable drawer from the fridge or the dry drawer from the freezer: 1. First, remove surrounding multipurpose drawers if necessary.
- Page 72 Maintenance Where to keep the scoop (applicable models only) Keep the scoop in the front part of the ice bucket. Place the scoop as shown in the figure, making sure it does not interfere with the ice dispenser when the ice bucket tray is inserted.
- Page 73 3. While slightly twisting the infuser, pull it out of the sealed mouth. 4. Clean the infuser with neutral agents and running water. Rinse and dry well. 5. Reassemble the Autofill pitcher in the reverse order of disassembly. CAUTION The water pitcher and lid are not microwave safe and can melt or deform if exposed to heat (including hot water).
-
Page 74: Cleaning
Maintenance Cleaning Interior and exterior WARNING • Do not use benzene, thinner, or home/car detergent such as Clorox™ for cleaning purposes. They may damage the surface of the refrigerator and cause a fire. • Do not spray water onto the refrigerator. This may cause electric shock. •... - Page 75 3. Clean the dispenser nozzle thoroughly, and then assemble it back. CAUTION • Fully insert the dispenser nozzle, so it is back to its original position. • Do not use a sponge with rough textures for cleaning the dispenser nozzle. Rubber seals If the rubber seals of a door become dirty, the door may not close properly and reducing refrigerator performance and efficiency.
-
Page 76: Replacement
This product contains a light source of energy efficiency class <G>. The lamp(s) and/or control gear(s) are not user-serviceable. To replace the lamp(s) and/or control gear(s) in the product, contact a local Samsung service centre. For detailed instructions on replacing lamp(s) or control gear(s) in your product, visit the Samsung website (http://www.samsung.com), go to Support >... -
Page 77: Troubleshooting
Troubleshooting Before calling for service, review the checkpoints below. Any service calls regarding normal situations (No Defect Cases) will be charged to users. General Temperature Symptom Possible causes Solution • Power cord is not plugged • Properly plug in the power in properly. - Page 78 Troubleshooting Odour Symptom Possible causes Solution • Clean the refrigerator and • Spoiled food. remove any spoiled food. Refrigerator has odours. • Make sure strong smelling • Food with strong odours. food is wrapped airtight. Frost Symptom Possible causes Solution Frost around the •...
- Page 79 Symptom Possible causes Solution • You must wait for 12 hours • Ice maker has just been for the refrigerator to make installed. ice. • Set the freezer temperature • Freezer temperature is too below -18 °C (0 °F) or -20 °C high.
- Page 80 Water does not dispense. • Dispenser panel Lock is • Deactivate dispenser panel activated. Lock. • Use only Samsung-provided or approved filters. • A third-party water filter • Unapproved filters may was installed. leak and damage the refrigerator.
-
Page 81: Do You Hear Abnormal Sounds From The Refrigerator
Do you hear abnormal sounds from the refrigerator? Before calling for service, review the checkpoints below. Any service calls related to normal sounds will be charged to the user. These sounds are normal. • When starting or ending an operation, the refrigerator may make sounds similar to a car engine igniting. - Page 82 Troubleshooting • As the refrigerator cools or freezes, refrigerant gas moves through sealed pipes, causing bubbling sounds. Bubbling! • As the refrigerator temperature increases or decreases, plastic parts contract and expand, creating knocking noises. These noises occur during the defrosting cycle or when electronic parts are working.
-
Page 83: Appendix
Appendix Safety Instruction • For the most efficient use of energy, please keep the all inner fittings such as baskets, drawers, shelves and ice cube tray on the position supplied by manufacturer. • This refrigerating appliance is not intended to be used as a built-in appliance. Install Instruction For refrigerating appliances with climate class Depending on the climate class, This refrigerating appliance is intended to be used at... -
Page 84: Temperature Instruction
Appendix Temperature Instruction Recommended Temperature The optimal temperature setting for food storage: • Fridge: 3 °C • Freezer: -19 °C • Fridge of Freezer Convert: 3 °C NOTE The optimal temperature setting of each compartment depends on the ambient temperature. Above optimal temperature is based on the ambient temperature of 25 °C. Power Cool Power Cool speeds up the cooling process at maximum fan speed. - Page 85 How to store for best preservation (applicable models only) Cover foods to retain moisture and prevent them from picking up odors from other foods. A large pot of food like soup or stew should be divided into small portions and put in shallow containers before being refrigerated.
- Page 86 Appendix Refrigerator & Freezer Storage Chart The freshness longevity depends on temperature and exposure to moisture. Since product dates aren't a guide for safe use of a product, consult this chart and follow these tips. Milk products Product Refrigerator Freezer Milk 1 week 1 month...
- Page 87 Fish / Seafood Product Refrigerator Freezer Fresh fish 1-2 days 3-6 months Cooked fish 3-4 days 1 month Fish salad 1 day Not recommended Dried or pickled fish 3-4 weeks Fruits Product Refrigerator Freezer Apples 1 month Peaches 2-3 weeks Pineapple 1 week Other fresh fruit...
-
Page 88: Information For Model And Ordering Spare Parts
24 Months. • Relevant information for ordering spare parts, directly or through other channels provided by the manufacturer, importer or authorized representative • You can find professional repair information on http://samsung.com/support. You can find user servicing manual on http://samsung.com/support. English... - Page 89 Memo Untitled-1 89 2022-03-25 6:06:51...
- Page 90 Memo Untitled-1 90 2022-03-25 6:06:51...
- Page 91 Memo Untitled-1 91 2022-03-25 6:06:51...
- Page 92 Contact SAMSUNG WORLD WIDE If you have any questions or comments relating to Samsung products, please contact the SAMSUNG customer care center. Country Contact Center Web Site 0330 SAMSUNG (7267864) www.samsung.com/uk/support IRELAND (EIRE) 0818 717100 www.samsung.com/ie/support DA68-04434A-00 Untitled-1 92 2022-03-25...
Need help?
Do you have a question about the RH68B Series and is the answer not in the manual?
Questions and answers