Table of Contents
Advertisement
Quick Links
Advertisement
Table of Contents

Related Manuals for Marvel MLNP115-I S 01A MLNP115-SS01B


Summary of Contents for Marvel MLNP115-I S 01A MLNP115-SS01B
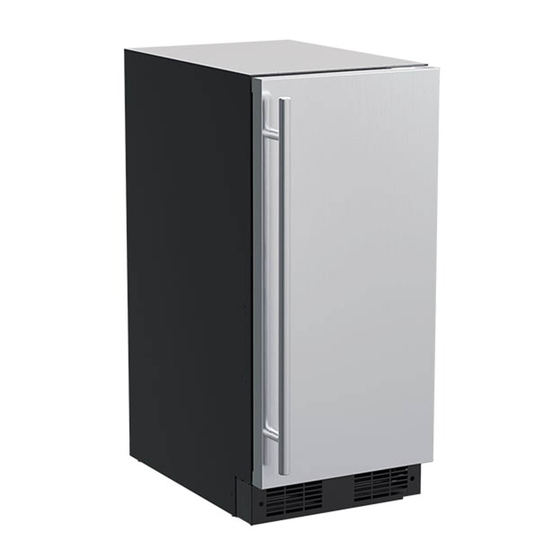
- Page 1 GE T TING STARTED QUICK REFERENCE GUIDE MARVEL NUGGET ICE MACHINES M L N P 1 1 5 - I S 0 1 A M L N P 1 1 5 - S S 0 1 B M S N P 1 1 5 - S S 0 1 A...
-
Page 2: Table Of Contents
WARNING Got a Marvelous Design? State of California Proposition 65 Warning: We would love to see how your Marvel product looks in its This product contains one or more chemicals known new home. Send us photos at marketing@marvelrefriger- to the State of California to cause birth defects or ation.com, and we might feature your Marvel home design... -
Page 3: Unpacking Your Appliance
If there is damage, the packaging will be needed as proof of damage in transit. Afterwards please dispose of all items responsibly. MARVEL WARNING XXXXXXXXXXXX XXXXXXXXXXXX Dispose of the plastic bags which can... -
Page 4: Installing Your Appliance
The over- CAUTION all height of your Marvel appliance may be adjusted higher (by turning the leveling leg out, CCW) and lower (by turning Front Grille the leveling leg in, CW). -
Page 5: Electrical
ELECTRICAL Electrical Connection A grounded 115 volt, 15 amp dedicated circuit is required. This product is factory equipped with a power supply cord that has a three-pronged, grounded plug. It must be plugged into a mating grounding type receptacle in accor- dance with the National Electrical Code and applicable Do not remove local codes and ordinances (see Figure 6). -
Page 6: Cutout And Product Dimensions
CUTOUT & PRODUCT DIMENSIONS PREPARE SITE 14 ⁄ ” (379 mm) CAUTION Your product has been designed for either free-standing FRONT or built-in installation. When built-in, your unit does not require additional air space for top, sides, or rear. However, 28”... - Page 7 CUTOUT & PRODUCT DIMENSIONS CUTOUT DIMENSIONS - MLNP115 14 ⁄ ” (379 mm) Preferred location for electrical outlet is in an adjacent 5⁄8" FRONT cabinet. (16 mm) Figure 11 34 1⁄₄" 24" Figure 13 28” (870 mm) (610 mm) 33 ⁄ ” 34 ⁄...
- Page 8 CUTOUT & PRODUCT DIMENSIONS CUTOUT DIMENSIONS - MPNP415 FRONT Figure 18 Figure 16 *15” cutout width may be sufficient if opening is exact and square PRODUCT DIMENSIONS Figure 19 REAR Figure 17 SIDE Figure 20...
-
Page 9: Door Adjustments
DOOR ADJUSTMENTS Grille Installation Door Swing REMOVING AND INSTALLING GRILLE Wall 2-1/8" Min. (54 mm) WARNING WARNING - D isconnect electric power to the unit before removing the grille. When using the unit, the Figure 22 grille must be installed. 90°... - Page 10 DOOR ADJUSTMENTS To align and adjust the door - MSNP115 1. Gently pry off hinge cover from top of unit. 2. Loosen (do not remove) top and bottom hinge screws using a Torx T-25 screwdriver. 3. Align door squarely with cabinet. 4.
- Page 11 DOOR ADJUSTMENTS Door Adjustments - MLNP115 & MPNP415 DOOR ALIGNMENT AND ADJUSTMENT Align and adjust the door if it is not level or not sealing properly. If the door is not sealed, the unit may not cool properly, or excessive frost or condensation may form in the interior.
-
Page 12: Door Reversal
DOOR REVERSAL REVERSING THE DOOR Prepare door for reinstallation: 1. Remove gasket. This will reveal mounting holes for the 1. Open door. magnet assembly. 2. Using T-25 Torx bit loosen screw #1 and remove 2. Remove magnet assembly from door with T-10 TORX screw #2 on top and bottom hinge. -
Page 13: Installing The Anti-Tip Device
INSTALLING THE ANTI-TIP DEVICE Check to be sure the unit is level from front to back Anti-Tip Bracket - MSNP115 and side to side. Make any necessary adjustments. 1. Slide unit out so screws on top of unit are easily The unit’s top surface should be approximately 1 /8”... -
Page 14: Integrated Panel Installation
6. Secure integrated panel to door using clamps. A robust tape may also be used. Marvel recommends the use of bar clamps to secure the panel to the door. If using tape, be certain the tape will not damage panel finish upon removal. -
Page 15: Installing The Drain Plumbing
INSTALLING THE DRAIN PLUMBING Drain NOTE This model comes equipped with a factory installed drain pump. The maximum lift for the drain pump is 10 feet. This must be CONNECT DRAIN LINE done as close to the rear of the unit as possible. CAUTION Failure to connect water supply or drain line connections properly can result in personal injury and property damage. - Page 16 CAUTION CAUTION FIlter head 3/8" NPT, Figure 42 WARNING Figure 43...
-
Page 17: Operation Of Ice Machine
Time 2. Adjust using to reach set point varies based upon ambient temperature, temperature of product loaded, door openings, etc. Marvel 3. Confirm setting by pressing recommends allowing the unit to reach set points before... -
Page 18: Using Your Electronic Controls
USING YOUR ELECTRONIC CONTROL Figure 44 Electronic control CONTROL FUNCTION GUIDE FUNCTION COMMAND NOTES ON/OFF Press and release. Unit will immediately turn On or OFF. Adjust Ice Density See “Ice” section. The o F / o C symbol will flash briefly after 5 sec- Press and hold for 5 seconds and onds. - Page 19 USING YOUR ELECTRONIC CONTROLS - MPNP415 MODELS ONLY Figure 46 Electronic control Control Function Guide Function Command Notes ON/OFF Press and release. Unit will immediately turn ON or OFF. Option Open Door Closed Door White White Hold and press and release .
- Page 20 USING YOUR ELECTRONIC CONTROLS - MPNP415 MODELS ONLY BrightShield™ This model includes BrightShield™ with Vyv™ Antimicrobial Light Technology. BrightShield™ • Kills* and prevents the growth of viruses, bacteria, fungi, yeasts, mold, and mildew • Provides continuous antimicrobial action to keep surfaces clean •...
-
Page 21: Cleaning Your Ice Machine
CLEANING YOUR ICE MACHINE Cleaning NUGGET ICE MACHINE CLEANING CYCLE This ice machine has an automatic clean alert function. The control will indicate in the display, approximately every EXTERIOR CLEANING six months with normal use, reminding you to Stainless steel can discolor when exposed to chlorine gas, clean your unit. - Page 22 The filter is designed to filter out scale, sediment, particles and cloudiness as well as reduce chlorine and other off tastes and odors. Marvel recommends replacing the filter (Part No. S41016405-ACCY) when you clean your machine. The filter is available at...
- Page 23 CLEANING YOUR ICE MACHINE will appear in the display Cleaning Condenser a. Reinstall shield and close door. b. The machine will circulate water and perform a INTERVAL - EVERY SIX MONTHS series of final rinses for approximately 15 minutes. c. The unit will resume making ice - indicated by 3 sof To maintain operational efficiency, keep the front grille free tones and scrolling in the display.
-
Page 24: Care And Cleaning
3. After water is drained, reinstall the drain pump and reattach all connections. For questions regarding winterization, please call Marvel Refrigeration at 616.754.5601... -
Page 25: Obtaining Service
800.223.3900 for directions on how to obtain warranty coverage in your area. • If the product is outside the first year warranty period, Marvel Customer Service can provide recommendations of service centers in your area. A listing of authorized service centers is also available at www.marvelrefrigeration.com under the... -
Page 26: Warranty
For designated Marvel Professional product, Marvel offers a one year extension of the two year warranty coverage from the date of purchase, free of charge. To take advantage of this third year warranty, you must register your product with Marvel within 60 days from the date of purchase at marvelrefrigeration.com and provide proof of purchase. - Page 28 Marvel Refrigeration 1260 E. Van Deinse St. Greenville MI 48838 616.754.5601 All specifications and product designs subject to change without notice. Such revisions do not entitle 30668 Rev C the buyer to corresponding changes, improvements, additions, replacements or compensation for previously purchased products.
Need help?
Do you have a question about the MLNP115-I S 01A MLNP115-SS01B and is the answer not in the manual?
Questions and answers