HTP RGH-199 Installation, Start-Up, Maintenance, Parts, Warranty
Hide thumbs
Also See for RGH-199:
- User's information manual (12 pages) ,
- Installation manual (79 pages)
Table of Contents
Advertisement
Installation
Start-Up
Maintenance
Parts
Warranty
RGH-150 / 199* Models
* "LP" Denotes Propane Gas
This manual must only be used by a qualified installer / service technician. Read all instructions in this manual before installing.
Perform steps in the given order. Failure to do so could result in substantial property damage, severe personal injury, or death.
Improper installation, adjustment, alteration, service, or maintenance could void product warranty and cause property
damage, severe personal injury, or death.
California Proposition 65 Warning: This product contains chemicals known to the State of California to cause cancer, birth
defects, or other reproductive harm.
The manufacturer reserves the right to make product changes or updates without notice and will not be held liable for
typographical errors in literature.
The surfaces of these products contacted by potable (consumable) water contain less than 0.25% lead by weight as required
by the Safe Drinking Water Act, Section 1417.
NOTE TO CONSUMER: PLEASE KEEP ALL INSTRUCTIONS FOR FUTURE REFERENCE.
272 Duchaine Blvd.
New Bedford, MA 02745
Crossover
Water Heaters
www.htproducts.com
lp-590 Rev. 003 Rel. 007 Date 4.2.19
Advertisement
Table of Contents

Subscribe to Our Youtube Channel
Related Manuals for HTP RGH-199


Summary of Contents for HTP RGH-199
- Page 1 Crossover Water Heaters Installation Start-Up Maintenance Parts Warranty RGH-150 / 199* Models * “LP” Denotes Propane Gas This manual must only be used by a qualified installer / service technician. Read all instructions in this manual before installing. Perform steps in the given order. Failure to do so could result in substantial property damage, severe personal injury, or death. Improper installation, adjustment, alteration, service, or maintenance could void product warranty and cause property damage, severe personal injury, or death.
- Page 2 WARNING: If the information in these instructions is not followed exactly, a fire or explosion may result causing property damage, personal injury or death. • Do not store or use gasoline or other flammable vapors and liquids in the vicinity of this or any other appliance. WHAT TO DO IF YOU SMELL GAS •...
- Page 3 Foreword For the Installer This manual is intended to be used in conjunction with other This water heater must be installed by qualified and licensed personnel. literature provided with the water heater. This includes all related The installer should be guided by the instructions furnished with the control information.
-
Page 4: Table Of Contents
E. Applications F. Circulator Sizing G. Pressure Relief Valve From the Uniform Plumbing Code 2000 - Section 510 - H. Filling the Heater Protection From Damage Part 5 - Venting 1. Water heaters generating a glow, spark or flame capable of igniting A. -
Page 5: Part 1 - General Safety Information
Part 1 - General Safety Information This water heater must be installed by a licensed plumber, licensed This water heater is approved for indoor installations only and is not gas fitter, and/or professional service technician. Improper intended for use as a pool heater. Clearance to combustible materials: installation and/or operation can cause a potentially hazardous 0”... -
Page 6: Improper Combustion
DO NOT alter or modify the water heater or water heater controls. covered by the warranty. Altering any HTP water heater with parts not manufactured by HTP WILL INSTANTLY VOID the water heater warranty and could result in The water must be potable, free of corrosive chemicals, sand, property damage, personal injury, or death. -
Page 7: Freeze Protection
Damages resulting from incorrect installation or from use with instructions provided by the manufacturer. of products not approved by HTP ARE NOT covered by warranty. Failure to install a temperature limiting or mixing valve and follow these instructions could result in property damage, severe personal injury, or death due to scalds. -
Page 8: Part 2 - Before You Start
LP Conversion Kit - 199 Model (7855P-452) Vent Screens (3”) 2 screens (7850P-085) Table 4 - Included with the Water Heater B. Optional Equipment Optional equipment available from HTP (and Part #): Optional Parts Cascade Communication Cable One (1) (7850P-093) 150 PSI Pressure Relief Valve (7850P-103) 3/4”... -
Page 9: Part 3 - Prepare The Water Heater Installation
Other Optional Equipment Below is a list of other optional equipment available from HTP. These additional options may be purchased through your HTP distributor: This water heater has a condensate disposal system that may freeze • 2” PVC Concentric Vent Kit (Part # KGAVT0501CVT) if exposed to sustained temperatures below 32 F. -
Page 10: Leveling
B. Leveling All water heaters eventually leak. Locate the water heater where any leakage from the relief valve, related piping, tank, or In order for the condensate to properly flow out of the collection connections will not result in damage to surrounding areas or system, the area where you locate the heater must be level. -
Page 11: Exhaust Vent And Intake Pipe
the water heater is installed in areas where indoor air is contaminated (see Table 7) it is imperative that the water heater be installed as direct vent so that all combustion air is taken directly from the outdoors into The space must be provided with correctly sized combustion/ the water heater intake connection. -
Page 12: Prevent Combustion Air Contamination
Approved Carbon Monoxide Detectors: Each carbon monoxide 3. If practical, close all building doors, windows, and doors between detector as required in accordance with the above provisions shall the space in which the water heater remains connected to the comply with NFPA 70 and be ANSI/UL 2034 listed and IAS certified. common venting system and other spaces in the building. -
Page 13: Technical Specifications
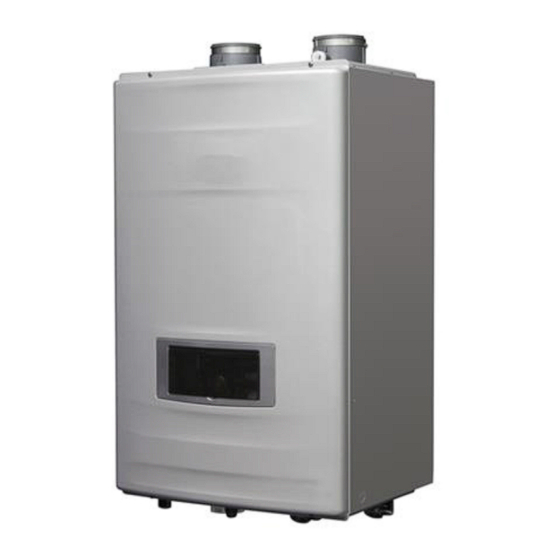
I. Technical Specifications Model Installation Indoor, Wall Hung, Fully Condensing Minimum / Maximum Input (Btu/Hr) 15,000 / 150,000 19,900 / 199,000 F Rise 8.2 GPM 11 GPM Hot Water Capacity F Rise 6.4 GPM 8.5 GPM F Rise 3.7 GPM 5 GPM Flue System Category IV, Sealed Combustion Direct Vent, Power Vent... - Page 14 13.4 34.2 15.4 10.3 29.9 10.7 12.6 15.3 17.3 Figure 3 - 150 Model Dimensions 14.8 36.3 11.6 16.8 31.9 10.6 7.20 10.5 12.5 17.6 19.7 Figure 4 - 199 Model Dimensions Description Diameter Air Intake Adapter 3” Exhaust Outlet Adapter 3”...
- Page 15 Figure 5 - Components Number Component Description Number Component Description Number Component Description Air Intake Pipe Adapter Condensate Trap Control Panel Flue Air Pressure Sensor Gas Pipe Adapter Heat Exchanger Air Inlet Orifice Condensate Adapter Flame Detection Sensor Air Inlet Pipe Hot Water Adapter Water Level Detection Sensor Gas Outlet Pipe...
-
Page 16: Wall-Mounting
more or less energy. The negative regulated gas valve provides only the units are putting only the needed energy into the connected the amount of fuel required to ensure clean combustion. The mixer storage tank, and also to ensure all connected units get even run accurately regulates the combination of gas and air throughout the time to balance out service requirements. -
Page 17: Part 4 - Water Piping
• Isolation (shutoff valves) should be used to ease future or death. servicing. HTP offers isolation valves (Part #7850P-090). These optional parts may be purchased separately. • All water piping should be insulated. -
Page 18: Backflow Preventer
B. Backflow Preventer Use a backflow preventer specifically designed for water heater installations. This valve should be installed on the cold water fill supply line per local codes. C. Potable Expansion Tank A potable hot water expansion tank is required to offset heated water expansion. In most city plumbing systems, the water meter has a no return or back flow device built into the system to prevent back flowing of water into city mains. - Page 19 RECIRCULATION COLD WATER INLET HOT WATER OUTLET Figure 9 - DHW Piping, Single Water Heater - NOTE: There is a Built-In Flow Check in the Internal Pump Loop NOTES: 1. Minimum pipe size should match connection size. Upsize pipe accordingly if greater flow is required. 2.
- Page 20 RECIRCULATION COLD WATER INLET HOT WATER OUTLET Figure 10 - Piping with Recirculation - NOTE: There is a Built-In Flow Check in the Internal Recirculation Pump Loop NOTE: For installations where internal pump is not adequate for the recirculation loop, an additional pump can be installed and powered by the appliance (2A Max).
- Page 21 HOT WATER OUTLET COLD WATER INLET Figure 11 - Water Heater with Storage Tank - NOTE: There is a Built-In Flow Check in the Internal Pump Loop HOT WATER OUTLET COLD WATER INLET Figure 12 - Water Heater with Storage Tank and Recirculation - NOTE: There is a Built-In Flow Check in the Internal Recirculation Pump Loop NOTES: 1.
- Page 22 AIR HANDLER HOT WATER OUTLET COLD WATER INLET Figure 13 - Water Heater with Air Handler without Internal or External Recirculation - NOTE: There is a Built-In Flow Check in the Internal Pump Loop SOLENOID AIR HANDLER HOT WATER OUTLET COLD WATER INLET Figure 14 - Water Heater with Air Handler and Recirculation - NOTE: There is a Built-In Flow Check in the Internal Recirculation Pump Loop NOTE: If Preheat, Internal, or External Recirculation is active when using Air Handler, a solenoid valve must be used to isolate air handler loop when central...
- Page 23 COLD WATER INET HOT WATER OUTLET Figure 15 - Water Heater with Thermal Bypass Valve - NOTE: There is a Built-In Flow Check in the Internal Recirculation Pump Loop Using the Optional Crossover (Thermal Bypass) Valve In piping applications where a dedicated recirculation line is not available or too costly to install, the water heater can use a crossover (thermal bypass) valve as a method of recirculation.
- Page 24 AIR SEPARATOR DIFFERENTIAL PRESSURE SPACED TEES WATER HEATER COLD WATER INLET LEAD FREE HOT WATER OUTLET Figure 16 - Water Heater Installed with Combi Appliance - NOTE: There is a Built-In Flow Check in the Internal Recirculation Pump Loop NOTE: The solenoid valve is powered by the water heater. The solenoid valve must be normally closed, energize when the water heater is over 90% of capacity, and deactivate when water heater is less than 50% of capacity.
- Page 25 Figure 17 - Cascaded Water Heaters Figure 18 - Cascaded Water Heaters w/ Recirculation NOTE: For installations where internal pump is not adequate for the recirculation loop, an additional pump can be installed and powered by the appliance (2A Max). See Pressure Drop and Pump Curves, this manual. NOTES: 1.
-
Page 26: Circulator Sizing
F. Circulator Sizing Figure 19 - This chart represents the internal recirculation pump performance curve taking into account valves and heat exchanger pressure losses. Figure 20 - This chart represents heat exchanger pressure drop through the heat exchanger and internal valves. NOTE: When using external recirculation mode with the built-in pump, observe the following maximum recirculation pipe lengths including fittings: •... -
Page 27: Pressure Relief Valve
∆T = 77 ∆T = 45 ∆T = 35 Number of Flow Rate Water Pipe Dia. Flow Rate Water Velocity Pipe Dia. Flow Rate Water Pipe Dia. Units (GPM) Velocity (ft/s) (In.) (GPM) (ft/s) (In.) (GPM) Velocity (ft/s) (In.) 3.75 3.61 4.64 1 1/2... -
Page 28: Filling The Heater
Part 5 - Venting The heater must be vented as detailed in this section. Ensure exhaust vent and intake piping complies with these instructions regarding vent system. Inspect finished exhaust vent and intake piping thoroughly to ensure all joints are well secured, airtight, and comply with all applicable code requirements, as well as the instructions provided in this manual. -
Page 29: Approved Materials For Exhaust Vent And Intake Pipe
Due to the extreme flammability of most glues, cements, solvents, and primers used to join plastic exhaust vent and intake pipes, explosive solvent vapors must be cleared from all vent piping before start-up. Avoid using excess cement or primer, as this may pool in the vent pipes. Vent assemblies should be allowed to cure for a period of at least 8 hours before powering a connected appliance. -
Page 30: Additional Requirements For Installation In Canada
DO NOT mix components from different venting systems. The vent system could fail, causing leakage of flue products into the living space. Use only the approved pipe and fitting materials, and primer and cement specifically designed for the material used, as listed in the above table. -
Page 31: Exhaust Vent And Intake Pipe Location
D. Exhaust Vent and Intake Pipe Location INSIDE CORNER DETAIL FIXED OPERABLE CLOSED FIXED CLOSED OPERABLE LP-179-CC 03/28/17 Exhaust Vent Terminal Intake Pipe Terminal Area Where Intake Terminal Is Not Permitted Figure 22 - Exit Terminals for Direct Vent Systems - ANSI Z223.1 / NFPA 54 for US and CAN/CSA B149.1 for Canada DESCRIPTION CANADA Clearance above grade, veranda, porch, deck, or balcony... -
Page 32: Exhaust Vent And Intake Pipe Sizing
NOTE: Clean and dry the appliance connection. DO NOT use primer E. Exhaust Vent and Intake Pipe Sizing or cement on the appliance connection. 1. The exhaust vent and intake pipe size is 3”. Push the length of pipe into the connection until it touches 2. -
Page 33: Applications
12. All piping must be fully supported. Use pipe hangers at a minimum HTP: of 4 foot intervals to prevent sagging of the pipe where condensate may form. 13. Do not use the heater to support any piping. Description Stock Code 14. - Page 34 Two Pipe Sidewall Venting Two Pipe Roof Venting EXTERIOR WALL with Elbow (Intake) with Elbow (Intake) and Coupling (Exhaust) and Coupling (Exhaust) 1" MIN. 12" MIN. EXHAUST INSERT EXHAUST SCREEN MAINTAIN 12" MINIMUM CLEARANCE ABOVE HIGHEST ANTICIPATED SNOW LEVEL OR GRADE, WHICHEVER IS GREATER (TYP) LP-505-A 06/23/15...
- Page 35 EXHAUST AIR INTAKE FRONT VIEW EXHAUST AIR INTAKE LP-325-PP 03/31/11 SIDE VIEW Figure 27 - Horizontal (Snorkel) Venting NOTES: A. For every 1” of overhang, the exhaust vent must be located 1” vertical below overhang (overhang means top of building structure and not two adjacent walls [corner of building]).
-
Page 36: Venting Through An Existing System
Concentric Venting Through an Existing System NOTE: The following instructions refer only to venting through an existing vent system, and not to venting with HTP’s optional concentric vent kits. Refer to Concentric Vent Kit installation manual (LP-166) for further information on venting with the optional concentric vent kits. -
Page 37: Power Venting, Indoor Combustion Air In Confined Or Unconfined Space
3. Power Venting, Indoor Combustion Air in Confined or Unconfined Space This heater requires fresh, uncontaminated air for safe operation considered part of the space. Confined space is space with volume less than 50 cubic feet per and must be installed in a mechanical room where there is adequate combustion and ventilating air. -
Page 38: Part 6 - Installing The Condensate Drain
(water) as a normal by-product. This condensate is acidic, with a acidic condensate (p/n 7450P-212 available from HTP). Follow all the pH level between 3 and 4. This condensate must be drained away installation instructions included with the neutralizer. -
Page 39: Part 7 - Connecting Electrical Service
Part 7 - Connecting Electrical Service 3. The wiring diagrams in this manual are to be used for reference purposes only. 4. Refer to these diagrams and the wiring diagrams of any external Install wiring and electrically ground water heater in accordance controls used with the installation when wiring the water heater. - Page 40 Figure 36 - Wiring Detail NOTE: T/T only operates when Air Handler Application is selected in Installer Menu - 19:SU - AH. C. Wiring a Cascaded System When wiring the water heater for Cascade operation, select one as the Master water heater. The remaining water heaters will be designated Followers.
- Page 41 Figure 42 - Electrical Wiring Diagram lp-590 Rev. 003 Rel. 007 Date 4.2.19...
- Page 42 Figure 43 - Ladder Diagram lp-590 Rev. 003 Rel. 007 Date 4.2.19...
- Page 43 Connector Description HT Selv No. of Location Board Silk GROUND Power Supply Line Heater Pump Power Supply (Live) Ignitor Power Supply HEAT/CP2 External Pump 65001WS-12 Gas Valve Power Supply HT (120V~) AC GROUND Power Supply (Neutral) 9-12 AC Power COM Line Solenoid Valve Power Supply (Live) CP2/3WAY LW6A4-03...
- Page 44 Connector Description HT SELV No. of Location Board Silk Flame Sensor Outlet Operating Water Temperature OP.S Sensor DH.S DHW Temperature Sensor Inlet Water Temperature Sensor SELV (5V) LWD1140-14 BG.S Exhaust Temperature Sensor ST.S Return Water Temperature Sensor SP.S Overheat Temperature Sensor IWM Stepper Motor Coil / Y Phase IWM Stepper Motor Coil / X Phase CN10...
-
Page 45: Part 8 - Gas Connections
Part 8 - Gas Connections FIRE AND/OR EXPLOSION HAZARD To avoid serious injury or death, the gas line installation and the gas line inlet pressure test must be done by a licensed professional. Ensure the gas on which the water heater will operate is the same type specified on the rating plate (natural gas or LP gas). This water heater must be converted into propane operation unless specifically manufactured for use with propane. -
Page 46: Additional Precaution For Excess Flow Valve (Efv)
C. Additional Precaution for Excess Flow Valve (EFV) If an excess flow valve (EFV) is in the gas line, check the manufacturer’s minimum and maximum flow capacity ratings. An improperly sized It is required to use a combustion analyzer to verify final adjustment EFV will not allow for a full flow of gas to the water heater and will according to the combustion chart (Table 24). -
Page 47: Part 9 - Controls
Part 9 - Controls A. Control and Display Overviews Figure 47 - Control Panel Detail Figure 48 - LCD Display After start-up, the display appears as follows. LCD also features a backlit lamp that will illuminate: • When a user action is detected (a button is pressed) •... -
Page 48: Changing The Dhw Set-Point
C. Changing the DHW Set-Point D. Changing the Time NOTE: The setpoint cannot be changed if water is flowing through Press and hold the button for five seconds when the display the unit. Ensure there is no demand on the water heater when panel is powered ON to change the time. -
Page 49: Status Display
F. Status Display Status Display will activate when button is pressed and held for five seconds at Standby Mode. Figure 52 - Status Display Screen Display Display Detail Description (Main Menu) (Sub Menu) A:GA or A:LI Flow Unit Current Flow Unit (LI: Liters/min, GA: Gallons/min) b:dH DHW outlet water temperature Current DHW target temperature... -
Page 50: Installer Mode
G. Installer Mode Installer Mode will activate when button is pressed and held for five seconds while the water heater display is powered Off. Figure 53 - Installer Mode Screens Display Default Detail Description : Recirculation Pump is not used. (Recirculation and Preheat Modes are OFF.) : Title 24 Mode (Required in California, Optional in other states). -
Page 51: Setting Up A Cascaded System
This function sets the time to run pumps and powers the solenoid valve to purge air from AP:cP the system. Range: 1 - 30 Minutes 14:AP Pu:oF Pump Test Mode Turn this function ON to activate pump testing. Only works in installation mode. Turns off when in normal mode. -
Page 52: Using Recirculation Modes - Step
Program the Master and Follower Water Heaters in a Cascade System: To program the cascade system, first enter the Installer Mode. Scroll down to and select the following parameters on each water heater in the system: 1. 9:cP – Set the number of units in the cascade loop [range from 1-20]. 2. -
Page 53: Recirculation Functions - Using Recirculation Modes - Step 2
Preheat or Internal Recirculation Modes – When calls for hot water are satisfied, the water heater is factory programmed to Preheat and automatically maintain the temperature set point of the water heater – 24 hours a day, 7 days a week. The differential setting can be adjusted to control the temperature set point. -
Page 54: Smart Auto-Learn Recirculation Function
NOTE: The optional On Demand Recirculation kit can be used to activate recirculation when unit is set to Internal or External Recirculation Modes. Hotter water increases the risk of scald injury. Scalding may occur within 5 seconds at a setting of 140 F (60 C). -
Page 55: Part 10 - Troubleshooting
Figure 59 - A - Selecting a Recirculation Function, B - Entering Day Setting e. The default day is displayed when the program function is selected. Press the button to remove a day. Turn the dial to select other days. See Figure 60 A. f. - Page 56 Error Code Error Code Description Possible Remedies Press the Power button to clear the Error Code. The Code will also automatically reset after one hour (up to three (3) times. If Error happens again: 1. Monitor the gas pressure to the water heater while in operation. Ensure pressure is between 3.5 and 14” Flame has extinguished 5 Er:10 2.
- Page 57 Error Code Error Code Description Possible Remedies This Error Code will go away when exhaust temperature decreases. If Error happens again: Exhaust (Eh) Sensor Open or 1. Check exhaust temperature sensor. Ensure connections are secure. Er:35 Short 2. Check sensor resistance. If resistance is zero, replace the sensor. 3.
- Page 58 Error Code Error Code Description Possible Remedies Register, Ram, Rom, I/O Port, This Error Code will go away when the condition is remedied. AD Abnormal, Important If Error happens again: Er:70 EPROM Data or Safe Data 1. Turn power OFF and ON at the main power switch internal to the water heater. Abnormal 2.
-
Page 59: Error Tree Analysis
B. Error Tree Analysis 1. Flame Detection Figure 63 - Flame Detection Error Analysis Tree 2. Air Pressure Switch Detection Figure 64 - Air Pressure Switch Analysis Tree lp-590 Rev. 003 Rel. 007 Date 4.2.19... -
Page 60: Recirculation / Inlet / Dhw / Operating Temperature / Exhaust Sensors
3. Recirculation / Inlet / DHW / Operating Temperature / Exhaust Sensors Figure 65 - Recirculation / Inlet / DHW / Operating Temperature Sensors Error Analysis Tree C. Suggested Corrective Actions Problem Possible Causes Possible Remedies 1. Is the plug on the power supply cord unplugged 1. - Page 61 DIAGNOSTICS AND SUGGESTED CORRECTIVE ACTIONS The water heater control is able to record information about the water heater’s condition at the time of the ten previous faults or errors. This information is available to view in the Installer Mode under the History screen. The following screens may be displayed when reviewing the water heater history.
-
Page 62: Part 11 - Installation Checklist
DHW Inlet Temperature (In) Sensor DHW Outlet Temperature (dH) Sensor (7850P-015) (7850P-019) Exhaust Temperature (Eh) Sensor HX (OP) Temperature Sensor (7850P-070) (7850P-081) Temperature ( Resistance (Ω) Temperature ( Resistance (Ω) 62162 28409 48440 22152 38045 17408 30107 13782 23998 10990 19261 8824 15562... - Page 63 Install Exhaust Vent and Intake Piping Have venting lengths been minimized? Are terminations properly spaced from windows, doors, and other intake vents? Have all vent terminations been installed at least one foot above exterior grade and one foot above normal snow accumulation level? Is vent piping properly supported? Has vent piping been checked for leaks?
-
Page 64: Part 12 - Maintenance
Part 12 - Maintenance The water heater must be inspected and serviced annually, Failure to inspect the venting system and have it repaired by preferably at the start of the heating season, by a qualified service a qualified service technician can result in vent system failure, technician. - Page 65 after the line has had time to drain. If the valve weeps, lift solution to circulate through the water heater for at least 1 hour at the lever again to attempt to clean the valve seat. If the valve a rate of 4 gallons per minute. This will remove any possible harmful does not properly seat and continues to weep, contact a scale deposits.
- Page 66 INSPECTION ACTIVITIES DATE LAST COMPLETED 1 st YEAR 2 nd YEAR 4 th YEAR* 3 rd YEAR PIPING Near water heater Check water heater and system piping for any sign of leakage. piping Leaking pipes could cause property damage. Make sure all piping is properly supported.
-
Page 67: Part 13 - Replacement Parts
Part 13 - Replacement Parts NUMBER DESCRIPTION PART NUMBER NUMBER DESCRIPTION PART NUMBER M3 X 6 PH + M/S 7855P-384 B-10 M4 X 12 TH + M/S 7855P-393 M4 X 8 PH + Self Tapping 7855P-385 B-11 M4 X 14 PH + Self Tapping 7855P-394 M4 X 8 TH + Self Tapping 7855P-386... - Page 68 Figure 69 - Cabinet Replacement Parts NUMBER DESCRIPTION PART NUMBER NUMBER DESCRIPTION PART NUMBER Bottom Wall Mount Bracket 7850P-092 Manual Power Switch 7855P-014 Cabinet Assembly - 150 Model 7855P-626 Condensate Block APS 7855P-017 Cabinet Assembly - 199 Model 7850P-263 Display Panel Bracket - 150 Model 7855P-628 Top Wall Mount Bracket 7850P-068...
- Page 69 Figure 70 - Heat Exchanger Replacement Parts NUMBER DESCRIPTION PART NUMBER NUMBER DESCRIPTION PART NUMBER Exhaust Temperature Sensor Clip 7855P-349 Ceramic Fiber Burner - 150 Model 7855P-635 27-4 Exhaust Temperature (Eh) Sensor 7855P-092 Ceramic Fiber Burner - 199 Model 7855P-420 Exhaust Pipe Assembly - 150 Model 7855P-630 27-5...
- Page 70 Figure 71 - Combustion System Replacement Parts NUMBER DESCRIPTION PART NUMBER NUMBER DESCRIPTION PART NUMBER Burner Inlet Channel (w/ Damper) 7855P-424 Gas Pipe (to Mixer) - 150 Model 7855P-638 Air Damper - 150 Model 7855P-637 Gas Pipe (to Mixer) - 199 Model 7855P-650 Air Damper - 199 Model 7855P-618...
- Page 71 64 65 O-12 B-16 O-11 O-10 O-11 O-11 B-15 O-10 O-11 B-16 O-10 Figure 72 - Water Side Replacement Parts NUMBER DESCRIPTION PART NUMBER NUMBER DESCRIPTION PART NUMBER OP Temperature Sensor 7850P-081 Mixing Block 7855P-603 3/4” Pipe Gasket 7855P-073 DHW Outlet Adapter 7855P-225 Overheat Switch (Heat Exchanger) 7850P-051...
-
Page 72: Limited Warranty For Rgh Water Heaters
COVERAGE 4. The workmanship of any installer. The manufacturer disclaims and does A. During the first year after the original date of installation, HTP warrants not assume any liability of any nature caused by improper installation, that it will repair or replace, at its option, any defective or malfunctioning repair, or maintenance. - Page 73 (12 grains/gallon) temperature) During the claims process a product that must be replaced will be given a designation of either a) field scrap, or b) return to HTP. If the product must Total Hardness 120 mg/l be returned to HTP, the returned product must arrive at HTP within thirty...
-
Page 74: Notes
Notes lp-590 Rev. 003 Rel. 007 Date 4.2.19... -
Page 75: Customer Installation Record Form
Customer Installation Record Form The following form should be completed by the installer for you to keep as a record of the installation in case of a warranty claim. After reading the important notes at the bottom of the page, please also sign this document. Customer’s Name Date of Installation Installation Address...
Need help?
Do you have a question about the RGH-199 and is the answer not in the manual?
Questions and answers