Table of Contents
Advertisement
Quick Links
Installation Guide
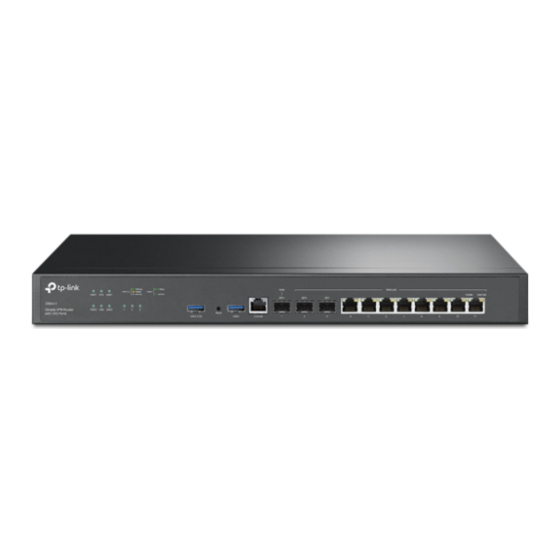
Omada VPN Router with 10G Ports
Connection
Modem
Configuration
The router supports two configuration options:
Standalone Mode: Configure and manage the router singly.
Controller Mode: Configure and manage the network devices centrally. It is recommended in the large-scale network, which consists of mass devices such as
access points, switches, and gateways.
Note: When the router is managed by a controller, configurations of the router will be overridden by the controller.
Option 1: Standalone Mode
In Standalone Mode, use a computer to configure and manage the router.
Router
1.
Connect a computer to a LAN port of the router with an RJ45 cable
properly. If your computer is configured with a fixed IP, change it to Obtain
an IP address automatically.
ER8411
2.
3.
4.
5.
PC
For detailed configurations, refer to the User Guide of the router. The guide
can be found on the download center of our official website:
https://www.tp-link.com/support/download/.
LED
Indication
On: The router is powered by PWR1.
PWR1*
Off: PWR1 is disconnected or it works improperly, or the router is powered off.
Green On: The router is powered by PWR2.
PWR2
Yellow On** : PWR2 are connected, but the router is powered by PWR1.*
Off: PWR2 is disconnected or it works improperly, or the router is powered off.
Flashing: The router works properly.
SYS
On or Off : The router works improperly.
Quick Flashing: The router is being reset.
Green On: The fan works properly.
FAN
Yellow On: The fan works improperly.
For USB Modem:
Green Flashing: A modem is connected and it is initializing.
Green On: The modem is loaded.
USB
Off: No modem is inserted, or it is corrupted or incompatible.
For USB Storage:
Green On: A USB storage device is inserted and identified.
Off: No USB storage device is inserted, or it is corrupted or incompatible.
Green On: Running at 10 Gbps, but no activity.
Green Flashing: Running at 10 Gbps and transmitting or receiving data.
SFP+ (Port 1-2)
Yellow On: Running at 1000 Mbps, but no activity.
Yellow Flashing: Running at 1000 Mbps and transmitting or receiving data.
Off : No device is linked to the corresponding port.
On: Running at 1000 Mbps, but no activity.
Flashing: Running at 1000 Mbps and transmitting or receiving data.
SFP (Port 3)
Off: No device is linked to the corresponding port.
Green On: Running at 1000 Mbps, but no activity.
Green Flashing: Running at 1000 Mbps and transmitting or receiving data.
RJ45 (Port 4-11)
Yellow On: Running at 100/10 Mbps, but no activity.
Yellow Flashing: Running at 100/10 Mbps and transmitting or receiving data.
Off: No device is linked to the corresponding port.
*PWR1 is the primary power supply and it takes priority over PWR2.
**When both PWR1 and PWR2 work properly and the router is powered by PWR1, it takes 10-20
seconds for the LED PWR2 (yellow) to go out.
Open a web browser and type the default management address
192.168.0.1 in the address field of the browser, then press the Enter key.
Create a username and a password for subsequent login attempts and
for security.
Use the username and password set above to log in to the webpage.
After a successful login, you can configure the function by clicking the
setup menu on the left side of the screen.
AC Power Cord
Advertisement
Table of Contents

Related Manuals for TP-Link ER8411


Summary of Contents for TP-Link ER8411
- Page 1 *PWR1 is the primary power supply and it takes priority over PWR2. **When both PWR1 and PWR2 work properly and the router is powered by PWR1, it takes 10-20 seconds for the LED PWR2 (yellow) to go out. Connection ER8411 Modem AC Power Cord Configuration The router supports two configuration options: Standalone Mode: Configure and manage the router singly.
- Page 2 Launch a web browser and enter https://omada.tplinkcloud.com in the address c. Enter your TP-Link ID and password to log in. A list of controllers that have been bar. Enter your TP-Link ID and password to log in. Click + Add Controller and bound with your TP-Link ID will appear.
Need help?
Do you have a question about the ER8411 and is the answer not in the manual?
Questions and answers