Table of Contents
Advertisement
Quick Links
TRUE
food service equipment
CONGRATULATIONS!
You have just purchased the finest commercial freezer available.
You can expect many years of trouble-free operation.
TABLE OF CONTENTS
WARRANTY
TRUE FOOD SERVICE EQUIPMENT, INC.
2001 East Terra Lane • O'Fallon, Missouri 63366-4434
(636)-240-2400 • FAX (636)-272-2408 • INT'L FAX (636)272-7546 • (800)-325-6152
Parts Department (800)-424-TRUE • Parts Department FAX# (636)-272-9471
Web: www.truemfg.com
,
.
inc
-
gdim
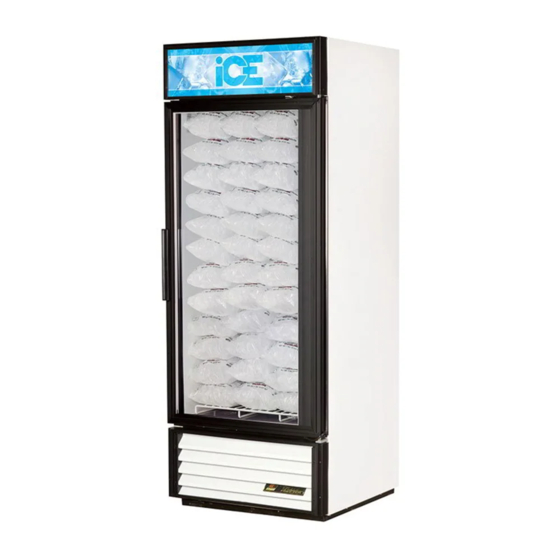
glass door ice merchandisers
1
2
3
4
4
5
6
7
8
13
14
15
16
17
INSTALLATION MANUAL
INSTALLATION MANUAL
gdim
GDIM-26NT
GDIM-49NT
#975541 • LM • 6/15
Advertisement
Table of Contents

Related Manuals for True GDIM


Summary of Contents for True GDIM
-
Page 1: Table Of Contents
TRUE FOOD SERVICE EQUIPMENT, INC. 2001 East Terra Lane • O’Fallon, Missouri 63366-4434 (636)-240-2400 • FAX (636)-272-2408 • INT'L FAX (636)272-7546 • (800)-325-6152 Parts Department (800)-424-TRUE • Parts Department FAX# (636)-272-9471 Web: www.truemfg.com #975541 • LM • 6/15... -
Page 2: Safety Information
You have selected one of the finest commercial refrigeration units made. It is manufactured under strict quality controls with only the best quality materials available. Your TRUE cooler when properly maintained will give you many years of trouble-free service. WARNING: Use this appliance for its intended purpose as described in this Owner Manual. -
Page 3: Proper Disposal, Connecting Electricity, & Adapter Plugs
NEMA plugs TRUE uses these types of plugs. If you do not have the right outlet have a certified electrician install the correct power source. NOTE: International plug configurations vary by voltage and country. -
Page 4: Installation
• Lamps must be replaced by identical lamps only. Before you start to install your TRUE unit, carefully inspect it for • Appliance tested according to the climate classes 5 and 7 freight damage. If damage is discovered, immediately file a claim with temperature and relative humidity. -
Page 5: Wire Gauge Chart
WARNING: WARRANTY IS VOID IF VENTILATION IS INSUFFICIENT. C. Remove skid bolts. (See photo B). Proper leveling of your TRUE cooler is critical to operating D. Cut straps if applicable. (See photo C). success (for non-mobile models). Effective condensate removal Carefully lift cabinet off of skid. -
Page 6: Installation Of Legs Or Castors
TRUE gdim truemfg INSTALLATION OF CASTORS OR OPTIONAL LEGS Important Safeguard for installation of leg/castor. Images 1-5 demon- strate procedure. SECURING CASTORS AND LEGS To obtain maximum strength and stability of the unit, it is important that you make sure each castor is secure. Optional legs are hand- tightened securely against the lower rail assembly see image 4-5. -
Page 7: Sealing Cabinet To The Floor
TRUE gdim truemfg SEALING CABINET TO FLOOR STEP 1 - Position Cabinet - Allow one inch between the wall and NOTE: Asphalt floors are very susceptible to chemical attack. A rear of the refrigerator to assure proper ventilation. For freezers 3... -
Page 8: Operation
• LAE temperature control is located on the front of cabinet countertop or in/behind louvered grill. GDIM models will have the light switch located on the right side on the ceiling inside the unit. Most instances the switch is located next •... -
Page 9: Mechanical Temperature Controls Sequence Of Operation
TRUE gdim truemfg MECHANICAL TEMPERATURE CONTROLS AIR SENSING An air sensing temperature control used in a freezer application will require a defrost cycle with heaters to ensure that the evaporator coil is kept clear of frost and ice. MECHANICAL TEMPERATURE CONTROL GENERAL SEQUENCE OF OPERATION MECHANICAL CONTROL FREEZER GENERAL SEQUENCE OF OPERATION 1. - Page 10 TRUE gdim truemfg WHEN TO MAKE AN ADJUSTMENT TO A MECHANICAL TEMPERATURE CONTROL We advise to make a mechanical temperature control adjustment only for a high altitude location. HOW TO ADJUST A MECHANICAL TEMPERATURE CONTROL OPERATION INSTRUCTIONS: Scale Guide for Measuring...
- Page 11 TRUE gdim truemfg INSTRUCTIONS: DANFOSS TEMPERATURE CONTROL ADJUSTMENT FOR HIGH ALTITUDE APPLICATIONS STEP 1 - Unplug cooler. STEP 2 - Remove the screws that secure the temperature control to the inset box. STEP 3 - To make these adjustments it may be necessary to remove the temperature control from the housing.
- Page 12 TRUE gdim truemfg CHART CCW Adjustment (based on 360°/ Height complete turn) 2000' 42° 3000' 78° 4000' 114° 5000' 150° 6000' 186° 7000' 222° 8000' 258° 9000' 294° 10,000' 330° BUL. NO.
- Page 13 RECOMMENDED DEFROST SETTINGS: The following procedure may be followed to customize your needs. TRUE Manufacturing has factory set your defrost time clock to a High usage, high temperature, and high humidity may require 4 recommended time and duration defrost scenario. All refrigeration defrost settings per day.
-
Page 14: Maintenance, Care, Cleaning
TRUE gdim truemfg MAINTENANCE, CARE, CLEANING CLEANING THE CONDENSER COIL STEP 3 - Remove bolts anchoring compressor assembly to frame rails and carefully slide out. (tube connections are flexible) When using electrical appliances, basic safety precautions should be followed, including the following: STEP 4 - Clean off accumulated dirt from condensing coil with a stiff bristle brush. -
Page 15: Important Warranty Information
If you cannot remove the dirt adequately, please call your refrigera- tion service company. If you have any questions, please call TRUE Manufacturing at 636-240- 2400 or 800-325-6152 and ask for the Service Department. Direct On most of the reach-in units the condenser is accessible in the to Service Department 1(855)372-1368. -
Page 16: Stainless Steel Equipment Care And Cleaning
TRUE gdim truemfg STAINLESS STEEL EQUIPMENT CARE 8 STEPS THAT CAN HELP PREVENT RUST ON AND CLEANING STAINLESS STEEL: CAUTION: Do not use any steel wool, abrasive or chlorine based USING THE CORRECT CLEANING TOOLS products to clean stainless steel surfaces. -
Page 17: General Maintenance
TRUE gdim truemfg GENERAL MAINTENANCE LIGHT BULB REPLACEMENT (IDL) INTEGRATED DOOR LIGHTING WARNING: When replacing a light bulb make sure power to the unit is either turned off or unplugged. IDL (INTEGRATED DOOR LIGHTING): • Squeeze the plastic lampshield together and pull away from the door (See Image 1). -
Page 18: Warranty
WARRANTY CLAIMS All claims for labor or parts must be made directly through TRUE. All claims should include: model number of the unit, the serial number of the cabinet, proof of purchase, date of instal- lation, and all pertinent information supporting the existence of the alleged defect.
Need help?
Do you have a question about the GDIM and is the answer not in the manual?
Questions and answers