
Related Manuals for Bauhn ACSB-0422-B


Summary of Contents for Bauhn ACSB-0422-B
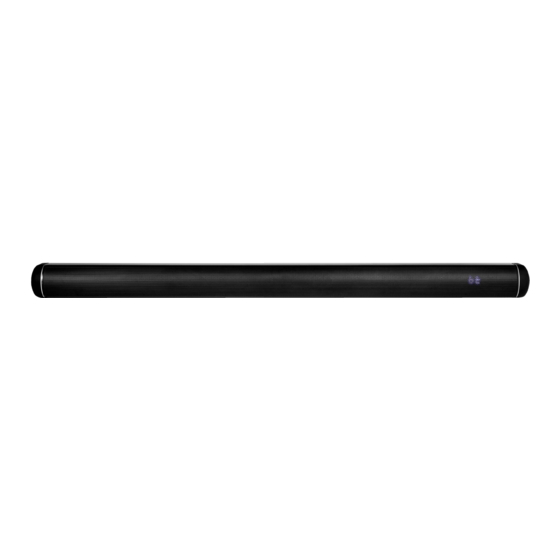
- Page 1 2.0 Channel Soundbar MODEL: ACSB-0422-B, ACSB-0422-C User Manual AFTER SALES SUPPORT tempo.org/support 1300 002 534 MODEL: ACSB-0422-B, ACSB-0422-C PRODUCT CODE: 708839 04/2022...
-
Page 2: Welcome
Welcome Congratulations on your purchase! This manual tells you all you need to know about using your new BAUHN product. ® Please take special note of any important safety and usage information presented with the symbol. All products brought to you by BAUHN are manufactured to the highest standards of performance and safety and, ®... -
Page 3: Table Of Contents
Contents Welcome Operation General Operation Unpack and Prepare Input Modes What's in the box Function Display Wall Mount Installation Kit Bluetooth ® Important Tips Pairing Bluetooth Devices ® Installation - Free Standing Bluetooth Playback ® Installation - Wall Mounted Troubleshooting Wall Mounting Instructions Connect to Power Specifications... -
Page 4: Unpack And Prepare
Unpack and Prepare What's in the box Before setting up your new Soundbar, check you have everything: A. 2.0 Channel Soundbar B. Remote Control C. AAA Activ Energy Batteries D. 3.5mm Audio Cable E. Optical Cable F. AC Power Adaptor G. -
Page 5: Wall Mount Installation Kit
Wall Mount Installation Kit The illustration below shows the contents of the wall mount installation kit. These are the parts you will need when wall mounting the soundbar. Some parts are not shown at the same scale. Note: If you choose to wall mount the soundbar, you will find that a standard HDMI cable will not fit properly. Please contact our After Sales Support on 1300 002 534 and we will provide you with a HDMI adaptor. -
Page 6: Installation - Free Standing
Installation - Free Standing This soundbar can sit free-standing on a surface, or it can be mounted to a wall. Place on a secure, flat surface. Make sure the soundbar is standing on its rubber pads (on the left and right sides of the soundbar) and no other area of the bottom of the soundbar is touching the surface. -
Page 7: Installation - Wall Mounted
Installation - Wall Mounted Wall mounting instructions are on the following pages. • Wall mounted installation must be carried out by qualified personnel only. Incorrect assembly can result in severe personal injury and property damage! If you intend to install this product yourself, you must check for installations such as electrical wiring and plumbing, which may be hidden inside or behind the wall. -
Page 8: Wall Mounting Instructions
Wall Mounting Instructions Fix the supplied wall-mounting brackets to the bracket fixing holes on the back of the soundbar with the supplied short screws. Affix the brackets as shown in the illustration (left). Use a pencil to make 4 drill hole marks on the wall for the adaptors. -
Page 9: Connect To Power
Use the supplied screws and plastic anchors to fix the wall mount adaptors onto the drilled hole marks. Once fixed to the wall, hang the soundbar onto the wall mount adaptors. Connect to Power Make sure the power switch is switched off at the power outlet until you have finished connecting your cables. -
Page 10: Controls And Connections
Controls and Connections Get to know your Soundbar LED display Front view Remote control sensor Buttons on the Soundbar : Decrease the volume level. (POWER/SOURCE): Press to turn on. Press again to select your preferred input source. Press and hold to put into Standby mode. : Increase the volume level. -
Page 11: Rear Ports On The Soundbar
Rear Ports on the Soundbar Plug in a USB stick to play media files stored on your USB storage STORAGE device. Use the supplied 3.5mm to 3.5mm audio cable to connect the SOUND headphone socket of the connected audio device, such as a media player, to the AUX socket on the soundbar. - Page 12 Rear Ports on the Soundbar HDMI (ARC) To use the ARC function, make sure the soundbar's HDMI (ARC) socket is connected via a HDMI cable (not included) to the HDMI (ARC) socket of your ARC compliant TV. Then just use your TV's remote control to adjust the volume output (VOL +/–...
-
Page 13: Remote Control
Remote Control Setup Insert two AAA size batteries according to the polarity markings (+ / -) inside the compartment. Make sure the batteries are correctly aligned and properly pushed into AAA size place. batteries included Precautions When Using Batteries • Do not use old and new batteries together. •... -
Page 14: Using The Remote Control
Using the Remote Control To use the remote control, point it towards the remote control sensor at the front of the soundbar. The remote control will not operate if its path is blocked. The remote control has a range of up to about 6 metres from the soundbar at an angle of up to 30 degrees to either side of the sensor, as illustrated below. -
Page 15: Remote Control Overview
Remote Control Overview MODE (POWER): Switch the soundbar on or standby : Mute the sound MODE: Switch between the input : Skip to the next track sources : Start or pause playback : Increase the volume level TREBLE + : Increase the treble : Skip to the previous track BASS + : Increase the bass : Decrease the volume level... -
Page 16: Operation
Operation General Operation Function Action Press the (POWER/SOURCE) button on the right side of the soundbar, or Turn the Soundbar On (POWER) button on the press the remote control. Press and hold the (POWER/ SOURCE) button on the soundbar or Turn the Soundbar Off press the (POWER) button on the... -
Page 17: Input Modes
Input Modes Function Display Input Display Function Display HDMI ARC Volume Bluetooth Mute "- - - -" will flash on LED display ® Optical Treble (-5 to 5) Coaxial Bass (-5 to 5) EQ News EQ Music Note: The LED display will turn off around EQ Movie 5 minutes without operation. -
Page 18: Bluetooth
® mode automatically. it to search for compatible devices. Select 'BAUHN ACSB-0422' from the list of found devices. If a mobile phone on which you are playing music Note: Only one playback unit can be connected to receives a call, the music will be interrupted. -
Page 19: Bluetooth ® Playback
Bluetooth Playback ® Function Action Increase the Volume Press the button on the soundbar or the button on the remote control. Decrease the Volume Press the button on the soundbar or the button on the remote control. Play/Pause Press the button on the remote control. -
Page 20: Troubleshooting
Troubleshooting If you have problems with the soundbar, check below for advice. If you don't find a solution here, contact After Sales Support on 1300 002 534. Problem Solution • Ensure that the AC power adaptor is properly connected. • Ensure that there is power at the DC outlet. No power •... - Page 21 Problem Solution • Make sure the input source is set to ARC; the LED will display "HD". • Make sure your TV or external device supports ARC function and connect the HDMI cable to the ARC port of the TV or external device. No sound in HDMI ARC •...
-
Page 22: Specifications
For Technical Support: Bluetooth pairing operation ® Up to 10 metres Ph: 1300 002 534 range – distance W: tempo.org Bluetooth pairing name BAUHN ACSB-0422 ® E: tempo.org/support Bluetooth pairing password 0000 ® Distributed by Tempo (Aust) Pty Ltd, Bluetooth version ®... -
Page 23: Compliance And Responsible Disposal
Compliance and Responsible Disposal Packaging Compliance The packaging of your product has been This product complies with the Australian Safety selected from environmentally friendly Standard AS/NZS 62368.1 to ensure the safety of the materials and can usually be recycled. Please ensure product. -
Page 24: Warranty Information
Warranty Information The product is guaranteed to be free from defects in workmanship and parts for a period of 12 months from the date of purchase. Defects that occur within this warranty period, under normal use and care, will be repaired, replaced or refunded at our discretion, solely at our option with no charge for parts and labour. -
Page 25: Repair And Refurbished
Repair and Refurbished Goods or Parts Notice Unfortunately, sometimes faulty products are manufactured, which need to be returned to the supplier for repair. Please be aware that if your product is capable of retaining user-generated data (such as files stored on a computer hard drive, telephone numbers stored on a mobile telephone, songs stored on a portable media player, games saved on a games console or files stored on a USB memory stick) during the process of repair, some or all of your stored data may be lost. - Page 26 Notes...
- Page 27 Notes...
- Page 28 Online support Visit bauhn.com.au for software updates to keep your soundbar up-to-date, as well as the latest User Manual for information on the updated features. Warranty returns Should you for any reason need to return this product for a warranty claim, make sure to include all accessories with the product.
Need help?
Do you have a question about the ACSB-0422-B and is the answer not in the manual?
Questions and answers