Table of Contents
Advertisement
READ AND SAVE THESE INSTRUCTIONS
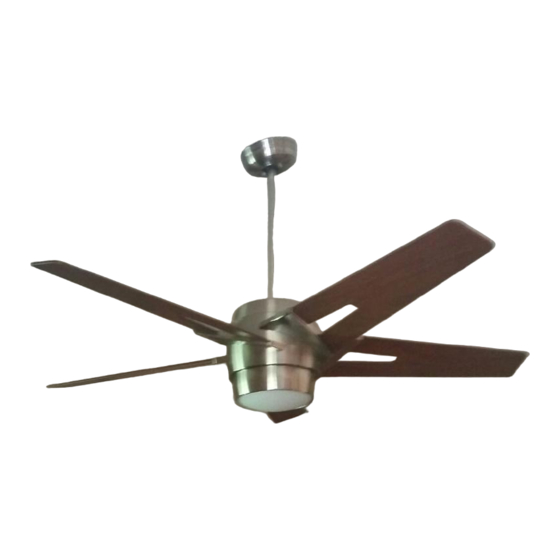
54" Ceiling Fan Owner's Manual
CF550BS00
CF550ORB00
DATE CODE:
The date code of this fan may be found on the box, stamped in ink on a white label.
You should record this data above and keep it in a safe place for future use.
Part No. F40BP74530000
LUXE ECO
Model Number
Net Weight:
™
20.9
Lbs.
Form No. BP7453
ETL Model No.: CF550
Advertisement
Table of Contents

Related Manuals for Emerson LUXE ECO CF550BS00


Summary of Contents for Emerson LUXE ECO CF550BS00
- Page 1 READ AND SAVE THESE INSTRUCTIONS LUXE ECO ™ 54” Ceiling Fan Owner's Manual Model Number CF550BS00 CF550ORB00 20.9 Net Weight: Lbs. DATE CODE: The date code of this fan may be found on the box, stamped in ink on a white label. You should record this data above and keep it in a safe place for future use.
- Page 2 WARNING: To reduce the risk of fire or electric shock, this fan should only be used with fan speed control, Model No. UC9056T manufactured by Rhine Electric Co., Ltd. WARNING: To avoid fire, shock or injury, do not use an Emerson or any other brand of control not specifically approved for this fan.
-
Page 3: Unpacking Instructions
Emerson Electric Co. Substitution of parts or a. FAN MOTOR ASSEMBLY accessories not designated for use with this product by Emerson Electric Co. could result in personal injury or property damage. 1. Check to see that you have received the following parts: NOTE: If you are uncertain of part description, refer to exploded view illustration. -
Page 4: Electrical Requirements
Electrical Requirements Your new ceiling fan will require a grounded electrical WARNING supply line of 120 volts AC, 60 Hz, 15 amp circuit. The outlet box must be securely anchored and Turning off wall switch is not sufficient. To avoid capable of withstanding a load of at least 50 pounds. - Page 5 How to Put Your Ceiling Fan Together (continued) 4. Make sure the rubber grommet is properly installed onto the coupling cover then slide the coupler cover onto the downrod until it rests on top of the motor housing. Place the ceiling cover over the downrod.
-
Page 6: How To Hang Your Ceiling Fan
How to Hang Your Ceiling Fan CEILING WARNING Turning off wall switch is not sufficient. To avoid possible electrical shock, be sure electricity is turned off at the main fuse box before wiring. All wiring must be in accordance with National and Local codes and the ceiling fan must be properly grounded as a precaution against possible electrical shock. -
Page 7: How To Wire Your Ceiling Fan
How to Wire Your Ceiling Fan If you feel that you do not have enough electrical BLACK wiring knowledge or experience, have your fan FAN WIRE GROUND installed by a licensed electrician. WIRE LISTED WHITE SUPPLY WIRE WARNING (NEUTRAL) CONNECTOR (3) Turning off wall switch is not sufficient. - Page 8 9. Installation of your ceiling fan is now complete. GLASS SHADE Proceed with installation of the wall control. FLAT AREAS (3) LIGHT KIT Please call Emerson technical support at GLASS SHADE 1-800-654-3545 if you have any questions about installation and operation of this ceiling fan. Figure 14...
-
Page 9: Wall Control Procedures
General Preset Memory Feature Your Emerson Ceiling Fan/Light Control consists of Your Emerson receiver is equipped with a preset wall mounted transmitter and a receiver which is pre- memory feature. If the AC supply to the receiver is installed inside the motor assembly. The remote... - Page 10 Wall Control Installation (continued) NOTE: Make all wiring connections using wire connectors (supplied). Make sure that all FAN/LIGHT WALL SCREWS (2) connections are tight, including ground, and that CONTROL WALL BOX no bare wire is visible at the wire connectors, except for the ground wire.
-
Page 11: Programming The Receiver Operating Frequency
(in the other wall box). LIGHT LIGHT Secure with wire connectors supplied. FAN OFF FAN OFF EMERSON ® EMERSON ® 9. Connect one black wire of the wall control to the “load” (black) wire and secure with wire connector FAN/LIGHT supplied. -
Page 12: High Speed Conditioning Of Fan Control
High Speed Conditioning of Fan Control 2. After 2 minutes, press the reverse ( ) button and IMPORTANT: The following steps must be allow the fan to operate uninterrupted for completed immediately following the 2 minutes at high speed. frequency programming of the ceiling fan. 3. -
Page 13: Troubleshooting
The use of any other control not specifically accessories not designated for use with this product approved for this fan could result in fire, shock and by Emerson Electric Co. could result in personal personal injury. injury or property damage. -
Page 14: Repair Parts
Repair Parts ETL Model No.: CF550... - Page 15 Repair Parts Listing Model Number Description CF550BS00 CF550ORB00 Hanger Ball Assembly, 761655-17 761655-32 Consisting of: Hanger Bracket — — Hanger Ball — — Downrod (4.5”) — — Parts Bag Containing: 764255 764255-1 Wire Connector (5) — — Pin, Clevis (1) —...
-
Page 16: Limited Warranty
You will be responsible for all insurance, freight or other transportation charges to our factory or authorized service center. Your Emerson Air Comfort Ceiling Fan should be properly packed to avoid damage in transit since we will not be responsible for any such damage.
Need help?
Do you have a question about the LUXE ECO CF550BS00 and is the answer not in the manual?
Questions and answers