Bticino Classe100 X16E User And Installation Manual
Hide thumbs
Also See for Classe100 X16E:
- User and installation manual (100 pages) ,
- User and installation manual (64 pages)

Related Manuals for Bticino Classe100 X16E


Summary of Contents for Bticino Classe100 X16E
- Page 1 Classe100 X16E 344682 User and installation manual RA00169AC-11/21-PC www.bticino.com...
- Page 2 Classe100 X16E User and installation manual...
-
Page 3: Table Of Contents
Use with the Door entry Classe100X App Introduction Account registration Authentication Forgotten password Help Sending log Association of the device Home page Display the cameras or Entrance Panels Open door locks Staircase Lights To receive a video door entry call Call home: Call your Classe100 X16E... - Page 4 Classe100 X16E User and installation manual Menu Users Settings Account NETATMO cameras...
-
Page 5: Quick Guide
Classe100 X16E User and installation manual Quick guide Answer a call 1. Touch to answer the call. 2. If necessary, during the call press the joystick to display the audio/video parameter adjustment icons. 3. Move the joystick up/down to select the type of parameter for which you want to modify the value (see the following table) among: –... - Page 6 Classe100 X16E User and installation manual 4. Touch to open the main Entrance Panel door lock 5. Touch to end the call.
-
Page 7: Auto-Switching On And Camera Scrolling
Classe100 X16E User and installation manual Auto-switching on and camera scrolling 1. Touch to display the Entrance Panels or the cameras in your system. 2. If necessary, touch to activate the audio communication 3. Touch to display another Entrance Panel or camera (using the scrolling service). When switching from one camera to the next the key lights up. - Page 8 Classe100 X16E User and installation manual 4. Touch to end camera display mode, or wait for the automatic switch off time to elapse.
-
Page 9: Call Another Room Or Apartment (Intercom)
Classe100 X16E User and installation manual Call another room or apartment (intercom) 1. For example, touch programmable key to activate the communication with the Internal Unit (e.g. configured as 2) Note: the programmable key to use for calling a certain Internal Unit is set by the installer (see Programming of the programmable keys). - Page 10 Classe100 X16E User and installation manual When the Internal Unit answers, the key starts flashing. Touch it to end the call or establish communication with the Internal Unit. Note: if during the conversation a call is received from the Entrance Panel, the conversation is...
-
Page 11: Dissociate A Smartphone
Classe100 X16E User and installation manual Dissociate a smartphone 1. Touch to open the pull-down menu. 2. Touch to open the user section. 3. Scroll to dissociate a smartphone. 4. Touch to continue. 5. Touch to confirm The user will no longer be able to manage the system using that smartphone. -
Page 12: Dissociate An User
Classe100 X16E User and installation manual Dissociate an user 1. Touch to open the pull-down menu. 2. Touch to open the user section. 3. Scroll to dissociate a user, and therefore all the devices associated with the same. 4. Touch to continue. - Page 13 Classe100 X16E User and installation manual If your user is the main user, and you want to delete it, it will be necessary to indicate a replacement as main user. 6. Touch to indicate the new main user. 7. Touch to continue.
-
Page 14: Customise The Home Page Of The Door Entry Classe100X App
Classe100 X16E User and installation manual Customise the home page of the Door entry Classe100X App 1. Touch to open the pull-down menu. 2. Touch to open the setting section. 3. Touch to customise the Home page Door lock 2 Door lock 2 4. - Page 15 In addition to the Staircase Light key, it is also possible to show on the homepage the Entrance Panels/ Cameras (A) and Door Locks (B)corresponding to the programmable keys of your Classe100 X16E. The Cameras/Entrance Panels will be available in the appropriate area (C), while for the Door Locks there is a dedicated key (D).
-
Page 16: General Information
We would like to inform you that the service provided by BTicino by means of remote use via the app involves the use of data. The cost linked to data usage depends on the type of contract which the... -
Page 17: Warnings And Consumer Rights
Classe100 X16E User and installation manual Warnings and consumer rights Read carefully before use and keep for future reference Touching the units with wet hands is forbidden. Using liquid cleaners or aerosols is forbidden. Blocking the ventilation openings is forbidden. -
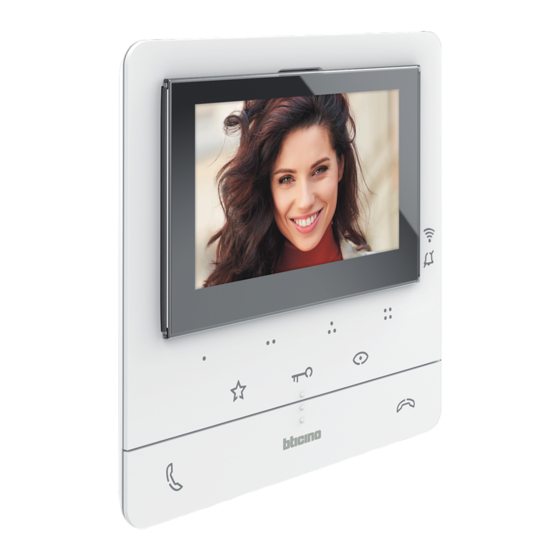
Page 18: Front View
When it flashes red it indicates that the Wi-Fi is active but not connected to a network. When green and on steady, Classe100 X16E is exchanging data with the Door Entry CLASSE 100 APP (Entrance Panel call/Automatic Switching On/Call Home) - Page 19 Classe100 X16E User and installation manual Communication disabling key Use this key to answer a call: when a call is answered, it switches on red; when the call is terminated it switches off. Staircase light touch key Use this key to switch the Staircase Light on...
-
Page 20: Rear View
Classe100 X16E User and installation manual Rear view BTICINO V.le Borri, 231 21100 (VA) ITALY Made in Italy 2 1 5M 1 BTICINO V.le Borri, 231 21100 (VA) ITALY Made in Italy 1. Mini USB socket for device Firmware update 2. -
Page 21: Installation
Classe100 X16E User and installation manual Installation Caution: Installation, configuration, starting-up and maintenance must be performed exclusively by qualified personnel. Dimensional data and recommended installation heights Recommended height, unless different regulations are specified. 164 mm 20,5 mm Wall-mounted installation 502E - 503E... - Page 22 Classe100 X16E User and installation manual...
-
Page 23: Installation On The Tabletop Bases 344692 (Optional)
Classe100 X16E User and installation manual Installation on the tabletop bases 344692 (optional) - Page 24 Classe100 X16E User and installation manual...
-
Page 25: Configuration
Classe100 X16E User and installation manual Configuration The device must be only physically configured. N - Internal Unit number The configurators connected to the N sockets of the device assign an identification number within the system to each video internal unit . The internal units must be configured in progressive order. -
Page 26: Programming Of The Programmable Keys
Classe100 X16E User and installation manual Programming of the programmable keys Your Classe100 X16E is equipped with keys that perform specific functions depending on the configurator connected to the M socket. MODE SERVICE NOTES M = 00 Internal intercom It sends the call to all the... - Page 27 Classe100 X16E User and installation manual MODE SERVICE NOTES M = 02 Intercom inside the apartment, in systems with apartment interface 346850, or intercom among apartments in systems without apartment interface Intercom inside the apartment, in systems with apartment interface 346850, or intercom among...
- Page 28 Classe100 X16E User and installation manual MODE SERVICE NOTES M = 03 Intercom inside the apartment, in systems with apartment interface 346850, or intercom among apartments in systems without apartment interface Intercom inside the apartment, in systems with apartment interface 346850, or intercom among...
- Page 29 Classe100 X16E User and installation manual MODE SERVICE NOTES M = 04 Activation of the EP (configured with P+1) directly without call or activation of the actuator 346210 (configured with P+1 and MOD=9) Intercom inside the apartment, in systems with...
- Page 30 Classe100 X16E User and installation manual MODE SERVICE NOTES M = 06 “Preset intercom” function with intercommunicating call to the Handset configured with N=1. From the system handsets it is possible to send an intercom call to the handset configured with N= 1.
- Page 31 Classe100 X16E User and installation manual MODE SERVICE NOTES M = 10 General intercom, it sends the call to all the apartment devices, in systems with apartment interface 346850, or intercom towards all the apartment devices in systems without apartment interface 346850;...
- Page 32 Classe100 X16E User and installation manual MODE SERVICE NOTES M = 13 Intercom among apartments in systems with apartment interface 346850 Intercom among apartments in systems with apartment interface 346850 Intercom among apartments in systems with apartment interface 346850 Intercom among apartments in systems with...
-
Page 33: Use From The Device
Classe100 X16E User and installation manual Use from the device Note: the background and icons shown may differ from those on the device. Functions Call another room or apartment NETATMO cameras (intercom) Door lock release PE or cameras direct auto-switching on... -
Page 34: Call Another Room Or Apartment (Intercom)
Classe100 X16E User and installation manual Call another room or apartment (intercom) This section can be used to communicate with other video/audio Internal Units installed in your home, or in other apartments. The programmable key to use for calling a certain Internal Unit is set by the installer (see Programming of the programmable keys). - Page 35 Classe100 X16E User and installation manual When the Internal Unit answers, the key starts to flash; communicate with the Internal Unit, or touch to close the call. Note: if during the conversation a call is received from the Entrance Panel, the conversation is...
-
Page 36: Pe Or Cameras Direct Auto-Switching On
Classe100 X16E User and installation manual PE or cameras direct auto-switching on Using the automatic switch on key it is possible to display the main Entrance Panel camera and, if installed, scroll through other cameras/Entrance Panels. Using the programmable keys it is also possible to directly display a camera or Entrance Panel. - Page 37 Classe100 X16E User and installation manual 3. Touch to display another Entrance Panel or camera (using the scrolling service). When switching from one camera to the next, the (A) key lights up. To end camera display mode wait for the switching off time to elapse or press the (B) key Note: switching from one camera to another is also possible without enabling the audio.
-
Page 38: Netatmo Cameras
If your NETATMO account is associated to several homes, each with one or more cameras, the full home list will be displayed. You will therefore be able to see images of your seaside home from your Classe100 X16E installed in your main home Note: it si possible to display the images from compatible NETATMO cameras only if the monitoring function is active on the NETATMO Security App. - Page 39 Classe100 X16E User and installation manual Camera 1 3. Move the joystick up/down to select the camera that you want to display. Camera 2 4. Touch to activate the desired camera, (the image is displayed for three minutes).
- Page 40 Classe100 X16E User and installation manual 5. Touch to end.
-
Page 41: Door Lock Release
Classe100 X16E User and installation manual Door lock release It is possible to open the main Entrance Panel door lock, using the door lock key. Using the programmable keys, it is also possible to open the system door locks. The programmable key to use for opening a certain door lock is set during the configuration by... -
Page 42: Paging
Classe100 X16E User and installation manual Paging This function can be used to send voice messages using the microphone of the Classe100 X16E through the speakers of the sound system. Programming of the This function is enabled during the configuration by the installer (see... -
Page 43: Services
Classe100 X16E User and installation manual Services With preset systems it is possible to also enjoy a range of services, such as: Inductive loop Door status Professional Studio (Office) Safe door lock Inductive loop The INDUCTIVE LOOP service enables the device to be used by people wearing hearing aids with (T) selector. -
Page 44: Door Status
Classe100 X16E User and installation manual Door status This service indicates through the door lock LED if the entrance door is open or closed. This service is enabled during the configuration by the installer (see Programming of the programmable keys). -
Page 45: Professional Studio (Office)
Classe100 X16E User and installation manual Professional Studio (Office) When a call is received from the Entrance Panel, this service automatically opens the associated door lock without the need for pressing the door lock control key. This service can be enabled during the configuration by the installer (see... -
Page 46: Safe Door Lock
Classe100 X16E User and installation manual Safe door lock When active, this service prevents the opening of the Entrance Panel door lock unless communication with the same is active. Therefore, the opening of the door lock is only permitted when Entrance Panel and Internal Unit are in voice communication. -
Page 47: Device Adjustments And Settings
Classe100 X16E User and installation manual Device adjustments and settings Using the joystick it is possible to perform adjustments (Adjustments and/or Parameter Adjustment menu during Audio/Video connection) and settings (Settings menu) Use of the joystick You must use the joystick on the side of the device to navigate on the menu and select the settings. -
Page 48: Wi-Fi Adjustments And Settings
Classe100 X16E User and installation manual Wi-Fi adjustments and settings Wi-Fi adjustments and settings menu From stand-by press the joystick to activate the display Move the joystick up/down to select the page among: Door Entry You can download the Door... - Page 49 Classe100 X16E User and installation manual Wi-Fi settings page,where it is possible to enable/disable/ reset the Wi-Fi, perform the first association to the app and reset the device. Device info. EXIT Exit the menu.
- Page 50 Classe100 X16E User and installation manual Ringtone volume adjustment From stand-by press the joystick to activate the display and select the corresponding page. Press the joystick to adjust the volume. The ringtone is played at the set volume level. Move the joystick up/ down to select the volume level (1 –...
- Page 51 When a call is received from the entrance panel, this function automatically activates the associated door lock without the need for pressing the door lock control key. To enable this function, Classe100 X16E must be configured as shown in the Programming of the programmable keys.
- Page 52 Classe100 X16E User and installation manual WI-FI settings From stand-by press the joystick to activate the display and select the corresponding page. Press the joystick to select the page of interest. Enable/disable the Wi-Fi Network Move the joystick up/down to...
- Page 53 Classe100 X16E User and installation manual Device reset RESET EXIT Exit the menu. Enable/disable the Wi-Fi Network In this page you can display the Wi-Fi network to which the device is connected and if necessary disable the connection. A Wi-Fi network name to which the device is connected;...
- Page 54 Classe100 X16E User and installation manual Reset the Wi-Fi network In this section it is possible to change the Wi-Fi network to which the device is connected, or the network password. 1. Press the joystick to reset the Wi-Fi network.
- Page 55 Classe100 X16E User and installation manual Device reset This page can be used to reset the device. 1. Press the joystick to reset the device. RESET 2. Move the joystick down to select the confirmation icon. 3. Press the joystick to confirm.
- Page 56 From stand-by press the joystick to activate the display and select the corresponding page. 1. Press the joystick to display the information. A Wi-Fi network name to which the Classe100 X16E is connected. Wi-Fi: Wi-Fi Home B Network parameters. IP: 192.168.178.43 FW Vers.: 1.0.0...
- Page 57 Classe100 X16E User and installation manual Audio/video parameter adjustments (function not available for the NETATMO cameras) During a connection to an Internal Unit, Entrance Panel or when using the Call home function with Door Entry CLASSE100X app, it is possible to modify the speaker volume and, in case of video connection, the colour, contrast and brightness of the image.
- Page 58 Classe100 X16E User and installation manual Press the joystick to modify the level. Move the joystick up/ down to select the desired level. Press the joystick to confirm or wait for the timeout. Move the joystick up/ down to select another parameter or the last page to exit.
-
Page 59: Settings
Classe100 X16E User and installation manual Settings Settings menu From stand-by, press and hold down the joystick for about 5 seconds to activate the display and access the > 5 sec Settings menu Move the joystick up/down to select the page among:... - Page 60 Classe100 X16E User and installation manual Enable/disable the key sound This function enables/disables the BEEP when the keys are pressed. The function is disabled by default, to enable it follow the procedure below: From stand-by, press and hold down the joystick for 5 seconds to access the advanced menu and select the corresponding page.
- Page 61 Classe100 X16E User and installation manual ICON TYPE OF CALL Selection of the call ringtone from the MAIN ENTRANCE PANEL Selection of the call ringtone from the SECONDARY ENTRANCE PANEL FLOOR CALL ringtone selection INTERCOM CALL ringtone selection EXTERNAL INTERCOM CALL ringtone selection (interface 346850 only)
-
Page 62: Use With The Door Entry Classe100X App
User and installation manual Use with the Door entry Classe100X App Introduction You can interact with your Classe100 X16E using the free Door Entry CLASSE100X app. After registering and authenticating, you must make the association with the device; at this point you can –... -
Page 63: Account Registration
You must first register to be able to use the Door Entry CLASSE100X app and thus use the interface functions with your Classe100 X16E. After opening the app follow the registration instructions: When the account has been created it will be common to all the connected Legrand/BTicino device app A Access the... - Page 64 Classe100 X16E User and installation manual 6. Enter a password and fill the fields with your details. 7. Tick to accept the terms and conditions of use laid down in the associated text (obligatory). 8. Touch to continue.
-
Page 65: Authentication
Classe100 X16E User and installation manual Authentication After registering with the portal, you can authenticate by entering email and password. A Access the Help section password recovery Touch to start the procedure C Touch to create a new account 1. Enter email and password. -
Page 66: Forgotten Password
Classe100 X16E User and installation manual Forgotten password When you have forgotten the password: 1. Touch to activate the password recovery procedure. 2. Enter the email address where the system can send a verification code. 3. Touch to confirm the forwarding of the verification code. -
Page 67: Help
Classe100 X16E User and installation manual 6. Enter the new password. For security reasons enter a new password with these features: – minimum length 8 characters; – must contain at least one letter and one number; – it must be different from the last 5 passwords used. -
Page 68: Faq
Classe100 X16E User and installation manual In this section it is possible to display FAQ (and their answers) regarding the use of the Door entry Classe100X App. 1. Touch to enter the FAQ section 2. Select the topic on which you require clarifications. -
Page 69: Association Of The Device
Follow this to associate your account to the Classe100 X16E. This operation is only necessary on the first access and allows you to connect the Classe100 X16E to your home Wi-Fi network and activate the connection between the two devices. - Page 70 Classe100 X16E User and installation manual 5. From stand-by press the joystick to activate the display. 6. Touch to continue.
- Page 71 Classe100 X16E User and installation manual This screen is displayed to indicate that your Classe100 X16E has never been associated. The screen will disappear once the procedure has been completed successfully. Door Entry CLASSE 100X 7. Move the joystick down to select the Wi-Fi settings page.
- Page 72 Classe100 X16E User and installation manual 9. Touch to activate the temporary Wi-Fi network created by your C100X16E. This screen appears, followed by a qrcode. SOFT_AP...
- Page 73 Classe100 X16E User and installation manual 10. Touch to continue. 11. Using the smartphone, scan the QR Code.
- Page 74 Classe100 X16E User and installation manual 12. Touch to access your smartphone settings 13. Touch to access the Wi-Fi network settings Wi-Fi Wi-Fi Wi-Fi Home BTICINO_cc9bdf BTICINO_cc9bdf Wi-Fi Home Wi-Fi 02 Wi-Fi 02 Wi-Fi 03 Wi-Fi 03 Wi-Fi 04 Wi-Fi 04...
- Page 75 Classe100 X16E User and installation manual Wi-Fi Home Home1234% Wi-Fi 02 Wi-Fi 03 Wi-Fi 04 Wi-Fi Home Wi-Fi 05 Wi-Fi 06 16. Now select the home Wi-Fi network to which the C100X16E will be connected. 17. Enter the home Wi-Fi network password 18.
- Page 76 Classe100 X16E is now connected to the home Wi-Fi network Wi-Fi Home 20. Touch to continue. Note: The disconnection of Classe100 X16E from the Wi-Fi network, or the reset of the Wi-Fi network to change the password, are possible using the specific menu, Wi-Fi...
-
Page 77: Home Page
Classe100 X16E User and installation manual 21. Touch to continue. Home Page customisation). 22. Touch to immediately customise the Home Page (see Home page. 23. Touch to delay it to a later date. You will be directed to the... - Page 78 The Home Page of the Door entry Classe100X App can be customised based on personal needs. After being authenticated, from this page you can interact with your Classe100 X16E and with the video door entry system. You can also make various settings via the pull-down menu. A Pull-down menu.
-
Page 79: Display The Cameras Or Entrance Panels
Classe100 X16E User and installation manual Display the cameras or Entrance Panels By means of this function you can display the cameras and Entrance Panels configured by your installer (see Configuration). You can also display the associated NETATMO cameras as indicated in the... - Page 80 Classe100 X16E User and installation manual Telecamera Telecamera 3. Touch to make the management keys appear A Call quality indicator: indicates if the conditions are good enough (Cloud, Wi-Fi and 3G/4G connection) for the communication. Good quality Average quality Poor quality 4.
-
Page 81: Open Door Locks
Classe100 X16E User and installation manual Open door locks By means of this function you can open the door locks of the Entrance Panels configured on the device by your installer. A Door lock of the associated Entrance Panel. Other door locks. -
Page 82: To Receive A Video Door Entry Call
Classe100 X16E User and installation manual To receive a video door entry call Via this function you can receive the calls from the Entrance Panel. With smartphone in stand-by, following a call from the Entrance Panel: – on Android, the image taken with the call* management icons appears;... - Page 83 Classe100 X16E User and installation manual 4. You can also open the door lock of the Entrance Panel from which the call comes, by dragging the switch. When it becomes green the door lock has been activated. If it remains red, the command has not been performed correctly.
- Page 84 Note: this function is only available if monitoring is active in the NETATMO Security App, and if the NETATMO camera has been enabled in Classe100 X16E. A. Entrance Panel image display B. Name of the individual detected in the home by the Welcome NETATMO camera Note: if the camera detects unknown individuals, their number is displayed By interfacing with the “At home”...
- Page 85 Classe100 X16E User and installation manual When the NETATMO Security App detects a face, it always includes it in the “At home” section. After a certain amount of time (1h minimum and 12h maximum) with the camera no longer detecting the face, this is moved to the “Out” section.
-
Page 86: Call Home: Call Your Classe100 X16E
User and installation manual Call home: Call your Classe100 X16E You can communicate with your Classe100 X16E by means of this function. 1. Touch to call the Classe100 X16E. 2. When the Classe100 X16E call answers the audio communication is activated. - Page 87 Classe100 X16E User and installation manual 3. Touch to end the call.
- Page 88 User and installation manual Menu This pull-down menu can be used to manage the associated users, customise the Home Page, set the Wi-Fi connection, reset and update your Classe100 X16E. 1. Touch to open the pull-down menu. A Opens the Users section.
- Page 89 – dissociate users or devices; – to invite other users to associate their accounts to your Classe100 X16E, so that they can use the connected Classe100 X16E functions. If the main user is dissociated ( ), it will be necessary to indicate a replacement.
- Page 90 Classe100 X16E User and installation manual Invites a user With this procedure you can invite other users to use the functions of your Classe100 X16E. In this way they can use the connected Classe100 X16E functions. J.Brown@BTicino.com J.Brown@BTicino.com 1. Touch to invite another user.
- Page 91 Classe100 X16E User and installation manual Dissociate a smartphone 1. Scroll to dissociate a smartphone. 2. Touch to continue. 3. Touch to confirm The user will no longer be able to manage the system using that smartphone. authentication To re-associate the smartphone simply repeat the...
- Page 92 Classe100 X16E User and installation manual Dissociate an user 1. Scroll to dissociate a user, and therefore all the devices associated with the same. 2. Touch to continue. 3. Touch to confirm If your user is the main user, and you want to delete it, it will be necessary to indicate a replacement as main user.
- Page 93 Classe100 X16E User and installation manual Now you have been dissociated. To return to manage the system, you must be invited again. Warning: if the user to dissociate is the only one left, the system will suggest a tutorial to reset the...
- Page 94 Classe100 X16E User and installation manual Settings This section can be used to update the firmware, customise the Home Page, set the Wi-Fi connection, reset and update your Classe100 X16E. 1. Touch to open the setting section. Update the Classe100 X16E...
- Page 95 On entering the section, if an update is available, a key will be displayed to install it, otherwise the version currently in the Classe100 X16E appears. 1. Touch to install it. At the end of the installation you can display the firmware version installed in your Classe100 X16E.
- Page 96 It is also possible to rename and display the Staircase Lights object and the objects corresponding to the programmable keys of your Classe100 X16E. Note: The number and the types of objects available for customisation depend on the way your installer...
- Page 97 Classe100 X16E User and installation manual Set the video internal unit Wi-Fi In this section, it is possible to set the Wi-Fi connection of your Classe100 X16E with the home Wi-Fi network. This procedure can be used to: – reset the connection on another network (e.g.
- Page 98 Classe100 X16E User and installation manual 3. Press the joystick to access the page. Wi-Fi Home 4. Move the joystick to select the Reset page.
- Page 99 User and installation manual RESET 5. Press the Joystick to reset the Wi-Fi network and connect Classe100 X16E to another network, or to the same network with a different password. 6. Move the joystick down to select the confirmation icon.
- Page 100 Classe100 X16E User and installation manual 7. Press the joystick to confirm. The device can now be connected to the Wi-Fi network. The page will show the QR-code to create a new connection 8. Touch to continue.
- Page 101 Classe100 X16E User and installation manual 9. Frame the QR-code with your smartphone and continue the procedure as shown in Association of the device, item...
- Page 102 Classe100 X16E User and installation manual Reset the video internal unit This section can be used to reset Classe100 X16E at the end of the procedure: – all the accounts (association of accounts to Classe100 X16E) will be deleted; –...
- Page 103 Classe100 X16E User and installation manual 2. Move the joystick to select the Settings page. 3. Press the joystick to access the page...
- Page 104 Classe100 X16E User and installation manual Wi-Fi Home 4. Move the joystick to select the device Reset page. RESET 5. Press the joystick to reset the Classe100 X16E.
- Page 105 Classe100 X16E User and installation manual 6. Move the joystick down to select the confirmation icon. 7. Press the joystick to confirm.
- Page 106 User and installation manual 8. Press to perform the reset. At the end of the procedure the authentication page appears. It is possible to use your Classe100 X16E for functions that do not require association with the Door entry Classe100X App.
- Page 107 This section can be used to select the ringtone to associate to the Door Entry CLASSE100x App. A Set the default ringtone corresponding to the one set on your smartphone Disable the ringtone 1. Touch to select the ringtone among the ones available on CLASSE100 X16E...
- Page 108 Classe100 X16E User and installation manual Account The account is common to the connected Legrand/BTicino devices APP Note: the changes to the parameters of this section will be transferred to all the devices with Apps using the Legrand account installed.
- Page 109 Classe100 X16E User and installation manual Personal data This section may be used to change some data of the account currently managing the device, or to replace it with another registered Legrand account. A Account name/surname, touch to change and then touch the key to confirm...
- Page 110 Classe100 X16E User and installation manual Language 1. Touch to change the language used by the App to send you mail notifications,etc. 2. Select the language 3. Touch to end 4. Touch to confirm Security This section can be used to change the password of your account and to disconnect it from all devices.
- Page 111 Classe100 X16E User and installation manual Change the password 1. Touch to change the password 2. Enter the current password 3. Touch to continue. 4. Enter the new password, which must meet the following requirements: – at least 8 characters;...
- Page 112 Classe100 X16E User and installation manual Disconnect from all devices 1. Touch to activate the procedure In order to disconnect your account from all devices, the password must be changed. 2. Enter the email address where the system can send a verification code 3.
- Page 113 Classe100 X16E User and installation manual Enter a secure password that you don't use for other websites. 6. Enter the new password 7. Re-enter it for confirmation 8. Touch to continue Your account is now disconnected from all the devices to which it was associated.
- Page 114 Classe100 X16E User and installation manual Authorisations This section can be used to enable the reception of communications from Legrand and the sharing of the App usage data. 1. Touch to enable communications. 2. Touch to enable data sharing. Legal information...
- Page 115 Classe100 X16E User and installation manual Partner apps In this section you can display all the third parties to whom you granted rights to operate on your connected devices. (E.g.: Homekit, Google home etc.) 1. Touch to remove the access of sites or Apps to some of your account data...
- Page 116 Classe100 X16E User and installation manual Delete the account This section can be used to permanently delete your Legrand account, which can therefore no longer be used for the Applications to which it was associated. Note: when deleting your account, all the data associated with the Applications will also be lost.
- Page 117 Classe100 X16E User and installation manual NETATMO cameras In this section, it is possible to connect the Netatmo cameras of your system to the Door Entry CLASSE100X App. from the device and the App, and take In this way, you will be able to display the cameras both...
- Page 118 Classe100 X16E User and installation manual Main home Main home Camera 1 Seaside home Camera 1 6. Select the home for which you wish to view the cameras in the home page 7. Touch to continue. 8. You can now use the home page to also view the Netatmo cameras of the previously selected home.
- Page 119 Classe100 X16E User and installation manual...
- Page 120 BTicino SpA Viale Borri, 231 21100 Varese www.bticino.com BTicino Spa reserves at any time the right to modify the contents of this booklet and to communicate, in any form and modality, the changes brought to the same.
Need help?
Do you have a question about the Classe100 X16E and is the answer not in the manual?
Questions and answers
How can I add OPEN DOOR to the Shortcut Center on my android phone ? So far the only shortcut is Everybody left, which was added without my input and which, I assume, locks the door.