Table of Contents
Advertisement
Quick Links
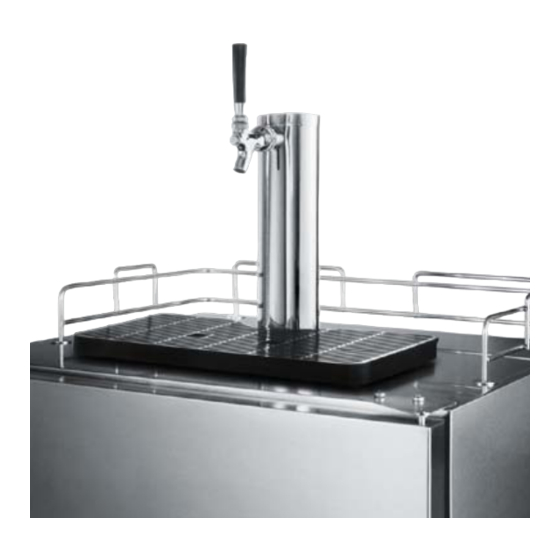
FULL-SIZE COMMERCIAL BEER DISPENSER
BEFORE USE, PLEASE READ AND FOLLOW ALL SAFETY RULES AND OPERATING INSTRUCTIONS.
Write Model and Serial Numbers here:
Model # _______________________
Serial # _______________________
Find these numbers on back of unit.
Model SBC490 (All Versions)
Use and Care Guide
0
Felix Storch, Inc.
770 Garrison Avenue
Bronx, NY 10474
www.summitappliance.com
Advertisement
Table of Contents

Related Manuals for Summit SBC4907FRTWIN


Summary of Contents for Summit SBC4907FRTWIN
- Page 1 FULL-SIZE COMMERCIAL BEER DISPENSER Model SBC490 (All Versions) Use and Care Guide BEFORE USE, PLEASE READ AND FOLLOW ALL SAFETY RULES AND OPERATING INSTRUCTIONS. Felix Storch, Inc. Write Model and Serial Numbers here: 770 Garrison Avenue Model # _______________________ Bronx, NY 10474 Serial # _______________________ www.summitappliance.com Find these numbers on back of unit.
-
Page 2: Table Of Contents
TABLE OF CONTENTS Important Safeguards ...................2 Before Using for the First Time ................3 We Care About the Environment Tips for Saving Energy Disposing of a Worn-Out Appliance ..............4 Placing and Installation .................. 4 - 5 Choosing the Right Place ................4 Applications ....................4 Connection to Power Supply ..............5 Temperature Control ....................6... -
Page 3: Important Safeguards
IMPORTANT SAFEGUARDS WARNING! To reduce the risk of fire, electric shock or injury when using this appliance, follow these basic precautions: 1. Read all instructions before using the appliance. 2. The appliance must be correctly connected to the power supply. 3. -
Page 4: Before Using For The First Time
BEFORE USING FOR THE FIRST TIME These instructions are important, and we request you read them before using this beer dispenser. They describe the appliance and the correct and safe way to use it. The instructions were prepared for various models so you may find descriptions of some accessories and functions that do not apply to yours. -
Page 5: Disposing Of A Worn-Out Appliance
DISPOSING OF A WORN-OUT APPLIANCE • When your appliance finally wears out, dispose of it. • Before you dispose of your old appliance: Take the door or doors off but leave the shelves and drawers in place so that children cannot easily climb inside. •... -
Page 6: Connection To Power Supply
Connection to Power Supply Connect this appliance to a 3-prong power supply socket outlet (which has a ground terminal). If you only have a two-prong outlet, have it replaced by a qualified technician with an outlet that meets the local codes ... -
Page 7: Temperature Control
TEMPERATURE CONTROL How to Adjust the Thermostat The beer dispenser is controlled with a thermostat knob located inside the unit, towards the right-hand corner. Turn the knob clockwise from the STOP (0) position toward higher numbers for colder temperatures. Place the drip tray under the beer faucet. The recommended pressure for the CO system is 8-10 lbs. -
Page 8: Installation
INSTALLATION Unless the model number includes the letters “BI” (for “built-in”) , your appliance is not designed to operate in enclosed spaces. When placing your unit, make sure you allow at least 4” clearance on both sides, rear and top to ensure adequate airflow. -
Page 9: Casters (For Use As A Freestanding Beer Cooler)
Casters (for use as a freestanding beer cooler) Empty the cabinet and lay down the beer dispenser sideways so the door hinge side is at the top. Be careful not to cause dents or scratches on the cabinet. Placing a soft cloth or cardboard underneath the cabinet is recommended. -
Page 10: Co Regulator And Co Cylinder
Regulator and CO Cylinder Note: Your CO cylinder is shipped empty to avoid any possible accidents during transportation. When you purchase the first keg of beer, have your beer distributor fill the CO cylinder. You must read and understand the following procedures for CO cylinders before installation : 1. -
Page 11: Parts List
PARTS LIST Unpack and inspect the various parts of this unit Remove all packing materials and parts. Inspect to make sure all parts listed below are present. 1 Draft arm assembly (with washer) 1 CO cylinder 1 CO regulator 1 Keg tap (American Sankey type) 1 Cleaning kit Vinyl tubing 1 Stainless steel (removable) floor to protect the unit during keg insertion... -
Page 12: Operation
OPERATION Dispensing Beer Follow these steps to dispense beer: 1. Make sure the beer dispenser is plugged in properly to a 120V, 60Hz, 15 amp grounded AC outlet. 2. Place the drip tray under the beer faucet. 3. Open the beer faucet by pulling the tap towards you quickly and completely to dispense the beer. -
Page 13: Converting The Beer Dispenser To A Built-In Unit
CONVERTING THE BEER DISPENSER TO A BUILT-IN UNIT For your convenience, we offer beer dispensers that can be quickly built in under your counters. Simply follow the steps below for a quick and easy installation. Note: Not all models have built-in capability. Only models with letters BI are built-in compatible. -
Page 14: Instructions For Building-In
Instructions for Building-In Find the mid-point From left to right the width is about 24". From back to front, the dimension is about 25". Therefore the mid-point is located wherever these coordinates cross each other. Use a pencil or marker to note this spot. Note: 12 inches from left to midpoint. -
Page 15: Maintenance And Cleaning
MAINTENANCE AND CLEANING Automatic Defrosting of the Beer Dispenser There is usually no need to defrost the beer dispenser because the ice deposited on the inner back wall is automatically defrosted. Ice deposits on the inner back wall during compressor operation. Later on, when the compressor is not operating, the ice defrosts and water drains through the outlet in the inner back wall into the drain pan situated above the compressor where it evaporates. -
Page 16: Cleaning The Appliance
Cleaning the Appliance Disconnect the power supply before cleaning the appliance. Do not use coarse or abrasive cleaning agents as you can damage the surface of the appliance. Periodic cleaning of the beer dispenser is necessary. A complete cleaning kit is provided for your convenience. -
Page 17: Noise
And always make sure you check the accessories in the interior of the appliance; they should be placed correctly in their positions. Summit Outdoor beer dispensers contain a rear fan which runs only when the compressor is on, and some models have an internal air circulation fan which runs... -
Page 18: Troubleshooting
TROUBLESHOOTING Problem Cause Correction Beer is cloudy: Excessively low Drain a few ounces before drinking. The beer in the temperatures Raise the temperature setting of the unit. glass appears may cause hazy and not clear. hazy or cloudy beer, particularly when the beer lies in the cold coil for long... - Page 19 Beer has off taste: Improper Brush and clean the tap properly. It should be Often bitter and cleaning of the scoured using a detergent, then rinsed clean. bite-y; sometimes completely lacking Contaminated Beer tube should be examined. If contaminated, flavor and zest. It air line it should be replaced.
-
Page 20: Limited Warranty
LIMITED WARRANTY ONE-YEAR LIMITED WARRANTY Within the 48 contiguous United States, for one year from the date of purchase, when this appliance is operated and maintained according to instructions attached to or furnished with the product, warrantor will pay for factory-specified parts and repair labor to correct defects in materials or workmanship.
Need help?
Do you have a question about the SBC4907FRTWIN and is the answer not in the manual?
Questions and answers