Table of Contents
Advertisement
Quick Links
Advertisement
Table of Contents

Related Manuals for Arrows Hobby ARRAH024P


Summary of Contents for Arrows Hobby ARRAH024P
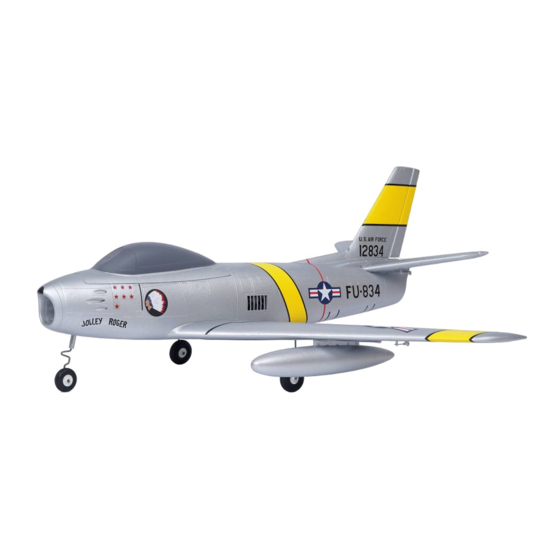
- Page 1 64mm F-86 64mm F-86 Operating Manual Operating Manual www.arrowshobby.com...
- Page 2 WARNING: This manual contains important information that will help you maintain and operate your model aircraft in a reliable and safe manner. Please read the instructions and warnings carefully prior to assembly, setup or use. As this model aircraft is a sophisticated hobby product, it must be flown with safety and common sense in mind, failure in doing so may result in injury or property damage.
-
Page 3: Table Of Contents
All in all, it is a classic. While Arrows Hobby has introduced a number of EDF jets, from the hand tossed Viper to the high end MiG-29 and F-15, our engineer- ing team began with the Marlin 64mm EDF, still the best EDF trainer made. The F-86 is the successor to the Marlin with fixed gear for strength and the same full 5-channel performance with flaps. -
Page 4: Model Assembly
Model assembly Main wing installation 1.Install the wing spar through the main wing set 2. Guide the servo wire into the cockpit as shown, fix pass-through as shown. the main wing to fuselage using the included plastic parts and screws, and then connect the Y-harness wires of CH1 and CH6. - Page 5 Model assembly Vertical stabilizer installation 1.Connect the rudder servo connectors to the servo extensions in the fuselage. Install the vertical tail into the slot in the fuselage and secure with the included screws. Landing gear installation 1.Install the front landing gear into the slot at the bottom of fuselage and fix with included screw as shown.
- Page 6 Model assembly 2.Insert the main landing gear assembly into the wing landing gear slot and pivot 90 degrees to lock the landing gear in place. Note: Main landing gear differs left & right. Auxiliary fuel tank installation 1. Install the fuel tank onto the wing slot.
-
Page 7: Battery Installation
Battery installation 1. Remove the battery hatch. 2. Remove the hook and loop tape from the fuselage. Apply the looped surface to the battery. 3. Install the battery into the fuselage- securing it with the preinstalled battery straps. Note: The weight of each battery may vary due to different manufacturing techniques. -
Page 8: Control Horn And Servo Arm Settings
Preflight check transmitter and model setup After assembly and prior to your first flight, make sure all control surfaces respond correctly to your transmitter by refer- ring to the diagram below. Control throws The suggested control throw setting for the 64mm F-86 are as follows (dual rate setting): Tips: The maiden flight should always be flown using low rates, fly the aircraft until you are famil- iar with its characteristics prior to trying high... -
Page 9: Center Of Gravity(Cg)
Finding the center of gravity Finding the correct center of gravity is critical in ensuring that the aircraft 130mm-140mm performs in a stable and responsive manner. Please adjust the weight distribution so the aircraft balances in the range stated on the diagram. •... -
Page 10: Flying Course
Before flying the model Monitor your flight time Monitor and limit your flight time using a timer (such as a stopwatch or on the transmitter, if available). As modern Lithium Polymer batteries are not designed to discharge completely, when the battery runs low, the ESC will lower then completely cut the power to the motors to protect the battery. -
Page 11: Troubleshooting
Troubleshooting Problem Possible Cause Solution Lower throttle stick and throttle trim to lowest Aircraft will not respond to ESC is not armed. settings. the throttle but responds to Throttle channel is reversed. other controls. Reverse throttle channel on transmitter. Replace damaged parts. Damaged spinner, propeller, motor or motor mount. - Page 12 重要提示: 1. 在组装、调整及飞行前请务必认真阅读产品说明书以熟知产品的特性。请严格按照说明书提示进行飞机的组装、 调整及飞行。 2. 模型不是玩具,具有一定的危险性,操作者需要具备一定的飞行经验,初学者请在专业人士指导下操作。 3. 禁止十四岁以下儿童在任何情况下操作、飞行。 警告 ★作为用户,您对本产品的安全操作和维护负全部责任。请始终严格遵照产品指导说明及安全警告操作本产品及其相关 配置(例如遥控器、充电器、电池等) 。 ★本产品由无线电遥控器控制,在飞行过程中,可能会受到外界强信号源干扰而导致失控,甚至坠机,因此,在飞行过 程中务必始终与飞机保持一定的安全距离,避免意外碰撞、受伤。 ★请勿随意暴露置放模型飞机的电子产品,尤其是电池,存放时请务必保证周围三米之内无易燃易爆物体。 ★在任何情况下,都务必保证油门杆处于起始位、发射机处于通电状态时,才能连接模型飞机内部的动力电池。 ★在任何情况下,都不要尝试用手去回收飞行中的模型飞机,必须要等模型飞机降落停稳以后,再进行回收。 ★请勿在公路、人群、高压线密集区、机场附近及其它法律法规明确禁止飞行的场合飞行。 ★请勿在雷雨、大风、大雪或者其它恶劣气象环境下飞行。 ★请勿将相关化工类产品、零部件、电子部件等置于儿童可触及的范围。 ★请勿将本产品尤其是未经特别设计和保护的电子件暴漏于潮湿的环境中,以免造成损坏。 ★请勿将本品任意处置于口中,以免造成人身伤亡。 ★请勿在发射机电池低电量的情况下操纵模型飞机。 ★请勿在配件未充分冷却的情况下触碰或移动。 ★请勿使用化学制剂擦拭清洁本产品。 ★务必保证飞机在整个操作过程中始终在视线范围和遥控控制距离内。 ★务必保证在拆卸飞机之前移除电池。 ★务必保证所使用的电池是满电状态。 ★务必保证所使用的所有线束完好无损。 飞行前准备 1. 开箱检查包装内物品是否有损坏或遗漏。 2. 通读此飞机说明书以及其相关配置说明书(如遥控器、电池和充电器) 。 3. 确保遥控器和使用的电池都是满电状态(请严格遵从配件原厂家说明书) 。 4. 遥控器设置(请严格遵从遥控器厂家的说明书) 。 5.
- Page 13 F-86 战斗机, 绰号 : 佩刀, 是二战后美国北美航空公司研制的第一代单座单发后掠翼亚音速喷气式战斗机, 用于空战, 拦截与轰炸。 它可以在高速混战中对抗苏联的后掠翼 MiG-15. F-86 是第一架俯冲时超音速以及第一架装备空对空飞弹的战机。它是美国早期设计 的最为成功的喷气式战斗机代表作。除了大量的次型外,它还衍生出海军型 FJ 战斗机。 人们总是乐此不疲地争论, Arrows Hobby 涵道机 MiG-29 和 F-15 哪个是“王道” 。Arrows Hobby 的工程师团队深受鼓舞, 并“周 到”地带来第三个选项,64mmF-86。Arrows Hobby 64mm F-86 以其高速性能下的控制性以及低速飞行的机动性和稳定性毫无疑义 地成为“王道”机型的强劲角逐者。 64mm F-86 配备 64mm12 叶涵道组、2840-KV3150 无刷电机、40A 无刷电调,其搭配 4S 电池,可给飞行提供澎湃的动力,以...
- Page 14 组装过程 主翼安装 1.如图所示,将主翼安装至主翼对接管。 2.如图所示,将舵机线穿入机身到座舱内,用所附主翼 固锁胶件和螺丝固定主翼至机身。安装完主翼连接1通 和6通2Y线。 平尾安装 1.如图所示,将平尾舵机线连接至机身尾部延长线,平 尾安装至机身尾部槽位。...
- Page 15 组装过程 垂尾安装 1.如图所示,将垂尾舵机线连接至机身尾部舵机延长线, 垂尾安装至机身尾部相对应的凹槽,用所附螺丝固定。 起落架安装 1. 如图所示,将前起落架安装至机头底部槽位,用所附 螺丝固定。...
- Page 16 组装过程 2.将主起落架插入主翼起落架槽中,并旋转90度以锁定 起落架位置。(注意:主起落架区分左右) 油箱安装 1. 如图所示,将两侧油箱安装至主翼底部槽位。...
- Page 17 电池安装 如图所示,安装厂家推荐型号电池至电池舱,使用所附魔 术带或魔术贴固定。 注意: 1. 电池与电调连接前,务必确定油门杆处于低位。 2. 启动油门前,务必确定没有任何人或物体处于螺旋 桨的转动直径以内。 3. 由于不同电池厂家生产的电池重量有轻微差异,需 要调整电池在舱内的前后位置来平衡飞机的重心位置。 接收机连接示意图 Channel-1 副翼 —Aile Channel-2 平尾 —Elev 以 Futaba 遥控器为例,请按照图示顺序一一连接接收机通 Channel-3 油门 道,其他通道可接入襟翼信号线或 LED 灯信号线 , 随后妥善 —Thro 固定接收机。 Channel-4 垂尾 —Rudd Channel-5 起落架 —Gear Channel-6 其他通道 —Spare...
- Page 18 重心 130mm-140mm 本产品的重心在机翼前缘向后 130-140mm 的位置。玩家 需要通过移动电池在电池舱里的前后位置或者使用配重块 来调整重心。请务必确保,在调整飞机重心的时候,飞机 处于组装完毕待飞的状态。 重要产品相关信息 1. 本产品随附的电调处在安全启动模式。安全启动模式,意即如果电机、电池已连接至电调,但油门杆不在低油门 位置或关闭位置,电机不会启动,只有将油门杆移至低油门位置或关闭位置,电机才会启动。油门杆移至低油门位 置或关闭位置时,电机将发出一系列哔声。几声相同的哔声表示电调已检测到电池。哔声的数量等于电池的节数。 此时,电机已准备就绪,并将随着油门移动开始启动。 2. 电机和电调已预连接,需要观察电机转动方向是否正确,如方向不正确,只需换插三条电机与电调连接线中的任 意两条,即可改变电机转动方向。 3. 电机具有刹车设置(可选项) 。由于电调是刹车关闭状态,我们推荐电机也保持刹车关闭状态。此外,请注意,当 油门杆处在全油门位置上时,如果将电机、电池连接到电调,则可能会意外打开刹车。如要关闭刹车,需将油门杆 移至全油门位置,并插上电机电池,电机此时会发出一声哔响,再将油门杆移至低油门位置或关闭位置,则电机已 准备就绪,且刹车将被关闭。 4. 电池的选择和安装。我们推荐使用 4S 2200-2600mAh 35C 锂电池。如果使用其他电池,电池的容量不能低于推 荐电池容量,且电池的尺寸和重量应与推荐电池相同,以保证适配机身电池舱,且不会显著改变重心。 电调说明 注意 : 为了让电调适应你的遥控器油门行程,在首次使用本电调或更换其他遥控器使用时,均应重新设定油门行程。 油门行程设定说明: 正常使用开机过程说明 : 1. 开启遥控器,将油门打到最高点; 1. 开启遥控器,将油门打到最低点; 2.
- Page 19 舵面测试 在计划飞行之前, 需要使用遥控器测试每个舵面的工作情况, 确保摇杆动作与各个舵面动作的对应关系如下图所示 : 注意:在舵面调试中,请务必将油门摇置于最低位,并将桨拆下,以免电机意外启动发生事故。 副翼 副翼摇杆 副翼摇杆 向左运动 向右运动 升降舵 升降摇杆 升降摇杆 向上运动 向下运动 方向舵 方向摇杆 方向摇杆 向左运动 向右运动...
- Page 20 舵角和舵机摇臂安装 大舵面 舵角 摇臂 平尾 图示是出厂设置,首飞建议直接使用出厂 设置,完成首飞以后,根据个人情况以及 垂尾 对模型飞机的熟知程度自行调整。 小舵面 副翼 襟翼 舵面行程 大 小 本产品舵面行程参数如右图所示: 请注意,舵量越大,模型飞机的动作响应 升降舵 12mm 上 / 下 10mm 上 / 下 越快,动作幅度越大。首飞建议使用小舵 方向舵 10mm 左 / 右 8mm 左 / 右 量。然后根据个人情况以及对模型飞机的 熟知程度调整舵量。 副翼舵 14mm 上 / 下 12mm 上...
- Page 21 故障检修指导 问题 问题原因 解决方式 油门推杆无响应,但舵机 ——电调未连接电机 ——降低油门推杆和油门微调设定 有响应 ——油门通道反向 ——反过来重新装油门通道 ——桨罩、桨、电机、电机架坏了 ——更换损坏的配件 桨的噪音过大或者震动过大 ——桨或者桨罩的小部件松动了 ——把桨、桨夹和桨罩的小部件拧紧 ——桨装反了 ——反过来重新装桨 ——电池电量低 飞行时间变短,飞机无力 ——重新给电池充电 ——桨装反了 ——依照电池说明书更换新的电池 ——电池坏了 飞舵面不动,或者动作响 ——更换或者维修坏了的配件 ——舵面、舵角、连接杆、舵机坏了 应较慢 ——检查所有连接线,确保所有接头无松动现象 ——连接线坏了或者接头松了 舵面反向 ——检查通道控制(舵面)方向,调试飞机舵面 和遥控器的舵面控制杆 ——遥控器发射机通道反向 ——检查电池、发射机、接收机、电调、电机是 电机无力 否有损坏(如有,请及时更换) ——电机或电池坏了 ——电调用了不合适的低压保护装置 ——立刻操控飞机降落,重新给电池充电 配件列表 机身...
Need help?
Do you have a question about the ARRAH024P and is the answer not in the manual?
Questions and answers