Advertisement
Quick Links
Advertisement

Related Manuals for Minka minkaAire ANYWHERE F307


Summary of Contents for Minka minkaAire ANYWHERE F307
- Page 1 ANYWHERE INSTRUCTION MANUAL WARRANTY CERTIFICATE U.S. Patent(s) Pending...
- Page 2 ©2017 Minka Lighting Inc. Manual design and all elements of manual design are protected by United States Federal and/or State Law including Patents, Trademark, and/or Copyright Laws.
- Page 3 * The warranty is void once the original purchaser or user ceases to own the fan or the fan is moved from its original point of installation. * The warranty is void with the use of any hanger bracket (non-Minka Aire or non-fan specific) other than the hanger bracket supplied & installed...
- Page 4 To obtain warranty service during the warranty period, the purchaser should return the fan with the sales receipt to the original place of purchase. The authorized Minka-Aire® dealer, at its sole discretion, will either repair or replace the fan after verifying the legitimacy of the warranty claim.
-
Page 5: Table Of Contents
CONTENTS SAFETY RULES..................CARE OF YOUR FAN..................PACKAGE CONTENTS..............TROUBLESHOOTING..................HANGING THE FAN................. SPECIFICATIONS....................OPERATING YOUR FAN..............1151 W. Bradford Court, Corona, CA 92882 For Customer Assistance Call: 1-800-307-3267... -
Page 6: Safety Rules
SAFETY RULES 1. Before you begin installing the fan, shut power off at the circuit breaker of the fuse box. 2. Be cautious! Read all instructions and safety information before installing your new fan. Review accompanying assembly diagrams. CAUTION: CAUTION: To avoid personal injury, the use of gloves may nrcessary while handling fan parts with sharp edges. CAUTION: CAUTION: To reduce the risk of personal injury, mount the fan base to a stud, wood post or beam using the hardware provided with your fan. - Page 7 5. This product employs overload protection (fuse). A blown fuse indicates an overload or short-circuit situation. If the fuse blows, unplug the product from the outlet. Replace the fuse as per the user servicing instructions (follow product marking for proper fuse rating) and check the product.
- Page 8 WARNING: WARNING: Do not operate any fan with a damaged cord or plug. Discard fan or return to an authorized service facility for examination and/or repair. WARNING: WARNING: If using this fan in a WET location, this fan must be connected to a supply circuit that is protected by a Ground Fault Circuit interrupter (GFCI) to reduce the risk of personal injury, electrical shock or death.
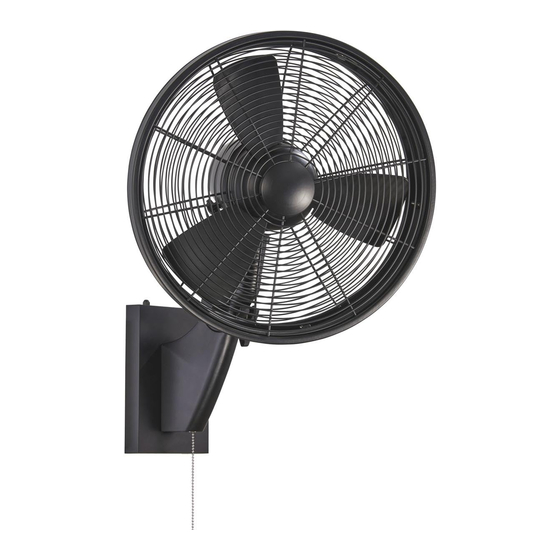
- Page 9 PACKAGE CONTENTS Unpack your fan and check the contents. You should have the following items: Fan motor assembly A. Mounting hardware: #10x 1.5" Mounting screws (6PCs.) B. Rubber cover C. Pull chain fob...
- Page 10 WARNING: WARNING: All of the parts, hardware have been provided for your safety and the proper installation of your new fan. The use of other parts, hardware or components not supplied by Minka Aire with ® the fan will void the Minka Aire Warranty.
- Page 11 A. THE WALL HAS AN WALL OUTLET A. THE WALL HAS AN WALL OUTLET CAUTION: CAUTION: If you are going to attach the fan to a wood stud or wood post, the stud or wood post must be wide enough and thick enough to sustain the wall bracket and the weight of the fan.
- Page 12 WARNING: WARNING: Make sure that all 2 hooks on the wall bracket have engaged complately with the 2 slots in the fan assembly and that the fan assembly is stable. 5. Replace the thumbscrews at bottom of fan assembly be sure to securely tighten thumbscrews. (Fig. 4) 6.
- Page 13 PILOT HOLES WALL BRACKET HOOKS STUD MOUNTING HOLES FAN ASSEMBLY BLOWN FUSE 5 AMPS, WALL FUSE 125V BRACKET FAN ASSEMBLY PLUG MOUNTING SCREWS FUSE COVER WALL WALL OUTLET THUMB- OUTLET SCREWS SLOTS FIG. 3 FIG. 4 FIG. 5 FIG. 6...
- Page 14 B. THE WALL HAS AN SIDE MOUNT WALL OUTLET BOX B. THE WALL HAS AN SIDE MOUNT WALL OUTLET BOX WARNING: WARNING: If your wall are with an side mount wall outlet box only, follow the steps below to hang your fan properly: 1.
- Page 15 SETSCREW POWER CUT OFF WIRE POWER BACK COVER BACK COVER CORD 3-PIN WIRE MOUNTING MOUNTING CONNECTORS SCREWS SCREWS BACK COVER BACK COVER POWER CORD POWER WIRE FAN ASSEMBLY RUBBER COVER FAN ASSEMBLY FIG. 7 FIG. 8 FIG. 9...
- Page 16 5. First determine the approximate position of where you want the fan to be located on the wall. You must use ALL SIX ALL SIX holes in wall bracket when installing wall bracket. Position wall bracket on wood stud or wood post and mark 6 hole locations. (Fig. 10) 6.
- Page 17 9. Grab the fan firmly with two hands. Align the 2 slots in the middle of the back of the fan assembly with the 2 hooks on the wall bracket and then pull down firmly on fan assembly. (Fig. 12) PILOT HOLES STUD MOUNTING...
- Page 18 POLYURETHANE ADHESIVE WALL BRACKET HOOKS FAN ASSEMBLY FAN ASSEMBLY WIRE NUTS THUMB- SCREWS SLOTS WALL FIG. 11 FIG. 12 FIG. 13...
-
Page 19: Operating Your Fan
OPERATING YOUR FAN Install the pull chain and fob onto the pull chain located in bottom of the fan. Turn on the power and check the operation of the fan. (Fig. 14) A. The pull chain controls the fan speed as follows: 1 pull - High, 2 pulls - Medium, 3 pulls - Low, and 4 pulls - Off. -
Page 20: Care Of Your Fan
CARE OF YOUR FAN GUARD SETSCREWS Here are some suggestions to help maintain your fan. 1. Because of the fan's natural movement some connections may become loose. Check the support connections, brackets and blade attachments twice a year. Make sure they are secure. 2. -
Page 21: Troubleshooting
TROUBLESHOOTING SYMPTOM SYMPTOM Fan will not start Fan Sounds Noisy SOLUTION SOLUTION Check the main and branch circuit fuses or breakers. Make sure all screws on fan motor assembly and fan guards are snug. Check the line wire connections to the fan. Make sure the safety guard are securely in place. -
Page 22: Specifications
25.1 605.7 7.38 9.18 4.023' 13.5" Medium 0.284 33.8 889.69 0.363 43.2 1256 1122.09 High For any additional information about your Minka Aire Ceiling fan, please write to; 1151 W. Bradford Court, Corona, CA 92882 For Customer Assistance Call: 1-800-307-3267...
Need help?
Do you have a question about the minkaAire ANYWHERE F307 and is the answer not in the manual?
Questions and answers