Table of Contents
Advertisement
Quick Links
Advertisement
Table of Contents

Related Manuals for Nokia RM-227


Summary of Contents for Nokia RM-227
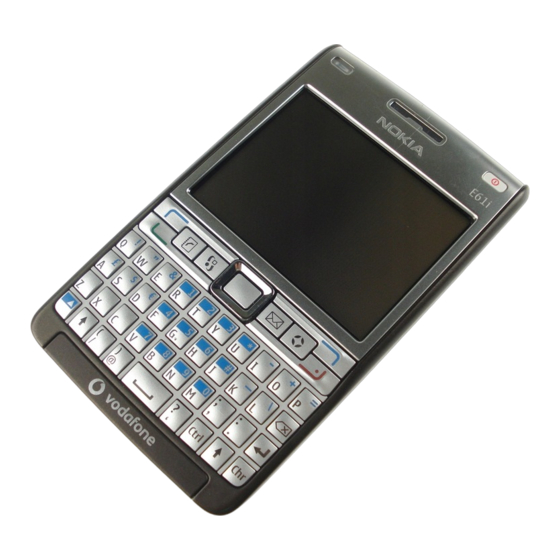
- Page 1 Nokia E61i User Guide 9254199 Issue 1...
- Page 2 Nokia Corporation. Other product and company names mentioned herein may be trademarks or tradenames of their respective owners. Reproduction, transfer, distribution, or storage of part or all of the contents in this document in any form without the prior written permission of Nokia is prohibited.
- Page 3 TO THE ACCURACY, RELIABILITY OR CONTENTS OF THIS DOCUMENT. NOKIA RESERVES THE RIGHT TO REVISE THIS DOCUMENT OR WITHDRAW IT AT ANY TIME WITHOUT PRIOR NOTICE. The availability of particular products and applications and services for these products may vary by region. Please check with your Nokia dealer for details, and availability of language options.
-
Page 4: Table Of Contents
Copy contacts between SIM and device memory..................47 Transfer data with Bluetooth or infrared......17 Select ringing tones for contacts........47 Synchronize data with another device......18 Business cards.................47 Messages..............19 Nokia Team suite............49 Organize messages...............19 Edit teams................49 Search for messages.............19 E-mail messages..............19 Calendar................51 Text messages................23 Create calendar entries............51... - Page 5 To-do..................51 Services..................70 Calendar views................52 Office applications ............71 Add a received calendar entry to your calendar..52 File manager................71 Clock................53 Quickoffice................71 Print....................72 Connectivity..............54 Notes..................73 Packet data (GPRS)..............54 Calculator..................73 UMTS...................54 Converter..................73 Cable connection..............55 Screen export................74 Bluetooth..................55 Data and software management......76 Infrared..................59 Modem..................60 Application manager............76 Email data roaming...............60 Remote configuration network service......76 Internet access points............60...
- Page 6 Memory card security............97 Certificate manager...............97 Mobile VPN ................98 Security settings for wireless LAN access points..................98 Shortcuts...............99 Battery information..........102 Nokia battery authentication guidelines..103 Authenticate hologram.............103 What if your battery is not authentic?......104 Care and maintenance...........105 Disposal..................105 Additional safety information......107 Small children...............107 Operating environment.............107...
-
Page 7: For Your Safety
For your safety Read these simple guidelines. Not following them may SWITCH OFF NEAR BLASTING be dangerous or illegal. Read the complete user guide Follow any restrictions. Do not use the device for further information. where blasting is in progress. SWITCH ON SAFELY USE SENSIBLY Do not switch the device on when wireless... -
Page 8: About Your Device
EMERGENCY CALLS Warning: To use any features in this device, other Ensure the phone function of the device is than the alarm clock, the device must be switched on. switched on and in service. Press the end key Do not switch the device on when wireless device use as many times as needed to clear the display may cause interference or danger. -
Page 9: Enhancements, Batteries, And Chargers
ACP-7, ACP-8, ACP-9, ACP-12, LCH-12 and AC-1 when used with the CA-44 adapter. Warning: Use only batteries, chargers, and enhancements approved by Nokia for use with this particular model. The use of any other types may invalidate any approval or warranty, and may be dangerous. -
Page 10: Basic Information About Your Device
Model number: Nokia E61i-1. Options Memory details and the memory. > Hereinafter referred to as Nokia 61i. To rearrange the folder, scroll to the application you want to move, and select Options > Move. A check mark An extended version of this user guide is available on is placed beside the application. -
Page 11: Scroll And Make Selections
application, and press the scroll key to switch To insert a number, press the blue function key so that to it. is shown on the display, and a key with a number on the blue background. To lock the blue function key and insert only numbers, press the blue function key Scroll and make selections twice so that... -
Page 12: Change The Writing Language
Memory card send options depending on the application you use, such as e-mail or multimedia messages and infrared or Your Nokia device supports the FAT16 and FAT32 file Bluetooth connectivity. systems for memory cards. If you use a memory card... -
Page 13: Installing Applications
Nokia device, you may need to format the memory card with You can use Nokia PC Suite to install applications. Nokia your Nokia device. However, all data in the memory card PC Suite transfers the installation file to your device, and is permanently deleted if you format the memory card. -
Page 14: Hear Your Messages
The application is available in your device in Play voice — Listen to the selected voice. • English. To download additional languages, visit Voice details — View information about the voice. • www.nokia.com. Delete — Delete the selected voice. • Select Menu Office Msg. -
Page 15: Themes
tone, select Play. If you have two alternate phone the profile is selected. The Offline profile does not lines in use, you can specify a ringing tone for each prevent you from establishing a wireless LAN line. connection at a later time, so comply with any Video call tone —... -
Page 16: Search
Notification light To preview a theme, highlight the theme you want to preview, and select Options > Preview. Select Apply You can set the notification light on the cover of your start using the new theme. device to blink when you have received a new message Search or when you have missed a phone call. -
Page 17: Transfer Content Between Devices
5. Select your other device from the list. You are asked compatible Nokia device to your Nokia E61i using to enter a passcode (1 to 16 digits) on your Nokia Bluetooth connectivity or infrared. The type of content E61i. The passcode is used only once to confirm this that can be transferred depends on the phone model. -
Page 18: Synchronize Data With Another Device
The items that you can transfer vary depending on the other device. Synchronize data with another device If you have previously transferred data to your Nokia E61i, and your other device supports synchronization, you can use Transfer to keep the data of the two devices up to date. -
Page 19: Messages
Messages Organize messages Select Menu > Messag.. In Messaging (network service), you can send and To create a new folder to organize your messages, receive text messages, multimedia messages, and e- select My folders Options folder. Enter the mail messages. You can also receive web service >... - Page 20 standards IMAP4 (revision 1) and POP3, and a range of e-mail or Internet mail messages. IMAP4 is e-mail solutions. Other e-mail providers may offer a version of the Internet message access services with different settings or features than those protocol that lets you access and manage described here.
- Page 21 When you create a new mailbox, the name you give to To view e-mail messages in a folder, scroll to the folder, the mailbox replaces Mailbox in the Messag. main view. and press the scroll key. Scroll to a message, and press the scroll key.
- Page 22 to retrieve all messages not previously To reply to all recipients of an e-mail, open the e-mail, retrieved. The device goes online and connects to and select Options Reply all. > > the mailbox to retrieve the mails. Tip: If you reply to an e-mail that contains 3.
-
Page 23: Text Messages
To delete e-mails from the device only, select Options enter the subject of the e-mail. Enter your e-mail > Delete Phone (header remains). message in the text area, and select Options > Send. > To delete e-mail both from the device and from the To attach a file to an e-mail, select Options Insert... - Page 24 Picture messages than one number, separate the numbers with a semicolon. 2. Enter the text of the message. To use a template, Note: The picture message function can be used select Options Insert > Template. > only if it is supported by your service provider. Only 3.
-
Page 25: Multimedia Messages
Multimedia messages the device may make it smaller so that it can be sent by MMS. A multimedia message (MMS) can contain text and 4. Each slide of your message can contain only one objects such as images, sound clips, or video clips. video or audio clip. - Page 26 5. To add slides, select Insert slide. Before you can send or receive multimedia messages > on your device, you must define the multimedia 6. Select Options and from the following: message settings. Your device may have recognized the Preview —...
-
Page 27: Instant Messaging
Play — Replay the presentation from the start. Instant messaging (IM) (network service) allows you to • Find — Find phone numbers and e-mail or Web converse with other people using instant messages and • addresses the presentation may contain. You may join discussion forums (IM groups) with specific topics. - Page 28 User's name, User Phone number, and E-mail To save a conversation, while in the conversation view, address. select Options Record chat. The conversation is saved > as a text file that can be opened and viewed in the To search for IM groups and group IDs, select Notes application.
- Page 29 To prevent IM users from joining the group, select Editing options — Edit or delete the contact card, • Options Add to banned list and from the following: move it to another contact list, or receive a note > when the contact's online status changes. From IM contacts —...
-
Page 30: Special Messages
Settings IM login type — To establish a connection between • your device and the default server automatically, select Automatic. Select Auto. in home network Select Options Settings settings. > > automate the connection when in your home Select from the following settings: network. -
Page 31: Message Settings
To send a service request to your service provider, select period, the message is deleted from the message Options Service command. Enter the service request center. > as a text message, and select Options > Send. Message sent as — Convert the message to another •... - Page 32 may not be able to change the default access point If you have not defined a mailbox yet, select Mailbox in if it is preset in your device by your service provider. use, and press the scroll key. The mailbox guide opens Multimedia retrieval —...
- Page 33 to the remote e-mail server while connecting to the the device and the server. Select Always ask if you mailbox. want to confirm from where the e-mail should be deleted every time you delete an e-mail. Settings for sent e-mail Send message —...
- Page 34 Folder subscriptions (for IMAP4 mailboxes Folder view — Define whether you want the list of • • only) — Subscribe to other folders in the remote messages in the folders to be shown on one row or mailbox and retrieve content from those folders. two rows.
-
Page 35: Telephone
Telephone When the device is locked, calls may be possible to the leading 0, if necessary), and phone number. To end the official emergency number programmed into your call or cancel the call attempt, press the end key. device. To make a call using the saved contacts, press the To make and receive calls (network service), the device contacts key. -
Page 36: Answer A Call
To remove the phone number assigned to a number All voice calls, All data and vid. calls, or All fax • key, scroll to the speed dialing key, and select Options calls. — Divert all incoming voice, data and video, >... -
Page 37: Video Calls
To bar calls, select Cellular call barring and select from recipient, if the recipient has a compatible mobile the following options: phone with a video camera. A video call can only be made between two parties. Outgoing calls — Prevent making voice calls with •... - Page 38 Push to talk (PTT) (network service) provides direct you want push to talk calls to be answered voice communication connected with the push of a key. automatically. Select Not allowed if you want push With push to talk, you can use your device as you would to talk calls to be rejected automatically.
- Page 39 Server address — Enter the IP address or domain informs you when it is your turn to speak. Speak • name of the push to talk server obtained from your towards the microphone, and do not cover the service provider. loudspeaker with your hands.
- Page 40 Create a channel To view more information about a selected participant, select Options Contact details. > A channel is like a chat room: you can call the channel To call a selected contact, select Options Talk 1 to > to see if anyone is online. The channel call does not alert To make a group call, select Options Make PTT group...
-
Page 41: Net Calls
Push to talk log VoIP (voice over internet protocol) technology is a set of protocols that facilitate phone calls over an IP To open the push to talk log, select Options log. network, such as the internet. VoIP phone calls can be >... - Page 42 Third: select a preferred net call profile (optional) Connect to service — to establish a connection to a • service when there is a net call service and suitable If you select a preferred net call profile, Internet tel. connection network available. automatically uses this network profile to connect to Disconnect from serv.
- Page 43 After you have successfully connected to a service, you scroll to the desired contact. Select Options Call > > can save the used wireless LAN network as a known Internet call. access point. To make a call from Log, select Menu Recent >...
-
Page 44: Voice Commands
Voice commands To launch an application using a voice command, press and hold the voice key, and clearly speak the voice command. If the recognized application was not Select Menu Tools Voice cm.. > > correct, select Next to view a list of other matches or Use voice commands to make phone calls and to launch Quit to cancel. -
Page 45: Log
When you open the voice mailbox application for the To set the time how long all communication events are first time, you are asked to enter the number of your held in the log, select Options Settings > > voice mailbox. To change the number, select Options duration, an option, and OK. -
Page 46: Contacts
Contacts Press the contacts key. 2. Enter a name for the group or use the default name, and select OK. Manage all of your contact information, such as phone numbers and addresses. Add a personal ringing tone, 3. Open the group, and select Options >... -
Page 47: Manage Default Information
You can send, receive, view, and save contact cards as select Options SIM contacts SIM directory to open business cards in vCard or Nokia Compact Business Card > > the SIM directory. Mark the contacts you want to copy, format. or select Mark all to copy all contacts. - Page 48 To view a received business card, select Show from the displayed notification, or open the message from the inbox folder in Messag.. To save a business card, select Options Save business > card when the incoming message appears on the device.
-
Page 49: Nokia Team Suite
Team suite. > > conference call service (network service) defined for With Nokia Team Suite, you can create, edit, and delete the selected team. teams, and send messages, view teams' web pages and Communication log — View the communication log •... - Page 50 To see to which teams a member belongs, select Options Members Belongs to teams. > >...
-
Page 51: Calendar
You can synchronize your calendar data with a If you select All calendar entries deleted, all compatible computer using Nokia PC Suite. For repeated entries are deleted. If you select information on synchronization, see the PC Suite guide. Delete entry, only the current entry is deleted. -
Page 52: Calendar Views
Calendar views To switch between the different calendar views, select Options in any calendar view. Select a type of view from the list. To set the default calendar view, select Options > Settings Default view Month view Week view, > >... -
Page 53: Clock
Clock Alarm clock Select Menu Office > Clock. > To change the clock type, select Options Settings If the alarm time is reached while the device is switched > > Clock type Analogue or Digital. off, the device switches itself on and starts sounding the >... -
Page 54: Connectivity
GPRS connection is put on wired solution with a USB (Universal Serial Bus) cable hold unless the network supports dual transfer mode. connection for Nokia PC Suite. Your device also allows you to communicate using net calls (Voice over IP), push UMTS to talk, instant messaging (chat), and modem-based connections. -
Page 55: Cable Connection
Manage connections Since devices using Bluetooth technology settings in Nokia PC Suite. Insert a memory card to communicate using radio waves, your device and the your device, connect the device to a compatible other devices do not need to be in direct line-of-sight. - Page 56 Start using Bluetooth connectivity My phone's visibility — Select Shown to all to allow • other devices using Bluetooth technology to find There may be restrictions on using Bluetooth your device when you have set Bluetooth > On. To technology in some locations. Check with your local prevent other devices from finding your device, authorities or service provider.
- Page 57 using Bluetooth technology within range and lists when you connect the devices for the first time. After them. pairing, it is possible to authorize the connection. See "Authorize a device," p. 58. Pairing and authorizing Tip: If you have sent data using Bluetooth the connection makes connecting quicker and easier, before, a list of the previous search results as you do not have to accept a connection between...
- Page 58 Receive data • Valid SIM card in your device For more information about car kit devices and If you want to receive data using Bluetooth, select compatibility with your device, see www.nokia.com Bluetooth My phone's visibility Shown to >...
-
Page 59: Infrared
Infrared 5. Select your device from the list of compatible devices. 6. To pair the devices, enter the Bluetooth passcode Do not point the infrared (IR) beam at anyone's eye or shown on the display of the car kit device to your allow it to interfere with other IR devices. -
Page 60: Modem
• You need a compatible computer with infrared you arrive at your workplace. connectivity. Access point groups • You must have Nokia PC Suite installed on your computer. To create an access point group, select Access point • You must have the appropriate drivers installed on... - Page 61 connect to the Internet and browse web pages, you 1. Select Menu Tools Settings Connection Access > > > > must first define Internet access points for these points. services. You may need to set up several Internet access 2. Select Options New access point.
-
Page 62: Connection Manager
For information on the advanced settings, see the Options > Details. The type of information shown extended user guide on the Web. depends on the connection type. To end a network connection, select the connection Set up an Internet access point for from the list and Options >... -
Page 63: Wireless Local Area Network (Wlan)
Wireless local area network (WLAN) Some places, like France, have restrictions on the use of To use wireless LAN, you must create an internet access wireless LAN. Check with your local authorities for more point (IAP) in a wireless LAN. Use the access point for information. -
Page 64: Operating Modes
WLAN wizard on the device keypad. The MAC address is shown on the device display. The WLAN wizard helps you to connect to a wireless LAN. Operating modes The WLAN wizard shows the status of your wireless LAN connections and network searches in the active Your device enables different types of communication standby mode. -
Page 65: Wireless Lan Access Points
Set up a wireless LAN access Menu Connect. WLAN wiz.. Found networks are > > displayed. point manually Scroll to the desired network, select Options and from the following: If you cannot use the WLAN wizard, you can define Start Web browsing Cont. -
Page 66: Wireless Lan Settings
access point. If you select WEP (wired equivalent privacy), 802.1x, or WPA2 (Wi-Fi protected access), you must also configure the relevant additional settings. See the extended user guide on the Web or the device help for more information. WLAN security sett. —... -
Page 67: Web
Select Menu (network service). You can also enter the Internet access point settings > manually. See "Internet access points," p. 60. is one of the two browsers in your device. With Web, you can browse regular Web sites. These pages Browse the Web use the extensible hypertext markup language (XHTML) or hypertext markup language (HTML). -
Page 68: Bookmarks
Third-party sites When you start a download, a list of ongoing, paused, are not affiliated with Nokia, and Nokia does not and completed downloads from the current browsing endorse or assume liability for them. If you choose to session is displayed. -
Page 69: News Feeds And Blogs
Web settings Clear the cache A cache is a memory location that is used to store data Select Menu Options > Settings. > > temporarily. If you have tried to access or have accessed Define the following settings: confidential information requiring passwords, empty the cache after each use. -
Page 70: Services
(for example, to retain the items you buy until you Tip: To start a connection, press and hold 0 in reach the cashier page). However, the information the standby mode. may be misused (for example, you may receive unwanted advertisements in your device). Java/ECMA script —... -
Page 71: Office Applications
Office applications Office folder contains tools that help you organize and To open Quickword, Quicksheet, or Quickpoint, scroll to manage the details of different events in your personal the desired tab with the scroll key. and business life. Not all file formats or features are supported. Some applications in the Office folder are not available... -
Page 72: Print
Quickpoint align text, change the font and font color, and add bullets and indentations. With Quickpoint, you can view and edit Microsoft Quicksheet PowerPoint presentations on the display of your device. Quickpoint supports the viewing and editing of With Quicksheet, you can read and edit Microsoft Excel presentations created in .ppt format in Microsoft files on the display of your device. -
Page 73: Notes
Calculator Before you print, make sure that your device is properly connected to the printer. To print a message or a file, select Options > Print. Note: This calculator has limited accuracy and is To print to a file, select Options Printing options >... -
Page 74: Screen Export
The converter has limited accuracy, and rounding errors 2. A list of currencies opens, and you can see the may occur. current base currency at the top. Scroll to the currency type and enter the exchange rate you would like to set per single unit of currency. Convert measurements 3. - Page 75 you want to use, and select OK. Select Options > Enable to show screen content. To hide the screen content, select Options > Hide. The screen exporter application is moved to the background. To stop showing screen content, select Options >...
-
Page 76: Data And Software Management
Data and software management Application manager Remote configuration settings In the Dev. mgr. main view, select Options and select from the following: Important: Only install and use applications and other software from trusted sources, such as Start configuration — Connect to the server and •... -
Page 77: Download
When you use the wizard for the first time you are The items are categorized under catalogs and folders guided through settings configuration. To start the provided by Nokia or independent service providers. wizard, select Start. Some items may be chargeable, but you can usually... - Page 78 If the settings configuration is interrupted, the settings will not be defined. After closing the wizard, you can start to use the configured applications. If you are not able to use Sett. wizard, visit the Nokia phone settings Web site at www.nokia.com.
-
Page 79: Camera
Camera To take pictures in a sequence, select Options > You can take photos or record video clips with the built- Sequence mode. The camera takes six pictures in a row. in camera. The camera lens is on the back of the device, To take timed pictures, select Options >... -
Page 80: Insert Pictures Into Messages
Insert pictures into Show captured img. — Select whether you want the • captured image to be displayed after the capture. messages Image resolution — Select the resolution of the • images you capture. When you are creating a new multimedia message, you Default image name —... -
Page 81: Media Applications
Media applications Images Select Menu > Media. Media contains different media applications that allow Select Menu Media Gallery > Images. > > you to save and view images, record sounds, and play Images consists of two views: sound clips. • In the image browser view you can send, organize, delete, and rename images stored in your device or Gallery memory card. -
Page 82: Realplayer
degrees, or select Left to rotate the image Tip: Streaming audio and video files means counterclockwise by 90 degrees. playing them directly from the Web without downloading them first to your device. Manage image files Play video clips and stream links To view detailed information about an image, select an image and Options... -
Page 83: Music Player
Settings Network settings Contact your service provider for the correct settings. Select Menu Media RealPlayer Options > Settings. > > > Select Connection > Network, scroll to the following Video settings settings, and press the scroll key to edit: Default access point —... - Page 84 Listen to music • Press 6 to go to the next track. Press and hold to fast forward. • Press 8 to stop a track. Warning: Listen to music at a moderate level. Continuous exposure to high volume may damage your Adjust music volume hearing.
-
Page 85: Recorder
With Equaliser, you can enhance or diminish resume recording. When you finish recording, select frequencies during music playback and modify how Stop. The sound clip is automatically saved. your music sounds. There are preset frequency settings The maximum length of a voice recording is 60 seconds, in your device, for example Rock. - Page 86 To switch between flash files saved on your device memory or memory card, scroll left or right. The available options may vary.
-
Page 87: Settings
Settings Select Menu Tools > Settings. application in your device. When you change the > language, the device restarts. You can define and modify various settings of your Writing language — Select a language from the list. • device. Modifying these settings affects the operation Changing the writing language also affects the of your device across several applications. -
Page 88: Call Settings
scroll to different directions. These settings are not Send my net call ID — Set this feature on if you want • available if you select Active standby > On. to display your net caller ID to the person you are Active standby apps. -
Page 89: Connection Settings
See "Speed dial," p. 35. — Install and manage VPN policies, manage VPN • Anykey answer — Select to answer an incoming policy servers, see the VPN log, and create and • call by briefly pressing any key, except the end key. manage VPN access points. - Page 90 See "Internet access points," p. 60. you switch the device on in a supported network. Select When needed to establish a packet data connection only when an application or action Access point groups requires it. Access point — Enter the access point name Select Menu Tools...
- Page 91 Wireless LAN the connection active until you select Options > Disconnect. Select Menu Tools Settings Connection Wireless > > > > LAN. To have an indicator displayed when there is a wireless VPN access points LAN available in your current location, select Show availability >...
- Page 92 Power saving — Enable or disable conservation of 802.1x authenticates and authorizes devices to access • battery power. a wireless network, and prevents access if the authorization process fails. To restore all settings to their original values, select Select WLAN security sett..
-
Page 93: Date And Time Settings
Configurations To view the EAP (extensible authentication protocol) To view and delete configurations for trusted servers, plug-ins currently installed in your device (network select Menu Tools Settings Connection > > > > service), select Menu Tools Settings Connection > > >... - Page 94 With most enhancements, you can select from the following settings: Default profile — Select the profile that is activated • when you attach an enhancement to your device. Automatic answer — Let the device answer phone • calls automatically when an enhancement is attached.
-
Page 95: Security
Security Device security PIN code — Change the PIN code. The PIN code must • be 4 to 8 numbers long. The PIN code protects your SIM card against unauthorized use and is provided Select Menu Tools Settings Security Phone and >... - Page 96 Fixed dialing Lock if SIM changed — Set the device to ask for the • lock code when an unknown, new SIM card is When fixed dialing is activated, calls may be possible to inserted into your device. The device maintains a list the official emergency number programmed into your of SIM cards that are recognized as the owner’s cards.
-
Page 97: Memory Card Security
To call the contact, press the call key. to be available. Certificates have a restricted lifetime. If "Expired certificate" or "Certificate not valid yet" is To edit the phone number, select Options > Edit. You shown even if the certificate should be valid, check that may need your PIN2 code to edit your fixed dialing the current date and time in your device are correct. -
Page 98: Mobile Vpn
Connection > VPN. > > > The Nokia mobile virtual private network (VPN) client See "Security settings for wireless LAN access creates a secure connection to compatible corporate points," p. 92. Intranet and services, such as e-mail. Your device connects from a mobile network, through the Internet, to a corporate VPN gateway that acts as a front door to the compatible corporate network. -
Page 99: Shortcuts
Shortcuts Here are some of the available keyboard shortcuts in Call key Open the Log. your device. Shortcuts can make the use of the Press and hold to open applications more efficient. Services and connect to the Some shortcuts are application-specific and they are Web. - Page 100 Image viewer Ctrl+B Bold. Call key Send the image. Press the blue Enter a number or a character function key once (so marked in blue on a key. Zoom out. that you see ) + the Zoom in. other key. Zoom in.
- Page 101 Go to the next track. Press and hold to fast forward. Stop a track.
-
Page 102: Battery Information
Use only Nokia approved batteries, the capacity and lifetime of the battery. Always try to and recharge your battery only with Nokia approved keep the battery between 15°C and 25°C (59°F and 77°... -
Page 103: Nokia Battery Authentication Guidelines
Nokia battery authentication guidelines Always use original Nokia batteries for your safety. To 2. When you angle the hologram check that you are getting an original Nokia battery, left, right, down, and up, you purchase it from an authorized Nokia dealer, look for... -
Page 104: What If Your Battery Is Not Authentic
What if your battery is not authentic? If you cannot confirm that your Nokia battery with the hologram on the label is an authentic Nokia battery, please do not use the battery. Take it to the nearest authorized Nokia service point or dealer for assistance. -
Page 105: Care And Maintenance
Care and maintenance Your device is a product of superior design and • Do not paint the device. Paint can clog the moving craftsmanship and should be treated with care. The parts and prevent proper operation. following suggestions will help you protect your •... - Page 106 Collection information is available from the product retailer, local waste authorities, national producer responsibility organizations, or your local Nokia representative. For more information, see product Eco-Declaration or country-specific information at /www.nokia.com.
-
Page 107: Additional Safety Information
Additional safety information Small children functionality of inadequately protected medical devices. Consult a physician or the manufacturer of the Your device and its enhancements may contain small medical device to determine if they are adequately parts. Keep them out of the reach of small children. shielded from external RF energy or if you have any questions. -
Page 108: Vehicles
• Read and follow the directions from the equipment in the area over the air bag or in the air bag manufacturer of their implanted medical device. deployment area. If in-vehicle wireless equipment is improperly installed and the air bag inflates, serious If you have any questions about using your wireless injury could result. -
Page 109: Emergency Calls
Emergency calls scene of an accident. Do not end the call until given permission to do so. CERTIFICATION Important: Wireless phones, including this device, operate using radio signals, wireless networks, INFORMATION (SAR) landline networks, and user-programmed functions. Because of this, connections in all conditions cannot be guaranteed. - Page 110 Additional SAR information may be provided under product information at www.nokia.com.
- Page 111 Index calls barring 36 access points 60, 89 data diverting 36 answering calls 36 connections 54 settings 88 application manager 76 declining calls 36 camera 79 applications display recording a video clip 79 common actions 12 settings 88 taking a picture 79 attachments 22 diverting calls 36 certificates 97...
- Page 112 60 music player 83 net call settings 89 settings 60 Quickoffice 71 net calls 42, 43 Quickpoint 72 Nokia Team suite 49 Quicksheet 72 language 87 editing teams 49 Quickword 71 listening to music 83 notes 73 logs 45...
- Page 113 speed dialing 35 voice recorder 85 spreadsheets 72 VoIP 42, 43 screen export 74 standby volume 84 scroll key 87 settings 87 VPN 98 Search 16 storage 12 security device 95 Web 67 memory card 97 text settings 69 selecting text and objects 11 copying 11 welcome note 87 selection key settings 87...
Need help?
Do you have a question about the RM-227 and is the answer not in the manual?
Questions and answers