Table of Contents
Advertisement
Quick Links
Operating Instructions
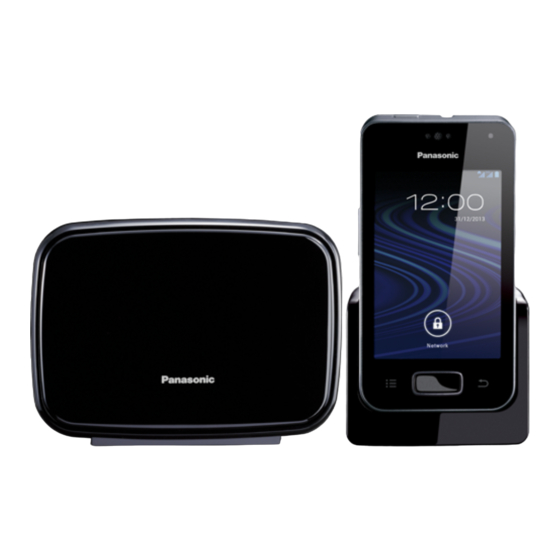
Premium Design Phone with Touchscreen
KX-PRX150FX
Model No.
Thank you for purchasing a Panasonic product.
Please read this document and save it for future reference.
To use this unit in your country, first change the unit's region setting to match
your country (page 45).
(For Czech and Slovakia)
This cordless telephone is possible to use according to General licence No.:
VO-R/8/08.2005-23 (for Czech), VPR-7/2001 (for Slovakia).
Advertisement
Table of Contents

Related Manuals for Panasonic KX-PRX150FXB


Summary of Contents for Panasonic KX-PRX150FXB
- Page 1 Premium Design Phone with Touchscreen KX-PRX150FX Model No. Thank you for purchasing a Panasonic product. Please read this document and save it for future reference. To use this unit in your country, first change the unit’s region setting to match your country (page 45).
-
Page 2: Table Of Contents
Table of Contents Introduction Other Features and Settings Accessory information ........3 Ringtones and audio settings .....40 General information ........4 Night mode ..........41 Auto talk .............41 Important Information Blocking incoming calls (caller barring) ..41 For your safety ..........6 Blocking outgoing calls (call restriction) ..42 Important safety instructions ......8 ECO mode ..........43 For best performance ........8... -
Page 3: Accessory Information
KX-A405 Key finder KX-TGA20FX Contact Panasonic or the authorised sales department listed on the back cover for the headset available in your area. You can register up to 4 optional key finders to your phone system. By registering a key finder to the base unit and then attaching the key finder to an easily misplaced item, such as your house or car keys, you can use your handset to find the item. -
Page 4: General Information
R For use in other countries, please contact your equipment supplier. Declaration of Conformity: R Panasonic System Networks Co., Ltd. declares that this equipment is in compliance with the essential requirements and other relevant provisions of Radio & Telecommunications Terminal Equipment (R&TTE) Directive 1999/5/EC. - Page 5 R Google, Android, Google Play and other marks are trademarks of Google Inc. ® R The Bluetooth word mark and logos are owned by the Bluetooth SIG, Inc. and any use of such marks by Panasonic Corporation is under license. ® R Wi-Fi is a registered mark of the Wi-Fi Alliance.
-
Page 6: Important Information
Important Information such devices to malfunction resulting in an accident. For your safety R Do not allow the AC adaptor or telephone line cord to be excessively pulled, bent or To prevent severe injury and loss of life/ placed under heavy objects. property, read this section carefully before R Keep all accessories, including the SIM using the product to ensure proper and safe... - Page 7 Important Information information, consult the manufacturer of GSM features operate between 880 MHz your vehicle or its equipment. and 1.88 GHz with a peak transmission R Turn the product off when boarding an power of 2 W. aeroplane. Await instructions from flight W-CDMA features operate between staff regarding the use of electronic devices 880 MHz and 2.17 GHz with a peak...
-
Page 8: Important Safety Instructions
Base unit location/avoiding noise to overheat and cause burns. R Charge the battery in accordance with the The base unit and other compatible Panasonic instructions and limitations specified in this units use radio waves to communicate with manual. -
Page 9: Other Information
Important Information R Operating the product near electrical Information for Users on Collection appliances may cause interference. Move and Disposal of Old Equipment and away from the electrical appliances. used Batteries Routine care R Wipe the outer surface of the product with a soft moist cloth. -
Page 10: Sar
This model meets international guidelines and rights shall remain with Panasonic or its EU requirements for exposure to radio waves. licensor. Your wireless device is a radio transmitter and Licence: receiver. -
Page 11: Disclaimer
R Wi-Fi: 2.4 GHz to 2.4835 GHz Panasonic System Networks Co., Ltd. R GSM900/W-CDMA900 (“Panasonic”) shall not be liable for loss of Uplink: 880 MHz to 915 MHz data or other incidental or consequential Downlink: 925 MHz to 960 MHz... - Page 12 Important Information R W-CDMA connection only: up to 290 hours Power source R Base unit: 220–240 V AC, 50/60 Hz R Charger: 100–240 V AC, 50/60 Hz Base unit power consumption R Standby: approx. 0.4 W R Maximum: approx. 0.8 W Charger power consumption R Standby: approx.
-
Page 13: Getting Started
E DSL/ADSL service users only: Connect your DSL/ADSL filter (not supplied). Note: R Use only the supplied Panasonic AC adaptor PNLV226CE. R Use only the supplied telephone line cord. Preparing the charger A Insert the AC adaptor plug firmly into the charger. -
Page 14: Preparing The Handset
Getting Started Preparing the handset Inserting a SIM card, microSD card, and the battery A SIM card (not supplied) allows the handset to connect to a mobile phone service. Consult your mobile phone service provider for more information. A microSD card (not supplied) allows you to expand the handset’s storage capabilities. Important: R When removing the battery, make sure you turn off the handset first. - Page 15 Getting Started Insert the battery (A) and lower it into the handset (B). Attach the cover. Charging the handset Charge the handset for about 5 hours before initial use. The charge indicator (A) lights while the handset is charging and turns off when the handset is fully charged. Important: R If the handset is placed into the charger while talking on the phone, the call is not disconnected.
-
Page 16: Information About Power And Charging
Battery use and replacement R Use only the supplied battery. For replacement, use only the Panasonic rechargeable battery noted on page 3. R The battery might swell when its life is close to an end. This is dependent on the usage conditions and is not a problem. -
Page 17: Getting To Know Your Phone System
Getting Started Getting to know your phone system Handset overview A Headset jack B Power button C Charge indicator D Volume button ( E Touchscreen F Micro USB jack G Front camera H Receiver (menu) button J Home button (back) button L Microphone M Camera flash N Rear camera... -
Page 18: Turning The Handset On And Off
Getting Started Navigation buttons (menu) button: Displays a list of options available in the current screen. (back) button: Returns to the previous screen or closes the current dialogue box, menu, on-screen keyboard, etc. Note: R The buttons are displayed in most screens. They appear at the bottom of the handset next to the home button, and turn off if you do not use them for a while. -
Page 19: Setup Wizard
Getting Started Setup wizard The first time you turn on the handset, the setup wizard prompts you to configure the following settings. Follow the on-screen instructions and configure each item as needed. Select the language. Configure date and time settings. Select the desired automatic time adjustment setting. -
Page 20: Home Screen
Getting Started Home screen The home screen is the main screen from which you can launch apps, such as the phone, camera, and web browser, and check widgets. It’s available any time by simply pressing the home button. You can customise the home screen to suit your needs, and add, move, and remove items as desired. -
Page 21: Status And Notifications
Getting Started Status and notifications Status bar The status bar is displayed at the top of the handset’s screen when using most apps. It displays the time and provides icons and other indicators that let you know the status of the handset’s battery, network signal strength, and certain features of the handset. - Page 22 Getting Started Allows you to make intercom calls Allows you to change certain features of your phone system Allows you to use the phone system’s answering system Allows you to access the base unit’s call log Allows you to use the base unit’s key finder feature Starting the [Landline] app Tap [Landline] in the home screen or app list.
-
Page 23: Phone Features
Phone Features Making calls You can use the [Phone] app to make and receive calls, check your call logs, as well as use services provided by your landline phone service provider and mobile phone service provider. The [Phone] app consists of the following tabs. Used to dial manually, make intercom calls, etc. -
Page 24: Using Other Features During A Call
Phone Features Tap the desired contact. Select the phone line you want to use to make the call. When finished, tap to end the call. Adding a phone number to your contacts while dialling ® [Add to contacts]. After dialling a number manually, tap To add the number to an existing contact: →... -
Page 25: Answering Calls
Phone Features R The handset sounds an alarm if a landline call is held for 9 minutes. If the call remains on hold, the alarm sounds again 30 seconds later (i.e., after 9 minutes and 30 seconds of being on hold). - Page 26 Phone Features Choosing not to answer a call When a call is being received, tap and drag it to . The result varies depending on the type of call. – For landline calls: The handset stops ringing. – For mobile calls: The call is rejected. Ringer volume Press the volume button up ( ) and down (...
-
Page 27: Using The Call Logs
Phone Features To switch between calls: → Tap To join the calls and have a conversation with all parties: → Tap To end the current call: → Tap Answering a second landline call When you hear the call waiting tone, tap To switch between calls, tap again. - Page 28 Phone Features next to the phone number or person you want to call. Select the phone line you want to use to make the call. When finished, tap to end the call. Adding information from the handset call log to your contacts Tap [Phone] in the home screen or app list.
- Page 29 Phone Features Erasing the base unit call log Tap [Landline] in the home screen or app list. Tap [Call log list]. R The handset connects to the base unit. To erase information for one call: ® [Delete from call log]. →...
-
Page 30: Phonebook Features
Phonebook Features Adding contacts You can use the [People] app to store all your contact information in the handset. Entries (also called “contacts”) contain information about your friends, family, and colleagues, such as their addresses, phone numbers, and email addresses. Note: R If you have a Google account and an Internet connection, you can synchronise your contacts with the handset automatically (page 46). -
Page 31: Managing Contacts
Phonebook Features and then enter the search text. R You can also scroll using the slider on the right side of the screen to search for a contact by first letter. Calling, texting, or emailing a contact Tap [People] in the home screen or app list. Tap the contact and then select the desired method of communication. -
Page 32: Answering System Features
Answering System Features Message recording features The following features can record your missed calls for you. – The base unit’s answering system (described in this section) – Your landline phone service provider’s voicemail service (page 47) – Your mobile phone service provider’s voicemail service (page 47) Answering system The base unit’s answering system can answer landline calls after a certain number of rings. -
Page 33: Playing Your Messages
Answering System Features Tap [Answering system]. R The handset connects to the base unit. Tap [Greeting] ® [Record greeting]. Tap [OK] and speak your message after the beep. to stop recording and save your new greeting message. R Your new greeting message is played back for confirmation. Playing your greeting message Tap [Landline] in the home screen or app list. - Page 34 Answering System Features Using message playback controls The following controls are available when playing messages. Tap to stop playback. Tap to skip to the previous message (if tapped within the first 5 seconds of playback) or to repeat the current message from the beginning. Tap to skip to the next message.
-
Page 35: Remote Operation Features
Answering System Features Remote operation features While away from home, you can use a touch-tone phone to access the base unit and listen to answering system messages or change answering system settings. You can access the answering system remotely using the following methods. –... - Page 36 Answering System Features Turn on the [New message alert] switch. Tap [Notification to] ® [(No entry)]. To select a person and phone number from your contacts: → Tap [Phonebook] and then select the desired contact and phone number. To enter a name and phone number manually: →...
- Page 37 Answering System Features When finished, hang up. Standard remote access Important: R You must set the remote access code in order to use standard remote access (page 39). Dial your phone number from a touch-tone phone. After the greeting message starts, enter the remote access code. Enter remote commands (page 37).
-
Page 38: Answering System Settings
Answering System Features Answering system settings Number of rings You can change the number of times the phone rings before the unit answers a call. Tap [Landline] in the home screen or app list. Tap [Answering system]. R The handset connects to the base unit. Tap [Settings] ®... - Page 39 Answering System Features Remote code The remote access code is a 3-digit code that must be entered in order to access the answering system remotely using standard remote access. This code prevents unauthorised parties from listening to your messages remotely. Tap [Landline] in the home screen or app list.
-
Page 40: Other Features And Settings
Other Features and Settings Ringtones and audio settings You can adjust the handset’s ringtone, ringer volume, and other audio settings, and save the settings as an audio profile. Audio profiles allow you to change multiple ringtone and audio settings easily. Selecting an audio profile ®... -
Page 41: Night Mode
Other Features and Settings Night mode Night mode allows you to select a period of time during which the handset will not ring for calls. This feature is useful for time periods when you do not want to be disturbed, for example, while sleeping. -
Page 42: Blocking Outgoing Calls (Call Restriction)
Other Features and Settings Important: R Caller ID is required to use this feature (page 47). R Once phone numbers have been added to the blocked caller list, the handset does not ring when a landline call is received until it has received the Caller ID and can confirm that the phone number is not stored in the blocked caller list. -
Page 43: Eco Mode
Other Features and Settings Tap [Landline settings] ® [Initial settings]. R The handset connects to the base unit. Tap [Call restrict]. Enter the base unit PIN and then tap [OK]. Turn on the checkbox for each handset that will be prevented from calling restricted phone numbers and then tap [Next]. -
Page 44: First Ring
Other Features and Settings First ring This setting determines whether the first ring is heard when a landline call is received. If your landline has Caller ID service and you do not want your phone system to ring before caller information is received, select [Off]. -
Page 45: Region Setting
Other Features and Settings Tap [Tone/pulse setting]. Select the desired setting. – [Pulse]: Select if your landline phone service uses pulse (rotary) dialling mode. – [Tone]: Select if your landline phone service uses tone dialling mode. Region setting This setting resets certain base unit settings to their default values based on the region you select. -
Page 46: Wi-Fi Settings
Other Features and Settings Setting the date and time manually ® [System settings] ® [Date & time]. From the home screen, tap Make sure that [Automatic date & time] is set to [Off]. To set the date: → Tap [Set date], select the desired date, and then tap [Set]. To set the time: →... -
Page 47: Caller Id Support
Other Features and Settings Follow the on-screen instructions. Caller ID support The base unit is Caller ID compatible. Caller ID is a service provided by your landline phone service provider which may require a subscription. Contact your landline phone service provider for details and availability. - Page 48 Other Features and Settings Tap [Phone] in the home screen or app list. ® [Settings] ® [Voice Call] ® [Voice mail] ® [Voicemail service] next to [My carrier]. Tap [Voicemail settings] ® [Voicemail number]. Enter the access number and then tap [OK] ® [OK]. Listening to voicemail Tap [Phone] in the home screen or app list.
-
Page 49: Expanding Your Phone System
Expanding Your Phone System Adding handsets In order to use a handset and base unit together, the handset must be registered to the base unit. You can register additional handsets to the base unit for a total of 6 handsets. Important: R See page 4 for information about recommended handsets. -
Page 50: Intercom Features
Expanding Your Phone System Select the desired handset and then tap [OK]. Intercom features Making an intercom call You can call another handset that is connected to the same base unit. Tap [Phone] in the home screen or app list. and then select the desired handset. -
Page 51: Adding Base Units
Expanding Your Phone System at the bottom of the screen and then select the landline. Note: R You can prevent other handset users from joining your landline calls by enabling privacy mode (page 51). Privacy mode If a handset user is talking on a landline call, this feature prevents other handset users from joining the call (page 50). -
Page 52: Adding A Dect Repeater
When you use the handset’s key finder search mode, the key finder will emit a sound that changes as the handset moves closer to the item. For more information, refer to the documentation supplied with your key finder or visit the following web site. http://panasonic.net/pcc/products/telephone/p/tga20/... - Page 53 Expanding Your Phone System Registering a key finder Tap [Landline] in the home screen or app list. Tap [Key finder] ® [Settings]. R The handset connects to the base unit. Tap [Add new device] for an available key finder location number (1–4). Using the key finder: With the tab pushed to the right (A), pull out the battery holder (B).
- Page 54 Expanding Your Phone System Searching for a key finder Tap [Landline] in the home screen or app list. Tap [Key finder] ® [Search]. R The handset connects to the base unit. Select the desired key finder. Try to locate the key finder. R While searching for the key finder, the handset beeps and displays the key finder’s signal strength (1–5) and level (1–100).
-
Page 55: Other Information
Other Information Phone settings overview You can customise general phone settings to suit your needs using the [Settings] app. Settings are grouped into the categories explained below. To open the [Settings] app, tap [Settings] in the home screen or app list. Settings category Description [Phone management]... - Page 56 Other Information Settings category Description [Accessibility] Contains settings that can make the phone easier to interact with. [Developer options] Contains advanced settings that are not required for typical use. [About phone] Allows you to confirm general phone information such as battery level, network status, and installed software versions.
-
Page 57: Included Apps
Other Information Included apps The supplied handset is a full-featured Android device and includes a wide range of apps. Some of the more commonly used apps are briefly introduced below. Note: R Included apps and their icons are subject to change. Phone Telephone app that allows the handset to make and receive landline and mobile calls. - Page 58 Other Information Skype Instant messaging app that also supports audio and video chats using the handset’s microphone and front camera. Panasonic TV Remote 2 TV control app for operating, configuring, sharing content with a compatible Panasonic VIERA TV. Media5 VoIP softphone app that allows you to make and receive phone calls over the Internet...
-
Page 59: Status Icons
Other Information Status icons Icons that appear in the status bar vary depending on the apps that are installed in the handset. Some common icons are described below. Connection to base unit is available Connection to base unit is available, ECO mode is turned on No connection to base unit No mobile network is available Mobile network data connection in use... -
Page 60: Notification Icons
Other Information Notification icons Icons that appear in the notifications panel vary depending on the apps that are installed in the handset. Some common icons are described below. New email received through Gmail New email message received New SMS message received Error when sending SMS message Calendar event reminder Song is being played... -
Page 61: Control Panel Settings
Other Information Control panel settings Changes the handset’s screen brightness (auto, dim, half, full). Changes the amount of time before the handset’s screen dims (15 seconds, 30 seconds, 1 minute). Turns the handset’s auto screen rotation feature on and off. Turns the handset’s airplane mode feature on and off. -
Page 62: Troubleshooting
Other Information Troubleshooting If you experience any problems when operating the product, perform the following. If the problem is not resolved, refer to the corresponding information in this section. Disconnect and then reconnect the base unit’s AC adaptor. Make sure that the telephone line cord is connected to the base unit. Turn off the handset, remove and then reinsert the handset’s battery, and then restart the handset. - Page 63 Other Information Settings Problem Cause and/or solution The display is in a R Change the display language (page 45). language I cannot read. I cannot turn on ECO R If [Repeater mode] is turned on (page 52), ECO mode is mode.
- Page 64 Other Information Problem Cause and/or solution The handset does not ring. R The ringer volume is turned off. Press the volume button on the side of the handset up ( ) and down ( ) to adjust the volume. R Night mode is turned on. Turn it off (page 41). I cannot make landline R The tone/pulse setting may be set incorrectly.
- Page 65 SIM card, microSD card, and battery into the handset, and charge the battery fully before use. If the exposed unit does not work properly, contact your place of purchase or nearest Panasonic service centre. Caution: R To avoid permanent damage, do not use a microwave oven...
-
Page 66: Updating The Software
Use a computer to access the support page for this product at the address below and check whether there is a software update available for the handset. http://www.panasonic.net/pcc/support/tel/sdect R If a software update is available, continue to the next step, otherwise there is no need to continue with this procedure. -
Page 67: Wall Mounting
Other Information Wall mounting Note: R Make sure that the wall and the fixing method are strong enough to support the weight of the unit. Base unit Screws (Not supplied) 55 mm... -
Page 68: Index
Index Country code: 43 Country setting: 45 Index Date and time: 45 DECT repeater: 3, 52 AC adaptor: 13 Display language: 45 Accessories: 3, 4 ECO mode: 43 Adding base units: 51 Adding handsets: 49 First ring: 44 Answering system: 32 Google account: 46 Call screening: 39 Handset... - Page 69 Index Troubleshooting: 62 USB: 15 Vibration: 40 Voicemail: 38, 47 Volume Receiver: 24 Speakerphone: 24 Wall mounting: 67 Wi-Fi: 46...
- Page 70 Notes...
- Page 71 Notes...
- Page 72 B-dul Preciziei, Nr. 24, West Gate Park, Clădirea H3, Etaj 2, Sector 6, București, 062204, Romania Telefon: +40.21.316.31.61 Fax: +40.21.316.04.46 e-mail: suport.clienti@eu.panasonic.com web: www.panasonic.ro 1-62, 4-chome, Minoshima, Hakata-ku, Fukuoka 812-8531, Japan © Panasonic System Networks Co., Ltd. 2013 PNQP1069ZA CC1013YK0...
Need help?
Do you have a question about the KX-PRX150FXB and is the answer not in the manual?
Questions and answers