Table of Contents
Advertisement
Available languages
Available languages
Soluzioni elettriche con frizione meccanica e arresto automatico e
unità di alimentazione.
Electric solutions with mechanical clutch and automatic shut off
and power supply.
Solutions électriques avec embrayage mécanique et arrêt
automatique et unitées d'alimentation.
Soluciones électricas para atornillar con embrague mecánico
y unidades d'alimentación.
Elektrische Lösungen mit mechanischer Kupplung mit
automatischer Abschaltung und die Speiseeinheiten.
MANUALE D'USO E MANUTENZIONE
USE AND MAINTENANCE MANUAL
MANUEL D'UTILISATION ET DE MAINTENANCE
MANUAL DE USO Y MANTENIMIENTO
BEDIENUNGS- UND WARTUNGSANLEITUNG
Cod. 681211000 R.06
Advertisement
Chapters
Table of Contents

Summary of Contents for FIAM. eTensil E8C1A-1200
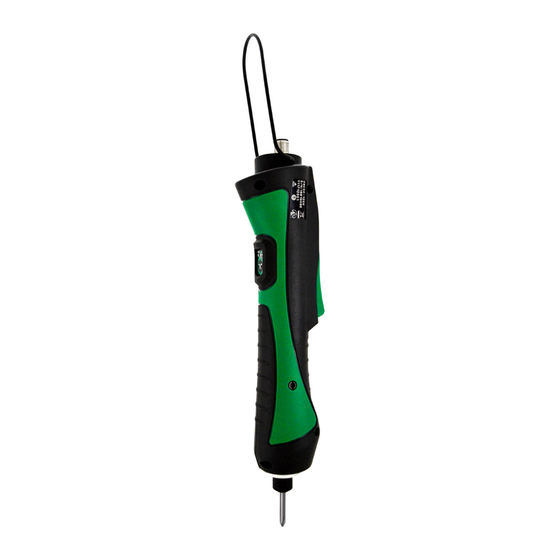
- Page 1 Soluzioni elettriche con frizione meccanica e arresto automatico e unità di alimentazione. Electric solutions with mechanical clutch and automatic shut off and power supply. Solutions électriques avec embrayage mécanique et arrêt automatique et unitées d’alimentation. Soluciones électricas para atornillar con embrague mecánico y unidades d’alimentación.
- Page 3 DICHIARAZIONE DI CONFORMITÀ PRODOTTO: Soluzioni eTensil abbinate con le unità di alimentazione TPU-1, TPU-2 - avvitatori elettrici, modelli diritti: E8C1A-1200, E8C1A-900, E8C1A-650, E8C2A-2000, E8C3A-1200, E8C3A-900, E8C4A-650, E8C5A-350 - avvitatori elettrici, modelli con regolazione esterna della frizione: E8C2ARE-2000, E8C3ARE-1200, E8C3ARE-900, E8C4ARE-650, E8C5ARE-350, E8C1ARE-1200, E8C1ARE-900, E8C1ARE-650 - avvitatori elettrici,...
-
Page 4: Table Of Contents
SOMMARIO DEFINIZIONE DEI SIMBOLI UTILIZZATI AVVERTENZE DI SICUREZZA GENERALE PER L’UTENSILE CARATTERISTICHE GAMMA AVVITATORI E MOTORI PER AVVITARE AVVIAMENTO DELL’UTENSILE UTILIZZO DELL’UTENSILE REGOLAZIONE DELLA COPPIA REGOLAZIONE DELLA COPPIA DEL MOTORE PER AVVITARE OPZIONI DI FUNZIONAMENTO IMPUGNATURA DELL’UTENSILE E MONTAGGIO SU BRACCIO DI REAZIONE STAFFAGGIO DEL MOTORE PER AVVITARE MODELLI ALIMENTATORE DESCRIZIONE DELL’ALIMENTATORE... -
Page 5: Definizione Dei Simboli Utilizzati
DEFINIZIONE DEI SIMBOLI UTILIZZATI: RAEE: Il prodotto è oggetto di smaltimento differenziato in conformità alla direttiva RAEE 2012/19/UE. Questo prodotto non va trattato come rifiuto domestico. ATTENZIONE, RISCHIO DI PERICOLO: L ’operatore deve consultare il presente manuale ogni volta che vedrà... -
Page 6: Avvertenze Di Sicurezza Generale Per L'utensile
AVVERTENZE DI SICUREZZA GENERALE PER L’UTENSILE ATTENZIONE : Leggere tutte le avvertenze e tutte le istruzioni. La mancata ottem- peranza alle avvertenze e alle istruzioni può dare luogo a scosse elettriche, a incendi e/o a lesioni serie. Conservare tutte le avvertenze e le istruzioni per riferimenti futuri. Il termine “utensile elettrico”... - Page 7 3) Sicurezza personale a) Non distrarsi, controllare quello che si sta facendo e usare il buon senso quan- do si azionano utensili elettrici. Non azionare l’utensile elettrico quando si è stanchi o sotto l’influsso di droghe, alcol o medicinali. Un momento di disatten- zione durante l’azionamento di utensili elettrici può...
- Page 8 d) Riporre gli utensili elettrici inutilizzati fuori dalla portata dei bambini e non permetterne l’uso a persone inesperte dell’utensile o che non conoscano que- ste istruzioni. Gli utensili elettrici sono pericolosi se utilizzati da persone ine- sperte. e) Effettuare la manutenzione necessaria sugli utensili elettrici. Verificare il pos- sibile errato montaggio o bloccaggio delle parti in movimento, la rottura delle parti e qualsiasi altra condizione che possa influenzare il funzionamento degli utensili elettrici.
-
Page 9: Caratteristiche Gamma Avvitatori E Motori Per Avvitare
CARATTERISTICHE GAMMA DEGLI AVVITATORI Campo di coppia** Velocità a vuoto massima/minima min. max.* Modello Codice giri/1' E8C1A-1200 1180 / 590 111712011 E8C1A-900 870 / 435 111712012 E8C1A-650 640 / 320 111712013 E8C2A-2000 2000 / 1000 111712000 E8C3A-1200 1180 / 590 111712001 E8C3A-900 870 / 435... -
Page 10: Avviamento Dell'utensile
* Fiam consiglia di utilizzare l’avvitatore/motore per avvitare fino all’80% del valore di coppia massimo dichia- rato. Tenere in considerazione questo aspetto in funzione della specifica applicazione. ** I valori di coppia indicati si riferiscono ad analisi di laboratorio basate sulla norma ISO5393 con avvitatore /motore per avvitare impostato alla velocità... -
Page 11: Utilizzo Dell'utensile
UTILIZZO DELL’UTENSILE LED n° 2 LED n° 1 Pulsante inversione senso di rotazione Leva di avviamento Prima di premere la leva di avviamento utensile controllare i Led posti sul pulsante di inversione senso di rotazione. Rotazione sinistra (antioraria): - LED n°1 acceso - LED n°2 spento Rotazione destra (oraria): - LED n°1 acceso... -
Page 12: Regolazione Della Coppia
REGOLAZIONE DELLA COPPIA Prima di effettuare eventuali regolazioni scollegare l’utensile dall’ali- mentatore. La coppia di serraggio si regola variando la compressione della molla della frizione, che non dovrà mai essere compressa total- mente o a valori tali da far raggiungere alla frizione coppie superiori a quelle indicate a catalogo per il modello d’utensile considerato. - Page 13 Grafici riferiti a codici: E8C2ARE-2000, E8C3ARE-1200, E8C3ARE-900, E8C4ARE-650, E8C5ARE-350. 111712074 COPPIA MASSIMA MODELLO E8C5ARE-350 111712073 COPPIA MASSIMA MODELLO E8C4ARE-650 111712072 COPPIA MASSIMA MODELLO EBC3ARE-900 111712071 COPPIA MASSIMA MODELLO E8C3ARE-1200 111712070 COPPIA MASSIMA MODELLO E8C2ARE-2000 COPPIA MINIMA N.B. nell'esemp 650 rpm e 350 massimo di reg Fig.
- Page 14 Grafici riferiti a codici: E8C1ARE-1200, E8C1ARE-900, E8C1ARE-650. 111712078 111712076 111712077 111712074 MODELLO E8C1ARE-1200 E8C1ARE-900 E8C1ARE-650 E8C5ARE-350 COPPIA MASSIMA 111712073 MODELLO E8C4ARE-650 LIMITE MASSIMO DI REGOLAZIONE PER IL 111712072 MODELLO INDICATO MODELLO (se comprimo ulteriormente la molla EBC3ARE-900 l'utensile stalla e la frizione non scatta) 111712071 MODELLO E8C3ARE-1200...
-
Page 15: Regolazione Della Coppia Del Motore Per Avvitare
REGOLAZIONE DELLA COPPIA DEL MOTORE PER AVVITARE Figura 1 Figura 2 Prima di effettuare eventuali regolazioni scollegare il motore per avvitare dall’alimentatore. La coppia di serraggio si regola variando la compressione della molla della frizione, che non dovrà mai essere compressa totalmente o a valori tali da far raggiungere alla frizione coppie superiori a quelle indicate a catalogo per il modello di motore per avvitare considerato. -
Page 16: Opzioni Di Funzionamento
OPZIONI DI FUNZIONAMENTO Attraverso la pressione prolungata (> 4 secondi) del pulsante reverse si accede alla programmazione “Smart Pro” di alcuni parametri funzionali. Premere la leva per il numero di volte indicato a fianco della funzione desiderata. Premere nuovamente il pulsante reverse per uscire dalla programmazione. -
Page 17: Impugnatura Dell'utensile E Montaggio Su Braccio Di Reazione
Segnaliamo che le prime quattro funzioni sono alternative, mentre le ultime 6 sono indipen- denti (indipendenti = una volta abilitate rimangono attive contemporaneamente alle altre fun- zioni abilitate). RESET: una volta entrati nel menu SMART-PRO tenere premuta la leva per almeno 3 secondi. *Alcune modalità... -
Page 18: Staffaggio Del Motore Per Avvitare
STAFFAGGIO DEL MOTORE PER AVVITARE Figura 1 Il motore per avvitare può essere staffato lungo il cannotto esterno solo nella zona indicata in figura 1. Non staffare in punti diversi del motore per avvitare perché può recare danno al motore per avvitare stesso e comprometterne la funzionalità; in tal caso Fiam non risponde per i danni arrecati al motore per avvitare. -
Page 19: Modelli Alimentatore
MODELLI ALIMENTATORE Codice Nome Descrizione TPU-1 Unità di alimentazione 686200100 TPU-2 Unità di alimentazione con segnali di ingresso/uscita integrati 686200101 DESCRIZIONE DELL’ALIMENTATORE Led 1 Led S1 Led S2 Led 2 Led S3 Led 3 Led 4 Led H Led L Pulsante impostazione velocità... -
Page 20: Informazioni Led Alimentatore
INFORMAZIONI LED ALIMENTATORE Colore Led Descrizione funzione Scatto frizione, l’utensile è arrivato in coppia Led 1 Verde Stallo motore oppure rilascio PTS (Avviamento a Leva + Spinta) in mo- dalità di avviamento LEVA+PTS (Avviamento a Leva + Spinta) o modalità Led 2 Rosso PULSANTE+PTS (Avviamento a Leva + Spinta) -
Page 21: Connettore Ingressi Uscite (Solo Per Modello Tpu-2)
CONNETTORE INGRESSI USCITE (SOLO PER MODELLO TPU-2) Segnali disponibili sul connettore DB15 presente nel modello TPU-2: Direzione DB15 Segnale Funzione femmina Segnale Ingresso Stop motore Comando di inibizione dei comandi Ingresso Svita Comando di svitatura Uscita Errore Segnalazione errore Uscita Rotazione Segnalazione che il motore è... -
Page 22: Caratteristiche Tecniche Dell'alimentatore
CARATTERISTICHE TECNICHE DELL’ALIMENTATORE: Caratteristica Valore Unità 230 +/-10% V a.c. Tensione di alimentazione di rete 50-60 Frequenza di alimentazione di rete Potenza nominale 0-40 °C Temperatura di esercizio Peso alimentatore MANUTENZIONE DELL’UTENSILE L’utensile segnala il raggiungimento di 1,000,000 di cicli dall’acquisto o dall’ultima manutenzione (lampeggia in rotazione la luce frontale) e la necessità... -
Page 23: Manutenzione Del Motore Per Avvitare
MANUTENZIONE DEL MOTORE PER AVVITARE Si raccomanda di rispettare gli intervalli di manutenzione previsti e di affidare i mo- tori per avvitare a Centri autorizzati Fiam. Per integrazione dei motori per avvitare su macchine con PLC, si raccomanda di rendere evidente (tramite PLC master) la necessità... -
Page 24: Faq
FAQ problematiche eTensil In premessa si riporta l’attenzione sulla corretta gestione delle diverse opzioni di funzionamento. La gamma eTensil lascia la possibilità all’operatore di entrare in programmazione “SMART PRO” (premendo per più di 4 secondi il pulsante reverse). Si raccomanda di verificare sempre con attenzione che alcune apparenti anomalie non siano legate in realtà... - Page 25 PROBLEMA RILEVATO POSSIBILE CAUSA POSSIBILE SOLUZIONE PARTE B: possibili anomalie NON legate alla programmabilità con SMART PRO prevedere manutenzione raggiungimento soglia programmata (o resettare luce la luce frontale lampeggia manutenzione programmata frontale seguendo le istruzioni sul durante l’avvitatura Manuale d’Uso e Manutenzione) collegando l’avvitatore mancato riconoscimento spegnere e riaccendere il sistema...
- Page 26 FAQ MOTORI PER AVVITARE PROBLEMA RILEVATO SOLUZIONE Collegando il motore per avvitare all’alimentatore Spegnere e riaccendere il sistema i LED Low e High continuano a lampeggiare Il motore per avvitare non esegue il singolo scatto frizione e non si ferma fino Eseguire manutenzione al rilascio del comando Ad ogni avvitatura la TPU indica esito NOK...
- Page 27 EC DECLARATION OF CONFORMITY PRODUCT: Electric eTensil solutions to be connect with TPU-1, TPU-2 unit - electric straight models: E8C1A-1200, E8C1A-900, E8C1A-650, E8C2A-2000, E8C3A-1200, E8C3A-900, E8C4A-650, E8C5A-350 - electric models with external clutch adjustment: E8C2ARE-2000, E8C3ARE-1200, E8C3ARE-900, E8C4ARE-650, E8C5ARE-350, E8C1ARE-1200, E8C1ARE-900, E8C1ARE-650 - electric angle...
- Page 28 TABLE OF CONTENTS EXPLANATION OF SYMBOLS USED GENERAL SAFETY WARNINGS FOR USING THE TOOL SCREWDRIVERS AND NUTRUNNER MOTORS RANGE SPECIFICATIONS STARTING THE TOOL USING THE TOOL TORQUE ADJUSTMENT NUTRUNNER MOTOR TORQUE ADJUSTMENT OPERATING OPTIONS HOLDING THE TOOL AND FITTING IT TO THE REACTION ARM CLAMPING THE NUTRUNNER MOTOR POWER SUPPLY UNIT MODELS DESCRIPTION OF THE POWER SUPPLY UNIT...
-
Page 29: Explanation Of Symbols Used
EXPLANATION OF SYMBOLS USED: WEEE: The product must be disposed of separately in accordance with the WEEE 2012/19/EU Directive. This product must not be treated as domestic waste. CAUTION, HAZARD RISK: The operator must refer to this manual every time this danger symbol appears. -
Page 30: General Safety Warnings For Using The Tool
GENERAL SAFETY WARNINGS FOR USING THE TOOL CAUTION! Read all warnings and all the instructions. Failure to follow the warnings and instructions could lead to the risk of electric shock, fire or serious injury. Keep all the warnings and instructions for future reference. The term “power tool”... - Page 31 3) Personal safety a) Always pay close attention to what you are doing. Use your common sense and do not use a tool if you are not concentrating. Never use the electric tool when you are tired or under the influence of drugs, alcohol or medications. Just one moment of carelessness while operating an electric tool can lead to serious personal injury.
- Page 32 d) When not in use, always keep electric tools out of the reach of small children and do not allow them to be used by persons unfamiliar with the tool or who have not read these instructions. Electric tools are dangerous if used by inexpe- rienced persons.
-
Page 33: Screwdrivers And Nutrunner Motors Range Specifications
SCREWDRIVERS RANGE SPECIFICATIONS Tightening torque** Idle speed min. max.* max./min. Model Code in lb r.p.m. E8C1A-1200 2,6÷14,1 1180 / 590 111712011 E8C1A-900 2,6÷14,1 870 / 435 111712012 E8C1A-650 2,6÷14,1 640 / 320 111712013 E8C2A-2000 5,3÷22,1 2000 / 1000 111712000 E8C3A-1200 5,3÷26,5 1180 / 590 111712001... -
Page 34: Starting The Tool
* Fiam recommends that the screwdriver/nutrunner motor be used up to 80% of the maximum declared tor- que. Take this aspect into consideration depending on the job in question. ** The torque values shown refer to laboratory analysis based on ISO 5393 Standard with the screwdriver set to maximum speed (HI). -
Page 35: Using The Tool
USING THE TOOL LED no. 2 LED no. 1 Forward/reverse rotation button Start lever Before pressing the lever that starts the tool check the LEDS on the reverse rotation switch. Left rotation (counter-clockwise): - LED no. 1 On - LED no. 2 Off Right rotation (clockwise): - LED no. -
Page 36: Torque Adjustment
TORQUE ADJUSTMENT Before making any adjustments always unplug the tool from the power supply unit. The tightening torque is adjusted by varying the clutch spring compression. It must never be fully compressed, nor compressed so much that the clutch torque is higher than that specified in the catalogue for the tool model concerned. - Page 37 Graphs related to the codes: E8C2ARE-2000, E8C3ARE-1200, E8C3ARE-900, E8C4ARE-650, E8C5ARE-350. 111712074 MAXIMUM TORQUE FOR THE E8C5ARE-350 MODEL 111712073 MAXIMUM TORQUE FOR THE MODEL E8C4ARE-650 111712072 MAXIMUM TORQUE FOR THE EBC3ARE-900 MODEL 111712071 MAXIMUM TORQUE FOR THE E8C3ARE-1200 MODEL 111712070 MAXIMUM TORQUE FOR THE E8C2ARE-2000 MODEL MAXI...
- Page 38 Graphs related to the codes: E8C1ARE-1200, E8C1ARE-900, E8C1ARE-650. 111712078 111712076 111712077 111712074 UE FOR THE E8C5ARE-350 E8C1ARE-1200 E8C1ARE-900 E8C1ARE-650 MAXIMUM TORQUE 111712073 UE FOR THE E8C4ARE-650 MAXIMUM ADJUSTMENT LIMIT FOR THE 111712072 SPECIFIED MODEL E FOR THE (compressing the spring further will cause EBC3ARE-900 the tool to stall without triggering the 111712071...
-
Page 39: Nutrunner Motor Torque Adjustment
NUTRUNNER MOTOR TORQUE ADJUSTMENT Fig. 1 Fig. 2 Before making any adjustments always unplug nutrunner motor from the power supply unit. The tightening torque is adjusted by varying the clutch spring compres- sion. It must never be fully compressed, nor compressed so much that the clutch torque is higher than that specified in the catalogue for the nutrunner mo- tor model concerned. -
Page 40: Operating Options
OPERATING OPTIONS A long press (> 4 seconds) of the reverse button enters “Smart Pro” programming of some functional parameters. Press the lever the number of times indicated beside the desired function. Press the reverse button again to exit from programming mode. FUNCTION CONFIGURATIONS Lever presses Function... -
Page 41: Holding The Tool And Fitting It To The Reaction Arm
It should be noted that the first four functions are alternative, while the next six are inde- pendent (independent = once enabled, these remain active together with the other en- abled functions). RESET: once you have entered the SMART-PRO menu, keep the lever pressed for at least 3 seconds. -
Page 42: Clamping The Nutrunner Motor
CLAMPING THE NUTRUNNER MOTOR Fig. 1 Only clamp the nutrunner motor along the external sleeve in the area shown in figure 1. Do not clamp nutrunner motor at other points because this could dama- ge it and compromise its working operation; in such case Fiam cannot be held responsible for any damage to nutrunner motor. -
Page 43: Power Supply Unit Models
POWER SUPPLY UNIT MODELS Code Name Description TPU-1 Power supply unit 686200100 TPU-2 Power supply unit with integrated input/output signals 686200101 DESCRIPTION OF THE POWER SUPPLY UNIT Led 1 Led S1 Led S2 Led 2 Led S3 Led 3 Led 4 Led H Led L Speed setting button... -
Page 44: Power Supply Unit Leds Information
POWER SUPPLY UNIT LEDS INFORMATION Colour Led Function description Clutch triggered, the tool has reached the set torque Led 1 Green Motor stalled or PTS released (Lever start + Push-to-start) in start mode LEVER +PTS (Lever start + Push-to-start) or BUTTON +PTS mode (Lever Led 2 start + Push-to-start) External stop tool command (only on TPU 2 model, equipped with inputs/... -
Page 45: Inputs Outputs Start Up Button (For Tpu-2 Model Only)
INPUTS OUTPUTS START UP BUTTON (FOR TPU-2 MODEL ONLY) Signals available on the DB15 connector on the TPU -2: Signal DB15 Signal Function female Direction Input Stop motor Control disable command Input Untighten Untightening command Output Error Error signal Output Rotation Signal that the motor is running ... -
Page 46: Power Supply Unit Technical Specifications
POWER SUPPLY UNIT TECHNICAL SPECIFICATIONS: Specification Value Unit 230 +/-10% V a.c. Mains supply voltage 50-60 Mains supply frequency Rated power 0-40 °C Operating temperature Power supply unit weight TOOL MAINTENANCE The tool indicates when it reaches 1,000,000 cycles since purchase or since the last maintenance (the front light flashes in rotation) and the need for an inspection which must be carried out by FIAM technical assistance. -
Page 47: Nutrunner Motor Maintenance
NUTRUNNER MOTOR MAINTENANCE Always follow the proposed maintenance schedule and have it carried out by Fiam authorised service centres. When integrating nutrunner motors into machines with a PLC, make the need for maintenance evident (through the master PLC) and activate alerts every 1,000,000 cycles to remind about routine maintenance on the nutrunner motor. - Page 48 eTensil issues FAQ To start, we would like to draw your attention to the correct management of the various operating options. The eTensil range allows operators to enter “SMART PRO” programming (by pressing the reverse button for more than 4 seconds). Always check that some apparent faults are not actually related to the chosen programming mode.
- Page 49 PROBLEM FOUND POSSIBLE CAUSE POSSIBLE SOLUTION PART B: possible issues NOT associated with SMART PRO programming Carry out scheduled maintenance The scheduled maintenance (or reset the front light by following The front light flashes deadline has been reached the instructions in the Operation during tightening and Maintenance Manual) The Low and High LEDs continue...
- Page 50 NUTRUNNER MOTOR FAQ PROBLEM FOUND SOLUTION The Low and High LEDs continue to flash when the Switch the system off and on again nutrunner motor is connected to the power supply The nutrunner motor clutch does not perform the single click and does not stop until the Carry out maintenance control is released The TPU indicates a NOK result for each...
- Page 51 DÉCLARATION CE DE CONFORMITÉ PRODUIT : Solutions eTensil combinées avec les unités d’alimentation TPU-1, TPU-2 - visseuses électriques, modèles droits: E8C1A-1200, E8C1A-900, E8C1A-650, E8C2A-2000, E8C3A-1200, E8C3A-900, E8C4A-650, E8C5A-350 - visseuses électriques, modèles avec réglage extérieur de l’embrayage: E8C2ARE-2000, E8C3ARE-1200, E8C3ARE-900, E8C4ARE-650, E8C5ARE-350, E8C1ARE-1200, E8C1ARE-900, E8C1ARE-650 - visseuses électriques,...
- Page 52 TABLE DES MATIÈRES DÉFINITION DES SYMBOLES UTILISÉS AVERTISSEMENTS DE SÉCURITÉ GÉNÉRALE POUR L’OUTIL CARACTÉRISTIQUES GAMME DES VISSEUSES ET DES BROCHES DE VISSAGE DÉMARRAGE DE L’OUTIL UTILISATION DE L’OUTIL RÉGLAGE DU COUPLE RÉGLAGE DU COUPLE DE LA BROCHE DE VISSAGE OPTIONS DE FONCTIONNEMENT POIGNÉE DE L’OUTIL ET MONTAGE SUR BRAS DE RÉACTION BLOCAGE DE LA BROCHE DE VISSAGE MODÈLE DISPOSITIF D’ALIMENTATION...
-
Page 53: Définition Des Symboles Utilisés
DÉFINITION DES SYMBOLES UTILISÉS: DEEE: L ’élimination du produit est sujette au tri sélectif conformément à la directive DEEE 2012/19/UE. Ce produit ne doit pas être traité en tant que déchet domestique. ATTENTION, RISQUE DE DANGER: L ’opérateur devra consulter ce manuel à chaque fois qu’il verra ce symbole de danger. -
Page 54: Avertissements De Sécurité Générale Pour L'outil
AVERTISSEMENTS DE SÉCURITÉ GÉNÉRALE POUR L’OUTIL ATTENTION : Lisez tous les avertissements et toutes les instructions. Le non-respect des avertissements et des instructions peut entraîner des risques d’électrocution, d’in- cendie et/ou de blessures graves. Conservez l’intégralité des avertissements et des instructions pour des consultations futures. - Page 55 3) Sécurité personnelle a) Restez vigilant, surveillez vos gestes et faites preuve de bon sens lorsque vous utilisez un outil électrique. N’utilisez pas un outil électrique si vous êtes fati- gué ou sous l’influence de drogues, d’alcool ou de médicaments. Un moment d’inattention pendant l’activation de l’outil électrique peut entraîner des blessures corporelles graves.
- Page 56 d) Replacez les outils électriques inutilisés hors de la portée des enfants et n’en permettez pas l’utilisation par des personnes non instruites sur le fonctionne- ment de l’outil ou ne connaissant pas ces instructions. Les outils électriques sont dangereux dans les mains d’un novice. e) Effectuez un entretien méticuleux des outils.
-
Page 57: Caractéristiques Gamme Des Visseuses Et Des Broches De Vissage
CARACTÉRISTIQUES GAMME DES VISSEUSES Plage de couple** Vitesse à vide min. max.* max./min. Modèle Ref. tr/min E8C1A-1200 1180 / 590 111712011 E8C1A-900 870 / 435 111712012 E8C1A-650 640 / 320 111712013 E8C2A-2000 2000 / 1000 111712000 E8C3A-1200 1180 / 590 111712001 E8C3A-900 870 / 435... -
Page 58: Démarrage De L'outil
* Fiam recommande d’utiliser la visseuse/broche de vissage jusqu’à 80% de la valeur de couple maximum déclarée. Il convient de prendre en compte cet aspect en fonction de l’application spécifique. ** Les valeurs de couple indiquées se réfèrent à des analyses de laboratoire basées sur la norme ISO 5393 avec une visseuse/broche de vissage réglée à... -
Page 59: Utilisation De L'outil
UTILISATION DE L’OUTIL LED n° 2 LED n° 1 Bouton d’inversion sens de rotation Levier de démarrage Avant de presser le levier de démarrage de l’outil, contrôlez les Led situées sur le bouton d’inversion du sens de rotation. Rotation gauche (anti-horaire): - LED n°... -
Page 60: Réglage Du Couple
RÉGLAGE DU COUPLE Avant de réaliser d’éventuels réglages, débranchez l’outil du dispositif d’alimentation. Le réglage du couple de serrage s’effectue en modifiant la compression du ressort de l’embrayage, qui ne devra jamais être comprimé totalement ou à des valeurs telles que l’embrayage atteint des couples supérieurs à... - Page 61 Graphiques relatifs aux codes: E8C2ARE-2000, E8C3ARE-1200, E8C3ARE-900, E8C4ARE-650, E8C5ARE-350. 111712074 COUPLE MAXIMAL MODÈLE E8C5ARE-350 111712073 COUPLE MAXIMAL MODÈLE E8C4ARE-650 111712072 COUPLE MAXIMAL MODÈLE EBC3ARE-900 111712071 COUPLE MAXIMAL MODÈLE E8C3ARE-1200 111712070 COUPLE MAXIMAL MODÈLE COUP E8C2ARE-2000 COUPLE MINIMAL N.B. : dans l’ex uniquement po / 900 tr/min ), s’enclenche pa...
- Page 62 Graphiques relatifs aux codes: E8C1ARE-1200, E8C1ARE-900, E8C1ARE-650. 111712078 111712076 111712077 111712074 L MODÈLE E8C5ARE-350 E8C1ARE-1200 E8C1ARE-900 E8C1ARE-650 COUPLE MAXIMAL 111712073 L MODÈLE E8C4ARE-650 LIMITE DE RÉGLAGE MAXIMALE POUR LE 111712072 MODÈLE INDIQUÉ MODÈLE (si l’on comprime encore plus le ressort, EBC3ARE-900 l’outil se bloque et l’embrayage ne 111712071...
-
Page 63: Réglage Du Couple De La Broche De Vissage
RÉGLAGE DU COUPLE DE LA BROCHE DE VISSA GE Fig. 1 Fig. 2 Avant de réaliser d’éventuels réglages, débranchez la broche de broche de vissa- ge du dispositif d’alimentation. Le ressort de l’embrayage ne devra jamais être comprimé totalement ou à des valeurs entraînant des couples de l’embrayage supérieurs à... -
Page 64: Options De Fonctionnement
OPTIONS DE FONCTIONNEMENT Une pression prolongée (> 4 secondes) du bouton reverse permet d’accéder à la programmation « Smart Pro » de certains paramètres fonctionnels : Appuyer sur le levier le nombre de fois indiqué à côté de la fonction souhaitée Pour quitter la pro- grammation, appuyer de nouveau sur le bouton reverse. -
Page 65: Poignée De L'outil Et Montage Sur Bras De Réaction
Il convient de noter que les quatre premières fonctions sont alternatives, tandis que les six prochains sont indépendantes (indépendantes = une fois activées, elles re- stent actives en même temps que les autres fonctions activées). RÉINITIALISER: une fois que vous êtes entré dans le menu SMART-PRO, maintenez le levier enfoncé... -
Page 66: Blocage De La Broche De Vissage
BLOCAGE DE LA BROCHE DE VISSAGE Fig. 1 La broche de vissage peut être bloquée au niveau du revêtement extérieur unique- ment dans la zone indiquée en figure 1. Ne fixez pas à des points de la broche de vissage différents de ceux indiqués car cela pourrait entraîner des dommages sur la broche de vis- sage en question et compromettre son fonctionnement;... -
Page 67: Modèle Dispositif D'alimentation
MODÈLE DISPOSITIF D’ALIMENTATION Code Description TPU-1 Unité d’alimentation 686200100 TPU-2 Unité d’alimentation avec des signaux d’entrée/sortie intégrés 686200101 DESCRIPTION DU DISPOSITIF D’ALIMENTATION Led 1 Led S1 Led S2 Led 2 Led S3 Led 3 Led 4 Led H Led L Bouton de paramétrage de la vitesse Prise d’alimentation... -
Page 68: Informations Led Dispositif D'alimentation
INFORMATIONS LED DISPOSITIF D’ALIMENTATION Colour Led Description fonction Déclenchement embrayage, l’outil a atteint le couple Led 1 Vert Blocage du moteur ou bien relâchement PTS (Démarrage par levier + Poussée) en mode de Démarrage LEVIER +PTS (Démarrage par Levier + Led 2 Rouge Poussée) ou mode BOUTON +PTS (Démarrage par Levier + Poussée) -
Page 69: Connecteur Entrées Sorties (Uniquement Pour Modèle Tpu-2)
CONNECTEUR ENTRÉES SORTIES (UNIQUEMENT POUR MODÈLE TPU -2) Signaux disponibles sur le connecteur DB15 présent dans le modèle TPU -2 : DB15 Direction Signal Fonction femelle du signal Entrée Arrêt moteur Commande de désactivation des commandes Entrée Dévisse Commande de dévissage Sortie Erreur Signalement erreur... -
Page 70: Caractéristiques Techniques Du Dispositif D'alimentation
CARACTÉRISTIQUES TECHNIQUES DU DISPOSITIF D’ALIMENTATION: Caractéristique Valeur Unité 230 +/-10% V a.c. Tension d’alimentation de réseau 50-60 Fréquence d’alimentation de réseau Puissance nominale 0-40 °C Température de fonctionnement Poids dispositif d’alimentation ENTRETIEN DE L’OUTIL L’outil signale qu’il a effectué 1 000 000 de cycles depuis l’achat ou depuis la dernière intervention de maintenance( l’éclairage frontal clignote durant la rotation), et qu’il nécessite un contrôle à... -
Page 71: Entretien De La Broche De Vissage
ENTRETIEN DE LA BROCHE DE VISSAGE Nous recommandons de respecter les intervalles de maintenance prévus et de con- fier les broches de vissage à des Centres agréés Fiam. Pour l’intégration des bro- ches de vissage sur des machines avec API, il est recommandé de rendre évidente la nécessité... - Page 72 FAQ problèmes eTensil En introduction, nous attirons votre attention sur la gestion correcte des différentes options de fonctionnement. La gamme eTensil offre à l’opérateur la possibilité d’entrer en programmation « SMART PRO » (en appuyant pendant 4 secondes sur la touche reverse). Nous recommandons de toujours vérifier attentivement si certaines anomalies apparentes ne sont pas liées en réalité...
- Page 73 PROBLÈME TROUVÉ CAUSE PROBABLE SOLUTION POSSIBLE PARTIE B : anomalies possibles NON liées à la programmation avec SMART PRO Prévoir une maintenance programmée Seuil de maintenance (ou réinitialiser la lumière frontale La lumière frontale clignote programmée atteint suivant les instructions sur le Manuel pendant le vissage d’utilisation et de maintenance) En connectant la visseuse à...
- Page 74 FAQ BROCHES DE VISSAGE PROBLÈME TROUVÉ SOLUTION En connectant la broche de vissage au dispositif Éteignez et rallumez le système. d’alimentation, les voyants Low et High continuent à clignoter La broche de vissage n’effectue pas le déclenchement à l’embrayage et ne s’arrête Effectuez l’entretien pas tant que la commande n’est pas relâchée À...
- Page 75 DECLARACIÓN DE CONFORMIDAD CE PRODUCTO: Soluciones eTensil combinadas con las unidades de alimentación TPU-1, TPU-2 - atornilladores eléctricos, modelos rectos: E8C1A-1200, E8C1A-900, E8C1A-650, E8C2A-2000, E8C3A-1200, E8C3A-900, E8C4A-650, E8C5A-350 - atornilladores eléctricos, modelos con regulación exterior del embrague: E8C2ARE-2000, E8C3ARE-1200, E8C3ARE-900, E8C4ARE-650, E8C5ARE-350, E8C1ARE-1200, E8C1ARE-900, E8C1ARE-650 - atornilladores eléctricos, modelos angulares: E8C2A90-2000, E8C3A90-1200, E8C3A90-900, E8C4A90-650, E8C5A90-350, E8C2A30-2000, E8C3A30-1200,...
- Page 76 ÍNDICE DEFINICIÓN DE LOS SÍMBOLOS UTILIZADOS ADVERTENCIAS DE SEGURIDAD GENERAL PARA LA HERRAMIENTA CARACTERÍSTICAS DE LA GAMA DE LOS ATORNILLADORES Y DE LOS MOTORES PARA ATORNILLAR 81 ARRANQUE DE LA HERRAMIENTA USO DE LA HERRAMIENTA REGULACIÓN DEL PAR REGULACIÓN DEL PAR DEL MOTOR PARA ATORNILLAR OPCIONES DE FUNCIONAMIENTO EMPUÑADURA DE LA HERRAMIENTA Y MONTAJE EN BRAZO DE REACCIÓN FIJACIÓN DEL MOTOR PARA ATORNILLAR...
-
Page 77: Definición De Los Símbolos Utilizados
DEFINICIÓN DE LOS SÍMBOLOS UTILIZADOS: RAEE: El producto debe ser eliminado mediante recogida diferenciada, de conformidad con la Directiva RAEE 2012/19/UE. Este producto no debe procesarse como residuo doméstico. ATENCIÓN, RIESGO DE PELIGRO: El operador debe consultar este manual cada vez que vea este símbolo de peligro. -
Page 78: Advertencias De Seguridad General Para La Herramienta
ADVERTENCIAS DE SEGURIDAD GENERAL PARA LA HERRAMIENTA ATENCIÓN: Lea todas las advertencias e instrucciones. El incumplimiento de las advertencias y de las instrucciones puede provocar descargas eléctricas, incendios y/o lesiones graves. Conserve todas las advertencias e instrucciones para referencias futuras. El término “herramienta eléctrica”... - Page 79 3) Seguridad personal a) No se distraiga, controle lo que está haciendo y use el sentido común cuan- do utilice herramientas eléctricas. No accione la herramienta eléctrica cuando esté cansado o bajo la influencia de drogas, alcohol o medicamentos. Un mo- mento de distracción durante el accionamiento de las herramientas eléctricas puede provocar lesiones personales graves.
- Page 80 d) Guarde las herramientas eléctricas que no se utilicen fuera del alcance de los niños y no permita el uso a personas inexpertas o que no conozcan estas ins- trucciones. Las herramientas eléctricas son peligrosas si son utilizadas por per- sonas inexpertas.
-
Page 81: Características De La Gama De Los Atornilladores Y De Los Motores Para Atornillar
CARACTERÍSTICAS DE LA GAMA DE LOS ATORNILLADORES Rango de par** Velocidad en vacío min. máx.* máx./min. Modelo Código E8C1A-1200 1180 / 590 111712011 E8C1A-900 870 / 435 111712012 E8C1A-650 640 / 320 111712013 E8C2A-2000 2000 / 1000 111712000 E8C3A-1200 1180 / 590 111712001 E8C3A-900 870 / 435... -
Page 82: Arranque De La Herramienta
* Fiam recomienda utilizar el atornillador/motor para atornillar hasta el 80 % del valor de par máximo declarado. Tenga en cuenta este aspecto en función de la aplicación específica. ** Los valores de par indicados se refieren a análisis de laboratorio basados en la norma ISO 5393 con el ator- nillador /motor para atornillar configurado en la velocidad máxima (HI). -
Page 83: Uso De La Herramienta
USO DE LA HERRAMIENTA LED n° 2 LED n° 1 Pulsador de inversión del sentido de rotación Palanca de arranque Antes de presionar la palanca de arranque de la herramienta, controle los LED situa- dos en el pulsador de inversión del sentido de rotación. Rotación izquierda (sentido antihorario): - LED 1 encendido - LED 2 apagado... -
Page 84: Regulación Del Par
REGULACIÓN DEL PAR Antes de realizar regulaciones, desconecte la herramienta del alimentador. El par de apriete se regula modificando la compresión del muelle del embrague, que nunca debe comprimirse totalmente o en valores que hagan que el embrague alcance pares superiores a aquellos indicados en el catálogo para el modelo de herramienta considerado. - Page 85 Gráficos que se refieren a códigos: E8C2ARE-2000, E8C3ARE-1200, E8C3ARE-900, E8C4ARE-650, E8C5ARE-350. 111712074 PAR MÁXIMO MODELO E8C5ARE-350 111712073 PAR MÁXIMO MODELO E8C4ARE-650 111712072 PAR MÁXIMO MODELO EBC3ARE-900 111712071 PAR MÁXIMO MODELO E8C3ARE-1200 111712070 PAR MÁXIMO MODELO E8C2ARE-2000 PAR MÍNIMO NOTA: en el eje herramientas d superado el lím Fig.
- Page 86 Gráficos que se refieren a códigos: E8C1ARE-1200, E8C1ARE-900, E8C1ARE-650. 111712078 111712076 111712077 111712074 MODELO E8C5ARE-350 E8C1ARE-1200 E8C1ARE-900 E8C1ARE-650 PAR MÁXIMO 111712073 MODELO E8C4ARE-650 LÍMITE MÁXIMO DE REGULACIÓN PARA EL 111712072 MODELO INDICADO ODELO (si se comprime más el muelle, la EBC3ARE-900 herramienta se bloquea y el embrague no 111712071...
-
Page 87: Regulación Del Par Del Motor Para Atornillar
REGULACIÓN DEL PAR DEL MOTOR PARA ATORNILLAR Fig. 1 Fig. 2 Antes de realizar regulaciones, desconecte el motor para atornillar del alimentador. El par de apriete se regula modificando la compresión del muelle del embrague, que nunca debe comprimirse totalmente o en va- lores que hagan que el embrague alcance pares superiores a aquellos indicados en el catálogo para el modelo de motor para atornillar considerado. -
Page 88: Opciones De Funcionamiento
OPCIONES DE FUNCIONAMIENTO Con la presión prolongada (> 4 segundos) del pulsador reverse, se accede a la pro- gramación “Smart Pro” de algunos parámetros de funcionamiento: Presione la pa- lanca la cantidad de veces indicada junto a la función deseada. Para salir de la pro- gramación, presione de nuevo el pulsador reverse. -
Page 89: Empuñadura De La Herramienta Y Montaje En Brazo De Reacción
NOTA: Se informa que las primeras cuatro funciones son alternativas, mientras que las siguientes seis son independientes (independientes = una vez habilitadas permanecen ac- tivas contemporáneamente a las otras funciones habilitadas). REAJUSTE: una vez que haya ingresado al menú SMART-PRO, mantenga presionada la palanca durante al menos 3 segundos. -
Page 90: Fijación Del Motor Para Atornillar
FIJACIÓN DEL MOTOR PARA ATORNILLAR Fig. 1 El motor para atornillar puede ser fijado a lo largo del cuerpo exterior solo en la zona indicada en la figura 1. No fije el motor para atornillar en otros puntos porque podría dañar el motor para atornillar y comprometer su funcionamiento;... -
Page 91: Modelos De Alimentador
MODELOS DE ALIMENTADOR Código Nombre Descripción TPU-1 Unidad de alimentación 686200100 TPU-2 Unidad de alimentación con señales de entrada/salida integradas 686200101 DESCRIPCIÓN DEL ALIMENTADOR Led 1 Led S1 Led S2 Led 2 Led S3 Led 3 Led 4 Led H Led L Pulsador para seleccionar la velocidad Conector... -
Page 92: Información Led Alimentador
INFORMACIÓN LED ALIMENTADOR Color Led Descripción función Activación del embrague, la herramienta ha alcanzado el par Led 1 Verde Bloqueo del motor o liberación del PTS (Arranque por Palanca + Empuje) en modo de arranque PALANCA + PTS (Arranque por Palanca + Empuje) o Led 2 Rojo en modo PULSADOR + PTS (Arranque por Palanca + Empuje) -
Page 93: Conector Entradas Salidas (Solo Para El Modelo Tpu-2)
CONECTOR ENTRADAS SALIDAS (SOLO PARA EL MODELO TPU-2) Señales disponibles en el conector DB15 presente en el modelo TPU -2: Dirección DB15 Señal Función hembra Señal Entrada Parada motor Mando de inhibición de los mandos Entrada Desatornilla Mando de desatornillado Salida Error Señala un error... -
Page 94: Características Técnicas Del Alimentador
CARACTERÍSTICAS TÉCNICAS DEL ALIMENTADOR: Característica Valor Unidad 230 +/-10% V a.c. Tensión de alimentación de red 50-60 Frecuencia de alimentación de red Potencia nominal 0-40 °C Temperatura de funcionamiento Peso del alimentador MANTENIMIENTO DE LA HERRAMIENTA La herramienta señala cuando se alcanzan 1 000 000 de ciclos a contar desde la com- pra o el último mantenimiento (la luz frontal parpadea durante la rotación) y cuando se requiere un control realizado por el servicio de asistencia técnica de FIAM. -
Page 95: Mantenimiento Del Motor Para Atornillar
MANTENIMIENTO DEL MOTOR PARA ATORNILLAR Se recomienda respetar la frecuencia de mantenimiento prevista y encomendar los motores para atornillar a los Centros Fiam autorizados. Para la integración de mo- tores para atornillar en máquinas con PLC, se recomienda hacer evidente (a través del PLC maestro) la necesidad de mantenimiento y activar una alerta cada 1.000.000 ciclos que recuerde la necesidad de hacer el mantenimiento ordinario del mismo. -
Page 96: Preguntas Frecuentes
Preguntas frecuentes sobre los problemas de eTensil En la introducción, se llama la atención sobre la gestión correcta de las diferentes opciones de funcionamiento. La gama eTensil permite al operador entrar a la programación «SMART PRO» (presionando el pulsador reverse durante más de 4 segundos). - Page 97 PROBLEMA OBSERVADO POSIBLE CAUSA POSIBLE SOLUCIÓN PARTE B: posibles desperfectos NO asociados a la programabilidad con SMART PRO Realice el mantenimiento programado Se ha alcanzado el umbral de (o reajuste la luz frontal siguiendo las La luz frontal destella mantenimiento programado instrucciones del Manual de Uso y durante el atornillado Mantenimiento)
- Page 98 PREGUNTAS FRECUENTES SOBRE LOS PROBLEMAS DEL MOTOR PARA ATORNILLAR PROBLEMA OBSERVADO SOLUCIÓN Al conectar el atornillador al alimentador los LED Apagar y encender el sistema Low y High siguen parpadeando El atornillador no realiza la liberación del embrague y no se detiene hasta que se Lleve a cabo el mantenimiento suelta el mando Cada vez que se atornilla, la TPU indica el...
- Page 99 EG-KONFORMITÄTSERKLÄRUNG PRODUKT: eTensil-Lösungen in Kombination mit den Speiseeinheiten TPU-1, TPU-2 - Elektroschrauber, gerade Modelle: E8C1A-1200, E8C1A-900, E8C1A-650, E8C2A-2000, E8C3A-1200, E8C3A-900, E8C4A-650, E8C5A-350 - Elektroschrauber, Modelle externer Einstellung Kupplung: E8C2ARE-2000, E8C3ARE-1200, E8C3ARE-900, E8C4ARE-650, E8C5ARE-350, E8C1ARE-1200, E8C1ARE-900, E8C1ARE-650 - Elektroschrauber, Winkelmodelle: E8C2A90-2000, E8C3A90-1200, E8C3A90-900, E8C4A90-650, E8C5A90-350, E8C2A30-2000, E8C3A30-1200, E8C3A30-900, E8C4A30-650, E8C5A30-350 - elektrische...
- Page 100 INHALT DEFINITION DER VERWENDETEN SYMBOLE ALLGEMEINE SICHERHEITSHINWEISE FÜR DAS WERKZEUG MERKMALE DER BAUREIHE DER SCHRAUBER UND EINBAUSCHRAUBER STARTEN DES WERKZEUGS VERWENDUNG DES WERKZEUGS DREHMOMENTREGULIERUNG DREHMOMENTREGULIERUNG DES EINBAUSCHRAUBERS FUNKTIONSOPTIONEN GRIFF DES WERKZEUGS UND MONTAGE AUF DREHMOMENTABSTUTZUNG HALTERUNG DES EINBAUSCHRAUBERS MODELLE NETZGERÄT BESCHREIBUNG NETZGERÄT LED-INFORMATIONEN NETZGERÄT INFORMATIONEN TASTE GESCHWINDIGKEITSEINSTELLUNG...
-
Page 101: Definition Der Verwendeten Symbole
DEFINITION DER VERWENDETEN SYMBOLE: WEEE: Das Produkt wird gemäß WEEE-Richtlinie 2012/19/EG getrennt entsorgt. Dieses Produkt darf nicht als Hausmüll behandelt werden. ACHTUNG, GEFAHRENSITUATION: Der Bediener muss diese Anleitung lesen, wenn er dieses Gefahrensymbol sieht. PFLICHT, DIE BEDIENUNGSANLEITUNG ZU LESEN: Bitte lesen Sie diese Bedienungsanleitung, bevor Sie das Produkt verwenden. -
Page 102: Allgemeine Sicherheitshinweise Für Das Werkzeug
ALLGEMEINE SICHERHEITSHINWEISE FÜR DAS WERKZEUG ACHTUNG: Lesen Sie alle Warnhinweise und Anweisungen. Die Nichtbeachtung von Warnhinweisen und Anweisungen kann zu Stromschlag, Feuer und/oder schweren Ver- letzungen führen. Bewahren Sie alle Warnhinweise und Anweisungen zur späteren Verwendung auf. Der Begriff „Elektrowerkzeug“ in den Warnhinweisen bezieht sich auf Elektrowerkzeuge, die entweder an das Stromnetz angeschlossen sind (mit Kabel) oder mit Batterie betrie- ben werden (kabellos). - Page 103 3) Persönliche Sicherheit a) Lassen Sie sich nicht ablenken, überprüfen Sie, was Sie tun, und verwenden Sie gesunden Menschenverstand bei der Bedienung von Elektrowerkzeugen. Betrei- ben Sie das Elektrowerkzeug nicht, wenn Sie müde sind oder unter dem Einfluss von Drogen, Alkohol oder Medikamenten stehen. Ein Moment der Unachtsamkeit beim Betrieb von Elektrowerkzeugen kann zu schweren Verletzungen führen.
- Page 104 d) Bewahren Sie unbenutzte Elektrowerkzeuge außerhalb der Reichweite von Kin- dern auf und erlauben Sie niemandem, der mit dem Gerät nicht vertraut ist oder diese Anleitung nicht kennt, sie zu benutzen. Elektrowerkzeuge sind gefährlich, wenn sie von unerfahrenen Personen benutzt werden. e) Führen Sie die erforderlichen Wartungsarbeiten an den Elektrowerkzeugen durch.
-
Page 105: Merkmale Der Baureihe Der Schrauber Und Einbauschrauber
MERKMALE DER SCHRAUBERBAUREIHE Drehmomentbereich** Maximale/minimale Leerlaufdrehzahl min. max.* Modell Best.-Nr. E8C1A-1200 1180 / 590 111712011 E8C1A-900 870 / 435 111712012 E8C1A-650 640 / 320 111712013 E8C2A-2000 2000 / 1000 111712000 E8C3A-1200 1180 / 590 111712001 E8C3A-900 870 / 435 111712002 E8C4A-650 640 / 320 111712003... -
Page 106: Starten Des Werkzeugs
* Fiam empfiehlt die Verwendung des Schraubers/Einbauschraubers für bis zu 80% des angegebenen maxi- malen Drehmoments. Berücksichtigen Sie dies für Ihre spezielle Anwendung. ** Die angegebenen Drehmomentwerte beziehen sich auf die Laboranalyse nach ISO 5393 mit dem Schrau- ber/Einbauschrauber auf Maximaldrehzahl (HI). Die Drehmomentwerte sind lediglich Richtwerte. Für die ordnungsgemäße Funktion des Systems empfehlen wir, folgende Regel zu beachten: Mindestpau- se zwischen zwei aufeinanderfolgenden Anziehvorgängen = 3-fache Anziehzeit (z.B. -
Page 107: Verwendung Des Werkzeugs
VERWENDUNG DES WERKZEUGS LED nr. 2 LED nr. 1 Taste Drehrichtungsumkehr Starthebel Vor dem Drücken des Starthebels des Werkzeugs die LEDs auf der Taste für die Drehrichtungsumkehr überprüfen. Linkslauf (gegen den Uhrzeigersinn): - LED Nr. 1 leuchtet - LED Nr. 2 ausgeschaltet Rechtslauf (im Uhrzeigersinn): - LED Nr. -
Page 108: Drehmomentregulierung
DREHMOMENTREGULIERUNG Trennen Sie das Gerät von der Stromversorgung, bevor Sie Einstellungen vornehmen. Das Anziehmoment wird durch Ändern des Drucks der Kupplungsfeder eingestellt, die niemals ganz oder so weit gespannt werden darf, dass die Kupplung höhere Drehmomente erreicht als im Katalog für das jeweilige Werkzeugmodell angegeben. - Page 109 Auf Codes bezogene Grafiken: E8C2ARE-2000, E8C3ARE-1200, E8C3ARE-900, E8C4ARE-650, E8C5ARE-350. 111712074 MAXIMALES DREHMOMENT E8C5ARE-350 MODELL 111712073 MAXIMALES DREHMOMENT MODELL E8C4ARE-650 111712072 MAXIMALES DREHMOMENT EBC3ARE-900 MODELL 111712071 MAXIMALES DREHMOMENT E8C3ARE-1200 MODELL 111712070 MAXIMALES DREHMOMENT E8C2ARE-2000 MODELL MINIMALES DREHMOMENT Hinweis: Im Be Werkzeuge mit 900 U/Min.) w aus).
- Page 110 Auf Codes bezogene Grafiken: E8C1ARE-1200, E8C1ARE-900, E8C1ARE-650. 111712078 111712076 111712077 111712074 HMOMENT E8C5ARE-350 E8C1ARE-1200 E8C1ARE-900 E8C1ARE-650 MAXIMALES DREHMOMENT 111712073 HMOMENT E8C4ARE-650 MAXIMALE EINSTELLGRENZE FÜR DAS 111712072 ANGEGEBENE MODELL MOMENT EBC3ARE-900 (wird die Feder weiter zusammengedrückt, sperrt das Werkzeug und die Kupplung löst 111712071 MOMENT E8C3ARE-1200...
-
Page 111: Drehmomentregulierung Des Einbauschraubers
DREHMOMENTREGULIERUNG DES EINBAUSCHRAUBERS Abb. 1 Abb. 2 Trennen Sie das Gerät von der Stromversorgung, bevor Sie Einstellungen vornehmen. Die Kupplungsfeder darf niemals ganz oder so weit gespannt werden, dass die Kupplung höhere Drehmomente erreicht als im Katalog für das jeweilige Werkzeugmodell angegeben. Das Anziehmoment wird durch Ändern des Drucks der Kupplungsfeder eingestellt. -
Page 112: Funktionsoptionen
FUNKTIONSOPTIONEN Durch längeres Drücken der Reverse Taste (Rückwärtstaste) (> 4 Sekunden) gelangen Sie in die „Smart Pro“-Programmierung bestimmter Funktionsparameter: Drücken Sie den Hebel so oft wie neben der gewünschten Funktion angegeben. Die Taste Reverse erneut drücken, um die Programmierung zu verlassen. KONFIGURATION DER FUNKTIONEN Druckvorgänge Hebel Funktion... -
Page 113: Griff Des Werkzeugs Und Montage Auf Drehmomentabstutzung
ANMERKUNG: Wir weisen darauf hin, dass die ersten vier Funktionen Alternativen sind, während die nächsten sechs unabhängig sind (unabhängig = einmal aktiviert, bleiben sie gleichzeitig mit anderen aktivierten Funktionen aktiv). RESET: wenn Sie das SMART-PRO-Menü aufgerufen haben, halten Sie den Hebel minde- stens 3 Sekunden lang gedrückt. -
Page 114: Halterung Des Einbauschraubers
HALTERUNG DES EINBAUSCHRAUBERS Abb. 1 Der Einschrauber kann nur in dem in Abbildung 1 gezeigten Bereich entlang der Außenschale eingespannt werden. Nicht an anderen Stellen des Einbauschraubers spannen, da dies das Werkzeug beschädigen und seine Funktionalität beeinträchtigen kann. In diesem Fall haftet Fiam nicht für Schäden am Einbauschrauber. -
Page 115: Modelle Netzgerät
MODELLE NETZGERÄT Artikelnr. Name Beschreibung TPU-1 Netzgerät 686200100 TPU-2 Netzgerät mit integrierten Eingangs-/Ausgangssignalen 686200101 BESCHREIBUNG NETZGERÄT Led 1 Led S1 Led S2 Led 2 Led S3 Led 3 Led 4 Led H Led L Taste zum Auswählen der Drehzahl Stromversorgungsbuchse Power I/O-Anschluss (nur für Modell TPU -2) -
Page 116: Led-Informationen Netzgerät
LED-INFORMATIONEN NETZGERÄT Farbe Led Funktionsbeschreibung Kupplungsauslösung, Werkzeug hat Drehmoment erreicht Led 1 Grün Motorblockierung oder PTS losgelassen (Start über Hebel + Schubkraft) bei Start in modus HEBEL +PTS (Start über Hebel + Schubkraft) oder Mo- Led 2 dus TASTE +PTS (Start über Hebel + Schubkraft) Externer Befehl Werkzeugstopp (nur bei Modell TPU 2, das mit Eingängen/ Led 3 Ausgängen ausgestattet ist) -
Page 117: Anschluss Ausgänge Eingänge (Nur Für Modell Tpu-2)
ANSCHLUSS AUSGÄNGE EINGÄNGE (NUR FÜR MODELL TPU-2) Auf dem DB15-Stecker von Modell TPU -2 verfügbare Signale: Signal- DB15 Signal Funktion Buchse richtung Eingang Motorstopp Befehl zum Sperren der Steuerung Eingang Abschrauben Befehl zum Abschrauben Ausgang Fehler Fehlermeldung Ausgang Drehung Signal, dass der Motor sich dreht ... -
Page 118: Technische Daten Der Netzgerät
TECHNISCHE DATEN DER NETZGERÄT: Eigenschaft Wert Einheit 230 +/-10% V a.c. Netzspannung 50-60 Netzfrequenz Nennleistung 0-40 °C Betriebstemperatur Gewicht Speiseeinheit WARTUNG DES WERKZEUGS Das Werkzeug zeigt an, dass seit dem Kauf oder der letzten Wartung 1.000.000 Zyklen erreicht wurden (das Frontlicht blinkt beim Drehen) und dass es vom technischen Kundendienst von FIAM überprüft werden muss. -
Page 119: Wartung Des Einbauschraubers
WARTUNG DES EINBAUSCHRAUBERS Es wird empfohlen, die geplanten Wartungsintervalle einzuhalten und für die Einbau- schrauber autorisierten Fiam-Zentren zu beauftragen. Für die Integration von Einbau- schrauber an Maschinen mit SPS wird es empfohlen, die Notwendigkeit der Wartung (über den SPS-Master) deutlich zu machen und alle 1.000.000 Zyklen ei nen Alarm zu aktivieren, der auf die Notwendigkeit einer planmäßigen Wartung des Einbauschrau- bers hinweist. -
Page 120: Faq
FAQ Probleme eTensil Im Vorwort wird auf die richtige Handhabung der verschiedenen Bedienmöglichkeiten hingewiesen. Die Produktpalette eTensil ermöglicht es dem Bediener, in die Programmierung „SMART PRO“ zu gelangen (durch Drücken der Rückwärtstaste für mehr als 4 Sekunden). Es wird empfohlen, immer sorgfältig zu überprüfen, ob einige scheinbare Anomalien nicht in Wirklichkeit mit dem gewählten Programmiermodus zusammenhängen. - Page 121 ERKANNTES PROBLEM MÖGLICHE URSACHE MÖGLICHE LÖSUNG TEIL B: Mögliche Anomalien, die NICHT mit der Programmierung über SMART PRO zusammenhängen eine planmäßige Wartung vorsehen die Schwelle für die planmäßige (oder die Frontleuchte gemäß den beim Einschrauben blinkt Wartung ist erreicht Anweisungen im Betriebs- und die Frontleuchte Wartungshandbuch zurücksetzen) Beim Anschluss des Schraubers...
- Page 122 FAQ EINBAUSCHRAUBER ERKANNTES PROBLEM LÖSUNG Beim Anschluss des Schraubers an die Stromversor- Das System aus- und wieder einschalten gung blinken die LEDs L (niedrig) und H (hoch) weiterhin Der Einbauschrauber führt keine einzelne Kupplungsbetätigung aus und stoppt erst, Wartung durchführen wenn die Steuerung losgelassen wird Bei jeder Verschraubung zeigt das TPU Anzugsdrehmoment verringern...
- Page 124 etensil.fiamgroup.com www.fiamgroup.com info@fiamgroup.com Meet us on: Fiam Utensili Pneumatici Spa Fiam France Fiam España Succursale Sucursal Viale Crispi 123 73, cours Albert Thomas Travessera de Gràcia, 11, 5ª planta 36100 Vicenza - Italy 69003 Lyon - France 08021 Barcelona, España Tel.
Need help?
Do you have a question about the eTensil E8C1A-1200 and is the answer not in the manual?
Questions and answers
Do you need to oil/grease tool as normal maintenance?
Yes, the FIAM eTensil E8C1A-1200 requires lubrication (oiling or greasing) for normal maintenance. The document specifies that maintenance for the gearbox includes lubrication, and additional maintenance such as replacing bearings and gears is only needed if required.
This answer is automatically generated