Table of Contents
Advertisement
Quick Links
Advertisement
Table of Contents

Related Manuals for Micsig ATO1000 Series


Summary of Contents for Micsig ATO1000 Series
- Page 2 Version Info Version Date Remarks V1.0 2020.06...
- Page 3 Preface Preface Dear customers, Congratulations! Thank you for buying Micsig instrument. Please read this manual carefully before use and particularly pay attention to the “Safety Precautions”. If you have read this manual, please keep it properly for future reference. The materials contained in this document are provided "as present" and are subject to change in future versions...
-
Page 4: Table Of Contents
Table of Contents Table of Contents TABLE OF CONTENTS ..............................I CHAPTER 1. SAFETY PRECAUTIONS ......................... 6 1.1 S AFETY RECAUTIONS ............................6 1.2 S ..........................7 AFETY ERMS AND YMBOLS CHAPTER 2. QUICK START GUIDE OF OSCILLOSCOPE ....................9 2.1 I NSPECT ACKAGE... - Page 5 3.2.11 MAP ................................ 41 3.2.12 Road Speed ............................. 42 3.2.13 Throttle Position ............................. 43 3.3 A ................................45 CTUATORS 3.3.1 Carbon canister solenoid valve ......................... 45 3.3.2 Disel Glow Plugs ............................46 3.3.3 EGR Solenoid Valve ........................... 47 3.3.4 Fuel Pump ..............................48 3.3.5 Idle speed control valve ..........................
-
Page 6: Table Of Contents
Table of Contents 5.2 A .......................... 90 DJUST ERTICAL ENSITIVITY 5.3 A ..........................90 DJUST ERTICAL OSITION 5.4 O HANNEL ............................91 5.4.1 Measured Signal ............................91 5.4.2 Filter ................................93 5.4.3 Waveform Invert ............................94 5.4.4 Set Probe Type ............................. 95 5.4.5 Set Probe Attenuation Coefficient ....................... - Page 7 10.10 H ................................146 CHAPTER 11 SAMPLING SYSTEM ......................... 147 11.1 S AMPLING VERVIEW ............................. 148 11.2 R SEQ K ......................150 EY AND INGLE 11.3 S ELECT AMPLING ..........................151 11.4 R ECORD ENGTH AND AMPLING ......................153 CHAPTER 12 HOMEPAGE FUNCTIONS ........................155 12.1 O 2~13) ......................
- Page 8 Table of Contents ANNEX ................................210 A:T ........................ 210 NNEX ECHNICAL SPECIFICATIONS B: M NNEX AINTENANCE OF OSCILLOSCOPE ....................214 C: A NNEX CCESSORIES ............................215...
-
Page 9: Chapter 1. Safety Precautions
Do not operate with suspected failures. If you suspect that there is damage to this product, have it inspected by service personnel designated by Micsig. ⚫ Use adapter correctly. Supply power or charge the equipment by power adapter designated by Micsig, and charge the battery according to the recommended charging cycle. ⚫... -
Page 10: Safety Terms And Symbols
Chapter 1. Safety Precautions Measurement Category ATO series oscilloscopes can be measured under measurement category I. Measurement Category Definition Measurement category I is for measurement on a circuit that is not directly connected to the mains power supply. For example, there is no circuit drawn from the main power source, or a circuit that has been drawn from the mains but has been specially protected (internal). - Page 11 Chassis Ground Measurement Ground Terminal Please read the following safety precautions to avoid personal injury and prevent damage to this product or any products connected to it. To avoid possible hazards, this product can only be used within the specified scope.
-
Page 12: Chapter 2. Quick Start Guide Of Oscilloscope
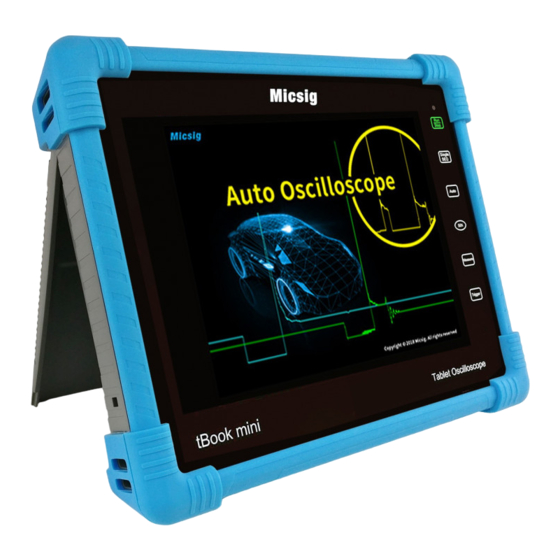
Chapter 2. Quick Start Guide of Oscilloscope Chapter 2. Quick Start Guide of Oscilloscope This chapter contains oscilloscope inspection and some related operations. It is recommended that you read this chapter carefully in order to understand the appearance, power on and off, oscilloscope settings and related calibration requirements of the ATO series oscilloscope. -
Page 13: Inspect Package Contents
If any damage to oscilloscope is found by the appearance inspection or it fails to pass the performance test, please contact Micsig’s agent or local office. If the instrument is damaged due to transportation, please retain the package and contact the transportation company or Micsig’s agent, and Micsig will make arrangement. -
Page 14: Rear Panel & Side Panel
Chapter 2. Quick Start Guide of Oscilloscope 2.3 Rear panel & side panel Figure 2-2 Rear panel & side Panel 2.4 Front Panel Figure 2-3 Front Panel of Tablet Oscilloscope... -
Page 15: Power On/Off The Oscilloscope
Touch button Description Run/Stop: Touch to start/Stop acquisition Single SEQ: Touch to trigger on a single waveform Auto:Automatically adjust the vertical scale factor, vertical position and horizontal time base to achieve the best display state of the waveform 50%:Touch to set: ⚫... -
Page 16: Understand The Oscilloscope Display Interface
The oscilloscope interface is shown in Figure 2-4. Figure 2-4 Oscilloscope Interface Display Description Micsig logo Oscilloscope status, including RUN, STOP, WAIT, AUTO Trigger point Sampling rate, memory depth The area in “[]”... - Page 17 Description Memory depth indicatrix Current trigger type indication Current trigger source, trigger level Trigger level indicator CH1、CH2、CH3、CH4 cchannel icons and vertical sensitivity icon. Tap the channel icons to open channels and corresponding channel menu, or close channels, operate in a loop; Tap mV or V to adjust the vertical sensitivity of channels;...
-
Page 18: Introduction Basic Operations Of Touch Screen
Chapter 2. Quick Start Guide of Oscilloscope 2.7 Introduction Basic Operations of Touch Screen The tBook mini Series oscilloscope operates mainly by tap, swipe, single-finger drag, and multi-finger drag. Figure 2-5 Basic Operations of tBook mini series Oscilloscope Tap button on the touch screen to activate the corresponding menu and function. Tap any blank space on the screen to exit the menu. -
Page 19: Mouse Operation
Figure 2-6 Slide out of Main Menu Tap the options in the main menu to enter the corresponding submenu. The opening methods of channel menu and math menu are slightly different from that of the main menu. Tap the channel icon and math icon to open the corresponding menu. Three-finger slide: to quickly turn on/off Zoom. -
Page 20: Use Auto
Chapter 2. Quick Start Guide of Oscilloscope Maximum input voltage of the analog input Category I 300Vrms, 400Vpk. 2.10 Use Auto Once the oscilloscope is properly connected and a valid signal is input, tap the Auto Set button to quickly configure the oscilloscope to be the best display effects for the input signal. - Page 21 Figure 2-9 Auto Set Waveform Auto Range - Continuously automatic, the oscilloscope continuously adjusts the vertical scale, horizontal time base and trigger level in a real-time manner according to the magnitude and frequency of signal. It is defaulted as off and needs to be opened in the menu.
-
Page 22: Load Factory Settings
Chapter 2. Quick Start Guide of Oscilloscope It can quickly view several continuous signals without adjusting the oscilloscope. This function is very useful if you need to use two probes at the same time, or if you can only use the probe with one hand because the other hand is full. - Page 23 Figure 2-12 Probe Connection Open the channel (if the channel is closed). Adjust the oscilloscope channel attenuation coefficient to match the probe attenuation ratio. button or manually adjust the waveform vertical sensitivity and horizontal time base. Observe the shape of the waveform, see Figure 2-13. Figure 2-13 Probe Compensation If the waveform on the screen is shown as “under-compensation”...
-
Page 24: Modify The Language
Chapter 2. Quick Start Guide of Oscilloscope Figure 2-14 Probe Adjustment The safety ring on the probe provides a safe operating range. Fingers should not exceed the safety ring when using the probe, so as to avoid electric shock. Connect the probe to all other oscilloscope channels (Ch2 of a 2-channel oscilloscope, or Ch 2, 3 and 4 of a 4- channel oscilloscope). -
Page 25: Chapter 3 Automotive Test
The ATO1000 series car-specific oscilloscope can test the charging circuit and the starting circuit to test whether the charging/starting circuit of the car is working properly. The specific operations are as follows::... -
Page 26: Charging
Chapter 3 Automotive Test 3.1.1 12V Charging 12V charging is suitable for gasoline vehicles. Use a BNC to banana cable, one end is connected to channel 1 of the oscilloscope, and the other end is connected to the positive and negative electrodes of the battery using two large alligator clips (the red wire is connected to the red clip to the positive electrode, and the black wire is connected to the black clip. -
Page 27: Charging
3.1.2 24V Charging 24V charging is suitable for diesel vehicles. The operation process is the same as that of 12V charging. The reference voltage is 26.5V~30V. It can be tested with an oscilloscope. The specific operation is shown in Figure 3-3: Figure 3-3 24V Charging 3.1.3 Alternator AC Ripple... -
Page 28: Ford Focus Smart Generator
Chapter 3 Automotive Test Figure 3-4 Charging Ripple 3.1.4 Ford Focus Smart Generator Use a BNC to banana cable, connect one end to channel 1 of the oscilloscope, connect the black plug to the black alligator clip to ground (battery negative), and use a needle to connect the red connector to the engine ECM to generator output control line. -
Page 29: Start
Figure 3-5 Ford Focus Smart Generator 3.1.5 12V Start Use the ATO oscilloscope to test the start of the gasoline car, the purpose is to test whether the performance of the battery is maintained in the normal range. Use a BNC to banana cable, connect one end to channel 1 of the oscilloscope, and use two large alligator clips to clamp the positive and negative poles of the battery (the red wire connects to the red clamp to the positive pole, and the black wire to the black clamp to the negative pole). - Page 30 Chapter 3 Automotive Test Figure 3-6 12V Start The following figure is the actual measurement diagram of the starting voltage and current of Mazda in a certain year: Figure 3-7 Starting voltage and current...
-
Page 31: Start
3.1.6 24V Start Use the ATO oscilloscope to test the starting process of the diesel vehicle, the purpose is to test whether the performance of the battery is maintained in the normal range, the operation process is the same as the 12V start. The specific operation is shown in Figure 3-8: Figure 3-8 24V Start 3.1.7... -
Page 32: Sensor Tests
Chapter 3 Automotive Test Figure 3-9 Cranking Current 3.2 Sensor Tests The sensor is an electronic signal conversion device that converts non-electrical information into voltage signals and reports various information about changes in the working environment to the car computer. For example, the air flow meter installed between the air filter and the throttle valve can measure the value of the air flow that is sucked into the engine through the throttle valve. -
Page 33: Abs
3.2.1 ABS The ABS wheel speed sensor is divided into analog and digital. The analog sensor has 2 signal terminals, the signal is a sine wave, and the frequency of the sine wave represents the speed. Digital sensors generally have 3 terminals, power, signal, and ground;... - Page 34 Chapter 3 Automotive Test Use ATO oscilloscope to test the accelerator pedal sensor, the specific operation is shown in Figure 3-11: Figure 3-11 Accelerator Pedal The following picture is the actual measurement diagram of the accelerator pedal sensor of a certain model:...
-
Page 35: Air Flow Meter
3.2.3 Air Flow Meter Air flow meters generally have vane type, hot wire type, digital type, etc.; among them: vane type and hot wire type are both analog output, and the output voltage is proportional to the air flow, generally 0.5V~4.5V, but the non- linear ratio, It needs to be corrected in the ECM;... -
Page 36: Camshaft
Chapter 3 Automotive Test 3.2.4 Camshaft The camshaft sensor is generally used for timing, and is often tested in conjunction with the crankshaft sensor to determine the timing of the vehicle. There are one or two camshaft sensors in the common car models, and the use of four is relatively small. -
Page 37: Coolant Temperature
Figure 3-14 Camshaft position sensor (Hall type) 3.2.5 Coolant Temperature The coolant temperature sensor is usually called a water temperature sensor. Generally, it contains a thermistor. As the temperature increases, the resistance becomes smaller, which causes the output voltage to change, and the water temperature changes slowly, so the voltage also changes slowly. -
Page 38: Crankshaft
Chapter 3 Automotive Test Figure 3-15 Coolant Temperature 3.2.6 Crankshaft The crankshaft sensor is installed in many places, which can be near the front pulley or on the rear flywheel. The ECM judges the precise position of the engine based on its output signal. Usually there are induction type and Hall type: the induction type output is usually a sine wave, there are missing teeth on the disk, and the sine wave will be missing in the missing teeth;... - Page 39 Figure 3-16 Crankshaft position sensor The figure below is the actual measurement of the crankshaft position sensor (inductive) of a certain model:...
-
Page 40: Distributor
Chapter 3 Automotive Test 3.2.7 Distributor Distributor appears on models with high-voltage cables, and distribute the generated high voltages to spark plugs in sequence. Distributors generally have Hall type and induction type. Hall type is generally 3-wire, voltage, signal, and ground. The output is square wave. Inductive type is generally 2-wire. The output is sensing signal; use BNC to banana cable, one end is connected to channel 1 of the oscilloscope, and the other end is black The plug is grounded, and the red connector is connected to the signal line of the distributor with a needle. -
Page 41: Knock
Figure 3-18 Fuel Pressure Sensor Test 3.2.9 Knock The knock sensor is a passive device, generally 2-wire, signal and ground, no external power supply is required, and a signal will be generated when it is subjected to vibration. It can also be removed for testing. The signal can be generated by tapping, and the signal amplitude generally does not exceed 5V;... - Page 42 Chapter 3 Automotive Test Figure 3-19 Knock Sensor test The following picture is the actual measurement diagram of the knock sensor of a certain model:...
-
Page 43: Lambda
3.2.10 Lambda The Lambda, or Oxygen Sensor is generally installed on the exhaust pipe, before the catalytic converter. It is a feedback sensor used to sense the oxygen content in the exhaust gas, so that the ECM can judge the combustion situation in the combustion chamber and adjust the fuel supply of the engine. -
Page 44: Map
Chapter 3 Automotive Test Figure 3-21 Lambda (Oxygen Sensor) diagram 3.2.11 MAP The MAP, or Intake Pressure sensor is used to sense the pressure of the intake manifold and send it to the ECM to determine the fuel supply, vacuum (or light load), and ignition timing advance angle. There are two kinds of analog and digital, usually there are 3 wires, power, signal, ground, or together with other devices. -
Page 45: Road Speed
Figure 3-22 MAP (intake pressure sensor) 3.2.12 Road Speed The speed sensor is generally installed on the drive output shaft of the speedometer of the gearbox or near the back of the head of the speedometer, to provide information for the ECM and monitor power. Usually is Hall type, there are 3 wires: power, signal, and ground, output square wave signal (some models will be analog, 2 wires, output inductive signal, sine wave). -
Page 46: Throttle Position
Chapter 3 Automotive Test Figure 3-23 Vehicle speed sensor test 3.2.13 Throttle Position The throttle position sensor is installed on the drive shaft of the throttle butterfly plate to sense the opening of the throttle and provide a basis for ECM to judge the intake. There are analog output and throttle switch output. Use a BNC to banana cable, connect one end to channel 1 of the oscilloscope, the other end of the black plug is grounded, and the red connector uses a needle to connect the signal line of the throttle position sensor or the throttle switch signal 1. - Page 47 Figure 3-24 Throttle Position Sensor test The following figure is the actual measurement diagram of the throttle position sensor of a certain model: Figure 3-25 Throttle Position Sensor Diagram...
-
Page 48: Actuators
Chapter 3 Automotive Test Actuators 3.3.1 Carbon canister solenoid valve The carbon canister is generally installed in the engine compartment and connected to the fuel tank through a pipe to collect the vaporized oil and gas in the fuel tank, so as to prevent the oil and gas from being discharged into the air and causing pollution. -
Page 49: Disel Glow Plugs
Figure 3-27 Audi A6 Carbon canister solenoid valve signal 3.3.2 Disel Glow Plugs When the engine or the weather is relatively cold, it will affect the combustion of diesel fuel, so the glow plug is required to heat the cylinder before starting. Diesel engine glow plugs generally have one for each cylinder, connected in series, powered by a battery, and controlled by a relay to open and close. -
Page 50: Egr Solenoid Valve
Chapter 3 Automotive Test Figure 3-28 Disel Glow Plugs 3.3.3 EGR Solenoid Valve The EGR solenoid valve is an abandoned recirculation solenoid valve. After opening, a part of the exhaust gas will be sucked into the intake manifold again to reduce the combustion temperature, so as to reduce the emission of nitrogen oxides in the exhaust gas and achieve the goal of environmental protection. -
Page 51: Fuel Pump
Figure 3-29 EGR solenoid valve test 3.3.4 Fuel Pump The fuel in the fuel tank can be pumped and pressurized through the fuel pump, usually there are 6-8 sectors. Under the same condition of the engine, a good fuel pump has the same and uniform current change in each sector. Use a current clamp, connect one end to channel 1 of the oscilloscope, and clamp the other end to the power line of the fuel pump. - Page 52 Chapter 3 Automotive Test Figure 3-30 Electronic fuel pump test...
-
Page 53: Idle Speed Control Valve
3.3.5 Idle speed control valve The idle speed control valve adjusts the throttle position or forms an air bypass around the engine according to the load conditions of the engine and the engine temperature to deliver controllable airflow to the air duct to adjust the engine idle speed. -
Page 54: Injector (Gasoline Engine)
Chapter 3 Automotive Test 3.3.6 Injector (gasoline engine) The fuel injector is an electromechanical device, which is supplied by a common rail fuel pipe and controlled by the ECM to start and stop time of fuel injection. Generally, it is a 2-wire device, the power supply voltage is 12V, and the ECM controls the grounding. -
Page 55: Injector (Diesel)
3.3.7 Injector (Diesel) Most diesel engines use common rail fuel injection, fuel injection time is affected by the oil pressure. Low pressure at low speed, injection time is longer, less injection volume; High pressure at high speed, injection time is short, volume is large. -
Page 56: Pressure Regulator
Chapter 3 Automotive Test 3.3.8 Pressure regulator The pressure regulator is a valve controlled by a square wave duty cycle. It is installed on the high-pressure fuel pump or on the common rail pipe and controls the common rail pressure together with the flow control valve. The pressure relief valve simply controls the amount of high-pressure oil entering the oil return system, thereby increasing or decreasing the fuel pressure of the common rail pipe. -
Page 57: Quantity (Flow) Control Valve
3.3.9 Quantity (Flow) control valve The flow control valve, also known as the flow regulator and the fuel inlet metering valve, is used to measure the flow of fuel from the low pressure or lift pump into the high-pressure fuel pump. The more fuel enters the piston chamber of the high-pressure fuel pump, the higher the pressure, which increases the pressure in the common rail fuel pipe;... -
Page 58: Throttle Servo Motor
Chapter 3 Automotive Test 3.3.10 Throttle Servo Motor Throttle servo motor are commonly used in electronically controlled engines, and throttle butterfly valves are usually used. The ECM controls the throttle servo motor according to the accelerator pedal signal to realize the throttle opening control, which is then monitored by the throttle position sensor and transmits the signal back to the ECM to achieve closed-loop control. -
Page 59: Variable Speed Cooling Fan
3.3.11 Variable speed cooling fan At present, most cars' fans are variable-speed, and the speed of the fan can be adjusted according to different working conditions and temperatures. Use a BNC to banana cable, connect one end to channel 1 of the oscilloscope, ground the other end of the black plug, and use a needle to pierce the red connector into the signal wire of the fan terminal;... -
Page 60: Variable Valve Timing
Chapter 3 Automotive Test Figure 3-38 Cooling fan measurement diagram 3.3.12 Variable valve timing Variable valve timing is achieved by adjusting the phase of the engine cam so that the intake air volume changes with the change of engine speed, so as to achieve the best combustion efficiency and improve fuel economy. Use a BNC to banana cable, connect one end to channel 1 of the oscilloscope, the other end of the black plug is grounded, and the red connector is pierced into the variable valve timing signal line with a needle tip. - Page 61 Figure 3-39 Variable valve timing test The following picture is the actual measurement diagram of the Variable valve timing of a certain model:...
-
Page 62: Ignition Tests
Chapter 3 Automotive Test 3.4 Ignition Tests Special Attention! During the secondary ignition test, because the test voltage is about 40K volts, the secondary ignition probe must be used for operation. It is strictly forbidden to use the ordinary probe, otherwise it is very likely to cause personal safety injury and instrument damage. - Page 63 The figure below is the actual measurement of the primary ignition of a certain model: Figure 3-41 Primary ignition actual test...
-
Page 64: Secondary
Chapter 3 Automotive Test 3.4.2 Secondary The secondary coil has more coil turns than the primary coil, and can generate a high voltage of up to 40kv, which can cause the spark plug to break down and ignite. There are several types: distributor ignition system, distributorless ignition system/invalid spark, COP independent ignition, multi-COP integrated unit ignition. -
Page 65: Primary + Secondary
3.4.3 Primary + Secondary When measuring the primary and secondary waveforms at the same time, please use the P130A probe, one end is connected to channel 1 of the oscilloscope, the black clip on the other end is grounded, pierce the needle into the ground wire of the primary coil, and the probe is hooked to the metal needle;... -
Page 66: Networks
Chapter 3 Automotive Test Figure 3-44 BMW 5 Series N20 Primary + Secondary ignition signal 3.5 Networks 3.5.1 CAN High & CAN Low CAN bus is a communication system, which is widely used in modern vehicles. A car may have 2 to 3 CAN bus networks, both high-speed and low-speed. - Page 67 Figure 3-45 CAN BUS Test The figure below is the actual measurement of the CAN bus of a certain model:...
-
Page 68: Lin Bus
Chapter 3 Automotive Test 3.5.2 LIN Bus The LIN protocol is short for Local Interconnect Network. The Lin bus communication is very common in automobiles, it is low speed, there are multiple control devices mounted on a network. It can contril non-safety-critical and low-speed devices on vehicles, such as wipers, windows, mirrors, air conditioners, electronic seats, etc. -
Page 69: Flexray Bus
Figure 3-47 Audi A6 LIN bus measurement 3.5.3 FlexRay Bus With the increase of car transmission content, the Flexray bus with faster transmission speed has been developed, and the transmission rate can reach 10Mbps. It has the advantages of high speed, determinability, and fault tolerance. It can work with CAN, LIN and other buses. -
Page 70: K Line
Chapter 3 Automotive Test Use the ATO oscilloscope to test the FlexRay bus, the specific operation is shown in Figure 3-48: Figure 3-48: FlexRay bus test 3.5.4 K line The K line is a special line for data transmission between the car control unit and the diagnostic instrument, and the transmission rate is low. - Page 71 Figure 3-49 K line test...
-
Page 72: Combination Tests
Chapter 3 Automotive Test 3.6 Combination Tests The electronic faults of automobiles are sometimes more complicated. We need to use an ATO oscilloscope to perform combination testing, compare several waveforms that collected, and help users judge the fault by observing and analyzing the timing relationship and quantitative relationship between the waveforms. -
Page 73: Crankshaft + Primary Ignition
3.6.2 Crankshaft + Primary ignition Measure the crankshaft and primary ignition at the same time, you can check whether the ignition advance angle is normal, and look for the cause of misfire at high engine speed. Check whether the crankshaft signal is normal or whether the primary ignition voltage and closing time are reached. -
Page 74: Primary Ignition + Injector Voltage
Chapter 3 Automotive Test 3.6.3 Primary ignition + Injector voltage If there is a problem with the startup or it is suddenly off, it may be necessary to test the primary ignition and the fuel injector at the same time. If the primary ignition fails, no fuel injector signal will be generated. Use a P130A probe, one end is connected to channel 1 of the oscilloscope, and the other end is grounded with a black clip. -
Page 75: Crankshaft + Camshaft + Injector + Secondary Ignition
3.6.4 Crankshaft + Camshaft + Injector + Secondary Ignition Use a BNC to banana cable, one end is connected to channel 1 of the oscilloscope, the other end is grounded with a black plug, and the red connector is pierced into the signal line of the crankshaft sensor with a needle; Use a BNC to banana cable, one end is connected to channel 2 of the oscilloscope, the other end is grounded with a black plug, and the red connector is pierced into the signal line of the camshaft sensor with a needle;... -
Page 76: Pressure Test
Chapter 3 Automotive Test 3.7 Pressure Test When the engine is started, the gas and liquid in the intake manifold, exhaust tail pipe, cylinder, and crankcase will generate pressure. The pressure can be converted into a voltage signal by the pressure probe. Therefore, the ATO oscilloscope can be tested by the pressure probe. -
Page 77: Exhaust Tailpipe
3.7.2 Exhaust Tailpipe Use ATO oscilloscope to test the exhaust tailpipe pressure and voltage under the two operating conditions of the engine, show as below Figure 3-55: Figure 3-55 Exhaust Tailpipe Test... -
Page 78: In-Cylinder
Chapter 3 Automotive Test 3.7.3 In-Cylinder Use ATO oscilloscope to test the pressure of the cylinder of the engine under 3 working conditions, show as below Figure 3-56: Figure 3-56 In-Cylinder Test The figure below is the actual cylinder pressure of Mazda 6 in a certain year:... - Page 79 Figure 3-57 Mazda 6 Cylinder internal pressure measurement...
-
Page 80: In-Crankcase
Chapter 3 Automotive Test 3.7.4 In-Crankcase Use ATO oscilloscope to test the pressure and voltage of the crankcase under two working conditions. The specific operation is shown in Figure 3-58: Figure 3-58 Crankcase Pressure and Voltage test... -
Page 81: Chapter 4 Horizontal System
Chapter 4 Horizontal System This chapter contains detailed information on the oscilloscope horizontal system. It is recommended that you read this chapter carefully in order to understand the setting function and operation of the horizontal system of the ATO oscilloscope. ⚫... -
Page 82: Moving The Waveform Horizontally
Chapter 4 Horizontal System 4.1 Moving the waveform horizontally Put one finger on the waveform display area to swipe left and right, for the coarse adjustment of the waveform position horizontally of all analog channels; after moving the waveform, tap the fine adjustment button in the lower left corner of the screen for fine adjustment. - Page 83 Figure 4-3 Adjust the Horizontal Time Base Method 2: Time Base Knob to turn on the time base knob (see Figure 4-4 horizontal time base knob), and then turn the knob to adjust the appropriate time base. The time base shown on the left is the currently selected time base. Figure 4-4 Horizontal Time Base Knob...
-
Page 84: Pan And Zoom Single Or Stopped Acquisitions
Chapter 4 Horizontal System Method 3: Double-tap Double tap on the screen with one finger to enlarge the waveform horizontally with the double-tap point as the center. Each time you double-tap, the horizontal time base decreases by one gear. 4.3 Pan and Zoom Single or Stopped Acquisitions After the oscilloscope is stopped, the stopped display screen may contain several acquired data with useful information, but only the data in the last acquisition can be horizontally moved and zoomed. - Page 85 Figure 4-6 ROLL Mode In ROLL mode, press to stop waveform display; press again to clear waveform display and restart acquisition; press to execute single sequence, it will stop automatically after completing a full screen acquisition. ROLL mode is generally used to observe waveforms with frequencies below 5 Hz. ROLL mode is defaulted as open.
- Page 86 Chapter 4 Horizontal System XY——XY Mode The vertical amount of CH1 is displayed on the horizontal axis in XY mode, and the vertical amount of CH2 is displayed on the vertical axis (see Figure 4-8 XY Mode). You can use XY mode to compare the frequency and phase relationship of two signals. XY mode can be used for sensors to display stress-displacement, flow-pressure, voltage-frequency or voltage- current, for example: plotting a diode curve.
-
Page 87: Zoom Mode
Figure 4-9 XY Time Base Mode Signal, Center on the Display Screen Tap the “Cursor” button to open the horizontal cursor. Set the cursor y2 at the top of the signal and the cursor y1 at the bottom of the signal. Record the Δy value in the upper right corner of the screen. - Page 88 Chapter 4 Horizontal System Figure 4-11 Zoom Interface Zoom window view is the enlarged portion of the normal display window. You can use “Zoom” to view a portion of the normal window that is horizontally expanded to learn more about signal analysis. Zoom on/off: Open the pull-up menu and tap button to turn the zoom function on/off.
- Page 89 Figure 4-12 Open Zoom Function by Three Fingers Sliding Down Zoom window is framed in a box on the normal window, and the other portion is covered by gray shade not displayed in the zoom window. This box shows the normal scan portion that was zoomed in the lower bottom. Tap the time base button to adjust the time base of the zoom window.
-
Page 90: Chapter 5 Vertical System
Chapter 5 Vertical System Chapter 5 Vertical System This chapter contains detailed information about the vertical system of the oscilloscope. It is recommended that you read this chapter carefully in order to understand the setting function and operation of the vertical system of the ATO oscilloscope. -
Page 91: Open/Close Waveform (Channel, Math, Reference Waveforms)
5.1 Open/Close Waveform (Channel, Math, Reference Waveforms) The channel icons on the right side of the oscilloscope waveform display area (tap to switch to math channel and reference channel) correspond to the six channels of CH1, CH2, CH3, CH4, math function and reference channel. Click these six soft keys can cyclically realize the functions: open the channel, open the channel menu, and close the channel. - Page 92 Chapter 5 Vertical System Figure 5-4 Channel Open, Close and Switching Figure 5-5 Using the Current Channel Selection Button Tap the current channel icon at the bottom of the screen to pop up the current channel switching menu and press the button to light it up, as shown in Figure 4-5.
-
Page 93: Adjust Vertical Sensitivity
5.2 Adjust Vertical Sensitivity Tap the vertical sensitivity buttons on the right side of the channel icon to adjust the vertical display of the waveform corresponding to the channel, so that the waveform is displayed on the screen at an appropriate size. -
Page 94: Open Channel Menu
Chapter 5 Vertical System 5.4 Open Channel Menu Tap the channel icon (channel is open) to open the channel menu. The channel menu is shown in Figure 5-7. Channel waveform inversion, channel bandwidth limit, probe type, probe attenuation factor, channel coupling mode, and sampling mode can be set in the vertical menu. Figure 5-7 Channel Switching Icon and Menu 5.4.1 Measured Signal Tap the icon on the right side of "Measured signal"... - Page 95 Figure 5-8 DC Coupling Figure 5-9 AC Coupling Note: This setting is only valid for the current channel. To switch the current channel, just tap the channel icon, channel indicator icon or the horizontal position pointed to by the channel indicator icon to switch directly, without exiting the menu.
-
Page 96: Filter
Chapter 5 Vertical System 5.4.2 Filter Open the channel menu, find the "bandwidth" selection box in the channel menu, and set the bandwidth limit, high- pass filter and low-pass filter as needed. 100M: Allow signals of all frequencies to pass. Low Pass: Only allow signals that are lower than the upper limit of the current set frequency to pass. -
Page 97: Waveform Invert
5.4.3 Waveform Invert After selecting “Invert”, the voltage value of the displayed waveform is inverted. Inversion affects the way the channel is displayed. When using a basic trigger, you need to adjust the trigger level to keep the waveform stable. Figure 5-12 Before Invert Figure 5-13 After Invert... -
Page 98: Set Probe Type
Chapter 5 Vertical System 5.4.4 Set Probe Type Probe types are divided into Voltage, Current and Pressure. Probe type adjustment steps: Open channel menu and find the probe type "probe type" , then select: Figure 5-14 Voltage Probe Figure 5-15 Current Probe Figure 5-16 Pressure Probe... -
Page 99: Set Probe Attenuation Coefficient
5.4.5 Set Probe Attenuation Coefficient When measuring with a probe, the correct measurement result can only be obtained by setting the correct probe attenuation ratio. In order to match the actual probe attenuation ratio, it is necessary to adjust the channel attenuation factor correspondingly under the channel menu. -
Page 100: Chapter 6 Trigger System
Chapter 6 Trigger System Chapter 6 Trigger System This chapter contains detailed information on the oscilloscope trigger system. It is recommended that you read this chapter carefully in order to understand the setting function and operation of the trigger system of the ATO oscilloscope. -
Page 101: Trigger And Trigger Adjustment
6.1 Trigger and Trigger Adjustment What is Trigger? The oscilloscope can capture a waveform only when it meets a preset condition first. This action of capturing the waveform according to the condition is Trigger. The so-called capture waveform is that the oscilloscope grabs a signal and displays it. - Page 102 Chapter 6 Trigger System (2) Grab the segment you want to observe from a fast and complex signal Figure 6-3 Abnormal Signal in Periodic Signals Figure 6-4 Abnormal Signal Captured by Setting Trigger Level What is Forced Trigger? When the oscilloscope does not meet the trigger condition, the artificial or automatic oscilloscope trigger is the forced trigger.
- Page 103 Figure 6-5 Oscilloscope Trigger Mode Setting If a signal feature is not understood, the oscilloscope should be set as “Auto” mode, which can ensure that the oscilloscope can also display the waveform when other trigger settings are not correct. Although the waveform is not necessarily stable, it can provide the intuitive judgment for our further adjustment of the oscilloscope.
- Page 104 Chapter 6 Trigger System Adjust trigger position (horizontal delay) Fingers swipe left and right in the waveform display area, the trigger point will move horizontally, the horizontal delay time changes, and the delay time is displayed at the top center of the screen, that is, the distance between the trigger point and the center line of the waveform display area is displayed.
- Page 105 Adjust trigger level The trigger level can be coarsely adjusted and finely adjusted. Coarse adjustment: Slide up and down in the trigger level adjustment area. Fine adjustment: After moving the trigger level, tap the fine adjustment button in the lower left corner of the screen for fine adjustment of the trigger level.
-
Page 106: Edge Trigger
Chapter 6 Trigger System Trigger hold-offoperation prompt It is typically used for complex waveforms. The correct hold-offsetting is usually slightly smaller than one repetition of the waveform. Setting the hold-offtime to this time can become the only trigger point for the repetitive waveform. Changing the time base setting will not affect the trigger hold-offtime. - Page 107 Set CH1 rising edge trigger and coupling as DC with operation steps as follows: Tap “Trigger” on the main menu to open the trigger menu, select edge trigger in the trigger type, and set edge trigger as follows, as shown in Figure 6-11: ⚫...
-
Page 108: Pulse Width Trigger
Chapter 6 Trigger System 6.3 Pulse Width Trigger The trigger happens when the trigger signal pulse width (8ns~10s, the trigger type indication icon at the top of the screen is ) reaches the set condition and the signal voltage reaches the set trigger level. Pulse width trigger menu is shown in the following table: Trigger Description... - Page 109 Figure 6-13 Pulse Width Trigger Setting Menu Pulse width trigger setting description: Pulse polarity selection The selected pulse polarity icon is displayed in the upper right corner of the display screen. The positive pulse is higher than current trigger level (CH1 positive pulse indication icon ), and the negative pulse is lower than current trigger level (CH1 negative pulse indication icon ).
- Page 110 Chapter 6 Trigger System Trigger condition and pulse width time setting Time restrictions that can set in the trigger condition: <, >, =, ≠. ⚫ Smaller than the time value (<) For example, for positive pulse, if it is set as T<80ns, the trigger will happen stably only when the pulse width is smaller than 80ns (Figure 6-15 Trigger Time T<80ns).
-
Page 111: Logic Trigger
Trigger Figure 6-18 Trigger Time T≠80ns The trigger pulse width time can be set as 8ns~10s. Tap the pulse width time setting box to pop up the time adjustment interface (as shown in Figure 6-19), and adjust the pulse width time. Adjust the pulse width time by adjusting or dragging the time scale. Figure 6-19 Pulse Width Time Adjustment Interface 6.4 Logic Trigger Trigger happens when the level between analog channels satisfies a certain logical operation (AND, OR, NAND,... - Page 112 Chapter 6 Trigger System Select the logic of trigger source as “AND” Select the logic of trigger source as “OR” Trigger Logic NAND Select the logic of trigger source as “NAND” Select the logic of trigger source as “NOR” Change to true value Trigger when the logic changes to true value Change to false value Trigger when the logic changes to false value...
-
Page 113: Nth Edge Trigger
Switch the trigger level channel: Tap the trigger level value shown in the upper right corner. Logic conditions True: Trigger when the logic changes to true value False: Trigger when the logic changes to false value Figure 6-21 Logic Trigger Trigger pulse width time can be set as 8ns~10s. - Page 114 Chapter 6 Trigger System Trigger Setting Description Option Falling edge Set signal trigger on the falling edge Nth Edge 1~65535 Set trigger on Nth edge after idle time Set CH1 to trigger on the 5th rising edge after 500us. The steps are as follows: Tap “Trigger”...
-
Page 115: Runt Trigger
Figure 6-22 Nth Edge Trigger Menu Adjust the trigger level to ensure that the waveform can be triggered stably, for example the trigger level is set to -3.2V. 6.6 Runt Trigger By setting the high and low thresholds, trigger on a pulse that cross one threshold but fail to cross a second threshold. -
Page 116: Slope Trigger
Chapter 6 Trigger System Figure 6-24 Runt Trigger Setting Menu 6.7 Slope Trigger Slope Trigger means trigger when the waveform reaches a set time condition from one level to another. Positive slope time: Time takes for the waveform to go from low to high. Negative slope time: Time takes for the waveform to go from high to low. - Page 117 Trigger Setting Description Option Set CH3 as trigger signal source Set CH4 as trigger signal source Set trigger on positive signal slope Rising Set trigger on negative signal slope Edge Falling Set trigger on detecting a signal slope change <T Trigger when the signal slope hold time is smaller than T >T Trigger when the signal slope hold time is greater than T...
-
Page 118: Timeout Trigger
Chapter 6 Trigger System The slope hold time can be set as 8ns~10s. Note: A stable trigger waveform can only be obtained by selecting the channel to which signals are connected as trigger source. 6.8 Timeout Trigger Timeout trigger happens when the time from the intersection of signal and trigger level and above (or below) the trigger level reaches the set time, as shown in Figure 6-27: Duration Set Level... -
Page 119: Video Trigger
⚫ Edge: positive; ⚫ Timeout time: 8ns; Adjust the trigger level to ensure that the waveform can be triggered stably. Figure 6-28 Time-out Trigger 6.9 Video Trigger The triggering method for video signals depends on video formats. Generally, there are PAL/625, SECAM, NTSC/525, 720P, 1080I and 1080P formats. - Page 120 Chapter 6 Trigger System Trigger Setting Description Option 525/NTSC Based on NTSC signal trigger 720P Base on 720P(50Hz, 60Hz) signal trigger 1080I Base on 1080I(50Hz, 60Hz) signal trigger Base on 1080P (24Hz, 25Hz, 30Hz, 50Hz, 60Hz) 1080P signal trigger Line Trigger lines Trigger on the rising edge of the first tooth pulse in Odd fields...
-
Page 121: Serial Bus Trigger
Figure 6-29 Video Trigger Prompts: ⚫ In order to better observe the waveform details in the video signal, first set the memory depth to be larger. ⚫ During the trigger debugging of the video signal, since the digital oscilloscope has multi-level gray scale display function, different brightness can reflect the frequency of different parts of the signal. -
Page 122: Chapter 7 Analysis System
Chapter 7 Analysis System Chapter 7 Analysis System This chapter contains detailed information on the oscilloscope analysis system. It is recommended that you read this chapter carefully in order to understand the setting function and operation of the analysis system of the ATO oscilloscope. -
Page 123: Automatic Measurement
7.1 Automatic Measurement Measurement setting Slide down from top, open the main menu, tap “Measure” or click on the right side of the screen to enter the measurement menu. There are 23 measurement items on the measurement menu. Measurement menu, selected measurement item display and measurement item display are shown in Figure 7-1: Figure 7-1 Automatic Measurement Menu Automatic measurement... - Page 124 Chapter 7 Analysis System All measurements Slide from bottom, open the pull-up menu, see Figure 7-2, click to open all measurement items, display the current channel measurement value. Switch the current channel to open all the measurement items of other channels, as shown in Figure 7-3;...
- Page 125 Time delay between rising or falling edges of channels may be measured, and there are nine effective measurement combinations Delay Figure 7-4 Delay Measurement Schematics Open the automatic measurement menu and tap to pop up the phase selection menu. The left channel is defaulted as the current channel, and other channels can be selected by the channel area that has been opened (except the reference channel);...
- Page 126 Chapter 7 Analysis System Positive overshoot Positive overshoot =[(max - high) / amplitude]*100% Negative overshoot Negative overshoot =[(low - min) / amplitude]*100% Phase Timing measurement. The amount of time that one waveform leads or lags another waveform, expressed in degrees where 360°comprises one waveform cycle.
-
Page 127: Frequency Meter Measurement
If the waveform required for measurement is not fully displayed on the screen, “Forward Clipping” or “Negative Clipping” is displayed at the position of the measured value. When the math function is operated, if source channel waveform is fully displayed, and the math waveform appears to be off the screen, the measured value of math waveform will not be influenced. - Page 128 Chapter 7 Analysis System Figure 7-7 Cursor Measurement Description Note: △ reading: indicates the difference between two cursor positions. Voltage readings behind Y1, Y2: indicate the position of activated horizontal cursors relative to the zero potential. Time readings behind X1, X2: indicate the position of activated vertical cursors relative to the trigger point. 1/△X: frequency S reading.
- Page 129 Figure 7-8 Open Cursor Selection Box and Close Cursor Vertical cursor movement descriptions: Use a single finger to press and hold the cursor indicator on the screen to make coarse adjustment to the cursor; tap the fine adjustment button in the lower left corner of the screen to fine-adjust the cursor that has just been adjusted.
- Page 130 Chapter 7 Analysis System Figure 7-9 Cursor Measurement Pulse Width In the XY horizontal mode, X cursor displays CH1 value (V or A), and Y cursor displays CH2 value (V or A). Figure 7-10 In XY Mode, Cursor Measurement...
-
Page 131: Chapter 8 Screen Capture, Memory Depth And Waveform Storage
Chapter 8 Screen Capture, Memory Depth and Waveform Storage This chapter contains detailed information about the oscilloscope's screen capture function and record length. It is recommended that you read this chapter carefully in order to understand the storage system of ATO oscilloscopes. ⚫... -
Page 132: Screen Capture Function
Chapter 8 Screen Capture, Memory Depth and Waveform Storage 8.1 Screen Capture Function The screen capture function can store the display information of the current display screen to the local or U disk in picture format. When the U disk is not inserted, the file is stored locally by default. When the U disk is inserted, the file is automatically stored in the U disk. -
Page 133: Waveform Storage
Figure 8-2 Video Recording Please refer to “12.7 Video” for details of viewing videos. 8.3 Waveform Storage The oscilloscope can save the analog channel or math channel waveform locally or in USB device. The file type can be WAV, CSV or BIN. The oscilloscope provides four reference channels, which can be called to load WAV format files into the reference channel and open the reference channel to display the reference waveform. - Page 134 Chapter 8 Screen Capture, Memory Depth and Waveform Storage Figure 8-3 Save CH1 Reference Waveform Interface Location: Stored locally and in USB device. File types: WAV, CSV, and BIN. File name: The initial file name is displayed as year + month + day + storage serial number. Press the file name box to pop up the virtual keyboard, tap “Backspace”...
- Page 135 In the main menu, tap to enter the save menu. In the Save menu, tap to open the Save Reference Waveform menu and make the following settings: ⚫ Storage location: locally. ⚫ Selecting the file type: WAV. ⚫ Entering the file name: CH1. Tap “Save”...
- Page 136 Chapter 8 Screen Capture, Memory Depth and Waveform Storage Figure 8-4 Delete Reference Files CSV files CSV file structure CSV format contains the basic information of the saved data: save time, file name, data length, sampling interval, trigger time, source, vertical scale, vertical offset, vertical accuracy, horizontal time base, horizontal accuracy, probe multiples.
- Page 137 600 and may actually contain up to 60,000 points. However, once the number of points sampled exceeds 60,000, some extraction method is required. The extraction factor used to generate the CSV record is configured to provide the best estimate of all samples represented by each point in the record. Therefore, Min and Max values do not appear in CSV files.
-
Page 138: Chapter 9 Math And Reference
Chapter 9 MATH and Reference Chapter 9 MATH and Reference This chapter contains detailed information on oscilloscope math operations and reference channels. It is recommended that you read this chapter carefully in order to understand the math and reference channel setting functions and operations of the ATO oscilloscope. -
Page 139: Dual Waveform Calculation
9.1 Dual Waveform Calculation Figure 9-1 MATH Channel Waveform Display math waveform on the lower right corner of the screen to enter the second channel selection area. Tap the soft key to open the math channel. After the math waveform is opened, the current channel selector is automatically opened. Tap the math channel icon, open the math channel, and tap again to open the math channel menu. - Page 140 Chapter 9 MATH and Reference The vertical sensitivity, unit and time base corresponding to the math waveform are displayed in the channel area of the math channel. For details, see “2.6 Understand the Oscilloscope Display Interface”. Math waveform units Use “Probe Type” on the channel menu to adjust the channel unit (refer to “4.8 Set Probe Type”) and set the unit of each input channel to Volt or Ampere.
-
Page 141: Fft Measurement
Multiplication or division When multiplication or division is selected, the values of function sources 1 and 2 values will be multiplied or divided point by point and the results will be displayed. Multiplication is useful when viewing the power relationship, if one of the channels is proportional to the current. 9.2 FFT Measurement FFT is used to calculate the Fast Fourier Transform using the analog input channel. - Page 142 Chapter 9 MATH and Reference Each window is alternatively used between frequency resolution and amplitude accuracy, and the appropriate window may be selected according to the characteristics of the following windows. ⚫ Rectangular window This is the best window type for resolution frequencies that are very close to the same value, but this type is the least effective at accurately measuring the amplitude of these frequencies.
- Page 143 Spectrum type Select , the vertical axis reads V or A; select , the vertical axis reads dB. When the spectrum is linear, the waveform is shown in Figure 9-4. Figure 9-4 Spectrum Amplitude as V-Hz Adjust FFT waveforms Waveform position ⚫...
-
Page 144: Reference Waveform Call
Chapter 9 MATH and Reference (using 1:1 probe). Note: FFT waveform does not support automatic parameter measurement. 9.3 Reference Waveform Call Reference waveform call and close in the bottom right corner of the screen to enter the second channel selection area. Tap button to open the reference menu, see Figure 9-5. - Page 145 If there are already files loaded into the reference channel, tap to open the reference channel of all loaded reference files; tap to close all currently opened reference waveforms. A single reference channel may also be opened with the Open/Close button. Figure 9-6 Restore Reference Waveform Close the reference waveform: In the reference menu, tap “Open/Close”...
-
Page 146: Chapter 10 Display Settings And Function Buttons
Chapter 10 Display Settings and Function Buttons Chapter 10 Display Settings and Function Buttons This chapter contains detailed information on the oscilloscope display settings and function keys. It is recommended that you read this chapter carefully in order to understand the display and function key setting functions and operations of the ATO oscilloscope. -
Page 147: Waveform Settings
10.1 Waveform Settings Open the display menu, tap button to open the waveform display menu. This menu is used to set the display mode and brightness of waveform. The waveform display mode is divided into two types: dots and vectors. The waveform brightness percentage is adjustable, and the waveform display setting is shown in Figure 10-2. -
Page 148: Horizontal Expansion Center
Chapter 10 Display Settings and Function Buttons Figure 10-4 20MHz Sine Wave Variable Persistence 500ms Erase persistence To erase the previously acquired results from the display, tap key or adjust the horizontal time base and vertical sensitivity. The oscilloscope will erase the persistence display and start the cumulative acquisition again. -
Page 149: Run/Stop And Single Seq
10.6 Run/Stop and Single SEQ in the right function area to quickly freeze and capture the current signal waveform, tap again, and the waveform will continue to run; Tap to conduct single acquisition, and the oscilloscope will display the single acquisition waveform. For details, please refer to “11.2 Run/Stop and Single SEQ Buttons”... -
Page 150: Chapter 11 Sampling System
Chapter 11 Sampling System Chapter 11 Sampling System This chapter contains detailed information about the oscilloscope acquisition system. It is recommended that you read this chapter carefully in order to understand the setup and operation of the sampling system of the ATO oscilloscope. -
Page 151: Sampling Overview
11.1 Sampling Overview To understand the sampling and sampling modes of the oscilloscope, you need to understand the sampling principle, aliasing, oscilloscope bandwidth and sampling rate, oscilloscope rise time, required oscilloscope bandwidth, and the influence of memory depth on the sampling rate. Sampling principle According to the Nyquist sampling principle, for a bandwidth-limited signal with the maximum frequency f , the... - Page 152 Chapter 11 Sampling System Frequency Figure 11-2 Theoretical Brick-Wall Frequency Response However, digital signals have frequency components that exceed the fundamental frequency (the square wave consists of sine waves at fundamental frequency and an infinite number of odd harmonics), and for bandwidths of 500MHz and below, the oscilloscope typically has Gaussian frequency response.
-
Page 153: Run/Stop Key And Single Seq Key
The following steps can be used to calculate the required oscilloscope bandwidth: Determine the fastest edge speed. Rise time information is typically obtained from the published device specifications used in the design. Calculate the maximum “actual” frequency component. According to Dr. Howard W. Johnson’s book “High-Speed Digital Design–A Handbook of Black Magic”, all fast edges have wirelessly continuous frequency components. -
Page 154: Select Sampling Mode
Chapter 11 Sampling System sequence key for a single acquisition. 11.3 Select Sampling Mode Open the channel menu, tap the sampling mode option under “Sample”, and choose among the four sampling modes: normal, average, peak and envelope in the pop-up box. The sampling modes of all channels are same. - Page 155 Figure 11-4 Sine Wave with Burr, Normal Sampling Mode Figure 11-5 Sine Wave with Burr, Peak Sampling Mode Use Peak detection mode to find burrs Connect signal to the oscilloscope to be stably displayed. To find burr, select the peak sampling mode in Sampling Mode option in the Channel menu. In the menu, tap “Display”...
-
Page 156: Record Length And Sampling Rate
Chapter 11 Sampling System Use the zoom mode to represent the characteristics of burr: Tap the “Zoom” button in the main menu to open the zoom window. To get a better resolution of burr, expand the time base to set the expanded portion of the normal window view around burr. - Page 157 For a single channel in a channel pair, the maximum sampling rate of the ATO series oscilloscope is 1GSa/s. If any two channels are opened, the sampling rate of the two channels will halved. For example, when CH1 and CH3 are opened, the sampling rates of CH1 and CH3 are both 500 MSa/s. If any three channels or all four channels are opened, the sampling rate per channel will become 1/4 of the maximum sampling rate.
-
Page 158: Chapter 12 Homepage Functions
Chapter 12 Homepage Functions Chapter 12 Homepage Functions This chapter contains the functions of the oscilloscope's homepage, and introduces the functions of the icons in the homepage and how to set them. It is recommended that you read this chapter carefully in order to understand the home page function of the ATO oscilloscope. -
Page 159: Oscilloscope (See Chapters 2~13)
12.1 Oscilloscope (see Chapters 2~13) 12.2 Contact us on the home page to find out the contact information of MICSIG. 12.3 File Manager on the home page to enter the file manager interface. The file format includes picture, ref (reference waveform), CSV, bin and video. -
Page 160: Settings
Chapter 12 Homepage Functions 12.4 Settings in the homepage to enter the system setting interface. The setting interface includes brightness, SOUNDS, language, shutdown time, USB, LAN, WLAN, WLAN AP, upgrade and INFORMATION. The system setting interface is shown in Figure 12-3. Figure 12-3 System setting interface Brightness Brightness adjustment method: adjust the brightness of the screen display, drag the "Brightness"... - Page 161 the files in the oscilloscope can be viewed, modified, deleted, and stored in the oscilloscope at the same time. The oscilloscope provides LAN port. Through wired connection, the oscilloscope can be connected to the network. After the LAN connection is set, the online upgrade can be carried out through the network, the internal files of the oscilloscope can be accessed through FTP, and the web interface of the oscilloscope can be accessed.
- Page 162 Chapter 12 Homepage Functions Figure 12-5 WLAN Connection Setting Tap the upper right switch to turn on the WLAN function. The oscilloscope automatically scans the surrounding wireless network and displays the name of the surrounding wireless network according to the list. Tap the wireless network you need to connect, and the password input box will pop up.
- Page 163 U-disk upgrade and online upgrade. Figure 12-7 Upgrade Local upgrade 1) Contact micsig company or download the relevant upgrade package from the website (the latest upgrade package download address: http://www.micsig.com/html/list_60.html). 2) Use USB cable to connect oscilloscope and PC.
- Page 164 The installable options include: 28m storage depth, HDMI, automatic range, frequency meter, WLAN, etc. If you need the optional function service, please contact Micsig to get license and enter the install option function at the license bar.
-
Page 165: Quickguide
12.5 Quickguide on the home interface to view the quick guide of the oscilloscope, and turn the page by sliding left and right. Figure 12-9 Quick Guide 12.6 Photo in the homepage interface to enter the picture viewing interface. Figure 12-10 Picture Viewing Interface... -
Page 166: Video
Chapter 12 Homepage Functions In the picture viewing interface, the picture can be displayed in full screen. When the full screen is displayed, drag the picture left and right to view the previous and next picture. Tap the return key to exit the full screen display. Figure 12-11 Picture Full Screen Viewing Interface In the picture viewing interface, tap the "select"... -
Page 167: Time
In the video viewing interface, tap the video to play back the selected video file, and tap the back button to exit the playback. During video playback, you can pause, and quickly switch to the previous video and the next video by shortcut keys. -
Page 168: Shutdown、Lock Screen And Unlock
Chapter 12 Homepage Functions 12.9 Shutdown、Lock Screen and Unlock Press the side button to enter the shutdown interface. Shutdown includes 4 options: shutdown, restart, screen lock or unlocking. Figure 12-15 Shutdown Interface Shut down: tap to shutdown the oscilloscope. Restart: click to restart the oscilloscope. - Page 169 Figure 12-15 Locking Interface...
-
Page 170: Chapter 13 Serial Bus Trigger And Decode (Optional)
Chapter 13 Serial Bus Trigger and Decode (Optional) Chapter 13 Serial Bus Trigger and Decode (Optional) This chapter contains the detailed information of serial bus decoding. You are recommended to read this chapter carefully to understand the setting and operation of ATO series auto-scope bus trigger and decode. This chapter mainly include the below contents: ⚫... - Page 171 Figure 13-1 Bus Type Selection Menu Open the pull-up menu and tap key to open or close the text mode, as shown in Figure 13-2. Figure 13-2 Bus Decode Text Mode Description: Two decode channels S1&S2 in the text interface must be configured identically to be opened, and each channel is displayed in chronological order with different colors;...
-
Page 172: Uart (Rs232/Rs422/Rs485) Bus Trigger And Decode
Chapter 13 Serial Bus Trigger and Decode (Optional) S1/S2/S1&S2 are the channel configuration bus information, and X knob is rotated or the label is switched to change the bus channel; Clicking save during the text acquisition process can save all currently acquired data. If the date volume is too large, “wait”... - Page 173 Figure 13-4 UART Bus Configuration Menu When word is displayed in ASCII, 7-bit ASCII format is used. Valid ASCII characters are between 0x00 and 0x7F. To display in ASCII, at least 7 bits in the “#Bits” must be chosen. If ASCII is chosen and the data exceeds 0x7F, the data will be displayed in hexadecimal.
- Page 174 Chapter 13 Serial Bus Trigger and Decode (Optional) When there is no parity bit, the data word length is considered to be the length of data bit. For example, if the data word length is 8bit, when there is no parity bit, it means that the total length of data bits is 8bit;...
- Page 175 data bit:55; follow the steps as below: (1) Tap S1 to open the decode channel, and click S1 again to open the bus configuration menu; (2) Select the bus type as “UART”, click “Ch1”, “Idle High”, “Check None”, “8bit”, “19.20kb/s”, display “hexadecimal”, then close menu;...
- Page 176 Chapter 13 Serial Bus Trigger and Decode (Optional) (1) Decode data packet displays real-time data about the bus activities; (2) Decode data displays as hexadecimal system in white; (3) When the word length is 5-8 bits, the decode data displays as two bits of hexadecimal; when the word length is 9 bits, the decode data displays as 3 bits of hexadecimal, and the 9th bit displays at the left side;...
-
Page 177: Lin Bus Trigger And Decode
13.2 LIN Bus Trigger and Decode For correctly decoding LIN bus data and making trigger stable, the bus configuration, trigger mode set and trigger level need to be adjusted. ⚫ Bus configuration Press to open the bus configuration menu, and the following need to be set according to measured signal: Source —... - Page 178 Chapter 13 Serial Bus Trigger and Decode (Optional) Figure 13-10 LIN Trigger Mode Configuration Menu Sync-Rising – When the “Sync Interval” of LIN bus ends, the rising edge triggers. Frame ID — Triggered when a frame with an ID equal to the set value is detected. Select “Frame ID”, click data on the touch screen, and use the pop-up virtual keyboard to modify it.
- Page 179 Figure 13-11 LIN Graphic Interface LIN decode data packet description: (1) Decode data packet displays real-time data about the bus activities. (2) Decode data displays as hexadecimal system. (3) “Frame ID” displays in yellow, “Data” displays in white, and “Parity sum” displays in green. If the parity sum has error, it is displayed in red “E”.
- Page 180 Chapter 13 Serial Bus Trigger and Decode (Optional) “Ch”: bus channel. “Time”: Time intervals between the last frames to current frames. “ID”: Frame ID value. “Data”: Frame data. “Error Check”: Frame parity sum, the sum of parity error displays in red. “Trigger”: “Yes”...
-
Page 181: Can Bus Trigger And Decode
13.3 CAN Bus Trigger and Decode For correctly decoding CAN bus data and making trigger stable, the bus configuration, trigger mode set and trigger level need to be adjusted. ⚫ Bus configuration to open the bus configuration menu, the signal source needs to be set, and the signal type and baud rate are set according to measured signal;... - Page 182 Chapter 13 Serial Bus Trigger and Decode (Optional) Trigger mode selection menu description: F.start — trigger at the start of the frame; Remote ID — setting the ID matches the remote frame trigger. After selecting the “Remote Frame ID”, and then set the ID value at the bottom of the trigger data area Operation description: Press the numbers on the touch screen and use the virtual keyboard to set;...
- Page 183 Figure 13-16 CAN Graphic Interface CAN decode data packet description: (1) Decode data packet displays real-time data about the bus activities. (2) Decode data displays as hexadecimal system. (3) “Frame ID” displays in yellow, “Data” displays in white, and “DLC” and “ CRC” codes display in green.
-
Page 184: Spi Bus Trigger And Decode
Chapter 13 Serial Bus Trigger and Decode (Optional) Figure 13-17 CAN Text Interface CAN text interface description, as shown in Figure 13-17: “Ch”: bus channel. “Time”: Time intervals between the last frames to current frames. “ID”: CAN frame ID value displayed in hexadecimal, maximum 29 bits. “Type”: Frame type, “SFF”... - Page 185 to open the bus configuration menu, the following need to be set: Clock source, data source, chip select signal, and data bits, as shown in Figure 13-18: Figure 13-18 SPI Bus Configuration Menu ⚫ Trigger mode Open the trigger configuration menu and select the appropriate trigger type; when selecting the SPI bus trigger, as shown in Figure 13-19: Figure 13-19 SPI Trigger Mode Configuration Menu The operation method is the same as CAN frame ID to be matched in the configuration, and will not be...
- Page 186 Chapter 13 Serial Bus Trigger and Decode (Optional) trigger mode matches the “Data” at 0001, please follow the steps below: (1) Tap S1 to open the decode channel, and click S1 again to open the bus configuration menu; (2) Select the bus type as “SPI”, click clock as “Ch1” rising edge, the data is “Ch2” high level, and the data word length is “4bit”;...
- Page 187 Figure 13-21 SPI Text Interface SPI text interface description, as shown in Figure 12-21: “Ch”: bus channel. “Time”: Time intervals between the last frames to current frames. “Data”: According to the data word length setting, the decode data is displayed. For example, if the data word length is 8bit, only one byte displays in the data column;...
-
Page 188: I2C Bus Trigger And Decode
Chapter 13 Serial Bus Trigger and Decode (Optional) 13.5 I2C Bus Trigger and Decode For correctly decoding I2C bus data and making trigger stable, the bus configuration, trigger mode set and trigger level need to be adjusted. ⚫ Bus configuration to open the bus configuration menu, Bus configuration includes the serial clock (SCL) and the serial data (SDA) corresponding to the channel settings. - Page 189 Trigger mode menu description: Start — trigger when SCL is high and SDA has a falling edge (includes restart). Stop — trigger when SCL is high and SDA has a rising edge. LostAck — Trigger when the bus Ack bit is high. Restart —...
- Page 190 Chapter 13 Serial Bus Trigger and Decode (Optional) Figure 13-24 I C Graphic Interface I2C decode data packet description: (1) Decode data packet displays real-time data about the bus activities. (2) Decode data displays as hexadecimal system. (3) Address content display: Read address displays in green, write address displays in yellow, and data displays in white.
-
Page 191: Arinc429 Bus Trigger And Decode
I2C text interface description, as shown in Figure 13-25: “Ch”: bus channel. “Time”: intervals between the last read/write operations to current read/write operations “Addr”: in address bar, “R” means the read operation, and “W” means write operation “Data”: data sent by one read and write operation is in the data bar. “Ack”: in Ack bar, “X”... - Page 192 Chapter 13 Serial Bus Trigger and Decode (Optional) Figure 13-26 ARINC429 Bus Configuration Menu ⚫ Trigger mode Open the trigger configuration menu and select the appropriate trigger type; when the ARINC429 bus trigger is selected, click the trigger type and relationship on the screen, as shown in Figure 13-27: Figure 13-27 ARINC429 Trigger Mode Configuration Menu If LABEL, SDI (source identifier), DATA or SSM (symbol/status mark) trigger are used, after selecting trigger mode, use the pop-up virtual keyboard to modify it, enter the value, and click “Enter”...
- Page 193 Label+SDI: Trigger on the specified label and the specified source terminal. Label+Data: Trigger on the specified label and the specified data. LABEL+SSM: Trigger on the specified label and the specified symbol status matrix. Word Err - Triggered when a word error occurs. Gap Err: Triggered when a gap error occurs.
- Page 194 Chapter 13 Serial Bus Trigger and Decode (Optional) ARINC429 decode data packet description: (1) Data packet, a total of 32bits, the data format is 8~1 (label bit, high bit first) +9~10(SD) +11~29 (data bit, low bit first) +30~31 (symbol status bit) +32 (parity bit) (2) Label (8bits) - Displayed in octal: yellow (3) SDI (2bits) - Displayed in binary: blue (4) Data (19bits) - Displayed in selected numeration system: white, or red if there is parity error...
-
Page 195: 1553B Bus Trigger And Decode
13.7 1553B Bus Trigger and Decode For correctly decoding 1553B bus data and making trigger stable, the bus configuration, trigger mode set and trigger level need to be adjusted. ⚫ Bus configuration to open the bus configuration menu, the data source and display hexadecimal need to be set, as shown in Figure 13-30: Figure 13-30 1553B Bus Configuration Menu ⚫... - Page 196 Chapter 13 Serial Bus Trigger and Decode (Optional) of valid C/S sync pulse). Data word sync header: Triggered at the beginning of data word (at the end of valid data sync pulse). Command/status word: Triggered when the specified command/status word is detected. Remote terminal address: Triggered when RTA of command/status word matches the specified value.
- Page 197 1553B decode data packet description: (1) Remote terminal address (5-bit data): blue (2) The value of remaining 11 bits of the command/status word: yellow (3) Decoded data: white (4) If the command/status or data word has a parity error, its decoded text is displayed in red instead of green or white.
-
Page 198: Chapter 14 Remote Control
Chapter 14 Remote Control Chapter 14 Remote Control This chapter mainly covers the application of the host computer, FTP and SCPI commands in order to understand the remote control function of the ATO oscilloscope. ⚫ Host computer (PC) ⚫ Remote control ⚫... -
Page 199: Host Computer (Pc)
The host computer download address http://www.micsig.com/html/list_64.html. Driver download address http://www.ni.com/download/ni-visa-16.0/6184/en/.. Download the host computer software on official website of Micsig, open RemoteDisplaySetup.exe file, and complete the software installation. Figure 14-1 RemoteDisplay Software 14.1.2 Connection of Host Computer... -
Page 200: Main Interface Introduction
Chapter 14 Remote Control the entered IP address. 14.1.3 Main Interface Introduction Figure 14-2 Host Computer Interface Click to exit the host computer software Host computer on/off button The button has two states: Oscilloscope connection status Green: Connect to selected oscilloscope when clicked button Red: Disconnect from oscilloscope when clicked Click to take photo quickly. -
Page 201: Operation Interface Introduction
9. Host computer waveform control area Waveform control area button has the same function with that button on the oscilloscope 14.1.4 Operation Interface Introduction The host computer and the oscilloscope are synchronously displayed, and the waveform operation mode and the menu opening and closing mode are the same as those on the oscilloscope;... -
Page 202: Mobile Remote Control
Figure 14-5 View Pictures 14.2 Mobile Remote Control Micsig ATO1000 series oscilloscopes support remote control on mobile phone. You need to download Android app from the official website of Micsig (address: http://www.micsig.com/html/list_64.html) and install it. After App is successfully connected, Android device can be used to control the oscilloscope and display the... -
Page 203: Ftp
Figure 14-6 Android APP Figure 14-7 Successful Connection of Android APP Android APP can be connected by two methods: Use oscilloscope portable hotspot: Mobile phone can be connected to the hotspot of oscilloscope. Enter the oscilloscope IP 192.168.1.254 in the IP box at the lower right corner of the screen to connect successfully for control;... - Page 204 Chapter 14 Remote Control oscilloscope are in the same network. Input the IP address (FTP:// IP address) displayed on the oscilloscope, and then connect. Figure 14-8 FTP Address Input Enter the username and password of FTP server. The default username and the password are “ftp”. Click Login, and view, call or manage files in the oscilloscope after successful login.
- Page 205 Figure 14-10 View Files WLAN AP Open the WLAN AP on oscilloscope (refer to 12.3 Settings - WLAN AP), connect PC to theWLAN AP of oscilloscope, Enter oscilloscope IP address on PC (ftp://IP address), the default IP is 192.168.1.254. Then connect to FTP server and enter the username and password.
-
Page 206: Scpi
SCPI command can be used to programmatically control ATO1000 Series digital oscilloscopes via the USB interface. ATO1000 Series may communicate with computer through USB device. Note: For more details, the ATO1000 series oscilloscope commands can be downloaded from the official website of Micsig. -
Page 207: Chapter 15 Reference
Chapter 15 Reference 15.1 Measurement Category Oscilloscope measurement category ATO oscilloscope is mainly used for measurement in measurement category I Measurement category definitions Measurement category I is for measurements performed on circuits not directly connected to MAINS. Examples are measurements on circuits not derived from MAINS, and specially protected (internal) MAINS derived circuits. In the latter case, transient stresses are variable;... -
Page 208: Software And Firmware Updates
Such as outdoor places. 15.3 Software and Firmware Updates Micsig often releases software and firmware updates for its products. To search for the firmware update for your oscilloscope, please download it from the website (download address of the latest upgrade package: http://www.micsig.com/html/list_60.html) -
Page 209: Chapter 16 Troubleshooting
Restart the oscilloscope after the checks above; ⚫ Contact Micsig if the problem persists, and we will provide service to you. If acquired waveforms do not display on the screen when the signal source is connected, please follow the steps below: ⚫... - Page 210 Chapter 16 Troubleshooting ⚫ Check whether the coupling mode setting in the channel menu is correct. If there is no display after pressing button: ⚫ Check whether the trigger mode is “Normal”, and whether the trigger level is beyond the scope of the waveform.
- Page 211 automatically standby at the set time. 13. Oscilloscope will automatically shut down after no operation for a period of time: ⚫ Check whether the shutdown time setting is Disabled; if it is not Disabled, it will automatically shut down when the set time is reached. 14.
-
Page 212: Chapter 17 Services And Support
Service Time Commitments : Micsig will give a reply of the time and cost for repair within 3 working days after receiving the product returned by the user for repair. After the reply is confirmed, the repair period for a general fault is 5 working days and shall not exceed 10 working days for any special fault. - Page 213 Annex Annex A:Technical specifications In addition to other notes, all technical specifications are applicable to all models of tbook Mini. To meet the technical specifications, two conditions must be met: The oscilloscope must work continuously for more than 30 minutes within the specified operating temperature range.
- Page 214 Annex Dimension (h * w * d) 250mm*200mm*55mm Oscilloscope (mainbody) 1040g 1125g Oscilloscope specifications single channel 1GSa/s Sampling rate range Double channel 500Msa/S Three / four channels 250Msa/S single channel 28/14m, double channel 14/7m, Recording length three/four channe l7/3.5m Bandwidth limit 100MHz, low pass filter Sampling normal, peak,...
- Page 215 Slope rising edge, falling edge, arbitrary Timeout positive, negative, arbitrary Type: odd field, even field, all fields, all lines, lines Video System: PAL, NTSC, SECAM, 720P, 1080I, 1080P Trigger on sending start bit, stop bit, data, 0 data, 1 UART (RS232/RS422 /RS485) data, X data, parity error within 10 Mb/s Trigger on synchronous rising edge, frame ID, frame...
- Page 216 Annex 4 windows: Rectangle 、 Hanning 、 Hamming 、 Blackman Double waveform +, -, *, / XY mode X-axis input / Y-axis input Channel 1(CH1)/Channel 2(CH2) Storage Waveform Unlimited Picture Unlimited User settings Display Maximum refresh rate 130k/s Persist none,auto、100ms~10s、∞ Waveform display range 14*10 grids Waveform display mode...
- Page 217 Annex B: Maintenance of ATO oscilloscope General maintenance Do not put or leave the instrument in a place where the LCD display will be exposed to direct sunlight for long period. Caution: To avoid damage to the oscilloscope or probes, do not expose them to sprays, liquids, or solvents. Clean oscilloscope Examine the oscilloscope and probes as often as operating conditions require.
- Page 218 Annex Annex C: Accessories Standard accessories 2 pcs for 10X standard probes (incl. grounding cap, grounding aligator clip, standard rubber plug) Power adapter (12V DC, 4A) Power cord ATO calibration certificate ATO packing list Optional accessories Oscilloscope suitcase/handbag Battery Carry strap belt Secondary ignition probe...
- Page 219 The company is not responsible for accidents and hazards caused by users' wrong operations. The copyright of this manual belongs to Micsig. No unit or individual may copy, copy or extract without Micsig's authorization. Micsig reserves the right to prosecute the above actions.
Need help?
Do you have a question about the ATO1000 Series and is the answer not in the manual?
Questions and answers