Mendip Stoves Churchill 5 SE MK4 Dual Control Operation And Installation Manual
Multi-fuel & smoke exemption models
Hide thumbs
Also See for Churchill 5 SE MK4 Dual Control:
- Operation and installation manual (21 pages)

Related Manuals for Mendip Stoves Churchill 5 SE MK4 Dual Control


Summary of Contents for Mendip Stoves Churchill 5 SE MK4 Dual Control
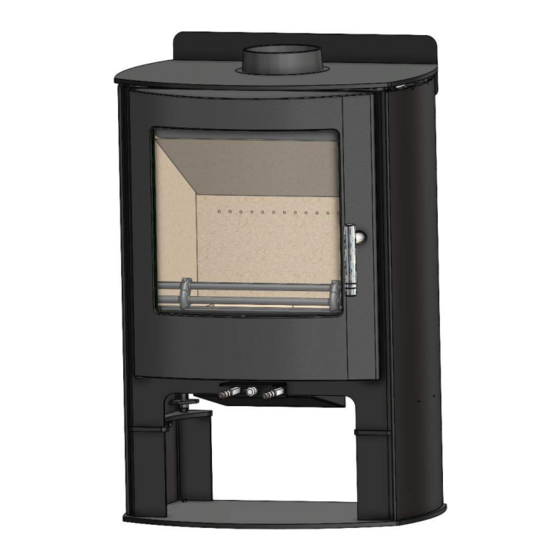
- Page 1 DEC 2021 OPERATION AND INSTALLATION MANUAL MULTI-FUEL & SMOKE EXEMPTION MODELS Churchill 5 SE MK4 Dual Control Churchill 5 Convec�on SE MK4 Dual Control Churchill 5 Convec�on Logstore SE MK4 Dual Control 1 of 28...
- Page 2 THE INTERNAL DIAMETER OF THE STOVE DIMENSIONS AND CONNECTION MEASUREMENTS FLUE COLLAR IS 125mm CHURCHILL RADIANT CHURCHILL CONVECTION 2 of 28...
- Page 3 THE INTERNAL DIAMETER OF THE STOVE DIMENSIONS AND CONNECTION MEASUREMENTS FLUE COLLAR IS 125mm CHURCHILL CONVECTION LOGSTORE The addi�onal, top flue rear convec�on panel The direct air intake spigot (80mm diameter) to (supplied loose within the stove) needs to be used when the rear of the stove is removable with a 2.5mm installing the stove 100mm from a combus�ble wall;...
- Page 4 This manual refers to the stoves listed above, which are tested in accordance with EN 13240. Thank you for purchasing your new stove from Mendip Stoves. Please read this manual carefully to ensure that you get maximum enjoymentand performancefrom yournew stoveand toprevent anypoten�al opera�onal problems.
-
Page 5: Health And Safety Precautions
IMPORTANT: These instruc�ons cover the basic principles to ensure the sa�sfactory installa�on of Mendip Stoves product :- Churchill models, although detail may need slight modifica�on to suit par�cular local site. - Page 6 Mendip Stoves recommend the use of a solid fuel flue lining system for all installa�on into exis�ng chimneys. All chimney systems must be used in accordance with Building Regula�ons Approved Document J.
- Page 7 STOVE PERFORMANCE & TESTING Mendip Stoves, Churchill Dual Control 5kW models are tested in accordance with EN 13240. Output wood Efficiency Suitable for CO@13%O2 Output coal Efficiency CO@13%O2 Dust fuel Defra Smoke Fuel Control Zones Yes / SE Churchill 5 5.0kW...
- Page 8 Churchill 5 Dual Control Convec�on Model INSTALLING THE CHURCHILL CONVECTION IN A CORNER POSITION Churchill 5 Dual Control Convec�on Model Pictured on a 1000mm wide and 1000mm deep glass teardrop floor plate. 8 of 28...
- Page 9 MINIMUM DISTANCE TO NON-COMBUSTIBLE MATERIALS The stove can be recessed in a suitable sized non combus�ble fireplace but a permanent free air gap of at least 50mm must be le� around the sides, the top and the back of the stove; this is to facilitate a reasonable heat output and allows access to the stove for removal and maintenance.
- Page 10 HOW TO FIT A LOGSTORE LEGS Remove the internal components of the stove and Tilt the stove onto it’s side to allow easy and safe fill the chamber with material to prevent the bricks access to the feet. Unscrew the levelling bolts at from falling.
-
Page 11: Commissioning And Handover
Connec�on to chimney Mendip Stoves are built with a top flue outlet as standard, this can be altered to a rear connec�on by removing the top collar, rear cover plate then exchanging collar and plate. Care should be taken to ensure an air�ght fit when refi�ng collar and plate. - Page 12 OPERATING YOUR STOVE - CHURCHILL DUAL CONTROL THE CHURCHILL STOVE HAS THREE AIR CONTROL LEVERS TO HELP REGULATE YOUR STOVE. PRIMARY AIR TERTIARY AIR SECONDARY AIR Pull out for more Pull out for more air, Pull out for less air, push in close air , push in close push in for normal air...
- Page 13 HOW TO LIGHT YOUR WOODBURNING STOVE Note: If the chimney is externally fi�ed or the stove has been installed on a larger diameter clay chimney liner then on cold days it maybe necessary to warm the flue using firelighters prior to ligh�ng with wood.
-
Page 14: Warning Note
DO NOT BURN HOUSE COAL. DO NOT BURN HOUSEHOLD WASTE. THIS APPLIANCE IS NOT AN INCINERATOR MENDIP STOVES RECOMMEND THE USE OF A FLUE THERMOSTAT TO CHECK YOUR STOVE IS NOT OVERHEATING. PLACE FLUE THERMOSTAT DIRECTLY ABOVE COLLAR OF STOVE AND REFER TO TEMPERATURE GAUGE ON PAGE 6. -
Page 15: Troubleshooting
RE-FUELLING WHEN BURNING WOOD Adding fuel to your stove when you only have glowing embers,and the flames have died down, is the cleanest way to refuel your stove. 1. Before refuelling, Pull open both the Primary and Secondary controls fully. 2. - Page 16 Wood burns more efficiently and cleanly if it is burnt ho�er. Mendip stoves do not recommend that their stoves are burnt overnight for this reason. As a night �me regime we recommend that the fire is loaded when hot and burnt for five minutes with the secondary air control fully open, un�l the new wood has taken and is burning, Then place the Secondary Air...
-
Page 17: Maintenance
MAINTENANCE Mendip stoves recommends that your model needs to have the ash removed from the stove at regular intervals (weekly if used daily). Allowing the ash pan to over flow can impede the func�on of the stove and can cause possible damage to the stove grate and ash pan. - Page 18 More informa�on regarding authorised fuels can be found at h�p://smokecontrol.defra.gov.uk/fuels.php The SE appliances need no modifica�on to the air control, altera�ons should not be a�empted. Mendip Stoves smoke control stoves should not be burnt with the door le� open. The refuelling procedure : Allow the newly charged fuel to burn with the secondary air control set at maximum for up 3 to 4 minutes.
-
Page 19: Loose Parts
STOVE PARTS, COMBUSTION CHAMBER, ASSEMBLY "This sec�on shows the parts contained in your stove, each stove has over 80 spare-parts and, each part is detailed. When new parts are required the sec�on will allow spares to be recognised and ordered. As a further source of reference please visit www.eurostove.co.uk for latest spare-part informa�on. - Page 20 HOW TO REMOVE THE WOODBURNERS INTERNAL PARTS To remove the vermiculite brick set take the following steps: Remove the log guard. Li� out the 2 base bricks next to the grate. Remove the le� hand vermiculite side brick by li�ing the top baffle brick and pulling the side brick down from the top.
- Page 21 VERMICULITE BRICK SET PART NUMBERS VERMICULITE BRICKS REFERENCE TABLE Diagram No. Part No. Descrip�on No. Of Parts ES-500-400-1 Full Brick Set - Churchill 5 ES-500-412-1 Rear Brick ES-500-413-1 Baffle Brick ES-500-414-1 Right Side Brick ES-500-415-1 Le� Side Brick ES-500-417-1 Base Brick Side ES-500-417-2 Base Brick Rear ES-500-420-0...
- Page 22 STOVE PART NUMBERS See Page 20 See Page 22 22 of 28...
- Page 23 STOVE PART NUMBERS Diagram No. Part No. Descrip�on ES-500-187-0 Top Flue Rear Convec�on Panel EST_2051_000_11_3 Flue Collar M90500-07-03-00-04 Flue Cover Plate M90500-07-10-01-01 Collar/Blanking Plate Seal ES-500-142-0 Flue Blanking Plate CH-500-180-0 Secondary Air Smoke Deflector ES-500-117-0 Turbulence Plate B90300-05-01-00-00 Grate ES-500-147-0 Grate Support ES-500-140-1 Log Retainer...
- Page 24 CHURCHILL 5 MK.4 DOOR ASSEMBLY - (Complete CH-500-300-0) Diagram No. Part No. Descrip�on CH-500-209-0 Door Handle CH-500-120-0 Glass Clamp CH-500-201-0 Door Frame (only) M90502-01-01-99-03 Glass (bowed) M90520-06-02-01-05 Door Rope Seal Kit M90520-06-13-99-02 Handle Fixing Kit M90026-01-02-01-04 Glass Seal Kit (incl. 6 Clamp Pads) CH-500-116-0 Secondary Air Wash Guide Plate Not Pictured...
- Page 25 25 of 28...
- Page 26 26 of 28...
- Page 27 27 of 28...
- Page 28 Mendip Stoves Unit H1 Mendip Industrial Estate Mendip Road Rooksbridge Somerset BS26 2UG Website www.mendipstoves.co.uk Email info@eurostove.co.uk Telephone 01934 750 500 691046 759511 Part of the Eurostove Ltd CODE: M10530-49-00-99-01 CHURCHILL DC Mk.4 Manual - Version 1 - Dec 2021...
Need help?
Do you have a question about the Churchill 5 SE MK4 Dual Control and is the answer not in the manual?
Questions and answers