
Related Manuals for Mendip Stoves Christon 400


Summary of Contents for Mendip Stoves Christon 400
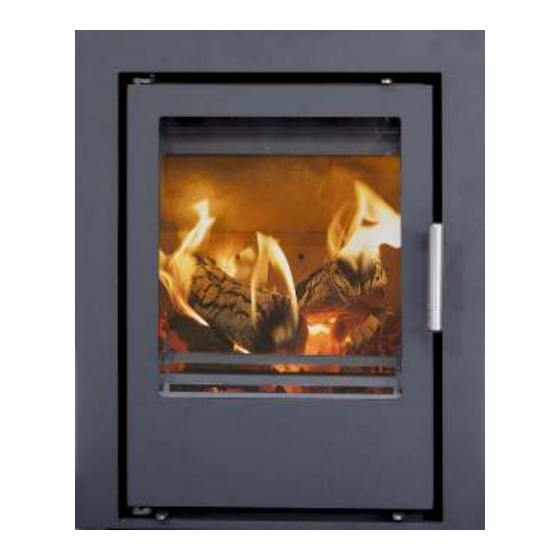
- Page 1 OPERATION AND INSTALLATION MANUAL Mul�-fuel and SE models Christon 400 Inset Stove 3 Sided FRAME 4 Sided FRAME February 2022 1 of 28...
- Page 2 102 CERTIFICATE Declaration of performance according to Regulation (EU) 305/2011 No. 300-ELAB-2436-EN PRODUCT Type Wood burning insert Christon 400 Trade name Heating of rooms in residential buildings Intended area of use Fuel Wood MANUFACTURER Mendip Stoves Ltd. Name Address Unit H1, Mendip Industrial Estate, Mendip Road, Rooksbridge, Somerset.
- Page 3 This manual refers to the stove listed above, which is tested in accordance with EN 13240. Thank you for purchasing your new stove from Mendip Stoves. Please read this manual carefully to ensure that you get maximum enjoyment and performance from your new stove and to prevent any poten�al opera�onal problems. Please note that “all local regula�ons, including those referring to na�onal and European Standards, need to be complied with when...
-
Page 4: Build In Dimensions
STOVE PERFORMANCE & TESTING Mendip Stoves, Christon 400 models are tested in accordance with EN 13240. Output Efficiency CO@13% Recommended for smoke Output coal Efficiency CO@13% O₂ wood fuel O₂ control Oct 2016 fuel Christon 4.6kW 78.2% 0.10 Yes / SE model 3.7kw... -
Page 5: Health And Safety Precautions
IMPORTANT: hese instruc�ons cover the basic principles to ensure the sa�sfactory installa�on of Mendip Stoves product :- Christon 400 models, although detail may need slight modifica�on to suit par�cular local site condi�ons. In all cases the installa�on must comply with current Building Regula�ons, Local Authority Byelaws and other specifica�ons or regula�ons as they affect the installa�on of the stove. - Page 6 Older proper�es, especially, may have chimney faults or the cross sec�on may be too large . Mendip Stoves recommend the use of a solid fuel flue lining system for all installa�on into exis�ng chimneys. All chimney systems must be used in accordance with Building Regula�ons Approved Document J.
-
Page 7: Installation Instructions
INSTALLATION INSTRUCTIONS Each installa�on is unique to the property so it is not possible to give details to suit every se�ng. The installa�on must comply with local and na�onal Building Regula�ons and be made using best prac�ce construc�on methods. Many fireplace openings have a suppor�ng lintel. Do not remove without suppor�ng the remaining structure of the building. - Page 8 All open flued appliances can be affected by temporary atmospheric condi�ons which may allow fumes to enter the house. Building regula�ons require that whenever a new or replacement fixed solid fuel or wood/biomass appliance is installed in a dwelling a carbon monoxide alarm must be fi�ed in the same room as the appliance. Further guidance on the installa�on of the carbon monoxide alarm is available in the latest edi�on of BS EN50292 and from the alarm manufacturer's instruc�ons.
- Page 9 Recess example Christon 400 Thedimensionsarethe minimumdimensions, unlessotherwisestated. Wallofcombustiblematerial Wallofnon-combustiblematerial,madeof 100mm aeratedconcreteintherecess example. Wallofnon-combustiblematerialthatisnot incontactwithcombustiblematerialand thereforehasnominimumthickness requirement. Register Plate Insulation If a secondary lintel is to be fitted with only a single thickness of brick to be used as the closure, the inner face of the bricks 50mm should be faced with insulation material e.g Rockwool, to...
- Page 10 Housing Construc�on, without an Exis�ng Chimney Breast If the property has no exis�ng chimney or chimney breast the first considera�on will be the posi�oning of the flue. Taking the flue to the roof internally through the property will involve complying with many regula�ons and even an external flue may be subject to planning regula�ons.
- Page 11 The insula�ng proper�es of many modern houses are extremely high and Inner skin of plasterboard many external walls are now constructed with an inner skin of plasterboard, supported on a wooden frame which is thermally insulated from the outer skin of brick. Having such a low thermal conduc�vity makes it impossible to use the outer wall as the back of the stove’s housing unless a means of ensuring that non of the heat from the stove is transferred to the house wall.
- Page 12 Remove all the internal components from the stove Prior to installing the outer convector box and stove carefully remove all the components from the stove and put somewhere where they will not become damaged. Follow the instruc�ons on page 27 of this manual. Inner baffle Lower baffle Rear right side...
- Page 13 Flue collar direc�on Ver�cal connec�on 45°connec�on 180° The flue direc�on can be changed from the ver�cal to a 45°connec�on by li�ing out the flue collar and fixing plate and turning it through 180°. Take the flue adapter off the stove. Op�onal fresh air kit Fresh air spigot supplied with the...
- Page 14 Securing the outer convector box Fit the outer convector box into the opening and mark the posi�on of the 2 holes on the base below. Remove the outer convector box and drill the holes into the base below. Using masonry anchor bolts secure the box to the base. Securing the stove Slide the stove into the outer convector box ensuring the 2 loca�on and securing brackets align...
-
Page 15: Combustion Air
This can be connected to the outside via a 80mm pipe so the appliance does not draw air from the room. However Mendip stoves s�ll recommends the use of an air brick as laid out in Document J for when the stove is being reloaded. - Page 16 OPERATING YOUR STOVE - CHRISTON 400 Suitable fuels Your stove is tested to burn wood or registered smokeless coal. Wood brique�es can also be burnt but special account should be taken of fuel weight. For a full list of suitable fuels, check with the official solid fuels approvals body, HETAS or Solid Fuel Associa�on.
- Page 17 OPERATING YOUR STOVE - CHRISTON 400- AIR CONTROLLER Secondary air slide right to open Door handle Starting point 1st catch Primary air:- Pull out to open Wood/coal Posi�on 1 Min / Posi�on 3 Min Posi�on 2 Max / Posi�on 4 Max Primary air Control settings When burning wood use posi�on 1 to posi�on 2...
- Page 18 Fully open the secondary air control above the stove door on right hand side. Fully open primary air control at base le� of stove. The Christon 400 air controls are now fully open.
- Page 19 Your local authority is responsible for implemen�ng the Clean Air Act 1993 including designa�on and supervision of smoke control areas and you can contact them for details of Clean Air Act requirements. The Christon 400 SE models have been recommended as suitable for use in smoke control areas when burning wood logs.
- Page 20 Please use the glove and opera�ng tool supplied when opera�ng air controls and door. SOLID SMOKELESS FUELS- Christon 400 models are suitable for use with good quality smokeless fuels and have been fully tested to the relevant European standard. Only use registered smokeless fuels on this stove. Take special note of load quan��es in front of this book.(page 6)
-
Page 21: Overnight Burning
OVERNIGHT BURNING Mendip stoves do not recommend burning registered smokeless coal in a slumbering posi�on, Mendip stoves are designed to burn wood and quality registered smokeless fuels. Wood burns more efficiently and cleanly if it is burnt ho�er. Mendip stoves do not recommend that their stoves are burnt overnight for this reason. -
Page 22: Troubleshooting
TROUBLE SHOOTING 1. Fire Will Not Burn - check 3) Soot forms on the window a) the air inlet is not obstructed in any way, a) The firewood may be too wet b) that chimney and flue ways are clear, b) the intake of secondary air may be insufficient c) that a suitable fuel is being used, c) fire not hot enough... -
Page 23: Maintenance
MAINTENANCE Mendip stoves recommends that your model needs to have the ash removed from the stove at regular intervals (weekly if used daily). Allowing the ash pan to over flow can impede the func�on of the stove and can cause possible damage to the stove grate and ash pan. -
Page 24: Loose Parts
STOVE PARTS, COMBUSTION CHAMBER, ASSEMBLY "This sec�on shows the parts contained in your stove, each stove has over 80 spare-parts and, each part is detailed. When new parts are required the sec�on will allow spares to be recognised and ordered. As a further source of reference please visit www.eurostove.co.uk for latest spare-part informa�on. - Page 25 CHRISTON COMBUSTION CHAMBER Christon 400 Complete brick set code: W13500-02-00-99-01 W13500-02-05-99-00 W13500-02-04-99-00 W13500-02-24-99-00 W90400-02-25-00-00 W13500-02-03-99-00 W13500-02-44-00-00 W13500-02-55-99-00 W13500-02-17-99-00 W92300-05-07-00-00 W13500-04-00-00-00 W13500-02-24-99-00 W90400-05-02-00-00 Part Code Part Code Door Glass M10540-01-01-99-00 Ashpan W13500-03-00-00-00 Door rope seal W13500-06-02-00-00 Handle M10540-06-04-99-00 Glass rope seal...
- Page 26 HOW TO REMOVE A VERMICULITE BRICK SET To remove a vermiculite brick set take the following steps. Ensure the stove is cold before removing brick set. Remove ashpan and log retainer , To remove log retainer li� out individual bars, then li� out metal support sec�on Remove lower baffle brick, slide baffle plate forward, then allow rear of baffle to drop down un�l baffle is ver�cal turn baffle and remove from...
- Page 27 HOW TO REMOVE A VERMICULITE BRICK SET Li� out the grate followed by the grate frame Remove the 4 firebricks that surround the grate. Remove side rear le� brick then remove side rear right brick. Remove side right front brick then remove side le� front brick. Remove rear brick.
- Page 28 Unit H1, Mendip Industrial Estate, Mendip Road, Rooksbridge, Somerset BS26 2UG Tel: 01934 750 500 Fax: 01173 156 207 www. Mendipstoves.co.uk E-mail : info@mendipstoves.co.uk Part of Eurostove group Mendip Stoves Ltd, 2016, ver 2.0 May 2022 CODE: M10540-49-00-99-00 28 of 28...
Need help?
Do you have a question about the Christon 400 and is the answer not in the manual?
Questions and answers