Table of Contents
Advertisement
Quick Links
Advertisement
Table of Contents

Related Manuals for BenQ LU9255


Summary of Contents for BenQ LU9255
- Page 1 Digital Projector User Manual LU9255 V1.00...
-
Page 2: Copyright And Disclaimer
Any third party content or service preinstalled in this product is provided "as is". BenQ does not, by expression or by implication, make any warrant to the content or to the services provided by third parties. -
Page 3: Table Of Contents
Table of Contents Copyright and disclaimer .............. 2 Copyright ..............................2 Disclaimer ..............................2 Statement regarding hyperlinks and third-party websites ............2 Important safety instructions ............6 General safety instruction .................... 6 Notice on laser ....................... 7 Laser class ..............................7 Laser parameters ........................... - Page 4 Connecting with HDBaseT transmitter ................... 31 Connecting with LAN........................... 31 Operations ..................32 Switch on/off the projector ................... 32 Connecting the power cord ........................ 32 Power indicator ............................32 Switch on the projector ........................33 Switch off the projector ........................39 Using the menu ................
- Page 5 Burn-In Messages ........................... 71 Lamp Error Messages..........................72 Thermal Error Messages ........................72 Troubleshooting ................74 Troubleshooting ......................74 The projector does not turn on......................74 No picture............................... 74 Blurred image............................74 Remote control does not work......................74 The password is incorrect.
-
Page 6: Important Safety Instructions
Important safety instructions Your projector is designed and tested to meet the latest standards for safety of information technology equipment. However, to ensure safe use of this product, it is important that you follow the instructions mentioned in this manual and marked on the product. General safety instruction 1. -
Page 7: Notice On Laser
10. Do not place liquids near or on the projector. Liquids spilled into the projector may cause it to fail. If the projector does become wet, disconnect it from the power supply's wall socket and call BenQ to have the projector serviced. This equipment has a three-pin grounding-type power plug. Do not remove the grounding pin. -
Page 8: Label Instruction
а а а / Digital Projector / Proyektor / Projecteur digital / Ц Model Name / Nama Model / Nom du modèle / М LU9255 P/N/ 9H.JMH77.26E Power Rating / Nilai Daya / Puissance nominale / Д а а а... -
Page 9: Laser Light Instruction
Laser light instruction Below drawing is the laser aperture location. Be careful not to let the eye see the light directly. Laser aperture Interlock switches This machine has 2 (Top cover x 1, Lens x 1) Interlock switches to protect the laser light Leakage. 1. -
Page 10: Prepare For Installation
Prepare for installation Caution for installation 1. If the projector and lens were purchased separately, remove the anti-dust cap before use and store it for future use. When transporting the projector, move the lens to the home position, remove the lens, and attach the anti-dust cap. Anti-dust cap 2. -
Page 11: Cooling Notice
Cooling notice Allow at least 50 cm (19.7 inch) for clearance around the exhaust vent. Make sure no objects block air input within 30 cm (11.8 inch). Keep the outlet at least 1 m away from the inlets of other projectors. Air inlet Air inlet Air outlet... - Page 12 • Allow at least 50 cm of clearance around the exhaust vent. Minimum 50 cm Minimum 50 cm Minimum 50 cm (19.69 inch) (19.69 inch) (19.69 inch) Minimum 50 cm (19.69 inch) Minimum 100 cm (3.94 inch) Minimum 50 cm (19.69 inch) Minimum 30 cm (11.81 inch)
-
Page 13: Package Contents
Package contents Standard packing items 3pin VESA to BNC Cable Lens information Part Model Lens Type Throw Ratio Lens Shift Number Vertical: -15%-55% LS2ST1 Wide zoom 5J.JDH37.011 WUXGA: 1.1-1.3 Horizontal: -5%-5% Vertical: -15%-55% LS2SD2 Standard 5J.JEN37.001 WUXGA: 1.54-1.93 Horizontal: -5%-5% Vertical: -15%-55% LS2LT1 Semi long... -
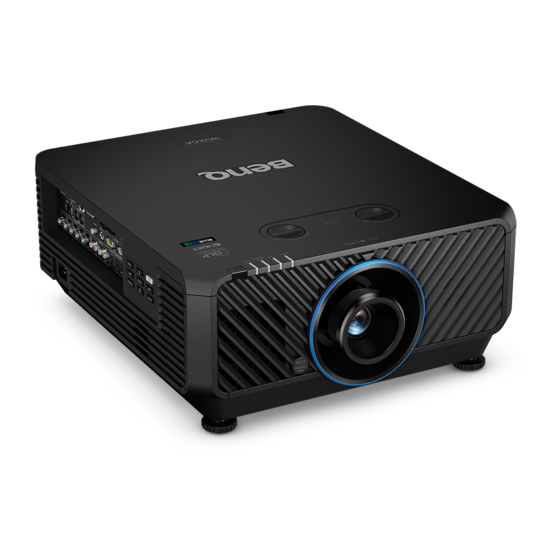
Page 14: Introduction
Introduction Projector exterior view Front and upper side view 1. Front IR remote sensor 2. FILTER indicator light 3. LIGHT SOURCE indicator light 4. TEMPerature indicator light 5. POWER indicator light 6. Front vent (cool air intake) 7. Front adjuster foots 8. -
Page 15: Controls And Functions
Controls and functions Control panel • MENU Turns on the On-Screen Display (OSD) menu. Goes back to previous OSD menu, exits and saves menu settings. See "Using the menu" on page 40 for details. Keystone/Arrow keys ( /◄ Left) • Manually corrects distorted images resulting from an angled projection. -
Page 16: Control Terminal
Make sure the port is valid before inserting a wired remote controller. The remote controller may be damaged in case of an invalid port, e.g. a wired remote controller is connected to trigger output. For more information about upgrading firmware via Lan, please contact BenQ service. -
Page 17: Remote Control
Remote control • ON / OFF Toggles the projector between standby mode and on. • KEYSTONE+/KEYSTONE- Manually corrects distorted images resulting from an angled projection. • VOLUME +/VOLUME - Increases/decreases the projector volume. QUICK INSTALL • Displays the Quick Install OSD menu. •... - Page 18 • OVERSCAN Press to select overscan mode. FREEZE • Freezes the projected image. • LAMP MODE Press to display OSD menu to select desired light mode. 3D MODE • Press to display 3D setup menu. • INFO. Press to display INFORMATION menu. LIGHT •...
- Page 19 Connect with projector When you use a system with multiple projectors, use commercially available M3 stereo mini jack cables to connect the other projectors via the WIRED REMOTE IN/WIRED REMOTE OUT terminals. The remote control is effective even in places where obstacles stand in the light path or where devices are susceptible to outside light.
- Page 20 Replacing the remote control battery 1. To open the battery cover, turn the remote control over to view its back, push on the finger grip on the cover and slide it up in the direction of the arrow as illustrated. The cover will slide off.
-
Page 21: Installation
Installation Caution: To avoid damaging the DLP chips, never aim a high-power laser beam into the projection lens. Installing removing the optional lens Caution: • Do not shake or place excessive pressure on the projector or the lens components as the projector and lens components contain precision parts. -
Page 22: Removing The Existing Lens From The Projector
Removing the existing lens from the projector 1. Push the LENSE RELEASE button to the unlock position. 2. Grasp the lens. 3. Rotate the lens counterclockwise. The existing lens will be disengaged. 4. Pull out the existing lens slowly. -
Page 23: Evaluate For Distance By Image Size
*** "A" is based on maximum lens shift offset position 55% LU9255 The screen aspect ratio is 16:10 and the projected picture is 16:10. Note: To optimize the projection quality, we suggest to project images in an area without grayscale. - Page 24 17.23 Note: There is 5% tolerance among these numbers due to optical component variations. BenQ recommends that if you intend to permanently install the projector, you should physically test the projection size and distance using the actual projector before you permanently install it, so as to make allowance for this projector's optical characteristics. This will...
-
Page 25: Lens Dimension
Lens dimension Optional Lens (Standard: LS2SD2) Optional Lens (Wide Zoom: LS2ST1) 525.11 (20.67) 525.11 (20.67) 531.91 (20.94) 596.90 (23.5) Standard Lens Wide Zoom Lens Optional Lens (Long Zoom: LS2LT2) Optional Lens (Semi Long Throw: LS2LT1) 525.11 (20.67) 525.11 (20.67) 576.50 (22.69) 546.53 (21.51) Long Zoom Lens Semi Long Throw Lens... -
Page 26: Adjusting By Lens Shift
Adjusting by Lens shift Horizontal lens shift lever Vertical lens shift lever The Lens Shift function can be used to adjust the position of the projected image either horizontally or vertically within the range detailed below. Adjusting the vertical image position The vertical image height can be adjusted between 55% and -15% for WUXGA of offset position. -
Page 27: Lens Shift Range Diagram
Lens shift range diagram Normal projection position Vertical shift Desk-Front Projection Max 0.55V Height of projected image Vertical shift Max 0.15V 0.05H 0.05H Width of projected image Ceiling Mount-Front Projection Vertical shift Height of projected image Shift to Left Shift to Right Max 0.55V Vertical shift Notice (when edge blending) -
Page 28: Connection
Connection Before connecting • Before connecting, carefully read the operating instructions for connecting the external device • Turn off the power to all devices before connecting cables. • Take note of the following before connecting cables. Failure to do so may result in malfunctions. - Page 29 HDMI 1 Serial Serial TMDS Data2+ TMDS Clock Shield TMDS Data2 Shield TMDS Clock- Even-numbered pins of 2 to 18 TMDS Data2- TMDS Data1+ Reserved (N.C. on device) TMDS Data1 Shield TMDS Data1- TMDS Data0+ DDC/CEC Ground TMDS Data0 Shield +5 V Power (max 50 mA) Odd-numbered pins of 1 to 19 TMDS Data0-...
-
Page 30: Connecting With Av Equipment
Connecting with AV equipment DVD player with HDMI VCR (with built-in TBC) terminal (HDCP) Blu-ray disc player Connecting with computer Monitor Control Computer Computer... -
Page 31: Connecting With Hdbaset Transmitter
Connecting with HDBaseT transmitter DVD Player DVD Player VGA Cable HDBaseT transmitter VGA IN YPbPr RJ45 HDMI RS-232 RJ45 Control PC RS-232 RJ45 Cat5e or above Control PC Projector Connecting with LAN... -
Page 32: Operations
Operations Switch on/off the projector Connecting the power cord Plug the power cord into the projector and into a wall socket. Turn on the wall socket switch (where fitted). Check that the POWER indicator light on the projector lights orange after power has been applied. -
Page 33: Switch On The Projector
Switch on the projector POWER on the projector or ON on the remote control to start the projector and Press a start up tone sounds. The POWER indicator light flashes green and stays green when the projector is on. The start up procedure takes about 30 seconds. In the later stage of start up, a startup logo is projected. - Page 34 Select language To use the OSD menus, please set them to your familiar language first. *After this process is done, this menu will not show up again after 1st time adjustment unless user presses Reset All Settings. 1. Press ENTER on the projector or remote control to turn the OSD menu on.
- Page 35 2. Use ◄/► to highlight the System Setup: Basic menu. 3. Press ▼ to highlight Language and press ENTER to select a preferred language. 4. Press ENTER twice* on the projector or remote control to leave and save the settings. *The first press leads you back to the main menu and the second press closes the OSD menu.
- Page 36 Purchase the BenQ Projector Ceiling Note that a special rear projection screen Mounting Kit from your dealer to mount and the BenQ Projector Ceiling Mounting your projector on the ceiling. Kit are required for this installation *Set Front Ceiling in the SYSTEM location.
- Page 37 Using test pattern The projector is capable of displaying the grid test pattern. It can be used to assist you with the adjustment of image size and focus, ensuring that the projected image is free from distortion. To display the test pattern, open the OSD menu and go to the System Setup: Advanced > Test Pattern and press ◄/►...
- Page 38 3. Press ▲/▼/◄/► to select one of the four corners and press ENTER. 4. Press ▲/▼ to adjust vertical values from 0 to 60. 5. Press ◄/► to adjust horizontal values from 0 to 60. Auto adjusting the image In some cases, you may need to optimize the picture quality. To do this, press AUTO on the projector or remote control.
-
Page 39: Switch Off The Projector
Fine turning the image size and clarity 1. Adjust the projected image to the size that you need using the ZOOM ring. 2. Sharpen the image by rotating the FOCUS ring. Focus ring Zoom ring Switch off the projector 1. Press POWER or OFF and a confirmation message will appear prompting you. -
Page 40: Using The Menu
Using the menu Main menu The projector is equipped with On-Screen Display (OSD) menus for making various adjustments and settings. Below is the overview of the OSD menu. Main menu icon Main menu Sub-menu Status Press MENU to Current input the previous page signal or to exit. -
Page 41: Display Menu
Display menu Wall Color • Press ◄/► to correct the image color bias reflected by the wall. The options are Off, Light Yellow, Pink, Light Green, Blue and Blackboard. • Aspect Ratio Press ◄/► to adjust the aspect of the projected image. The options are Auto, Real, 4:3, 16:9, 16:10 and 2.35:1. - Page 42 3. 4:3: Scales an image so that it is displayed in 4. 16:9: Scales an image so that it is displayed the center of the screen with a 4:3 aspect in the center of the screen with a 16:9 ratio. This is most suitable for 4:3 images aspect ratio.
-
Page 43: Corner Fit Menu
Corner Fit menu • Top Left Press ENTER and press ▲/▼/◄/► to correct the top left corner. • Top Right Press ENTER and press ▲/▼/◄/► to correct the top right corner. • Bottom Left Press ENTER and press ▲/▼/◄/► to correct the bottom left corner. •... -
Page 44: Blanking Menu
Blanking menu • Press ◄/► to adjust the top blanking area on the projected picture. • Bottom Press ◄/► to adjust the bottom blanking area on the projected picture. • Left Press ◄/► to adjust the left blanking area on the projected picture. •... -
Page 45: 3D Menu
3D menu 3D Sync Mode • Press ◄/► to select the 3D sync mode. The options are DLP Link and VESA 3D. • 3D Mode Press ENTER to enter the 3D Mode menu. Press ▲/▼ to select the 3D format. The options are Auto, Top-Bottom, Frame Sequential, Frame Packing, Side-By-Side and Off. -
Page 46: Picture Menu
Picture menu Picture Mode • Press ◄/► to select a picture mode. The options are Bright, Presentation, sRGB, Vivid, Cinema, DICOM SIM, 3D, HDR10, HLG, User 1 and User 2. Bright mode: Maximizes the brightness of the projected image. This mode is suitable for •... - Page 47 Brightness • Press ◄/► to adjust the brightness of the projected image. The higher the value, the brighter the image. And lower the setting, darker the image. Adjust this control so the black areas of the image appear just as black and that detail in the dark areas is visible.
-
Page 48: Color Temperature Fine Tuning Menu
3D Color Management • Press ENTER to enter the 3D Color Management menu. See "3D Color Management menu" on page 49 for more details. • Reset Picture Settings Press ENTER to enter the Reset Picture Settings menu. Press ▲/▼ and press ENTER to set to the default value. -
Page 49: 3D Color Management Menu
3D Color Management menu • Primary Color Press ENTER to enter the Primary Color menu. Press ▲/▼ to select the primary color. The options are R, G, B, C, M, Y, and W. When Primary Color select R, G, B, C, Y and M, Adjusting Hue, Saturation and Gain. •... -
Page 50: Source Menu
test the color presentation on monitors, TVs, projectors, etc. You can project any image from the disc on the screen and enter the 3D Color Management menu to Yellow GREEN make adjustments. To adjust the settings: 1. Go to the Picture menu and highlight 3D Color White Management. - Page 51 HDMI Format • Press ◄/► to selects a suitable color format to to optimize display quality. The options are Auto, RGB Limited, RGB Full, YUV Limited and YUV Full. Auto: Automatically selects a suitable color space and gray level for the incoming HDMI •...
-
Page 52: System Setup : Basic Menu
HDBaseT EDID • Press ◄/► to switch HDBaseT EDID between HDMI 1.4 or HDMI 2.0 in order to solve compatibility issue with uncertain old players. Enhance: Enhanced mode can switch to HDMI 2.0 EDID. • • Standard: Standard mode can switch to HDMI 1.4 EDID. •... -
Page 53: Menu Settings Menu
Press ◄/► to select the background color when no input signal. The options are BenQ, Black, Blue and Purple. • Splash Screen Press ◄/► to select the start up patern when the projector turns on. The options are BenQ, Black and Blue. Menu Settings menu Menu Display Time •... - Page 54 Blank Timer • Press ◄/► to set the length of time the image is blanked. The options are Disable, 5 mins, 10 mins, 15 mins, 20 mins, 25 mins and 30 mins. • Sleep Timer Press ◄/► to set the length of time before the projector is turned off. The options are Disable, 30 mins, 1 hr, 2 hrs, 3 hrs, 4 hrs, 8 hrs and 12 hrs.
-
Page 55: System Setup : Advanced Menu
System Setup : Advanced menu High Altitude Mode • Press ◄/► to enable or disable High Altitude Mode. Enable this function when the operating altitude is higher than 1500m or the ambient temperature is over 40°C. • Dynamic Dimming Press ◄/► to enable or disable dynamic dimming function. Enable the function to automatically reduces the screen's brightness level when the displayed image contains a high proportion of bright areas. - Page 56 HDbaseT control function table Standby Mode Control Function Remark Network Normal Side (< 0.5W) (<2W) (>2W) Front-IR O (Can disable (Wireless) by OSD) Rear-IR O (Can disable (Wireless) by OSD) RS-232 RJ45/LAN Wired Remote HDBT-IR (Wireless) RS-232 RJ45/LAN User can connect wired Wired Remote remote at HDBaseT TX side to get the wired function.
-
Page 57: Audio Settings Menu
Audio Settings menu • Mute Press ◄/► to enable or disable the mute function. • Using the remote control Press MUTE to temporarily turn off the sound. While the sound is off, the screen will display in the upper right corner of the screen. To restore the sound, press MUTE again. -
Page 58: Light Settings Menu
Light Settings menu • Light Mode Press ◄/► to select the light mode. The options are Normal, Economic, Dimming and Custom. Custom Brightness • Press ◄/► to adjust the brightness of the projector. • Constant Brightness Press ◄/► to enable or disable the function to maintain the brightness at the same level. Reset Light Timer •... -
Page 59: Closed Caption Menu
Closed Caption menu • Closed Caption Enable Press ◄/► to enable or disable the closed caption function. Caption Version • Press ◄/► to select the closed captioning mode. The options are CC1, CC2, CC3 and CC4. Standby Settings menu Standby Mode •... -
Page 60: Network Settings Menu
Network Settings menu • Wired LAN Press ENTER to enter the Wired LAN menu to setup the IP address, subnet mask, default gatway, DNS server and DHCP. AMX Device Discovery • Press ◄/► to enable or disable the AMX device discovery function. When the function is enabled, the projector can be detected by an AMX controller. - Page 61 Light Mode • Displays the current light mode. • HDBaseT Displays the current HDBaseT status. • 3D Format Displays the current 3D mode. Only available when 3D Mode is enabled. • Color System Displays the input system format. • Light Usage Time Displays the number of hours the light has been used.
-
Page 62: Menu Structure
Menu structure Main menu Sub-menu Options Display Wall Color Off / Light Yellow / Pink / Light Green / Blue / Blackboard Aspect Ratio Auto/ Real/ 4:3/ 16:9/ 16:10/ 2.35:1 2D Keystone Corner Fit Top Left/ Top Right/ Bottom Left/ Bottom Right Position Phase H.size... - Page 63 Color Tint Sharpness Brilliant Color On/ Off Gamma Selection 1.8/ 2.0/ 2.1/ 2.2/ 2.3/ 2.4/ 2.6/ DICOM/ BenQ HDR Brightness -2/ -1/ 0/ 1/ 2 Color Temperature Cool/ Normal/ Warm Color Temperature R Gain/ G Gain/ B Gain/ Fine Tuning...
- Page 64 3 hrs/ 4 hrs/ 8 hrs/ 12 hrs Filter Settings Filter Timer: On/ Off Reset Filter Timer: Reset/ Cancel Filter Usage Time Remote Receiver Front+Rear/ Front/ Rear Panel Key Lock On/ Off Background Color BenQ/ Black/ Blue/ Purple Splash Screen BenQ/ Black/ Blue...
- Page 65 Main menu Sub-menu Options System Setup: High Altitude Mode On/ Off Advanced Dynamic Dimming On/ Off Audio Settings Mute On/ Off Volume Built-in speaker On/ Off Light Settings Light Mode Normal / Economic/ Dimming/ Custom Custom Brightness 25%-100% Constant Brightness On / Off Light Usage Time Light Source Usage Time/...
- Page 66 Main menu Sub-menu Options Information Current System Status Native Resolution WUXGA 1920x1200 1080p 1920x1080 Detected Resolution Source Picture Mode Light Mode HDBaseT Connect / Disconnect 3D Format Color System Light Usage Time Filter Usage Time Appears when Filter Timer On Projector ID Firmware Version Service Code...
-
Page 67: Maintenance
Maintenance Before maintaining the projector • Make sure to turn off the power before maintaining the projector. • When switching off the projector, make sure to follow the procedures in "Switch off the projector" on page Care of the projector Your projector needs little maintenance. -
Page 68: Filter Maintenance
Filter maintenance Cleaning the filter The air filter prevents dust from accumulating on the surface of the optical elements inside the projector. If the filter is dirty or clogged, your projector may overheat or degrading the projected image quality. 1. Turn off the projector, and unplug the AC power cord from the AC outlet. 2. -
Page 69: Replacing The Side Filter
Replacing the side filter 1. Turn off the projector and unplug the power 4. Align the holes on the new filter module cord from the outlet. Remove any dust on with the captive screws on the filter cover. the projector and around the air vents. Loosen the two captive screws that secure the filter cover. -
Page 70: Replacing The Front Filter
Replacing the front filter 1. Turn off the projector and unplug the power 4. Replace the filter cover into the projector cord from the outlet. Remove any dust on by pushing gently in the direction shown. the projector and around the air vents. Loosen the two captive screws that secure the filter cover. -
Page 71: Led Indicator
LED indicator System message Power Temp Light Filter Status & Description Orange Stand-by Green Powering up Flashing Green Normal operation Orange Normal power-down cooling Flashing Download Green CW start fail Green Phosphor Wheel start fail Flashing Scaler shutdown fail(data abord) Flashing Scaler reset fail(video projector only) LAN download fail... -
Page 72: Lamp Error Messages
Lamp Error Messages Power Temp Light Filter Status & Description Lamp1 error in normal operation Lamp2 error in normal operation Both Lamp fail Lamp is not lit up Flashing Thermal Error Messages Power Temp Light Filter Status & Description Fan 1 error (the actual fan speed is outside the desired speed) Fan 2 error (the actual fan speed is outside the desired Flashing... - Page 73 Power Temp Light Filter Status & Description Green Thermal Sensor 2 open error Flashing Flashing Green Green Thermal Sensor 2 short error Flashing Green Green Thermal IC #2 I2C Connection error Flashing Flashing Green Temperature 3 error (over limited temperature) Green Thermal Sensor 3 open error Flashing...
-
Page 74: Troubleshooting
The projector will display a coded number on the screen. 2. Write down the number and turn off your projector. 3. Seek help from the local BenQ service center to decode the number. You may be required to provide proof of purchase documentation to... -
Page 75: Specifications
Specifications Specifications Optical Control Resolution LU9255 Type-B x 1 1920 x 1200 RS-232 serial control Display system 9 pin x 2 (In / Out) Single-chip DLP™ system IR receiver x 2 Lens F/Number 12V TRIGGER STANDARD LS2SD2 12VDC (Max. 0.2 A) x 1 F=2.0 to 2.09, f=22.84 to 28.61mm... -
Page 76: Dimensions
Dimensions 470.00 525.00 519.50 202.00 216.60 220.50 113.50 95.00 235.00 470.00 535.65 Attaching for ceiling mount *Ceiling Mount Screws: M6 (Max. L=12, Min. L=10) -
Page 77: Appendix
119.989 97.551 115.500 ◎ (Reduce Blanking) 1152 x 864 1152 x 864_75 75.000 67.500 108.000 1024 x 576 BenQ NB Timing 60.000 35.820 46.996 1024 x 600 BenQ NB Timing 64.995 41.467 51.419 1280 x 720 1280 x 720_60 60.000 45.000... -
Page 78: Support Timing For Component - Ypbpr Input
Refresh Clock 3D Frame 3D Top 3D side- Resolution Mode Frequency Rate (Hz) (MHz) Sequential Bottom by-side (kHz) 1440 x 900 WXGA+_60 59.887 55.935 106.500 ◎ ◎ 1400 x 1050 SXGA+_60 59.978 65.317 121.750 ◎ ◎ 1600 x 1200 UXGA 60.000 75.000 162.000... -
Page 79: Support Timing For Video Input
68.667 94.500 XGA_120 119.989 97.551 115.500 ◎ (Reduce Blanking) 1152 x 864 1152 x 864_75 75.000 67.500 108.000 BenQ Notebook 1024 x 576 60.000 35.820 46.996 Timing BenQ Notebook 1024 x 600 64.995 41.467 51.419 Timing 1280 x 720 1280 x 720_60 60.000... - Page 80 Refresh Clock 3D Frame 3D Top 3D side- Resolution Mode Frequency Rate (Hz) (MHz) Sequential Bottom by-side (kHz) WXGA_60 59.810 49.702 83.500 ◎ ◎ ◎ WXGA_75 74.934 62.795 106.500 1280 x 800 WXGA_85 84.880 71.554 122.500 WXGA_120 119.909 101.563 146.250 ◎...
-
Page 81: Supporting Timing For Hdmi-1 / Hdmi-2 Video Input
Supporting timing for HDMI-1 / HDMI-2 Video input Horizontal Vertical Dot Clock 3D Frame 3D Top Timing Resolution Frequency Frequency Frequency Frame side- Sequential Bottom (KHz) (Hz) (MHz) Packing by-side 480i 720 (1440) x 480 15.73 59.94 27.00 ◎ 480p 720 x 480 31.47 59.94... -
Page 82: Rs232 Command Control
RS232 command control Function Type Operation ASCII Power Write Power On <CR>*pow=on#<CR> Write Power off <CR>*pow=off#<CR> Read Power Status <CR>*pow=?#<CR> Source Write COMPUTER/YPbPr <CR>*sour=RGB#<CR> Selection Write COMPUTER 2/YPbPr2 <CR>*sour=RGB2#<CR> Write DVI-D <CR>*sour=dvid#<CR> Write HDMI (MHL) <CR>*sour=hdmi#<CR> Write HDMI 2 (MHL2) <CR>*sour=hdmi2#<CR>... - Page 83 Function Type Operation ASCII Picture Write Contrast + <CR>*con=+#<CR> Setting Write Contrast - <CR>*con=-#<CR> Write Set Contrast value <CR>*con=5#<CR> Read Contrast value <CR>*con=?#<CR> Write Brightness + <CR>*bri=+#<CR> Write Brightness - <CR>*bri=-#<CR> Write Set Brightness value <CR>*bri=5#<CR> Read Brightness value <CR>*bri=?#<CR> Write Color + <CR>*color=+#<CR>...
- Page 84 Function Type Operation ASCII Picture Write 4 Corners Top-Left - X Decrease <CR>*cornerfittlx=-#<CR> Setting Write 4 Corners Top-Left - X Increase <CR>*cornerfittlx=+#<CR> Read 4 Corners Top-Left - X Status <CR>*cornerfittlx=?#<CR> Write 4 Corners Top-Left - Y Decrease <CR>*cornerfittly=-#<CR> Write 4 Corners Top-Left - Y Increase <CR>*cornerfittly=+#<CR>...
- Page 85 Function Type Operation ASCII Operation Write Projector Position-Front Table <CR>*pp=FT#<CR> Settings Write Projector Position-Rear Table <CR>*pp=RE#<CR> Write Projector Position-Rear Ceiling <CR>*pp=RC#<CR> Write Projector Position-Front Ceiling <CR>*pp=FC#<CR> Read Projector Position Status <CR>*pp=?#<CR> Write Quick auto search <CR>*QAS=on#<CR> Write Quick auto search <CR>*QAS=off#<CR>...
- Page 86 Function Type Operation ASCII Miscellaneous Read Model Name <CR>*modelname=?#<CR> Read System F/W Version <CR>*sysfwversion=?#<CR> Read Scaler F/W Version <CR>*scalerfwversion=?#<CR> Read Lan F/W Version <CR>*lanfwversion=?#<CR> Read MCU F/W Version <CR>*mcufwversion=?#<CR> Write Blank On <CR>*blank=on#<CR> Write Blank Off <CR>*blank=off#<CR> Read Blank Status <CR>*blank=?#<CR>...
- Page 87 Function Type Operation ASCII Miscellaneous Write AMX Device Discovery - on <CR>*amxdd=on#<CR> Write AMX Device Discovery - off <CR>*amxdd=off#<CR> Read AMX Device Discovery Status <CR>*amxdd=?#<CR> Read Mac Address <CR>*macaddr=?#<CR> Write High Altitude mode on <CR>*Highaltitude=on#<CR> Write High Altitude mode off <CR>*Highaltitude=off#<CR>...
- Page 88 Function Type Operation ASCII Color Write Blue Offset + <CR>*BOffset=+#<CR> Calibration Write Blue Offset - <CR>*BOffset=-#<CR> Write Set Blue Offset value <CR>*BOffset=value#<CR> Read Get Blue Offset value <CR>*BOffset=?#<CR> Write Primary Color <CR>*primcr=value#<CR> Read Primary Color Status <CR>*primcr=?#<CR> Write Hue + <CR>*hue=+#<CR>...
-
Page 89: Pjlink
PJLink PJLink protocal The network function of this projector support the PJLink class 1, and the PJLink protocal can be used to perform projector setting and projector status query operations from a computer. Control commands The following table lists the PJLink protocal commands that can be used to control the projector. •... - Page 90 Control Parameter/ Command Remark Details Return String Input selection 11 12 21 31 32 INST? LU9255 list query 33 34 Projector name Returns the name set in [PROJECTOR NAME] of NAME? xxxxx query [NETWORK SETUP] Manufacturer INF1? BenQ Returns manufacturer name...
Need help?
Do you have a question about the LU9255 and is the answer not in the manual?
Questions and answers