Table of Contents
Advertisement
Quick Links
Advertisement
Table of Contents

Related Manuals for Kenwood K23MFW15


Summary of Contents for Kenwood K23MFW15
- Page 1 23 Litre Microwave K23MFW15 instruction manual...
-
Page 3: Table Of Contents
Contents safety warnings ........................4 unpacking ..........................9 getting ready ........................10 introducing microwave cooking ..................11 cooking with a microwave ......................11 checking your cooking utensils ......................12 using aluminium foil in your microwave ..................12 materials that can be used in the microwave .................13 microwave heating categories .......................14 steam .............................15 condensation ..........................15... -
Page 4: Safety Warnings
safety warnings IMPORTANT SAFETY INSTRUCTIONS READ CAREFULLY AND KEEP FOR FUTURE REFERENCE general safety • Switch off and unplug before fitting or removing parts/attachments, after use and before cleaning. • Keep your fingers away from moving parts and fitted attachments. •... - Page 5 clearance of 30cm above the oven and 20cm on each side. warning: The appliance must be used and maintained in accordance with the instructions provided. maintenance of your microwave warning : It is hazardous for anyone other than a qualified service agent to carry out any service or repair operation which involves the removal of a cover that gives protection against exposure to microwave energy.
- Page 6 • Care should be taken when using paper, plastic, wooden or other combustible materials in the microwave as they can catch fire. • Oil & fat for deep frying should not be heated in the microwave. • Only use cling film designed for microwave use and take extra care when removing the film to avoid steam burns.
- Page 7 • Keep the microwave door closed. • Turn off the power. • Unplug the microwave from the mains power. first aid Treat scalding by: • Quickly placing the scald under cold running water for at least 10 minutes. • Cover with a clean dry dressing. Do not use creams, oils or lotions. cleaning your microwave •...
- Page 8 • Never use scratched, cracked or damaged glass in a microwave. Damaged glass can explode. • Caution should be used when using combustible containers, never leave the microwave unattended when in use. delayed boiling Heating of beverages in a microwave can result in delayed eruptive boiling, therefore care must be taken when handling the container.
-
Page 9: Unpacking
Thank you for purchasing your new Kenwood Microwave. These operating instructions will help you use it properly and safely. We recommend that you spend some time reading this instruction manual in order that you fully understand all the operational features it offers. -
Page 10: Getting Ready
getting ready This microwave is designed for home use. It should not be used for commercial catering. 1. After unpacking your microwave, check that it has not been damaged whilst in the box. Make sure there are no dents, and the door closes properly. A damaged microwave could allow microwave energy to escape. -
Page 11: Introducing Microwave Cooking
introducing microwave cooking Always remember the basic safeguards you would follow when using any cooking equipment or handling hot food. This page gives some of the basic guidelines for microwave cooking. If you are unfamiliar with using a microwave, there is more information at the back of this instruction manual. cooking with a microwave If you are unsure how long the food should cook, begin cooking at the lowest recommended time, then add more time if necessary. -
Page 12: Checking Your Cooking Utensils
checking your cooking utensils Most heat-resistant, non-metallic cooking utensils are safe to use in your microwave. If made of plastic or glass, utensils will be marked as “microwave safe” or similar. If you are not sure and/or there is no “microwave safe” marking on the utensil, do NOT use it in the microwave. -
Page 13: Materials That Can Be Used In The Microwave
materials that can be used in the microwave utensils remarks Shielding only. Small smooth pieces can be used to cover thin parts of meat Aluminium foil or poultry to prevent overcooking. Arcing can occur if the foil is too close to oven walls. -
Page 14: Microwave Heating Categories
microwave heating categories Your microwave has been tested and labelled to meet the UK government’s voluntary agreement on the reheating of pre-cooked food. The heating characteristics and output power levels of microwaves are usually calculated using a relatively large portion of food (1000 gram load, IEC 60705) but many packs of pre-cooked food are sold in smaller packs, often about 350 grams. -
Page 15: Steam
steam When you microwave food, steam is created as water in the food heats up and evaporates. The steam formed during microwave cooking is entirely safe. It has to escape from the microwave to prevent pressure from building up inside the microwave. It does this through the vents on the back of the microwave and from around the door. -
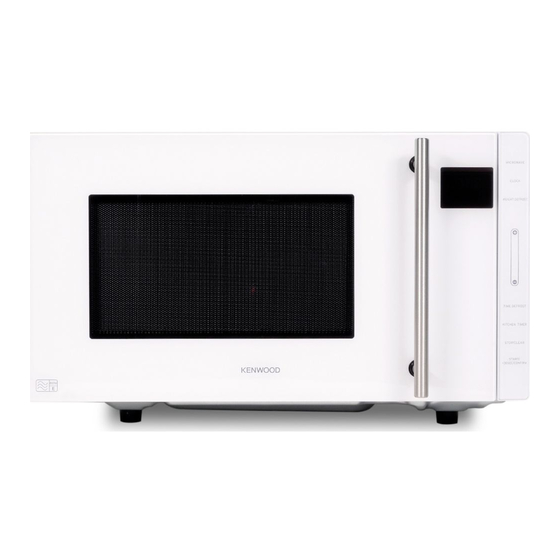
Page 16: Product Overview
product overview the main unit control panel the control panel MICROWAVE Button Use this button to select microwave function & power level. CLOCK Button LED Display Use this button to set the clock. Shows the clock, cooking time and WEIGHT DEFROST Button setting. -
Page 17: Checking Your Microwave
checking your microwave Check your microwave after unpacking. For your safety, the microwave stops if the door is opened during cooking. Close the door and press the START/+30SEC/CONFIRM (2) button to continue the cooking cycle. 1. Pull the handle to open the door. 2. -
Page 18: Clock Setting
clock setting When the microwave is connected to the mains power, the LED display will show ”0:00” and the microwave will beep once. Please ensure that you have set the clock prior to use. Please follow the steps below to set the clock. 1. -
Page 19: Kitchen Timer
kitchen timer When the kitchen timer is running, other functions cannot be used. When the microwave is not in use, this feature allows you to use the microwave as a timer. Please make sure the clock has been set. To set the Kitchen Timer, follow the steps below. 1. -
Page 20: Setting The Child Lock
setting the child lock This feature prevents the microwave from operating by locking the control panel until you cancel the lock. Please follow the steps below to set the child lock. 1. Press the STOP/CLEAR (1) button for 3 seconds; the unit will beep. The LED will display current time. -
Page 21: Microwave Cooking
microwave cooking For simple microwave cooking, follow the steps below. For instance, if you want to use 80% microwave power to cook for 20 minutes. 1. Press the MICROWAVE (1) button once and the LED display will show “P100”. Press the MICROWAVE (1) button repeatedly until the LED display shows “P80”. -
Page 22: Multi-Stage Cooking
multi-stage cooking 2 cooking stages can be set. If one stage is defrost, it should be programmed first. The unit will beep after the first stage is finished, then the next stage will begin. Auto-menu cannot be set as a multi-stage cooking programme. Follow the steps below: 1. -
Page 23: Quick Cooking
quick cooking This feature allows you to quickly cook your food for 30 seconds with 100% microwave power. Please follow the steps below. 1. Press the START/+30SEC/CONFIRM (2) button to start the quick cooking. Press the START/+30SEC/CONFIRM (2) button again to add another 30 seconds. -
Page 24: Auto Cooking
auto cooking This feature allows you to cook most of your food based on the food category and weight. Select the category and choose the weight of your food. For quick reference of the cooking time and the weight, please refer to the Auto-cook Menu Table. auto-cook menu 1. -
Page 25: Auto-Cook Menu Table
auto-cook menu table Cooking Menu Weight Display Comments Time 200g 200g 1:30 This setting is designed for re-heating cooked pizza slices (not frozen pizza). Additional cooking Pizza 400g 400g 2:00 time may be required for thicker pieces of pizza. 250g 250g 3:30 Make sure food is cooked thoroughly before... -
Page 26: Defrosting
defrosting This feature allows you to defrost your frozen foods simply by entering the weight or time. defrost by weight 1. Press the WEIGHT DEFROST (1) button once and the LED display will show “dEF1”. 2. Press the (2) buttons to adjust the weight of your food. -
Page 27: Checking The Cooking Function
checking the cooking function This feature allows you to check and view the current cooking settings. to find out the current cooking setting 1. Press the MICROWAVE (1) button once and the LED display will show the current cooking setting while the unit is in microwave mode. The display will last for 2 - 3 seconds and the microwave will then return to its original display. -
Page 28: Cleaning Your Microwave
cleaning your microwave Cleaning your microwave each time you use it will help to prevent a build up of stubborn marks that can be difficult to clean. Unplug your microwave from the mains and wait for it to completely cool down before cleaning. On the right hand side wall of the cavity is the wave guide cover. -
Page 29: Frequently Asked Questions
frequently asked questions If a problem does occur, it may often be due to something very minor. The following Q & A may be able to resolve the issue. questions answers Why doesn’t the food seem to Check that: cook? •... -
Page 30: Specifications
K23MFW15 input 230-240V~ 50Hz microwave output 800 W microwave frequency 2450 MHz outside dimensions 302 mm x 502 mm x 420 mm (height x width x depth) power consumption microwave input 1270 W Features and specifications may change without prior notice. - Page 32 For help or spare parts please call us on: 0344 561 1234 Manufactured for DSG Retail Limited under a Trademark License from Kenwood Limited DSG Retail Limited is responsible for after sales service. The symbol on the product or its packaging indicates that this product must not be disposed of with your other household waste.
Need help?
Do you have a question about the K23MFW15 and is the answer not in the manual?
Questions and answers